
How to Safely Remove Severe Yellowing from Delicate Antique Wedding Dresses?
For over two decades in the vintage fashion world, I've witnessed the heartbreak and quiet desperation that severe yellowing can inflict upon an antique wedding dress. It's more than just a stain; it’s a visible erosion of history, a clouding of cherished memories, and a daunting challenge for anyone hoping to restore a family heirloom. I've seen countless beautiful gowns, rich in story and sentiment, relegated to dark corners due to fear of irreversible damage during cleaning.
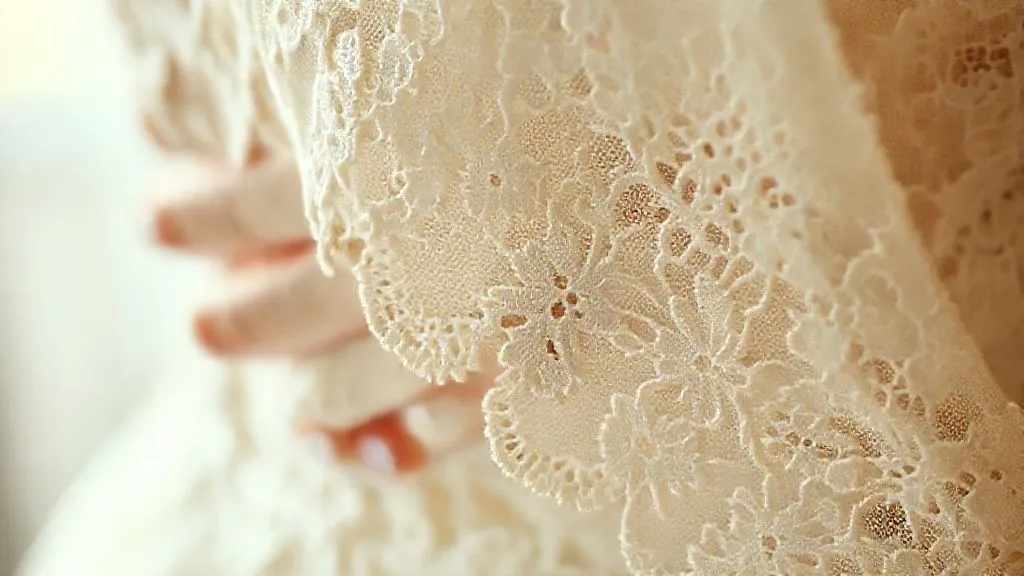
The unique fragility of these garments – often crafted from delicate silks, fine laces, and intricate embellishments – makes conventional cleaning methods a perilous gamble. The very thought of attempting to reverse decades of oxidation and environmental exposure can feel overwhelming, leaving many to simply accept the yellowed fate of their beloved dress. But what if there was a way to reclaim that ethereal glow without risking the integrity of these precious textiles?
In this definitive guide, I will share my accumulated expertise and proven techniques on how to safely remove severe yellowing from delicate antique wedding dresses. We'll delve into understanding why yellowing occurs, critical pre-treatment assessments, step-by-step gentle cleaning methods, and long-term preservation strategies. My goal is to empower you with the knowledge and confidence to transform your yellowed treasure back into a radiant symbol of enduring love and history.
Understanding the Enemy: Why Antique Dresses Yellow
Before we can tackle the yellowing, we must first understand its origins. It's not merely dirt; it's a complex chemical process, often exacerbated by time and environmental factors. In my experience, misunderstanding these root causes is where many restoration attempts go awry, leading to further damage rather than resolution.
Oxidation and Environmental Factors
The primary culprit behind yellowing is oxidation. Over time, air and light react with the fibers of the fabric, causing them to break down and change color. Exposure to pollutants, smoke, and even household fumes can accelerate this process, embedding microscopic particles that contribute to a dull, yellowed appearance. Sunlight, in particular, is a powerful catalyst for this chemical degradation.
Fabric Composition and Dye Instability
Different fabrics react differently to aging. Natural fibers like silk, linen, and cotton are highly susceptible to yellowing due to their protein and cellulose structures. Synthetics from earlier eras, while less common in antique wedding dresses, can also degrade and yellow. Furthermore, some original dyes or finishes applied to the fabric can become unstable over time, contributing to discoloration.
Improper Storage Techniques
I've seen this mistake countless times: a beautiful dress stored in an acidic cardboard box or a plastic garment bag. Both are detrimental. Acidic materials leach chemicals into the fabric, causing direct yellowing and weakening fibers. Plastic traps moisture and emits gases that can accelerate degradation, creating a microclimate ripe for discoloration. Proper storage is foundational to preservation, as we'll discuss later.
The Golden Rule: Assessment and Patch Testing is Non-Negotiable
Before any treatment begins, a thorough assessment is paramount. Think of yourself as a textile detective. Rushing this stage is the quickest route to irreversible damage. As an industry specialist, I cannot stress enough the importance of meticulous examination and testing.
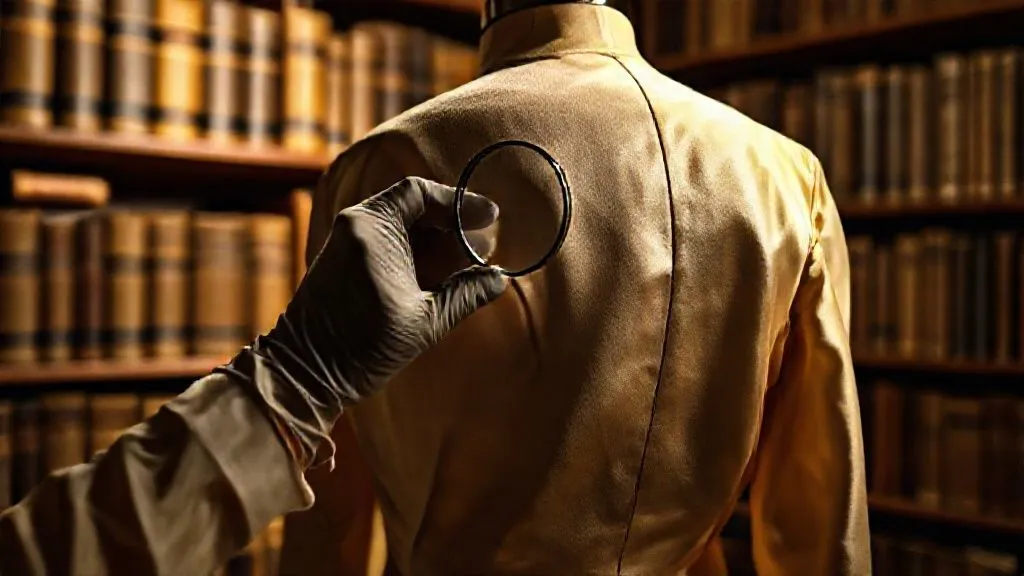
Initial Visual Inspection
Carefully examine the entire dress. Note the fabric type, the condition of seams, any existing tears or weak spots, and the type of embellishments (beads, sequins, lace appliques). Are there different types of fabric? What about metal components like zippers or hooks, which can rust? Document everything with photographs – these serve as a crucial "before" record. This initial survey helps you anticipate potential problem areas and decide if DIY is even feasible.
Fiber Identification
Knowing your fabric is key. Silk and wool (protein fibers) react differently to cleaning agents than cotton or linen (cellulose fibers). A simple, discreet burn test on a loose thread from an inconspicuous area (like an inner seam allowance) can help. Silk burns slowly, smells like burning hair, and leaves a brittle ash. Cotton burns quickly, smells like burning paper, and leaves a soft ash. If you’re unsure, or if the dress is extremely valuable, consult a professional conservator for fiber analysis.
The Critical Patch Test
This is your safety net. Never skip it. You must test any cleaning solution on an inconspicuous spot – an inner seam, under an arm, or within a hem. Look for color changes, fabric weakening, or any adverse reactions. If even a tiny patch shows signs of damage, stop immediately.
- Choose an inconspicuous area: Select a small, hidden spot, ideally where different components of the dress meet (e.g., a seam line, under a sleeve, inside the hem).
- Prepare your solution: Mix a small amount of your chosen cleaning agent (e.g., oxygen bleach solution) exactly as you intend to use it for the main treatment.
- Apply gently: Using a clean cotton swab or dropper, apply a tiny drop of the solution to the test area. Do not rub.
- Observe and wait: Let it sit for the same duration you anticipate for the full treatment (e.g., 15-30 minutes, or longer if soaking).
- Rinse and dry: Gently blot the area with distilled water and allow it to air dry completely.
- Evaluate the results: Check for any discoloration, fading, stiffening, weakening of fibers, or residue. Only proceed if there are no adverse effects.

Gentle Immersion: The Oxygen Bleach Method (Non-Chlorine)
For uniform yellowing across the entire garment, a gentle immersion bath with oxygen bleach is often the most effective and safest approach. This method brightens without the harshness of chlorine, which can irreparably damage delicate antique fibers. Remember, we are addressing How to safely remove severe yellowing from delicate antique wedding dresses?, and safety is paramount.
Choosing the Right Product
I exclusively recommend sodium percarbonate (commonly found in "OxyClean" type products, but ensure it's pure, unscented, and dye-free) or a very dilute solution of food-grade hydrogen peroxide. Avoid any product containing chlorine bleach at all costs. Chlorine is too aggressive for aged textiles and will weaken them, leading to tears and further discoloration over time. Always check the ingredients list meticulously.
Preparing the Bath
You'll need a large, clean, non-metallic basin or tub. Ensure it's large enough for the entire dress to lie flat without being crumpled. Use only distilled water, as tap water can contain minerals and chlorine that can react with the fabric. The water should be lukewarm – never hot, as heat can set stains and damage delicate fibers.
- Fill the basin: Add enough lukewarm distilled water to fully submerge the dress without overcrowding.
- Add oxygen bleach: For sodium percarbonate, follow manufacturer instructions for delicate fabrics, typically 1-2 tablespoons per gallon of water. For hydrogen peroxide, use a 1-3% solution (e.g., 1 part 3% H2O2 to 99 parts distilled water, or for 3% food-grade H2O2, roughly 1/4 cup per gallon).
- Dissolve thoroughly: Stir the solution gently until the powder is fully dissolved. Undissolved particles can cause concentrated bleaching.
The Soaking Process
This requires immense patience and vigilance. Do not leave the dress unattended. The goal is a gradual, gentle lifting of the yellowing, not a rapid chemical reaction.
- Prepare the dress: Carefully remove any non-washable embellishments or metal components if possible. Place the dress in a large mesh laundry bag or wrap it in a clean, white cotton sheet for support.
- Submerge gently: Slowly lower the entire dress into the prepared solution, ensuring it is fully saturated and submerged. Avoid vigorous agitation.
- Soak time: This is crucial. Start with a short soak, perhaps 30 minutes to an hour. Check frequently. For severe yellowing, you might need several short soaks, or one longer soak up to 4-6 hours, but never beyond that without re-evaluating. I have found that shorter, repeated soaks are often safer than one very long one.
- Gentle agitation (optional): If after a few hours the yellowing persists, you can very gently "swish" the dress in the water. Never wring, twist, or scrub.
- Observe: Watch the water. It will likely turn slightly yellowish as the discoloration is drawn out.
"Patience is not just a virtue in antique textile restoration; it's a non-negotiable prerequisite. Rushing the process is almost always the precursor to regret."
Targeted Treatment: Addressing Stubborn Spots
Sometimes, uniform yellowing is accompanied by more concentrated, stubborn spots or age-related discoloration. These require a more precise, localized approach after the general immersion, always with the utmost care for the delicate fibers.
Spot Cleaning Techniques
For localized yellowing that persists, a gentle spot treatment can be applied. Create a slightly stronger solution of your chosen oxygen bleach (e.g., a paste of sodium percarbonate and distilled water, or a slightly higher concentration of hydrogen peroxide). Apply this to the yellowed area using a cotton swab or a soft, clean brush. Dab, do not rub, and allow it to sit for a short period (5-15 minutes), constantly checking for any adverse reactions on the fabric. Rinse thoroughly afterwards with distilled water, blotting gently.
Enzyme Cleaners for Protein Stains
If the yellowing is suspected to be from protein-based stains (e.g., food, bodily fluids from wear), enzyme-based cleaners can be effective. However, use these with extreme caution on silk or wool, as enzymes can digest protein fibers. Always perform a rigorous patch test. For cellulose fibers (cotton, linen), a very diluted, enzyme-based laundry pre-treatment can be dabbed onto the stain, left for a few minutes, then thoroughly rinsed. Avoid prolonged contact.
Neutralizing Acids
Sometimes, yellowing can be due to localized acid degradation, particularly if the dress was stored with acidic materials. A very mild alkaline solution, such as a paste made from baking soda and distilled water, can be gently applied to the area. Allow it to sit briefly, then meticulously rinse. This method is highly experimental and should only be attempted after other methods have failed and with extreme caution, as pH changes can also damage fibers.
Rinsing and Drying: The Delicate Dance
The rinsing and drying phases are just as critical as the cleaning itself. Improper handling here can undo all your careful work or even cause new damage to the now-damp and vulnerable fibers. This is where the true delicacy of the antique wedding dress comes into play.
Thorough Rinsing
After treatment, the dress must be rinsed thoroughly to remove all traces of cleaning agents. Residual chemicals can continue to degrade the fabric over time, leading to new yellowing or weakening. Fill your basin with fresh, lukewarm distilled water. Gently lower the dress into the clean water, allowing it to soak for 15-20 minutes. Lift it out, drain the water, and repeat this process at least 3-5 times, or until the water runs completely clear and you can detect no scent of the cleaning agent. Support the entire garment as you lift it, never letting it hang under its own weight when wet.
Supporting the Fabric
Wet textiles, especially antique ones, are incredibly heavy and fragile. Never wring or twist the dress. Instead, gently press excess water out by sandwiching the dress between several layers of clean, white absorbent towels. You can roll it up in a towel "burrito" to absorb more moisture. For drying, a large, flat surface is essential. A clean, white mesh screen placed over a drying rack, or several layers of clean white sheets spread on a bed, work well. The goal is to distribute the weight evenly and prevent stretching or distorting the fabric.
Air Drying Best Practices
Always air dry. Never use a machine dryer, as the heat and tumbling will cause irreversible damage. Position the dress away from direct sunlight, heat sources, and vents. A clean, well-ventilated room is ideal. Turn the dress periodically (gently lifting and repositioning) to ensure even drying and prevent moisture traps. Depending on the fabric and humidity, this process can take several days. Patience is key. Ensure the dress is bone dry before even thinking about storage.
Case Study: The 'Grandma's Gown' Rescue
Let me share a true-to-life scenario, a composite of many restorations I've guided. This illustrates the power of methodical, patient intervention when dealing with severe yellowing.
The Challenge: A 1920s Silk Gown with Severe Uniform Yellowing and Brittle Lace
A client, Sarah, approached me with her grandmother's wedding dress, a stunning 1920s silk satin gown with intricate Valenciennes lace details. The dress was uniformly canary yellow, not off-white, and the lace felt brittle to the touch. It had been stored for decades in a plastic dry-cleaning bag in an attic, a common scenario that unfortunately accelerated its degradation. The sentimental value was immense; Sarah hoped to display it at her own wedding.
Our initial assessment revealed no major tears, but the silk was visibly weakened in some areas, and the lace was indeed very delicate. Fiber identification confirmed pure silk and cotton lace. The severe uniform yellowing pointed directly to oxidation and plastic degradation. We knew a single, aggressive treatment was out of the question.
Our Strategy:
- Meticulous Patch Testing: We tested a hidden seam with a very dilute oxygen bleach solution (1% hydrogen peroxide). After 30 minutes, there was a slight lightening, no fiber damage, and no change to the lace integrity. This gave us cautious confidence.
- Multi-Stage Soaking: Instead of one long soak, we opted for three separate 2-hour soaks over two days. Each soak used a fresh bath of 1% hydrogen peroxide in distilled water at lukewarm temperature. The dress was fully supported in a mesh bag. After each soak, it was thoroughly rinsed with multiple changes of distilled water.
- Targeted Collar Treatment: The collar, having absorbed more oils and pollutants, remained slightly yellower. We created a very mild paste of sodium percarbonate and distilled water, applied it with a cotton swab specifically to the collar, left it for 10 minutes, and then rinsed it meticulously.
- Supportive Drying: The dress was laid flat on a large, clean white mesh screen, covered with a sheer white cotton sheet, and air-dried in a climate-controlled room for three full days, turned gently every 12 hours.
The Outcome: The transformation was remarkable. The dress regained a soft, ivory hue, shedding its severe yellowing. The lace, while still delicate, appeared brighter and less brittle. Sarah was overjoyed, seeing her grandmother's gown reborn. This case perfectly illustrates that even severe yellowing can be safely addressed with patience, precision, and the right techniques.
| Aspect | Before Treatment | After Treatment |
|---|---|---|
| Yellowing Severity | Severe, uniform canary yellow | Soft ivory, significantly reduced |
| Fabric Condition | Weakened silk, brittle lace | Stable silk, improved lace flexibility |
| Treatment Duration | N/A | 3 x 2-hour soaks + 10 min spot treatment |
| Key Challenge | Oxidation & plastic degradation | Successfully mitigated |
Professional Intervention: When to Call the Experts
While many yellowed dresses can be successfully treated at home with the methods I've outlined, there are definitely situations where professional intervention is not just advisable, but absolutely essential. Knowing when to step back and seek expert help is a mark of true care and responsibility for your heirloom.
Identifying Red Flags
Here are clear indicators that your dress requires a conservator's touch:
- Extreme Fragility: If the fabric feels like it will disintegrate at a touch, or if it has significant tears and shattering.
- Unknown Fibers or Mixed Materials: If you cannot confidently identify the fabric composition, or if the dress contains a complex mix of materials (e.g., silk, metallic threads, plastics, beads with unknown coatings).
- Intricate Embellishments: Dresses with elaborate beadwork, sequins, metallic embroidery, or painted details are extremely challenging. These elements can dissolve, bleed, or fall off during wet cleaning.
- Mold or Mildew: If you see active mold growth, it requires specialized treatment beyond general yellowing removal.
- High Monetary or Sentimental Value: If the dress is exceptionally rare, historically significant, or holds irreplaceable sentimental value, the risk of DIY is too high.
- Previous Damage or Failed Attempts: If the dress has already been damaged by prior cleaning attempts, a conservator may be your last hope.
What to Look for in a Professional Conservator
When seeking professional help, look for specialists in textile conservation, not just a dry cleaner. A true conservator will:
- Have specific training and certifications in textile and costume conservation.
- Conduct a thorough, documented assessment of the garment's condition and materials.
- Discuss a detailed treatment plan with you, including potential risks and expected outcomes.
- Provide references and examples of their previous work.
- Use reversible, archival-grade methods and materials.
Don't hesitate to ask questions and get multiple opinions. This is an investment in your family's legacy. For finding qualified professionals, resources like the American Institute for Conservation of Historic and Artistic Works (AIC) are invaluable.
Long-Term Preservation: Preventing Future Yellowing
Once you've successfully restored your antique wedding dress, the next crucial step is ensuring its long-term preservation. Prevention is always easier and safer than cure. Proper storage is the bedrock of maintaining its renewed brilliance and preventing the return of yellowing.
Archival Storage Materials
This is non-negotiable. You must use only acid-free and lignin-free materials. Lignin, a component of wood pulp, breaks down over time, releasing acids that yellow fabric. Look for: acid-free tissue paper (unbuffered for silk/wool, buffered for cotton/linen), acid-free storage boxes (specifically designed for textiles), and unbleached cotton garment bags (never plastic!). These materials create a stable, non-reactive environment for your dress. According to textile preservation guidelines often referenced by institutions like the National Archives, proper archival storage can extend the life of textiles by centuries.
Environmental Control
Where you store the dress is almost as important as how. A cool, dark, and dry environment is ideal. Avoid attics, basements, and garages, which are prone to extreme temperature fluctuations, high humidity, and pests. Ideal conditions are typically: temperature between 65-75°F (18-24°C), and relative humidity between 45-55%. Fluctuations are more damaging than consistent, slightly off-ideal conditions. Keep the dress away from direct sunlight and fluorescent lights, both of which emit UV radiation that causes fading and yellowing.
Regular Inspection and Airing
Even with perfect storage, occasional checks are vital. Every 1-2 years, gently remove the dress from its box, unfold it, and allow it to air out in a clean, dust-free room for a few hours. This helps to release any trapped gases and allows you to inspect for any early signs of pest activity, new yellowing, or fabric degradation. When refolding, vary the fold lines to prevent permanent creases and stress points on the fabric. Refold using fresh acid-free tissue paper.
"The true legacy of an antique wedding dress isn't just its beauty, but its story, preserved for generations. Thoughtful preservation ensures that story continues."
| Storage Material | Pros | Cons |
|---|---|---|
| Acid-Free Tissue Paper | Prevents creasing, pH neutral, protects from light | Needs regular replacement, specific buffering for fabric type |
| Archival Storage Box | Physical protection, blocks light, stable environment | Can be bulky, requires climate-controlled space |
| Unbleached Cotton Garment Bag | Allows air circulation, protects from dust | Less physical protection than a box, can absorb moisture |
| Plastic Dry Cleaning Bag | Cheap, readily available | Traps moisture, emits gases, causes yellowing, weakens fibers (AVOID!) |
Frequently Asked Questions (FAQ)
Even with detailed guidance, specific questions often arise. Here are some of the most common inquiries I receive about restoring these delicate treasures:
Question: Can I use regular bleach on my antique wedding dress? Absolutely not. Regular household chlorine bleach is far too harsh for delicate, aged fabrics. It will not only weaken the fibers, making them brittle and prone to tearing, but it can also cause irreversible yellowing or even disintegration over time. Always opt for oxygen-based bleaches like sodium percarbonate or hydrogen peroxide, and only after rigorous patch testing.
Question: How do I know if my dress fabric can withstand treatment? The only reliable way is through meticulous visual inspection and, most importantly, a discreet patch test on an inconspicuous area. If the fabric feels extremely brittle, crumbles, or shows any adverse reaction during the patch test (discoloration, weakening, dissolving), it's a clear sign that the dress is too fragile for wet cleaning and requires professional conservation. When in doubt, err on the side of caution.
Question: What if my dress has beads or sequins? This is a major red flag for DIY wet cleaning. Many antique beads and sequins are made from materials like gelatin, celluloid, or painted glass that can dissolve, melt, or lose their finish when exposed to water or cleaning solutions. Metallic threads can tarnish or rust. If your dress has such embellishments, professional textile conservators are often the only safe option, as they can sometimes remove and reattach these elements, or employ specialized dry cleaning methods if appropriate.
Question: How often should I inspect my stored antique dress? I recommend a gentle inspection every 1-2 years. This allows you to check for any signs of new yellowing, pest activity (like moth larvae), or changes in fabric condition. It's also an opportunity to refold the dress along new lines to prevent permanent creasing and stress on the fibers. Always perform this inspection in a clean, dry environment, and handle the dress with clean hands or cotton gloves.
Question: Is DIY cleaning ever safe for highly valuable or historically significant dresses? Generally, no. For dresses with high monetary value, immense historical significance, or irreplaceable sentimental value, the risks associated with DIY cleaning are simply too great. The potential for irreversible damage outweighs any cost savings. In these cases, investing in a qualified professional textile conservator is not just a recommendation but a necessity to ensure the preservation of such a precious artifact.
Key Takeaways and Final Thoughts
Restoring a severely yellowed, delicate antique wedding dress is a labor of love, requiring patience, precision, and an unwavering commitment to the garment's integrity. It's a journey that connects you directly to its history, revealing the beauty that time had obscured. Remember these critical points:
- Assessment is paramount: Never skip the visual inspection and, especially, the patch test.
- Patience is a virtue: Gentle, gradual treatments are always safer than aggressive, rapid ones.
- Choose wisely: Use only oxygen-based bleaches and distilled water; avoid chlorine bleach at all costs.
- Support and stabilize: Wet fabric is incredibly vulnerable; always support the dress's full weight during handling and drying.
- Preserve for posterity: Proper archival storage in a controlled environment is essential to prevent future yellowing.
- Know your limits: If in doubt, or if the dress is highly valuable or complex, seek professional textile conservation.
I hope this comprehensive guide empowers you to approach the restoration of your antique wedding dress with confidence and care. Seeing a beloved heirloom regain its original splendor is an incredibly rewarding experience, a tangible link to the past that can now shine brightly into the future. By following these expert-backed methods, you're not just cleaning a dress; you're preserving a piece of history, a symbol of enduring love, for generations to come. For further scientific understanding of textile degradation, consider resources like academic journals on conservation science.
Recommended Reading
- 7 Proven Strategies: Halting Fraudulent Chargebacks in Rare Sneaker Sales
- Mastering Retention: 7 Strategies for Haute Couture Atelier Artisans
- Mastering Direct Ethical Sourcing from Artisanal Miners: 7 Key Steps
- 5 Actionable Ways: Revamp Stale Streetwear for New Buyers Now
- 7 Proven Steps: Authenticate Rare Designer Vintage from Thrift Stores


Your email address will not be published. Required fields are marked *