
How to Restore Faded Dye on a Collectible 1940s Vintage Dress?
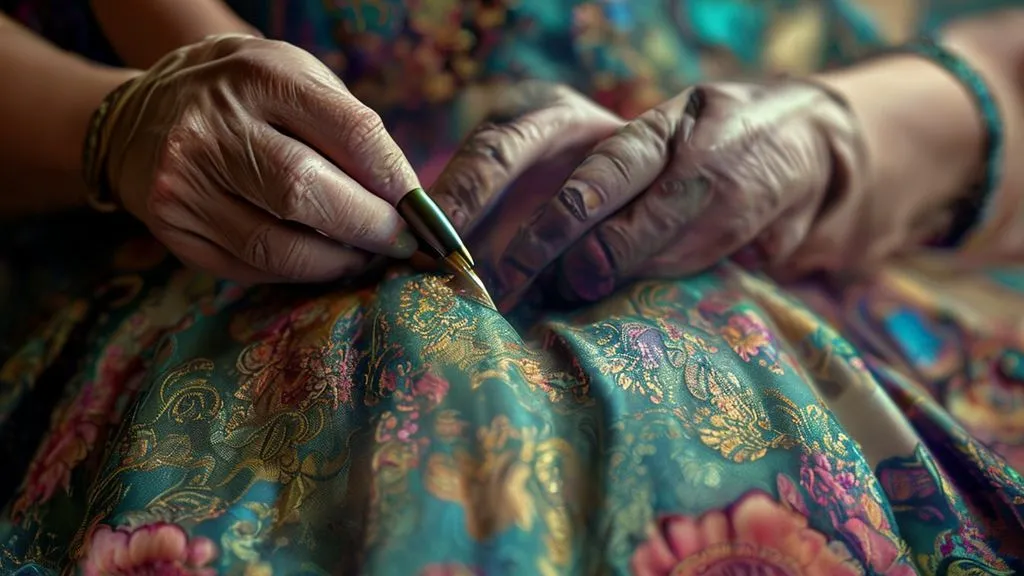
For over two decades in the vintage fashion world, I've witnessed the profound joy a truly preserved historical garment brings. But I've also seen the heartbreak of a once-vibrant 1940s dress losing its soul to time, its colors muted by the sun's harsh kiss or the rigors of neglect. It’s a common misconception that faded dye is a death sentence for a collectible piece; I assure you, it's often not.
The challenge of a faded 1940s vintage dress isn't just aesthetic; it's about preserving a piece of history, a tangible link to a bygone era. Collectors and enthusiasts often grapple with the fear of irreversible damage, wondering if any intervention will further degrade the delicate fibers or, worse, diminish its historical value. This hesitation is understandable, given the unique nature and fragility of these sartorial treasures.
In this definitive guide, I will share my accumulated wisdom and proven methodologies for approaching dye restoration on these precious garments. We'll delve into the science behind fading, the art of careful assessment, and practical, actionable steps – from non-invasive revival techniques to advanced re-dyeing – all designed to safely bring back the vibrancy of your collectible 1940s vintage dress without compromising its integrity or value. Prepare to embark on a journey that merges historical appreciation with meticulous textile conservation.
Understanding 1940s Fabrics and Dyes: A Foundation for Restoration
Before any restoration attempt, understanding the materials and dyeing processes prevalent in the 1940s is paramount. The war era significantly influenced textile production, leading to a fascinating mix of natural and emerging synthetic fibers, each reacting differently to fading and restoration techniques.
Common fabrics of the 1940s included rayon (often referred to as 'artificial silk'), wool, silk, and increasingly, blends. Cotton was also used, especially for utility wear. Rayon, a semi-synthetic fiber, was revolutionary but also notoriously sensitive to water and heat. Silk and wool, natural protein fibers, have their own specific care requirements, particularly concerning pH levels.
Identifying Your Dress's Fabric & Dye Type
Correct identification is your first line of defense against irreparable damage. While a professional textile conservator can perform definitive tests, you can make informed assessments at home:
- Visual and Tactile Inspection: Silk feels smooth and drapes fluidly; wool is springy and has a distinct texture; rayon often has a soft sheen and can feel 'slippery' when wet.
- Fiber Content Labels: If present, these are invaluable. However, labels on 1940s garments are rare or may have deteriorated.
- The 'Burn Test' (Extreme Caution!): If you have a tiny, inconspicuous loose thread or a very small, unseen snippet (e.g., from an inner seam allowance), a burn test can offer clues.
- Silk/Wool: Burns slowly, self-extinguishes, smells like burning hair, leaves a crushable ash.
- Rayon/Cotton: Burns quickly, smells like burning paper, leaves a fine grey ash.
- Dye Type Clues: Natural dyes (historically used) can fade more evenly than early synthetic dyes, which might show color shifts or patchy fading.
The Science of Dye Fading: Why It Happens and What You're Up Against
Understanding why a dye fades is crucial for choosing the right restoration strategy. It's not just 'getting old'; specific environmental factors initiate and accelerate dye degradation. The primary culprits are often light, moisture, and chemical exposure.
Ultraviolet (UV) radiation from sunlight or even strong artificial light is the most common cause of fading. UV light breaks down the molecular bonds in dye chromophores, the parts of the molecule responsible for color. This process is irreversible at a molecular level, but sometimes the effect is superficial, and deeper, unfaded dye might be accessible.
Improper washing and storage can also contribute significantly. Harsh detergents, high water temperatures, or acidic storage environments can leach dyes from fibers or chemically alter them. For instance, some early synthetic dyes were particularly unstable when exposed to specific pH levels or even certain atmospheric pollutants.

Pre-Restoration Assessment: Your Critical First Steps
Impatience is the enemy of preservation. Before touching your collectible dress with any cleaning or restoration agent, a thorough, methodical assessment is non-negotiable. This stage determines the viability of restoration and guides your choice of techniques.
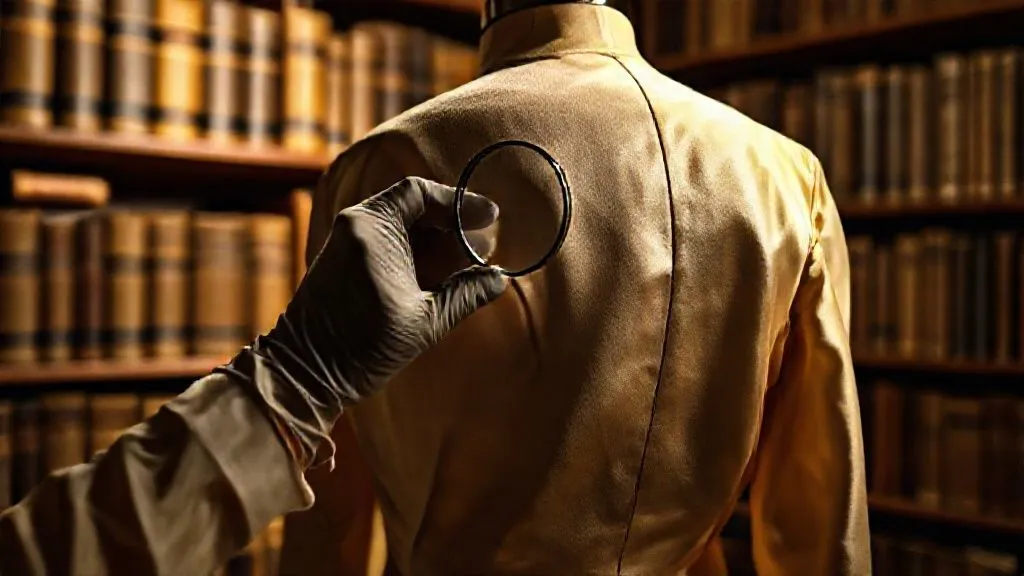
Inspecting for Damage & Weakness
Faded dye is often accompanied by other forms of degradation. Look for:
- Fabric Weakness: Gently tug at seams or less visible areas. If the fabric feels brittle or tears easily, it may not withstand treatment.
- Dry Rot: A severe form of degradation where cellulose fibers (like rayon or cotton) become extremely weak and powdery. This is largely untreatable for structural integrity.
- Moth or Pest Damage: Holes or eaten fibers, especially on wool or silk.
- Stains: Identify any existing stains, as these may require specific, targeted pre-treatment.
Document everything with photographs. This creates a record of the dress's condition 'before,' which is vital for assessing progress and for insurance purposes.
Patch Testing: The Golden Rule
I cannot stress this enough: ALWAYS PATCH TEST. Every single product, every solution, every technique must be tested on an inconspicuous area first. This might be an inner seam, the underside of a hem, or a small, hidden dart.
- Choose a Hidden Area: Select a spot that is representative of the main fabric but won't be seen.
- Apply a Tiny Amount: Use a cotton swab or a dropper to apply a minuscule amount of your chosen cleaning or dye solution.
- Observe: Wait for several minutes, or even hours, depending on the solution. Look for color bleed, discoloration, texture change, or fiber degradation.
- Repeat for Each Product: Do not assume one product will react the same as another, even if they're for similar purposes.
This meticulous step prevents accidental damage to the entire garment. It's a small investment of time that can save your invaluable collectible.
| Assessment Point | Status | Notes |
|---|---|---|
| Fabric Type Identified | Yes/No | e.g., Silk, Rayon, Wool |
| Overall Fabric Strength | Good/Fair/Weak | Look for brittleness, tears |
| Presence of Stains | Yes/No | Location, type if known |
| Extent of Fading | Mild/Moderate/Severe | Evenness, areas most affected |
| Patch Test Results | Positive/Negative | Color bleed, fabric change |
Gentle Cleaning: A Prerequisite for Dye Restoration
Many novice restorers jump straight to re-dyeing, but this is a critical mistake. A faded dress is likely also a dirty dress, and surface grime, oils, and accumulated dust can obscure true color and interfere with any dye absorption. Gentle, meticulous cleaning is almost always the first step, often revealing more vibrancy than expected.
Hand Washing Techniques for Delicate Vintage Fabrics
For most 1940s vintage dresses, hand washing is the safest approach:
- Preparation: Work in a clean basin or bathtub. Lay a clean towel on the bottom to cushion the dress.
- Temperature Control: Use cool to lukewarm water. Hot water can set stains, cause shrinkage, or damage delicate fibers.
- pH-Neutral Cleanser: Opt for a pH-neutral, unscented detergent specifically designed for delicates or vintage textiles. I often recommend products like Eucalan or a very mild baby shampoo. Avoid anything with bleach, optical brighteners, or harsh enzymes.
- Gentle Immersion: Carefully submerge the dress. Never agitate, wring, or twist. Gently press the water through the fabric.
- Soak Time: A short soak (15-30 minutes) is usually sufficient. For heavily soiled items, you might change the water and repeat, but never leave delicate items soaking for hours.
- Rinsing: Drain the soapy water and refill with clean, cool water. Continue to gently press water through the fabric until all suds are gone. This may require several rinses.
- Drying: Do NOT wring. Carefully lift the dress, supporting its weight. Lay it flat on several clean, absorbent towels. Roll the towels and dress together to gently press out excess water. Then, lay the dress flat on a fresh, dry surface or hang it on a padded hanger (if the fabric can support its own wet weight) away from direct heat or sunlight. Allow it to air dry completely.
Spot Cleaning & Stain Removal (Carefully!)
If you have specific stains, address them individually *after* a general gentle wash, or as a pre-treatment, but always with caution:
- Enzyme Cleaners: Can be effective on protein-based stains (blood, food) but must be used with extreme care on silk or wool, as they can degrade protein fibers. Always patch test and rinse thoroughly.
- Solvent-Based Cleaners: For oil-based stains (grease, cosmetics), a small amount of a gentle dry-cleaning solvent applied with a cotton swab can work. Ventilate well.
- Avoid Chlorine Bleach: Absolutely never use chlorine bleach on vintage fabrics, especially silk, wool, or rayon, as it causes irreversible damage and yellowing.
- Patience: Stain removal on vintage items is a slow process. Repeated, gentle applications are far better than one aggressive attempt.
Non-Invasive Dye Revival Techniques: Starting Gentle
Sometimes, what appears to be severe fading is merely surface dullness or a slight dehydration of the fibers. I always advocate starting with the least invasive methods, as they carry the lowest risk of damage. You might be surprised by the results.
Steaming & Humidity Treatment
For certain fabrics, particularly silk and rayon, a controlled application of steam or humidity can sometimes 'plump up' the fibers and make the existing dye appear more vibrant. This isn't re-dyeing, but rather a revival of the fabric's original luster and depth.
Use a professional garment steamer or a steam iron held several inches away from the fabric, ensuring no direct contact. Work in small sections. The moisture and gentle heat can relax fibers and improve light reflection, thus enhancing perceived color. Always test on an inconspicuous area first for any water spotting or unexpected color changes.
Fabric Conditioners & Optical Brighteners (Use with Extreme Caution!)
While modern fabric conditioners and optical brighteners are readily available, their use on collectible vintage garments is highly controversial and generally discouraged by conservators. Optical brighteners work by depositing fluorescent dyes that convert UV light into visible blue light, making whites appear whiter and colors appear brighter. However, this is an artificial effect and can look unnatural on vintage textiles, potentially obscuring original hues and adding an unwanted chemical layer.
If you absolutely must consider a fabric conditioner (perhaps for a non-collectible piece), choose one specifically formulated for delicates and free of dyes or perfumes. Again, a rigorous patch test is paramount, and be aware that these substances can be difficult to remove later, potentially affecting future conservation efforts. In my experience, for true collectibles, the risk often outweighs the minimal potential reward.

Advanced Dye Restoration: Re-Pigmentation & Re-Dyeing
When gentle methods are insufficient, and the fading significantly detracts from the garment's aesthetic and historical appeal, more advanced techniques like re-pigmentation or re-dyeing may be considered. This is a high-risk, high-reward endeavor that demands meticulous planning, precision, and an understanding of textile chemistry. It's often best left to experienced conservators, but if you choose to proceed, do so with utmost care.
Selecting the Right Dye for 1940s Fabrics
Matching the dye type to the fabric is critical for successful and lasting results:
- Acid Dyes: Best for protein fibers like silk and wool. They require an acidic environment (vinegar or citric acid) and heat to bond.
- Direct Dyes: Suitable for cellulose fibers such as rayon and cotton. These dyes bond directly to the fabric in a neutral to slightly alkaline solution, often with salt as an aid.
- Natural Dyes: While historically accurate, natural dyes can be unpredictable and require specific mordants (fixatives) that might be too harsh for delicate vintage fabrics. They are generally not recommended for a first-time restorer.
- Synthetic Dyes: Modern synthetic dyes offer a wider color palette and better colorfastness. Choose reputable brands known for quality and consistency.
Aim to match the original color as closely as possible. This often means choosing a lighter shade than you think, as fabrics tend to absorb more dye than anticipated. You can always add more dye, but you cannot easily remove it.
The Art of Dye Bath Preparation & Application
This is where the scientific method meets artistic intuition. Precision is key:
- Workspace Preparation: Protect your work area thoroughly. Use gloves, old towels, and plastic sheeting.
- Dye Concentration: Start with a highly diluted dye bath. It's easier to build color gradually than to strip it.
- Temperature Control: Follow dye manufacturer instructions for temperature. For silk and wool with acid dyes, warm to hot (but not boiling) water is usually required. For rayon, warm water is often sufficient. Ensure the temperature is consistent to avoid uneven dyeing.
- Even Immersion: The dress must be fully saturated and submerged evenly in the dye bath. Gently agitate the dress constantly to ensure uniform color absorption. Uneven agitation leads to streaks and blotches.
- Monitoring Color: Regularly lift a small section of the dress to check the color against a reference (an unfaded part of the dress, if possible, or a color swatch). Remember, the color will appear darker when wet.
- Rinsing and Setting: Once the desired shade is achieved, remove the dress and rinse it thoroughly under cool, running water until the water runs clear. For acid dyes, a final rinse with a small amount of vinegar can help set the color.
- Drying: Dry flat or on a padded hanger, away from direct heat or sunlight, as described in the cleaning section.
Case Study: Rescuing Eleanor's Silk Cocktail Dress
Case Study: Rescuing Eleanor's Faded Black Silk Cocktail Dress
Eleanor, a dedicated collector, approached me with a stunning 1940s black silk cocktail dress. It was in excellent structural condition, but its deep black had faded to a dull, uneven charcoal, particularly around the shoulders and décolletage. The original tag indicated 100% silk. After a thorough assessment and gentle hand wash, we determined the fabric was strong enough for a cautious re-dye.
Our strategy involved using a high-quality acid dye specifically formulated for silk. We prepared a very dilute dye bath, aiming for a subtle increase in depth rather than a complete overhaul. The dye bath was maintained at a consistent warm temperature, and I meticulously agitated the dress for 30 minutes, checking the color every five minutes against an unfaded section of the dress's inner lining. The key was patience and gradual color building.
The result was a remarkable transformation. The silk regained its rich, lustrous black, the fading lines disappeared, and the dress was restored to its former glory without any damage to the delicate fibers. Eleanor was thrilled, and the dress once again radiated the sophisticated elegance of the 1940s, ready for display or careful wear. This successful outcome underscored the importance of fabric identification, careful dye selection, and precise execution.

Post-Restoration Care & Long-Term Preservation
Restoring a faded dye on a collectible 1940s vintage dress is only half the battle. Maintaining that restored vibrancy and ensuring the long-term preservation of the garment requires ongoing vigilance and proper care. This is where your role as a diligent conservator truly shines.
Proper Storage: Light, Humidity, and Pests
Environmental control is paramount for preventing future fading and degradation:
- Light Control: Store your dress in a dark environment, away from any direct or indirect sunlight and artificial lights. UV-filtering window films or blackout curtains in storage areas are highly recommended.
- Temperature and Humidity: Aim for a stable, cool, and dry environment. High humidity encourages mold growth and can accelerate dye degradation. Fluctuating temperatures can also stress fibers. Ideal conditions are typically around 68°F (20°C) and 50% relative humidity.
- Acid-Free Materials: Use acid-free tissue paper to pad folds and support the dress. Store it in an archival-quality, acid-free garment box or on a padded hanger inside an archival garment bag. Never use plastic dry-cleaning bags, as they trap moisture and off-gas harmful chemicals.
- Pest Control: Keep storage areas clean and regularly inspected for pests like moths, silverfish, and carpet beetles, which can cause irreparable damage to textile fibers.
Displaying Your Collectible Dress Safely
If you choose to display your restored dress, do so with caution:
- Limited Exposure: Limit display time. Rotate garments on display with those in dark storage to minimize light exposure.
- UV Protection: Display in a room with UV-filtering glass or film on windows. Consider display cases with UV-protective acrylic.
- Support: Use museum-grade padded mannequins or forms that properly support the garment's weight and shape, preventing stress on seams and fabric.
| Storage Aspect | Recommendation | Why It Matters |
|---|---|---|
| Light Exposure | Dark, UV-filtered environment | Prevents dye fading and fiber degradation |
| Temperature & Humidity | Stable 68°F (20°C), 50% RH | Prevents mold, pest activity, and fiber stress |
| Materials Used | Acid-free tissue & archival boxes/bags | Avoids chemical migration and yellowing |
| Pest Control | Regular inspection, cleanliness | Protects against irreversible damage to fibers |
Common Pitfalls and How to Avoid Them
Even with the best intentions, mistakes can happen. Here are some of the most common pitfalls I've observed in vintage textile restoration and how to steer clear of them:
“The greatest mistake in vintage restoration isn't a lack of skill, but a lack of patience and respect for the garment's inherent fragility. Rushing a process or skipping a patch test invariably leads to regret.”
- Ignoring Patch Tests: As emphasized, this is the single most critical step. Skipping it is like performing surgery without diagnostics.
- Using Harsh Chemicals: Modern stain removers, chlorine bleach, or strong detergents are often too aggressive for delicate, aged fibers and can cause irreversible damage or discoloration.
- Improper Fabric Identification: Applying an acid dye to rayon or a direct dye to silk will yield disastrous results, either no color absorption or fiber damage.
- Over-Dyeing: Trying to achieve a deep color in one go. It's always easier to add more dye than to remove it. Gradual, controlled dyeing is key.
- Uneven Dyeing: Insufficient agitation or improper immersion leads to streaks, blotches, and an unnatural appearance.
- Improper Drying: Wringing, hanging heavy wet garments, or exposing them to direct heat can cause permanent distortion, stretching, or shrinkage.
- Lack of Documentation: Failing to photograph before, during, and after the process means you lose valuable insights and a record of your work.
Always approach restoration with a mindset of preservation, not just aesthetic improvement. Remember that the historical integrity of the garment should always be your highest priority.
Frequently Asked Questions (FAQ)
Q: Can all faded 1940s vintage dresses be restored? A: Unfortunately, no. The success of restoration depends heavily on the fabric's condition, the extent of the fading, and the original dye type. Fabrics with severe dry rot or extreme UV damage may be too fragile to withstand any treatment. Always perform a thorough assessment and patch test.
Q: Is re-dyeing a vintage dress considered ethical for a collector's item? A: This is a nuanced question. If the fading significantly detracts from the garment's original aesthetic and historical representation, and all non-invasive methods have failed, careful re-dyeing by an expert can be considered a form of conservation to restore its appearance. However, it should always be disclosed if the garment is ever sold or exhibited. The goal is to bring it closer to its original state, not to alter its historical context.
Q: How do I know if my dress has natural or synthetic dyes? A: Without laboratory analysis, it's challenging to be certain. Generally, garments from the early 1940s might still use some natural dyes, but synthetic dyes were becoming more prevalent. Natural dyes often fade with a softer, more subtle transition, while early synthetics can sometimes fade to unexpected hues or show more distinct color shifts. Fabric type (e.g., silk, wool) can also hint at traditional dye methods.
Q: What if I'm unsure about performing the restoration myself? A: If you have any doubts, the safest course of action is to consult a professional textile conservator or a specialist in vintage garment restoration. They have the expertise, equipment, and experience to handle delicate items and complex dye issues, ensuring the highest chance of a successful and safe outcome. You can find reputable conservators through organizations like the American Institute for Conservation of Historic and Artistic Works (AIC) or the Institute of Conservation (Icon) in the UK.
Q: Can I use household fabric dyes for this project? A: While household fabric dyes are accessible, many are formulated for modern, robust fabrics and might contain ingredients (like strong salts or high pH levels) that are too harsh for delicate vintage textiles. They also often lack the colorfastness and nuanced color control needed for historical garments. I highly recommend using professional-grade textile dyes designed for specific fiber types, ensuring better control and less risk.
Key Takeaways and Final Thoughts
Restoring faded dye on a collectible 1940s vintage dress is a deeply rewarding endeavor that blends historical appreciation with meticulous craftsmanship. It's a journey that requires patience, informed decision-making, and a profound respect for the garment's unique history. Remember these critical takeaways:
- Assess Thoroughly: Understand the fabric, dye type, and structural integrity before any intervention.
- Patch Test Everything: This is your non-negotiable insurance policy against irreversible damage.
- Start Gentle: Begin with non-invasive cleaning and revival techniques before considering re-dyeing.
- Match Dye to Fabric: Use the correct type of dye for silk, wool, or rayon to ensure proper absorption and colorfastness.
- Practice Patience and Precision: Gradual color building and even application are crucial for natural-looking results.
- Prioritize Preservation: Always aim to restore without compromising the garment's historical integrity or long-term stability.
- Store Smart: Proper, archival-quality storage is essential for maintaining the restored vibrancy and preventing future fading.
The beauty of a 1940s dress lies not just in its design, but in the stories it tells and the history it embodies. By approaching its restoration with care and expertise, you're not just reviving a color; you're safeguarding a piece of our collective past. Embrace the challenge, enjoy the process, and take pride in knowing you've given a cherished collectible a new lease on life. For further resources on textile conservation, consider exploring guides from institutions like the Victoria and Albert Museum or the Metropolitan Museum of Art, and for deeper dives into textile chemistry, the Textile Institute provides excellent academic resources. Always remember that the goal is to enhance, not erase, the garment's authentic journey.
Recommended Reading
- Killer Fashion Blog Posts: Your Ultimate Writing Guide!
- Runway Photography Redefined: Deliver High-Quality Images Quickly
- Mastering Client Approval: 7 Steps for Daring Costume Designs
- Mastering Durability: 7 Strategies for Lightweight Technical Weaves
- Slash Fashion Returns by 40%: AI's Fit Revolution for Perfect Sizing

Your email address will not be published. Required fields are marked *