
How to Prevent Urgent Seam Failure in Historical Costumes?
For over two decades in the demanding world of costume design and construction, I've witnessed the heart-stopping moment when a meticulously crafted historical garment gives way. It’s a scene I wouldn’t wish on any fellow artisan: a crucial seam rips mid-performance, a delicate bodice tears during an exhibition move, or a heavy skirt panel detaches on a film set. The panic is palpable, the consequences dire – from ruined performances to costly repairs and damaged reputations. I've learned, often the hard way, that prevention isn't just better than cure; it's absolutely essential.
The unique challenges of historical costumes—be it their age, the specific period construction methods, the inherent fragility of certain textiles, or the dynamic movement of performers—place immense stress on seams. These aren't just decorative lines; they are the structural backbone of the garment. When they fail, the entire illusion, the historical accuracy, and the performer’s confidence can unravel.
In this definitive guide, I will share my accumulated wisdom and practical strategies on how to prevent urgent seam failure in historical costumes. We'll delve into everything from foundational fabric choices and advanced construction techniques to proactive maintenance and essential emergency preparedness. My goal is to equip you with the knowledge and actionable frameworks to build costumes that not only look authentic but also possess the enduring strength to withstand the rigors of their use.
1. Understanding the Unique Stresses on Historical Costume Seams
Before we can prevent failure, we must first understand its root causes. Historical costumes are not simply clothing; they are often complex feats of textile engineering, subjected to stresses that modern garments rarely encounter. Ignoring these unique pressures is a common oversight I've seen lead to inevitable disaster.
Fabric Degradation & Fiber Fatigue
Many historical costumes, whether original artifacts or faithful reproductions, utilize fabrics that are inherently less robust than modern synthetics or are simply aged. Natural fibers like silk, linen, and wool, while beautiful and period-appropriate, can degrade over time due to light exposure, environmental factors, and chemical treatments. This degradation leads to fiber fatigue, making the fabric itself weaker and more prone to tearing at stress points, especially along seam lines. Even new, historically accurate weaves can sometimes lack the tight, dense structure of modern textiles, making them more susceptible to fraying and pulling apart under tension. Understanding the inherent strength and limitations of your chosen textile is the very first step in robust construction. For deeper insights into textile properties, I often refer to academic resources on material science. ScienceDirect offers excellent overviews of textile fiber properties.
Movement & Performance Dynamics
Unlike museum pieces, costumes for stage, screen, or living history are designed to be worn and moved in. Performers often engage in vigorous activities – dancing, dueling, riding horses, or simply making grand gestures – all of which exert significant, repetitive strain on seams. A seam that holds perfectly on a mannequin might catastrophically fail when a performer executes a sharp turn or reaches overhead. The weight and bulk of historical layers, such as corsets, petticoats, and heavy outer garments, further amplify these stresses, particularly at the armscyes, waistlines, and back seams.
Weight Distribution & Structural Load
Many historical silhouettes rely on intricate internal structures to achieve their distinctive shapes. Boning, interlinings, and multiple layers of fabric all contribute to the garment's overall weight, which must be carefully distributed to prevent localized stress. A poorly supported skirt, for instance, will pull heavily on its waistband seams. A bodice without adequate internal structure will place undue strain on its shoulder and side seams. It's a delicate balance of form and function, where every design decision impacts the longevity of the costume.
"The true strength of a historical costume lies not just in its exterior beauty, but in the unseen engineering within. Always consider the garment's life in motion, not just in repose."

2. The Foundation: Fabric Selection & Preparation for Durability
The journey to prevent urgent seam failure in historical costumes begins long before the first stitch is sewn: it starts with meticulous fabric selection and preparation. This foundational step is often underestimated, yet it's critical for the garment's overall integrity and longevity.
Choosing Period-Appropriate, Robust Materials
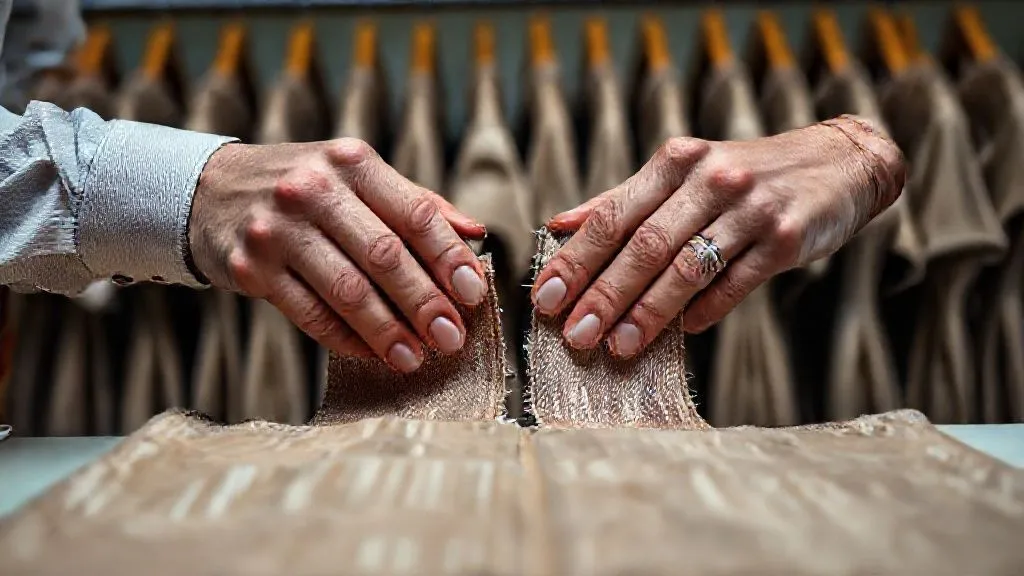
While historical accuracy dictates fabric choices, it's crucial to select materials that can withstand the intended use. Sometimes, this means making informed compromises. For instance, if a delicate silk is historically accurate but the costume will endure heavy stage use, consider a slightly heavier weight silk, a silk blend, or even a very fine, tightly woven cotton sateen that mimics silk's drape but offers superior strength. Look for fabrics with a tight weave, as loosely woven textiles are prone to unraveling and seam slippage. Always perform a 'pull test' on a fabric scrap: gently pull the fabric along the bias and warp/weft at a cut edge to see how easily threads shift or pull apart. This simple test can save countless hours of future repair.
Pre-Treating & Stabilizing Fabrics
Fabric preparation is non-negotiable. Pre-shrinking all fabrics (washing and drying them as they will be cleaned in the future) prevents distortion and stress on seams after the garment is completed. For delicate or loosely woven fabrics, consider stabilizing raw edges with a very fine, lightweight fusible interfacing or a narrow strip of silk organza before construction begins. This adds crucial support to the seam allowance, preventing fraying and providing a more stable base for stitching. I've found that even a simple starching and pressing can significantly improve fabric stability for cutting and initial construction.
| Fabric Type | Strength for Costumes | Seam Reinforcement Need |
|---|---|---|
| Silk Organza | Low (delicate, often used as interlining) | High (requires careful handling, French seams, or binding) |
| Linen (heavy weight) | Medium-High (durable, breathable) | Medium (good for flat-felled, bound seams) |
| Wool Broadcloth | High (dense, resilient) | Low-Medium (can handle strong stitches, often pressed open) |
| Brocade (silk/synthetic blend) | Medium-High (structure from weave) | Medium (can fray, benefit from binding/overcasting) |
| Cotton Twill | High (very strong, stable) | Low (excellent for flat-felled, topstitched seams) |
3. Mastering Seam Construction Techniques for Longevity
The actual method of joining fabric panels is perhaps the most critical aspect of preventing seam failure. This is where the artistry of costume construction truly shines, blending historical accuracy with modern engineering principles to create seams that endure. Generic garment construction often falls short when dealing with the specific demands of period wear.
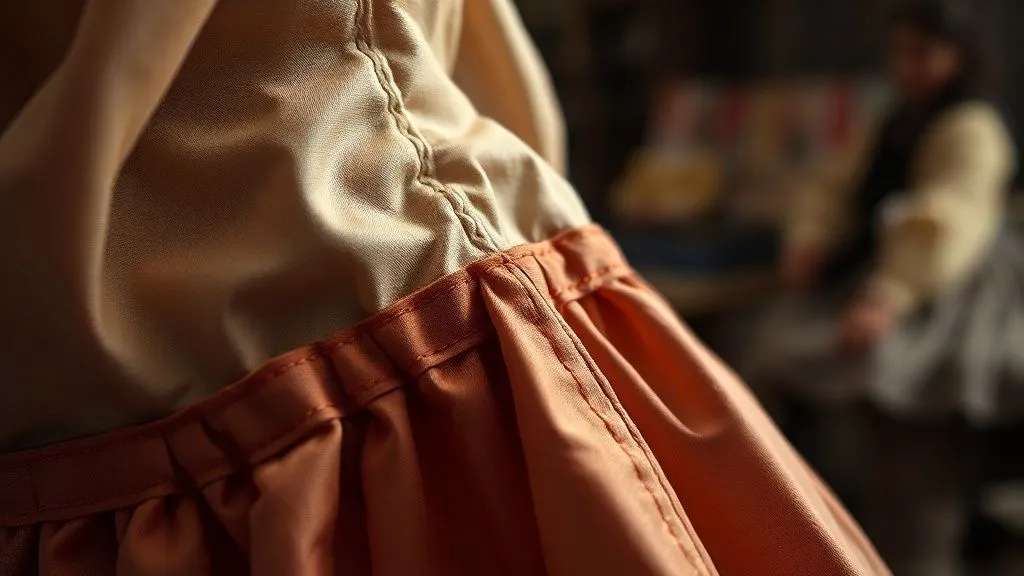
Seam Allowances: The Unsung Hero
Generous seam allowances are your first line of defense. While modern patterns often call for 5/8" (1.5 cm) allowances, I frequently increase this to 1" (2.5 cm) or more in high-stress areas like the center back, armscyes, and waistlines of historical garments. This extra fabric provides a stronger anchor for your stitches and allows for future adjustments without compromising seam integrity. It also gives you more material to work with if you need to bind, French seam, or flat-fell the edges for added durability. A narrow seam allowance, especially on a delicate fabric, is an invitation for disaster.
Stitch Type & Density: A Critical Choice
The type and density of your stitches are paramount. For most machine-sewn historical costume seams, a stitch length of 2.5 to 3 mm (10-12 stitches per inch) is ideal. Too long, and the seam is weak; too short, and it can perforate the fabric, weakening it. For hand-sewn seams, a strong backstitch or a dense running stitch is often preferred. Always use high-quality, strong thread – polyester-wrapped cotton or pure polyester threads are generally more durable than pure cotton for structural seams, even if linen thread is historically accurate for visible topstitching. Double-stitching high-stress seams (sewing two parallel rows of stitches) provides an excellent safety net.
Reinforcement Methods: Taping, Cording, & Interfacing
True mastery of costume construction involves proactive reinforcement. I regularly employ several techniques:
- Seam Taping: For curved or bias-cut seams (like armscyes, necklines, or empire waistlines), I often stitch a narrow strip of twill tape, silk organza, or even a bias strip of self-fabric into the seam allowance. This stabilizes the edge, prevents stretching, and adds significant strength.
- Cording: In areas of extreme stress, such as the attachment of heavy skirts to bodices or the gussets of trousers, cording (encasing a strong cord within the seam allowance or along the seam line) can distribute tension and prevent tearing.
- Interfacing: Strategically placed interfacing, particularly at points where multiple seams converge or where closures (hooks, eyes, buttons) will be attached, provides crucial stability. Choose interfacings that match the drape and weight of your main fabric to avoid stiffness.
"Never underestimate the power of a meticulously executed seam finish. A bound or French seam isn't just pretty; it's a fortress against fraying and failure."
4. Strategic Underpinnings: Supporting the Garment from Within
Just as a building relies on its hidden framework, a historical costume's longevity is heavily dependent on its internal support systems. These underpinnings are not merely aesthetic; they are engineering solutions designed to distribute stress, maintain shape, and ultimately, prevent urgent seam failure in historical costumes.
Linings & Interlinings: More Than Just Aesthetics
A well-chosen lining does more than provide a clean finish. It acts as a second skin, absorbing much of the wear and tear from the body and providing an additional layer of structural integrity. Interlinings, placed between the outer fabric and the lining, are even more critical. They can add stiffness, warmth, or, most importantly, strength. For a heavy wool coat, a sturdy canvas or flannel interlining can prevent the outer fabric from stretching or tearing under its own weight, especially at shoulder seams and the back. For delicate silks, a silk organza interlining can provide sheer strength without compromising drape, reinforcing every seam it touches.
Boning & Casing: Distributing Stress
In many historical periods, boning was essential for shaping the silhouette. However, its role extends to stress distribution. Properly placed boning, encased in sturdy channels (casing), can prevent fabric from buckling or tearing under tension, particularly in bodices, corsets, and even some skirt waistbands. The boning itself, if flexible yet firm, helps to spread the load across a wider area of fabric rather than concentrating it on a single seam. The casing, often made from cotton twill or even self-fabric, reinforces the seam line it is stitched to, acting as a mini-buttress.
Weighting & Hem Stabilization
The hem of a historical gown, especially one with a long train or made of heavy fabric, can exert considerable drag and stress on side seams and the waistline. Strategically placed weights (lead weights, chain weights, or even small curtain weights) within the hem can help the garment hang correctly and reduce drag. Furthermore, reinforcing hems with sturdy bias tape, horsehair braid, or a false hem of durable fabric significantly reduces the chance of the hem tearing away from the main garment, which often compromises the side seams as well. The Metropolitan Museum of Art's costume collection often showcases the intricate internal structures of historical garments.
5. Fit & Movement: Designing for Performance, Not Just Form
A beautifully constructed costume can still fail if it doesn't accommodate the wearer's body and intended movements. This is a crucial distinction between historical dress and historical costume. While historical dress might prioritize static form, historical costume must prioritize dynamic function. Ignoring this often leads to catastrophic seam failure.
Pattern Adaptation for Modern Movement
Original historical patterns were designed for historical bodies and historical patterns of movement, which often differed significantly from modern performance requirements. When adapting historical patterns, I always build in extra ease in critical areas: a slightly deeper armscye, a wider back panel, or a more generous shoulder slope can make all the difference. For male historical costumes, particularly those involving active movement, this is especially true. Modern performers often have broader shoulders and a wider range of motion than their historical counterparts. Adding subtle gussets or pleats in the underarm or back can provide crucial flexibility without compromising the period silhouette. This thoughtful adaptation is key to how to prevent urgent seam failure in historical costumes that see active use.
Stress Relief in High-Tension Areas (Gussets, Pleats, Darts)
Certain areas of any garment are inherently high-tension, but in historical costumes, this is amplified. The armscye (where the sleeve meets the bodice), the crotch seam of breeches, and the waistline where a heavy skirt attaches are prime examples. Instead of simply stitching these areas, incorporate design elements that distribute stress:
- Gussets: Small, diamond-shaped fabric inserts, particularly under the arm or in the crotch, allow for a greater range of motion and shift stress away from a single seam line.
- Inverted Pleats: In the back of a jacket or coat, an inverted pleat can provide critical ease for movement, preventing strain on the shoulder and side seams.
- Darts: While primarily for shaping, well-placed and properly sewn darts can also help distribute stress around curves, preventing fabric from pulling at the seam edges.
The Importance of Proper Gaps and Ease
It sounds counter-intuitive, but sometimes a small gap or a bit of extra ease is exactly what a costume needs. For example, in a tightly fitted historical bodice, allowing for a small gap at the center back lacing (rather than forcing it completely closed) can alleviate immense pressure on the side seams and armscyes. Similarly, ensuring adequate ease in the waist of a skirt or trousers prevents the fabric from tearing when the wearer sits or bends. It's about finding the balance between a historically accurate silhouette and the practical realities of movement.
Case Study: How a Theatrical Troupe Minimized Costume Rips
A regional theatre company was struggling with constant costume failures, especially in their highly physical Renaissance play. Their historically accurate patterns, while beautiful, were ripping at the armscyes and center back seams during sword fights and dances. I advised their costume shop to subtly redesign the armscye with a deeper curve and integrate small, self-fabric gussets under the arms of all doublets and bodices. For the women's gowns, we increased the back lacing gap by an inch, allowing for more torso movement without stressing the side seams. By implementing these minor design adjustments, the troupe reported a 70% reduction in urgent seam failures over a single production run, saving countless hours in emergency repairs and significantly extending the life of their costumes. This demonstrated the immense value of designing for movement from the outset.
6. Proactive Maintenance & Inspection: The Stitch in Time
Even the most expertly constructed costume will eventually show signs of wear. Proactive maintenance and regular inspection are vital to catch potential failures before they become urgent catastrophes. This is where the wisdom of a seasoned costume specialist truly makes a difference.
Regular Garment Assessments
I strongly advocate for a systematic assessment schedule. For active costumes (theatre, film), this means a quick but thorough inspection after every single wear. For exhibition pieces or less frequently used garments, quarterly or bi-annual checks are appropriate. During these assessments, look beyond obvious rips. Pay close attention to areas of high stress: armscyes, crotch seams, waistbands, and the connection points of heavy embellishments. Check for:
- Loose threads or stitches
- Fabric thinning or abrasion along seam lines
- Slight pulls or puckers that indicate strain
- Any signs of seam slippage (where threads are pulling out of the weave)
- The integrity of closures (hooks, eyes, zippers, buttons) that can transfer stress to seams.
Storage & Handling Best Practices
Improper storage and handling can cause more damage than wear. Costumes should be stored clean, on padded hangers (especially for heavy garments) or rolled in acid-free tissue for delicate items, to prevent creasing and stress points. Avoid overcrowding garment racks. When handling, always lift garments by their strongest points (e.g., shoulders of a coat, waistband of a skirt), never by delicate sleeves or hems. Educate performers and crew on proper dressing and undressing techniques, emphasizing gentle treatment of seams and closures. For comprehensive guidelines on textile preservation, museum conservation practices offer invaluable lessons. The American Institute for Conservation provides excellent resources.
Identifying Early Warning Signs
Learning to 'read' a costume is an acquired skill. A slight distortion in the hang of a sleeve, a subtle pulling at the side seam when the wearer moves, or a barely perceptible thinning of fabric along a bias seam are all early warning signs. These are the moments to intervene. A minor repair, such as reinforcing a few loose stitches or adding a small patch to the seam allowance, can prevent a complete blowout. Ignoring these subtle cues is a common mistake that leads to urgent seam failure.
- Visual Check: Scan all major seams for fraying, loose threads, or gaps.
- Tactile Check: Gently feel along seams for thinning fabric or areas of unusual tension.
- Stress Test (Gentle): If safe for the garment, gently mimic typical movements (e.g., raise arm, bend) to observe how seams react.
- Closure Inspection: Ensure all hooks, eyes, buttons, and zippers are securely attached and not pulling at the fabric.
- Lining Check: Don't forget to inspect the lining for tears, as it often takes the brunt of internal stress.
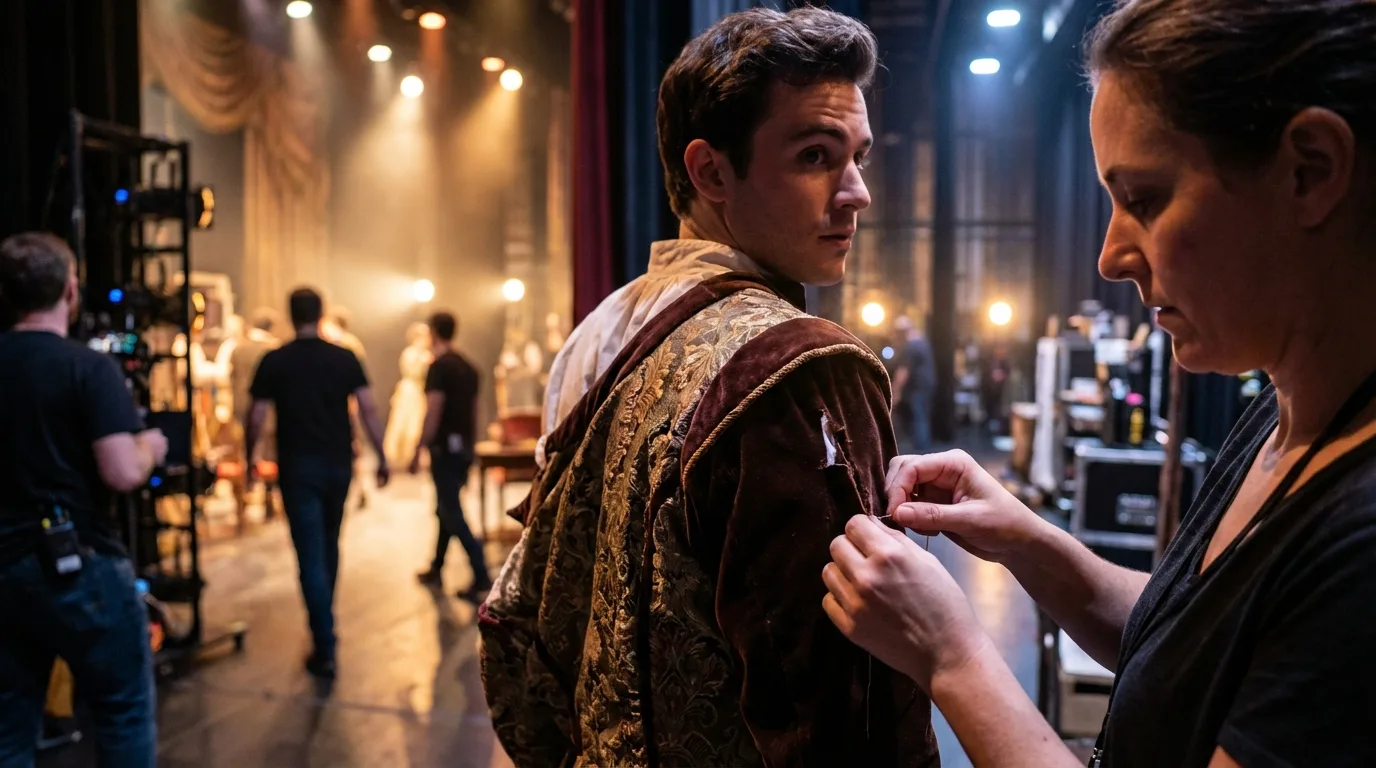
7. Emergency Preparedness: On-Set & Backstage Repair Kits
Despite all best intentions and preventative measures, accidents happen. A sudden tear, a popped stitch – these are the moments when a well-stocked and intelligently prepared emergency repair kit becomes a lifesaver. This isn't just about having needles and thread; it's about having the right tools for a quick, effective, and temporary fix that prevents further damage.
Essential Tools & Materials
My emergency kit is a carefully curated arsenal, designed for speed and versatility. It's not about a full sewing machine, but rather portable, precise tools:
| Item | Purpose |
|---|---|
| Assorted Hand Needles | Various sizes for different fabrics and thread weights. |
| Strong Thread (Black, White, Neutral) | Polyester or poly-cotton for durability and invisibility. |
| Small, Sharp Scissors | For precise cutting of threads, not fabric. |
| Thimble | Essential for protecting fingers and pushing needles through tough fabric. |
| Seam Ripper | For carefully unpicking failed stitches without damaging fabric. |
| Safety Pins (Assorted Sizes) | Quick temporary fixes, holding fabric together. |
| Fabric Glue (Temporary) | For quick, non-sewn fixes on non-structural areas or to prevent fraying. |
| Iron-on Fusible Webbing (Small) | For quick, temporary patch repairs if an iron is available. |
| Tweezers | For pulling out stubborn threads or positioning small pieces. |
| Small Fabric Swatches | Matching colors for quick patches, especially for common costume fabrics. |
Quick Fix Techniques for Minor Issues
The goal of an emergency repair is not perfection, but stabilization. Here are a few go-to techniques:
- The Whipstitch/Overcast Stitch: For a small, clean tear along a seam, a tight whipstitch can quickly pull the edges together. It's not pretty, but it holds.
- Safety Pin Reinforcement: For a seam that's just starting to give, strategically placed safety pins on the *inside* of the garment can hold the fabric together until a proper repair can be made. Position them parallel to the seam line to minimize visibility and stress.
- Fabric Tape/Fusible Webbing: For a raw edge or a small, non-structural tear, a strip of fabric tape or fusible webbing (if heat is available) can prevent further fraying and temporarily secure the area.
- Temporary Patching: For larger tears, a quick patch from a matching fabric scrap (even if roughly sewn or glued) can cover the damage and prevent it from worsening.
"A well-prepared emergency kit isn't a sign of weakness; it's a testament to experience and foresight. Always expect the unexpected, and be ready to adapt."
8. The Human Element: Training & Communication
Ultimately, costumes are worn by people, and their longevity is influenced by human interaction. Even the most robust construction can be undone by mishandling. This is why training and clear communication are as vital as any stitch or seam allowance in preventing urgent seam failure in historical costumes.
Educating Performers on Garment Care
I cannot stress this enough: performers, actors, and re-enactors must understand the unique fragility and construction of their historical garments. A brief but comprehensive orientation at the start of a production or event can make a world of difference. Teach them:
- How to properly don and doff their costume, especially items with complex closures like corsets or heavily layered garments.
- The 'no-pull' rule: never pull on delicate areas (sleeves, necklines, decorative elements) to adjust the fit.
- How to move within the costume's limitations, respecting the garment's stress points.
- Who to contact immediately if they notice any issue, no matter how small.
This empowerment fosters a sense of shared responsibility and respect for the craftsmanship involved.
Clear Communication with Wardrobe Teams
For any large-scale production, the wardrobe and dressing teams are the frontline guardians of your costumes. Establish clear lines of communication regarding:
- Specific care instructions for each garment.
- Known stress points or delicate areas that require extra vigilance.
- Procedures for reporting and documenting costume damage.
- Availability of emergency repair kits and who is trained to use them.
A well-informed and well-equipped wardrobe team can proactively address minor issues before they escalate, preventing major seam failures. Regular check-ins and debriefs are invaluable. USITT (United States Institute for Theatre Technology) offers excellent resources for theatre professionals, including costume care.
Post-Performance Debriefs
After each performance or significant use, a quick debrief with the performers and wardrobe team is incredibly useful. Ask specific questions:
- "Did you feel any pulling or tightness in specific areas?"
- "Were there any movements that felt restrictive or caused strain on the costume?"
- "Did you notice any loose threads or changes in the garment's fit?"
This feedback loop provides invaluable insights into how the costume is performing under real-world conditions, allowing for minor adjustments or targeted reinforcements before a seam gives way completely. It's a proactive approach that leverages the experience of those who wear and handle the garments daily.
Frequently Asked Questions (FAQ)
What is the best stitch to use for high-stress seams in historical costumes? For machine sewing, I recommend a slightly shorter stitch length (2.5mm or 10-12 stitches per inch) and often a double stitch (two parallel rows) for critical areas like armscyes, waistbands, and crotch seams. For hand sewing, a strong, dense backstitch is unparalleled for its strength and durability. Always use a high-quality, strong polyester or poly-cotton thread that won't degrade easily.
How can I reinforce an existing weak seam in a historical costume without completely deconstructing it? The best approach depends on the garment. For internal seams, you can often stitch a narrow strip of silk organza or twill tape over the existing seam allowance to add strength. If the seam is external or visible, carefully hand-stitch a new row of strong stitches directly over the original seam line, or use a small, discreet patch on the inside, carefully whipstitched over the weak area. Fabric glue can be a temporary solution for minor fraying, but never for structural integrity.
What types of fabrics are notoriously prone to seam failure in historical costume applications? Loosely woven fabrics like some raw silks, certain types of linen, or open-weave brocades are highly susceptible to seam slippage and fraying. Very fine, lightweight silks (like chiffon) or aged, brittle fabrics are prone to tearing. Always test a scrap of your chosen fabric for seam strength before committing to construction.
How do environmental factors like humidity or temperature affect seam integrity? Extreme fluctuations in humidity and temperature can significantly impact textile fibers. High humidity can cause natural fibers to swell and weaken, while very dry conditions can make them brittle. These changes can put stress on seams over time, especially if the garment is stored incorrectly or subjected to rapid environmental shifts. Consistent, moderate environmental control is crucial for long-term preservation and seam integrity.
When is hand-sewing superior to machine-sewing for durability in historical costumes? While machine sewing is faster and often very strong, hand-sewing offers superior control and flexibility in certain situations. For delicate fabrics that might be damaged by machine feed dogs, or for highly curved seams that require precise manipulation, hand-sewing can prevent distortion and provide a more secure, less stressed seam. Hand-worked buttonholes and eyelets are also often more durable than their machine-made counterparts, as they distribute stress more evenly.
Key Takeaways and Final Thoughts
Preventing urgent seam failure in historical costumes is a multifaceted discipline, demanding a blend of historical knowledge, textile science, and practical construction expertise. It's about looking beyond the surface and understanding the dynamic life a costume will lead. As I've outlined, success hinges on:
- Understanding Unique Stresses: Acknowledging the specific demands placed on historical garments.
- Meticulous Fabric Selection & Preparation: Choosing and treating materials for maximum resilience.
- Mastering Advanced Construction: Employing generous seam allowances, appropriate stitch types, and strategic reinforcement.
- Intelligent Underpinnings: Utilizing linings, boning, and weighting to distribute stress effectively.
- Designing for Movement: Adapting patterns and incorporating stress-relief elements for active wearers.
- Proactive Maintenance: Implementing regular inspections and proper handling/storage practices.
- Preparedness: Having an emergency kit and knowing how to execute quick, stabilizing repairs.
- Empowering Your Team: Educating performers and communicating clearly with wardrobe staff.
By integrating these strategies into your practice, you're not just building costumes; you're engineering wearable history that stands the test of time and performance. Embrace these principles, and you'll find yourself confidently creating garments that not only capture the essence of the past but also possess the enduring strength to prevent urgent seam failure, ensuring your creations shine without a single stitch out of place.
Recommended Reading
- 7 Artistic Strategies: Monetizing Unique Contemporary Jewelry Designs
- Low-Light Fashion: How to Achieve Consistent Editorial Quality?
- Mastering Bespoke Footwear Pricing: 5 Strategies for Luxury Market Success
- Unlock the Future: 7 Steps to Sustainable, High-Performance Functional Textiles
- 7 Expert Strategies: Adapt Fast Womenswear Trends to Your Classic Brand


Your email address will not be published. Required fields are marked *