
How to achieve consistent editorial quality in low-light fashion portraits?
Achieving consistent editorial quality in low-light fashion portraits is arguably one of the most demanding disciplines in our field. It’s not merely about capturing an image in dim conditions; it’s about crafting a narrative, evoking a specific mood, and maintaining a high level of technical and artistic precision across an entire series. In my experience, this consistency stems from a deeply integrated approach, where every decision, from pre-production to post-processing, is made with deliberate intent.
A common mistake I see is photographers treating low-light as an obstacle to be overcome, rather than a unique canvas to be painted upon. The secret lies in understanding that editorial quality in low light isn't about *more* light, but about *masterful control* of the light you have, or the light you introduce subtly.
The foundation for consistency is laid long before the shutter clicks: through meticulous **pre-visualization and planning**. Just as an architect drafts blueprints, we must envision the final image series, understanding how each shot contributes to the overarching story. This proactive approach minimizes variables and ensures a cohesive aesthetic.
- Mood Board Development: Create detailed mood boards encompassing lighting styles, color palettes, poses, and narrative cues. This serves as a visual anchor for the entire team.
- Location Scouting with Intent: Visit potential locations at the exact time of day you plan to shoot. Observe how the ambient light shifts, where shadows fall, and identify any practical light sources that can be integrated.
- Strategic Gear Selection: Choose lenses and camera bodies specifically for their low-light capabilities. This isn't just about high ISO, but about light-gathering power and sharp rendition at wide apertures.
- Team Briefing: Clearly communicate your vision to the model, stylist, and makeup artist. Their understanding of the mood and intended light will influence their performance and choices, directly impacting the final editorial look.
Next, we must become sculptors of light, even when it’s scarce. It's about **shaping and augmenting existing low light** rather than overpowering it. Think of ambient low light as your base layer, and any additional light as delicate highlights or subtle mood enhancers.
- Leveraging Practical Light Sources: Streetlights, neon signs, window light from a distant building, or even the glow of a phone screen can become powerful, narrative-rich light sources. Position your subject to make these sources work for you, often as rim lights or subtle key lights.
- Subtle Light Augmentation: Employ small, controllable LED panels (like Aputure MCs or similar), reflectors, or even white cards to bounce and direct existing light. The goal is to enhance, not dominate. A 5-in-1 reflector is an indispensable tool, allowing you to subtly fill shadows or add a touch of warmth.
- Understanding Light Fall-off: In low light, the inverse square law becomes your best friend and worst enemy. Placing a light source closer to your subject creates a dramatic, rapid fall-off, perfect for sculpting faces and isolating elements. Mastering this allows for precise light control.
- Color Temperature Management: Low-light environments often have mixed color temperatures. Use gels on your supplemental lights to match or creatively contrast with the ambient light, ensuring a consistent color narrative throughout the series. This avoids jarring shifts in white balance between shots.
Camera settings and gear choices are not merely technical specifications; they are creative decisions that directly impact the aesthetic and consistency. It’s about pushing your equipment to its limits intelligently, understanding the trade-offs.
- Fast Lenses are Non-Negotiable: Lenses with apertures of f/1.2, f/1.4, or f/1.8 are essential. They gather significantly more light, allowing for lower ISOs and faster shutter speeds. More importantly, they create a beautiful, shallow depth of field, which is crucial for isolating your subject in busy, low-light environments and drawing the viewer’s eye.
- High ISO Performance: While we aim for lower ISOs, modern full-frame sensors excel in low light. Know your camera's usable ISO range where noise is manageable and retains detail. In my experience, it's better to get a sharp, slightly noisy image than a blurry, clean one.
- Shutter Speed and Intentional Motion: Be deliberate with your shutter speed. A slightly slower shutter speed (e.g., 1/30s or 1/15s) can introduce beautiful, intentional motion blur, adding a dynamic, editorial feel, especially when paired with a sharp, static element like the model's eyes. Conversely, if sharpness is paramount, ensure your shutter speed is adequate to freeze movement.
- Mastering Manual Mode: Full manual control is paramount. Auto modes simply cannot make the nuanced creative decisions required for consistent editorial low-light work. You need to dictate the exposure triangle to achieve your vision.
The **direction of your model** becomes exponentially more critical in low light. With less light to define features, subtle expressions and precise poses are amplified, carrying more weight in the narrative. The connection between photographer and model is key.
- Clear and Concise Communication: Articulate the mood, the story, and the specific emotions you want to convey. Guide your model not just on pose, but on internal feeling.
- Slow, Deliberate Movements: Encourage the model to move slowly and gracefully. This allows you to capture nuanced transitions and also helps mitigate motion blur in slightly longer exposures.
- Emphasis on Gaze and Expression: In low light, the eyes often become the focal point. Direct the model’s gaze with precision to draw the viewer into the story. A subtle smirk or a faraway stare can define an entire image.
- Leveraging Shadows to Sculpt: Teach your model to work with the shadows. A slight turn of the head can deepen a shadow, adding drama and sculpting the face in ways bright light cannot.
Finally, **post-production is the refinement phase**, not the repair shop. Consistent editorial quality demands a disciplined approach to editing, ensuring that the mood, color, and texture remain cohesive across the entire series. This is where the initial pre-visualization comes full circle.
- Consistent Color Grading: Develop a specific color palette and apply it consistently. This might involve creating a custom LUT or a set of presets that reflect your brand and the project's mood board. Avoid wild shifts in color temperature or saturation between images.
- Judicious Noise Reduction: Apply noise reduction selectively and minimally. Over-smoothing can strip an image of its texture and editorial grit. Aim to reduce distracting chroma noise while preserving luminance detail.
- Selective Sharpening: Sharpen key areas, particularly the eyes and fine details of clothing, to ensure they pop. Again, avoid over-sharpening, which can look artificial.
- Dodging and Burning: This classic darkroom technique is incredibly powerful for sculpting light and shadow digitally. Use it to subtly enhance highlights, deepen shadows, and guide the viewer's eye through the frame, mirroring the light shaping you did during the shoot.
“True mastery in low-light fashion isn’t about fighting the dark; it’s about understanding its language and using its whispers to tell your story. Consistency is born from this deep, intentional dialogue with light and shadow.”
Ultimately, achieving consistent editorial quality in low-light fashion portraits is a holistic endeavor. It's an integration of technical prowess, artistic vision, and a deep understanding of light's transformative power. Practice, observe, and continuously refine your approach, and you'll find that the challenges of low light become your greatest creative assets.
Understanding the Root of the Problem: Why Does Inconsistent Low-Light Editorial Quality Happen?
The struggle to achieve consistent editorial quality in low-light fashion photography is a challenge I've witnessed many times over my career. It's a common scenario to capture a few truly stunning frames, only to find the majority of the shoot falls short, lacking the desired punch or cohesion. In my experience, this inconsistency isn't merely a stroke of bad luck; it stems from several identifiable, often interconnected, root causes that, when addressed, unlock remarkable potential.One primary culprit is a fundamental misunderstanding or an oversimplified approach to the exposure triangle in low-light conditions. It’s not just about cranking up the ISO and hoping for the best. Each element – ISO, aperture, and shutter speed – demands a nuanced tactical decision, where a misstep in one can cascade into problems for the others.
- ISO Management: Many photographers struggle with finding the delicate balance between capturing enough light and introducing unacceptable levels of digital noise. Pushing the ISO too high without a clear understanding of the camera's noise characteristics or the intended final output often leads to muddy, detail-deprived images.
- Aperture Decisions: While a wide aperture (low f-number) is crucial for gathering light, it also drastically reduces depth of field. In fashion, maintaining sharpness on key elements, like a model's eyes or intricate garment details, can become a constant battle against a razor-thin plane of focus, leading to soft, unusable shots.
- Shutter Speed Control: The temptation to use slower shutter speeds to compensate for low light is strong, but it introduces the risk of motion blur – either from the model, the camera, or even subtle environmental movements. Achieving the ethereal quality of low light without sacrificing crispness requires masterful control and often, a strategic embrace of *controlled* motion.
Think of it like an orchestra where each instrument plays a critical role. If the strings are too loud, or the brass is out of tune, the entire performance suffers. In low-light photography, if your ISO is screaming, your aperture is too shallow for the movement, and your shutter speed is blurring, the resulting "symphony" of light will be discordant and inconsistent.
Another significant issue I repeatedly observe is a passive approach to lighting strategy. Many photographers rely solely on available ambient light, which, while beautiful in principle, is often fickle and inconsistent across a set or location. They fail to actively shape, augment, or even subtract light, letting the environment dictate the image rather than the other way around.
"True mastery in low-light fashion isn't just about finding light; it's about *making* light, even when it seems absent, and ensuring its quality and direction are unequivocally aligned with your vision."
This often manifests as inconsistent light fall-off, varying color temperatures from one corner of a room to another, or shadows that are either too harsh or completely featureless. For instance, I recall a shoot where a beautiful window light illuminated a model perfectly in one pose, but moving her just a few feet away resulted in flat, uninspired lighting because the photographer didn't introduce a subtle fill or bounce to maintain that quality.
Furthermore, an inadequate or inconsistent post-production workflow specifically tailored for low-light images is a major pitfall. Low-light captures often require specialized handling in post, and a "one-size-fits-all" approach rarely yields editorial-grade consistency. This isn't about 'fixing' bad photos, but about *elevating* inherently challenging captures.
- Aggressive Noise Reduction: Overzealous noise reduction can strip away crucial detail, texture, and the very 'mood' that low light imbues, leaving behind a plasticky, artificial look.
- Inconsistent Color Grading: Low light often introduces complex color shifts. Without a precise and consistent grading strategy across an entire series, images can look disjointed, with varying hues and tones that break the editorial flow.
- Failure to Recover Detail: The ability to subtly lift shadows without introducing noise, or to recover nuanced highlights, is paramount. Many photographers lack the advanced techniques to coax out the hidden information within these challenging files.
Finally, a common mistake I see is a lack of thorough pre-production and clear communication regarding the specific aesthetic of "low-light" with the creative team. What "moody low-light" means to a photographer might be vastly different from what the stylist or creative director envisions. Without alignment, the resulting images can miss the mark on the collective vision.
This includes skipping crucial test shots in similar conditions, not creating a detailed mood board that specifies the *quality* of low light desired (e.g., soft and ethereal vs. hard and dramatic), or failing to clearly articulate the technical limitations and creative opportunities that low light presents to the team.
While less common among seasoned professionals, equipment misalignment can also contribute to inconsistency. Using a camera body with inherently poor high-ISO performance, or lenses that aren't fast enough (e.g., f/4 or slower in truly dark conditions), will inevitably limit your options and exacerbate the struggle for clean, consistent results. It's not always about having the *best* gear, but having the *right* gear for the specific demands of low-light fashion.
Ultimately, achieving consistent editorial quality in low-light fashion photography is rarely derailed by a single factor. It's often a confluence of these technical misunderstandings, passive lighting approaches, post-production missteps, and communication gaps that create a perfect storm for inconsistency.
Inadequate Pre-Production and Planning
In my fifteen years navigating the intricate world of fashion photography, I’ve witnessed firsthand how often a brilliant creative vision in low-light conditions falters not due to a lack of talent, but due to inadequate pre-production and planning. This isn't merely about scouting a location; it's about dissecting the very essence of light – or its scarcity – before ever stepping foot on set with a model.
Many photographers, especially those new to low-light, fall into the trap of believing that the inherent moodiness of such settings negates the need for rigorous planning. In my experience, the opposite is true: the less light you have, the more meticulously you must plan every single detail to achieve consistent, editorial-quality results.
"In low-light, every member of your team becomes an extension of your light meter and your vision. If they don't understand the 'why,' the 'how' will inevitably suffer."
A common mistake I see is a superficial approach to location scouting. It’s not enough to simply find a visually interesting spot; you must understand its light behavior at the precise times you intend to shoot. Think of yourself as an architect studying blueprints, not just admiring the facade.
- Detailed Light Mapping: During your scout, use a light meter (or a reliable light meter app) to measure ambient light levels at exact times. Note areas of deep shadow, subtle highlights, and potential light sources. This data is critical for anticipating exposure challenges.
- Environmental Interaction: Observe how surfaces – a dark brick wall versus a reflective puddle, a sheer curtain versus a dense forest – interact with the available light. These elements will dictate how light (natural or artificial) will behave and what mood it will truly convey.
- Obstacle Assessment: Identify anything that might block your already limited light, such as buildings, trees, or interior structures. These aren't just hindrances; they are potential shapers of light, creating dramatic shadows or shafts of light if used strategically.
The selection of gear is another area where inadequate planning can cripple a low-light shoot. This isn't just about having a full-frame camera; it's about having the *right* tools specifically tuned for light deprivation. Underestimating this is a primary reason for inconsistent results.
- Fast Lenses: Prioritize lenses with wide apertures (f/1.4, f/1.8, f/2.8). These are your primary light-gathering tools, allowing for lower ISOs and cleaner, less noisy images, which is paramount for editorial quality.
- Stable Support Systems: A robust tripod is non-negotiable for longer exposures or precise framing. For more dynamic yet still supported shots, consider a high-quality monopod. This stability minimizes motion blur, a common low-light pitfall.
- Discreet Auxiliary Lighting: Even if the goal is natural light, having discreet, powerful, and easily controllable artificial sources (e.g., small LED panels, compact strobes with modifiers, or even practical lights like lanterns or candles) is crucial for sculpting or adding a kiss of light where none exists.
- Remote Triggers: To absolutely minimize camera shake during long exposures, a cable release or wireless trigger is an inexpensive yet essential tool.
Team briefing and communication are magnified in importance. A low-light set is not the place for last-minute improvisations regarding the core vision. Every team member needs to understand the unique challenges and opportunities presented by the limited light. I once experienced a shoot nearly derailed because the stylist assumed we’d have ample light to showcase intricate fabric details, which was fundamentally at odds with the planned moody, low-key aesthetic.
- Comprehensive Visual Briefs: Share mood boards, sketches, and even test shots. Show them exactly how the light will be used to tell the story and guide their contributions.
- Model Direction: Guide your model on how to pose and move specifically within the shadows and highlights. Subtle shifts in body position can dramatically alter the light’s impact on their form.
- MUA/Hair/Stylist Adaptation: Explain how makeup, hair, and wardrobe choices need to adapt. Rich textures, subtle shimmer, or specific color palettes might be lost or enhanced differently than in bright light.
Lastly, without a clear shot list and storyboard, you are essentially wandering in the dark, hoping to stumble upon magic. In low-light, this is a recipe for wasted time, missed opportunities, and ultimately, inconsistent output.
- Pre-visualization: Sketch out key frames. How will the model interact with the limited light? Where are the shadows falling? This helps you work efficiently when light is fading fast, ensuring you capture the most critical shots first.
- Pacing and Time Allocation: Low-light shoots often require longer setup times and exposures. A detailed shot list ensures you allocate sufficient time for each setup and don't rush critical shots, which is crucial for maintaining technical quality.
- Narrative Flow: Ensure each shot contributes meaningfully to the overall story. Low-light often lends itself to a specific mood; your sequence must maintain that narrative consistency from beginning to end.
The ramifications of inadequate planning are severe in a low-light scenario. They range from logistical nightmares to outright creative failure. You face inconsistent image quality, missed "money shots" due to scrambling, budget overruns from reshoots, and widespread creative frustration among the entire team. In this demanding environment, preparation isn't just a best practice; it's the bedrock of consistent editorial excellence.
Technical Inconsistencies During the Shoot
Achieving editorial quality in low-light fashion demands unwavering technical precision. The subtle shifts that might go unnoticed in a well-lit studio become glaring inconsistencies when light is scarce, often derailing an entire series. It’s not just about getting *a* shot; it's about getting *every* shot to a consistent, publishable standard. In my experience, the most common culprit for inconsistency is a lack of rigorous control over fundamental camera and lighting parameters. We often chase the 'perfect moment' without anchoring our technical foundation, leading to a patchwork of images rather than a cohesive story.One of the most insidious issues is exposure drift. It's rarely a dramatic shift, but rather a subtle creep that can render a sequence unusable. This can stem from ambient light fluctuations, a light source's power output wavering, or even the model or photographer subtly changing their position relative to the light source, altering fall-off.
- To combat this, I advocate for an almost obsessive reliance on manual mode (M). Once your base exposure is set, lock it in.
- Utilize an incident light meter regularly, not just at the start. Meter the light falling on your subject's face or the key garment every few shots, especially if the setup involves complex lighting or natural light components.
- Tethered shooting is invaluable. Monitoring the live histogram on a larger screen provides immediate visual feedback, allowing for micro-adjustments before inconsistencies accumulate.
Focus inconsistency is another major headache in low-light scenarios. Autofocus systems struggle when contrast is low, leading to missed focus or, worse, front/back focus that only becomes apparent on a large monitor. A soft eye in an otherwise stunning image is an immediate rejection for most fashion editors.
"In low light, your focus isn't just about sharpness; it's about directing the viewer's gaze with absolute certainty. A soft focus point is a lost opportunity."
- Whenever possible, use manual focus with focus peaking. This gives you direct control and a visual aid for critical sharpness.
- If relying on autofocus, ensure your AF point selection is precise, always targeting the eyes. Avoid focus-recompose, as it can subtly shift your plane of focus.
- Consider using a focus assist beam from an external flash or a dedicated laser, but only if its presence doesn't interfere with the mood or light quality of your shot.
The challenge of white balance shifts cannot be overstated, particularly when blending artificial and ambient light. Different light sources possess varying color temperatures, and even a single LED panel can shift its color output as it dims or warms up. This can lead to a rainbow of color casts across an editorial series, requiring extensive and often destructive post-production correction.
- Always establish a custom white balance using a grey card or color checker at the beginning of the shoot and whenever lighting conditions significantly change.
- If mixing light sources, employ gels to color-match them. For instance, gelling a strobe with a CTO (Color Temperature Orange) to match warmer incandescent ambient light.
- Shooting exclusively in RAW format is non-negotiable. It provides the maximum latitude for correcting color temperature and tint without introducing banding or artifacts, but prevention is always better than cure.
Finally, the battle against digital noise is constant in low-light fashion. Pushing the ISO too high to compensate for insufficient light introduces grain that can detract from the luxurious feel expected in editorial work. While some noise can be aesthetically pleasing, uncontrolled or excessive noise is a technical flaw.
- Prioritize light over ISO. Use faster lenses (f/1.2 - f/2.8) and maximize the output of your artificial light sources first.
- Understand your camera's ISO invariance characteristics. Some modern sensors perform better with underexposure at lower ISO and pushing in post, rather than shooting at a higher ISO in-camera.
- If noise is unavoidable, apply strategic noise reduction in post-production, focusing on areas like skin tones and backgrounds, while preserving detail in fabric and hair. Always err on the side of minimal reduction to avoid a plasticky look.
Step-by-Step: A Practical Framework to Master Low-Light Fashion Portrait Quality
The pursuit of editorial-grade low-light fashion photography is less about raw talent and more about a methodical, disciplined approach. In my fifteen years navigating the nuanced world of fashion imagery, I've observed that consistent quality in challenging light stems from a robust framework that anticipates issues and leverages every available resource. This isn't just about cranking up the ISO; it's about strategic thinking from concept to final edit.Here’s a practical, step-by-step framework I employ, designed to elevate your low-light fashion portraits to a consistent, publishable standard:
-
Strategic Pre-Visualization & Planning: The Foundation
Before any gear leaves its case, the most critical work happens in your mind and on your mood board. Low light demands a clearer vision because there's less information to capture, making every detail more impactful.
-
Location & Light Analysis: Scout your location rigorously, not just for aesthetics but for its inherent light character. Where does ambient light, however faint, fall? Are there practical light sources (streetlights, neon signs, window light from a distant building) that can be incorporated or augmented? In my early career, I once spent an entire evening just observing how a single, distant streetlight illuminated a specific alleyway at different times, understanding its subtle shifts.
-
Narrative & Mood Board: Low light inherently lends itself to drama, mystery, and introspection. Define the story you want to tell. Is it film noir? Ethereal dreamscape? Gritty realism? Your mood board should reflect not just poses and styling, but also lighting references – how shadows fall, how highlights gleam, and the overall color palette. This guides every subsequent decision.
-
Wardrobe & Styling Synergy: Certain fabrics and textures react exquisitely to minimal light. Think silks, sequins, metallics, or deeply textured wools that catch and reflect light in intriguing ways. Avoid matte, flat materials that absorb light unless that’s specifically part of your narrative for a stark, unlit look. The right styling can effectively become a **light modifier** in itself.
-
-
Mastering Your Gear: The Technical Edge
While skill trumps gear, having the right tools is non-negotiable for pushing the boundaries of low-light quality. This isn't about owning the most expensive, but the most appropriate.
-
High-Performance Camera Bodies: Always prioritize a camera body with **exceptional high-ISO performance** and robust noise reduction capabilities at the sensor level. Full-frame sensors typically excel here due to larger photosites. I often advise newer photographers to invest in a slightly older flagship full-frame over a brand-new entry-level model for this specific purpose.
-
Fast Primes & Zooms: Lenses with wide apertures (f/1.2, f/1.4, f/1.8, f/2.8) are your best friends. They gather more light, allowing for lower ISOs or faster shutter speeds. A common mistake I see is relying on slower kit lenses; the difference a fast prime makes in low light is transformative, offering both light-gathering capacity and beautiful subject isolation. My go-to is often a 50mm f/1.2 or an 85mm f/1.4.
-
Intelligent Lighting Tools: Forget large, power-hungry strobes unless you have ample assistance. For low light, I lean towards compact, versatile continuous LED panels (like Aputure MCs or similar, often gelled for color), small, powerful speedlights, or even practical light sources like vintage lamps. The goal is focused, controllable light, not broad illumination. Look for high CRI ratings for accurate color rendition.
-
-
On-Set Lighting Choreography: Sculpting with Scarcity
This is where the magic happens – treating every photon as a precious resource and directing it with purpose. You're not just illuminating; you're painting with light and shadow.
-
Harnessing Available Light: Even in what seems like darkness, there's often *some* light. Identify its direction, quality, and intensity. Can a distant streetlamp serve as a rim light? Can the spill from a shop window create a soft key? Position your model to maximize this existing light, using it as your base layer.
-
Strategic Artificial Augmentation:
- Continuous Lights: For subtle fill or to create a specific glow, small LED panels are invaluable. They allow you to see the effect in real-time, which is crucial in dim environments. Use them to mimic practical light sources or to add a kiss of light where ambient falls short.
- Speedlights/Small Strobes: When you need more punch, speedlights are excellent. Bounce them off a small reflector, or use a grid to create a tight, dramatic beam. Gelling them is also key for matching ambient color temperatures or adding a stylistic tint. A classic technique is to use a gridded speedlight off-camera, aimed precisely at the model's face or a key detail, just enough to lift it from the shadows.
-
The Art of Light Shaping: Reflectors (silver for punch, white for soft fill), flags (black cards to block spill), and grids are essential. You're not just adding light; you're defining where it goes and, critically, where it *doesn't*. In low light, the negative space created by shadows is as important as the illuminated areas. Think of it as **chiaroscuro** for fashion.
-
-
Precision Camera Operation: The Exposure Triad & Focus
Your camera settings must be finely tuned to extract maximum quality from minimal light without introducing excessive noise or blur.
-
Balancing ISO, Aperture, Shutter: This is your holy trinity.
- Aperture: Start wide (f/1.2 - f/2.8) to maximize light intake and achieve subject separation.
- Shutter Speed: Aim for the slowest possible handheld speed without introducing motion blur (rule of thumb: 1/focal length, or faster if the model is moving). If using a tripod, you can go much slower.
- ISO: This is your last resort. Push it only as high as necessary to achieve a proper exposure, always being mindful of your camera's noise tolerance. Modern cameras can handle surprisingly high ISOs, but understanding your specific camera's limits is paramount.
-
Focusing in the Dark: This is notoriously tricky.
- AF Assist Beam: Utilize your camera or speedlight's AF assist beam if appropriate, though it can be distracting.
- Manual Focus with Live View Magnification: My preferred method. Zoom in on the model's eyes in Live View and manually adjust focus. This is incredibly precise.
- Focus Peaking: Many mirrorless cameras offer this, highlighting in-focus areas, which is a lifesaver.
- Pre-Focusing: If your model will be in a specific spot, focus on that spot beforehand using a small flashlight, then switch to manual focus.
-
Metering for Dynamic Range: Low-light scenes often have extreme contrast. Use **spot metering** to read the most important highlight (e.g., the model's face) and the deepest shadow you want to retain detail in. I often expose to protect the highlights and then recover shadows in post-processing, as highlight recovery is generally harder. Shoot in RAW, always.
-
-
Directing the Narrative: Model Interaction & Posing
In low-light conditions, subtle shifts in posture or gaze can dramatically alter the mood and how light interacts with the subject. Your direction becomes even more crucial.
-
Communication in Dim Settings: Be clear, concise, and perhaps a little more animated with your instructions. Use hand gestures. The model might not see you perfectly, but they need to feel your direction. Play music that matches the mood to help them embody the character.
-
Posing for Light & Shadow: Guide your model to turn into or away from the light source, creating pronounced shadows and highlights that sculpt their form. A slight tilt of the head, a hand gesture, or the turn of a shoulder can transform a flat image into a three-dimensional portrait. Emphasize expressions that match the mysterious or dramatic mood inherent in low light. I often ask models to imagine a specific emotion or story, rather than just telling them to "look sad."
-
-
Post-Production Alchemy: Refining the Vision
The darkroom (digital or chemical) is where the final magic happens, transforming good captures into exceptional editorial pieces. This isn't about fixing mistakes, but enhancing the mood and narrative.
-
RAW Development & Noise Management: Start with precise white balance. Then, gently recover shadows and pull back highlights. Apply noise reduction judiciously – over-applying it can make skin look plasticky. I prefer a subtle amount of luminance noise reduction and then addressing color noise. Sometimes, a touch of film grain can be added to mask remaining digital noise and lend a classic aesthetic.
-
Color Grading for Mood: Low-light images thrive on evocative color palettes. Use split toning or color grading tools to introduce subtle shifts – cool blues for a mysterious vibe, warm oranges for intimacy. Avoid overly saturated colors unless it's a specific stylistic choice, as low light often benefits from a more muted, sophisticated palette.
-
Detail Enhancement: Use dodging and burning to sculpt the light further, enhancing facial features, defining jawlines, or bringing out textures in the wardrobe. A slight increase in clarity or texture can bring out crucial details without making the image look over-sharpened. Remember, in low light, every visible detail counts more.
-
Ultimately, mastering low-light fashion isn't about fighting the darkness; it's about understanding and befriending it. It’s about making deliberate choices at every stage, from the initial concept to the final pixel, to create images that resonate with depth and a quiet power.
Step 1: Define Your Editorial Vision and Pre-Visualize
In the challenging realm of low-light fashion photography, simply having advanced technical skills isn't enough to consistently deliver editorial-quality work. Before you even touch a camera or think about your lighting setup, the most crucial step is to **define your editorial vision and meticulously pre-visualize** every aspect of the shoot. This isn't just a creative luxury; it's a foundational necessity that dictates every subsequent decision.A common mistake I see, even among seasoned professionals, is approaching a low-light scenario with a vague idea, hoping the magic will happen on set. This is akin to building a custom haute couture gown without a sketch or fabric choice – the final product will likely lack cohesion and intent. Your vision acts as the blueprint, guiding your choices from model casting to post-production. Without it, you're merely reacting to available light, not **sculpting it into a narrative**.
Defining your editorial vision means answering a series of profound questions about the story you want to tell. It’s about more than just a mood; it’s about the emotional resonance and the specific aesthetic you aim to achieve. In my experience, the clearer this vision, the more decisive and efficient your shoot becomes, particularly when working against the clock in diminishing light.
"The best low-light fashion images aren't stumbled upon; they are meticulously crafted from a clear, unwavering vision that anticipates and embraces the unique challenges and opportunities of reduced illumination."
To truly define this vision, consider the following elements:
- The Narrative: What story is being told? Is it melancholic, rebellious, ethereal, or powerful? Every successful editorial has a compelling narrative thread.
- The Mood and Atmosphere: How should the viewer *feel* when they see the image? Is it intimate, mysterious, dramatic, or serene? Low light inherently lends itself to certain moods, and understanding this connection is vital.
- The Aesthetic and Style: Is it gritty and urban, soft and romantic, stark and minimalist? This dictates everything from styling to location and, crucially, your lighting approach.
- The Target Publication/Audience: Who is this for? A high-fashion glossy like *Vogue* will have different requirements than an independent art magazine or a commercial brand campaign.
Once your vision is clearly articulated, **pre-visualization** becomes the bridge between concept and execution. This is where you translate abstract ideas into concrete plans, anticipating how light, shadow, and environment will interact to serve your story. For low-light scenarios, this step is paramount, as you're often working with limited resources and less forgiving conditions.
Effective pre-visualization techniques include:
- Detailed Mood Boards: Go beyond collecting pretty pictures. Analyze why specific images resonate. What are their lighting patterns, color palettes, and compositional choices? Deconstruct them to understand their underlying principles.
- Shot Lists and Storyboards: Map out specific shots, angles, and poses. For low light, consider how shadows will fall and how much detail you want to preserve or obscure. This helps ensure every frame contributes to the overall narrative.
- Lighting Diagrams and Sketches: Even simple stick figures can illustrate where your light sources will be, their direction, and their intensity relative to your subject. This is critical for understanding how your chosen low-light strategy will shape the image.
- Virtual or Physical Location Scouting: If possible, visit your location at the intended shoot time to observe the natural light. How does ambient light fade? Where do shadows deepen? This informs your supplemental lighting needs and compositional opportunities.
For example, if my vision is a dark, moody narrative of a model emerging from the shadows of an old theatre, my pre-visualization would involve sketching the theatre's interior, noting the practical lights I could use (like an old stage lamp), and planning how a single, focused light source could highlight the model's form while leaving the environment in evocative darkness. This level of detail ensures that when I arrive on set, I'm not scrambling; I'm executing a well-thought-out plan designed to achieve that precise editorial quality.
Step 2: Master Your Camera Settings and Lighting Techniques
Once you've established your conceptual framework, the true alchemy of low-light fashion photography begins with the meticulous command of your camera settings and the strategic deployment of lighting. This isn't merely about getting an image; it's about crafting an image that resonates with editorial quality and consistency.
In my experience, many aspiring fashion photographers approach low light with trepidation, viewing it as a limitation rather than an opportunity. The key is to understand the symbiotic relationship between your camera's exposure triangle and the light you introduce or manipulate.
Mastering Your Camera Settings for Low Light
The exposure triangle – ISO, Aperture, and Shutter Speed – becomes a delicate dance in low-light scenarios. Each setting must be considered for its impact on image quality, depth, and mood.
-
ISO: Pushing the Boundaries Thoughtfully
-
Modern camera sensors are remarkably capable, allowing for higher ISO values (e.g., 800-3200, sometimes even higher) with surprisingly clean results. Don't shy away from increasing your ISO to gather more light, but always prioritize the cleanest possible base.
-
A common mistake I see is photographers underexposing at a lower ISO, then trying to 'rescue' the image in post-production. It's almost always better to expose correctly, or even slightly overexpose, at a higher ISO if it means capturing more light information, rather than trying to lift shadows from a dark, noisy base.
-
-
Aperture: The Light Funnel and Depth Sculptor
-
For low-light fashion, your lens choice and aperture are paramount. Opt for fast prime lenses (f/1.2, f/1.4, f/1.8) that can gather maximum light. A wider aperture not only brightens your image but also creates that coveted shallow depth of field, isolating your subject with beautiful bokeh.
-
However, shooting wide open at f/1.4 demands extreme precision with focus. For editorial consistency, ensure your model's eyes are tack sharp. Sometimes, stopping down slightly to f/2.0 or f/2.8 might offer just enough extra depth of field to ensure critical sharpness, especially if the model is moving slightly or if you're working with a complex pose.
-
-
Shutter Speed: Freezing Time or Embracing Motion
-
This is where the balancing act truly becomes critical. To avoid motion blur from model movement or camera shake, you'll want the fastest possible shutter speed. As a general rule, for handheld shots, aim for at least 1/60th of a second, or ideally, the reciprocal of your focal length (e.g., 1/85th for an 85mm lens).
-
When working with artificial light, your shutter speed is primarily dictating how much ambient light is captured. If you're using strobes, your shutter speed will typically be at or below your camera's flash sync speed (often 1/200th or 1/250th) to ensure the entire frame is exposed by the flash.
-
Conversely, slow shutter speeds (1/15th, 1/8th, or longer) can be used creatively to introduce intentional motion blur, adding a dynamic, ethereal quality to your fashion narrative. This requires careful planning and often a sturdy tripod.
-
-
White Balance: The Foundation of Color Accuracy
-
In low-light and mixed-light environments, auto White Balance often struggles, leading to inconsistent color casts. For editorial quality, this is unacceptable. Always set a custom White Balance using a grey card or Expodisc. This ensures accurate skin tones and color rendition, critical for maintaining brand consistency across a series.
-
Strategic Lighting Techniques: Sculpting with Light and Shadow
Once your camera settings are finely tuned, your focus shifts to light. In low-light fashion, light isn't just illumination; it's a narrative tool, a painter's brush, defining mood, texture, and form.
-
Leveraging Available Light: The Art of Enhancement
-
The first rule of low-light photography is to find the light that already exists. Is there a faint glow from a distant streetlight? The soft spill from a shop window? The warm flicker of practical lights within a scene? Learn to identify and enhance these sources.
-
Simple tools like a reflector (silver for punch, gold for warmth, white for subtle fill) can bounce and amplify existing light onto your subject. Sometimes, a strategically placed mirror can create a dramatic shaft of light from an otherwise unnoticed source.
-
-
Artificial Light: Your Control Panel for Creativity
-
When available light isn't enough, or lacks the desired quality, artificial light becomes your sculpting tool. The choice between strobes (flash) and continuous lights depends on your specific needs.
-
Strobes offer immense power, allowing you to overpower ambient light and freeze motion, crucial for crisp fashion imagery. They're ideal for dramatic, high-impact shots. However, you don't see the light until it fires, requiring more test shots and experience.
-
Continuous lights (LED panels, tungsten, HMI) allow you to see exactly how the light falls on your subject in real-time, making adjustments intuitive. They're excellent for more ambient, cinematic looks, or when integrating video. The trade-off is often less power and more heat, though modern LEDs mitigate this.
-
-
Light Modifiers: Shaping the Narrative
-
A common mistake I see is photographers thinking any light is good light. It's not just about adding light; it's about shaping it. Modifiers are essential for controlling the quality, direction, and spread of your light.
-
For soft, enveloping light on a model's face, a large octabox or softbox is indispensable. For more dramatic, directional light with defined shadows, a beauty dish with a grid can be transformative. Strip boxes are excellent for creating rim or edge lighting, separating your model from the background.
-
Don't forget grids, which narrow the beam of light, preventing spill and allowing you to precisely illuminate specific areas. And flags or gobos can block light or cast shadows, further refining your composition.
-
-
Light Placement: The Art of Dimension
-
Think about your light in terms of dimension. A single, bare light source can look flat. Consider a key light (main light source), a subtle fill light to soften harsh shadows, and a hair light or rim light to add separation and sparkle.
-
Equally important is the strategic use of negative fill – using a black fabric or panel to absorb light and deepen shadows, adding drama and sculpting the model's features. This is particularly effective in low-light scenarios where you want to emphasize form and contrast.
-
In low-light fashion, consistency is born from control. It’s not about finding the perfect light; it’s about creating it, shaping it, and making it serve your editorial vision, shot after shot.
The true mastery lies in the iterative process: take a test shot, analyze the light and exposure, make precise adjustments, and repeat. This disciplined approach ensures that every image not only captures the essence of low-light but elevates it to an art form worthy of the most discerning fashion editorial.
Step 3: Implement a Robust Post-Processing Workflow
Once you’ve captured your low-light fashion images, the battle is only half won. In my 15+ years of experience, a robust post-processing workflow isn't merely about fixing mistakes; it's where the **editorial quality** is truly forged, transforming challenging captures into polished, consistent visual narratives.
Think of post-processing as the final tailoring of a haute couture garment. Every adjustment, from global exposure to the most minute local brushstroke, must be intentional and contribute to the overall vision. This is where we elevate the image from a mere photograph to a piece of art ready for publication.
"The raw file is merely the blueprint; post-processing is the construction and interior design. Without a meticulous approach, even the best blueprint will result in a shoddy build."
Here’s how I approach establishing a workflow that consistently delivers editorial-grade results in low-light scenarios:
-
The Foundation: Raw File Optimization
-
Noise Management, Not Eradication: Low light inevitably introduces noise. My strategy is to carefully balance luminance and chrominance noise reduction. Aggressive noise reduction can lead to a 'plastic' look, sacrificing crucial fabric texture and skin detail – a cardinal sin in fashion. I often apply minimal global noise reduction and then selectively target problematic areas with masks, preserving sharpness where it matters most.
-
Precise White Balance and Color Correction: Low-light sources often have strong color casts, from tungsten yellow to neon green. Using a color checker on set is invaluable, but in post, I meticulously fine-tune the white balance, then move to individual color channels. The goal is a natural, yet evocative, color palette that remains consistent across the entire series, reflecting the brand's aesthetic.
-
Dynamic Range Recovery: Low-light scenes often mean deep shadows and potentially blown highlights from practical lights. I leverage the dynamic range of RAW files to gently lift shadows, revealing detail without introducing excessive noise or a muddy appearance. Simultaneously, I recover subtle highlight information, ensuring light sources retain their character and don't become sterile white blobs.
-
-
Targeted Refinements and Artistic Vision
-
Local Adjustments: The Sculptor's Tools: This is where the image truly comes alive. I use dodging and burning techniques to sculpt the light, enhancing facial features, defining the silhouette of the garment, and drawing the viewer's eye. For instance, a subtle dodge on a model’s cheekbone or a burn to deepen the folds of a velvet dress can dramatically elevate the image. This isn't about making the model 'perfect' but about enhancing the existing beauty and light interaction.
-
Strategic Sharpening: Over-sharpening is a common pitfall. My approach is selective sharpening, focusing on key areas like eyes, lips, and intricate fabric details. I use masking to ensure backgrounds remain softer, maintaining a natural depth of field and avoiding harsh, artificial edges. This preserves the delicate balance between sharpness and the inherent softness of low-light photography.
-
Color Grading for Mood and Consistency: Beyond correction, color grading defines the emotional tone of the editorial. Whether it's a moody, desaturated look or a rich, vibrant palette, consistency is paramount. I often develop custom presets or LUTs that align with the creative brief, then apply them as a starting point, making subtle adjustments per image. This ensures a cohesive visual language across the entire story.
-
Grain Emulation: Sometimes, a touch of filmic grain can add a sophisticated, tactile quality that complements the low-light aesthetic. This is a deliberate artistic choice, not a cover-up for noise. When applied subtly and thoughtfully, it can enhance the mood and texture, providing a timeless feel often sought in editorial work.
-
-
Workflow Efficiency and Quality Control
-
Custom Presets and Templates: For recurring low-light scenarios or specific brand aesthetics, I develop and refine custom presets. These aren't 'one-click wonders' but rather intelligent starting points that save significant time while maintaining a consistent base look. This allows me to focus my creative energy on the finer, image-specific adjustments.
-
Non-Destructive Editing: Every adjustment is made non-destructively, whether through adjustment layers in Photoshop or the inherent nature of Lightroom/Capture One. This allows for endless refinement and collaboration, crucial when working with art directors and clients who may have feedback throughout the process.
-
Monitor Calibration: This cannot be overstated. A properly calibrated monitor is the bedrock of accurate color and tonal reproduction. Without it, all your meticulous post-processing efforts are effectively guesswork, leading to inconsistent results when viewed on different screens or in print.
-
The Review Loop: No image is truly finished until it has passed through a rigorous review process. I step away from the images, view them on different devices, and often solicit feedback from trusted colleagues or art directors. This fresh perspective can catch subtle inconsistencies or areas for improvement that I might have overlooked after hours of detailed work.
-
Essential Tools and Resources to Maintain Control
Achieving consistent editorial quality in low-light fashion photography isn't merely about having the latest gear; it's about establishing an ecosystem of tools and practices that grant you absolute control over every variable. In my fifteen years navigating the nuanced world of fashion editorials, I've learned that
control is the bedrock of consistency
, especially when light is scarce.This control extends from the initial capture to the final pixel, ensuring that your creative vision translates flawlessly into print or digital media. It's about making deliberate choices, supported by the right resources, to master the ambient darkness rather than being dictated by it.
Your camera body is your first line of defense against the challenges of low light. Invest in a camera known for its exceptional
high ISO performance
, as this directly impacts your ability to capture clean, usable files without excessive noise. This isn't about pushing boundaries; it's about having a robust foundation that allows for flexibility.Equally critical are your lenses. I cannot overstate the importance of
fast prime lenses
(e.g., f/1.2, f/1.4, f/1.8). These lenses are light-gathering powerhouses, allowing you to shoot at lower ISOs and achieve shallower depths of field even in dimly lit environments, which is crucial for that editorial separation and mood.- Prime Lenses: Offer superior sharpness and wider apertures (f/1.2-f/2.8), essential for maximizing available light and achieving beautiful, creamy bokeh.
- Fast Zoom Lenses: While convenient, ensure they maintain a constant wide aperture (e.g., f/2.8) across their zoom range to avoid exposure inconsistencies when recomposing.
Even in low-light scenarios, you're rarely relying solely on ambient light for editorial work; you're shaping and augmenting it.
Continuous LED panels
have become indispensable for their versatility and immediate visual feedback, allowing you to sculpt light precisely and predictably.Look for bi-color or RGBWW LEDs with high CRI (Color Rendering Index) ratings to ensure accurate skin tones and fabric rendition. Their constant output allows for precise metering and consistent results across a series of shots, crucial for maintaining a cohesive look throughout a story.
For subtle accents or to lift shadows without overpowering the mood, I often turn to
small, portable strobes or speedlights
, feathered through a grid or small softbox. They offer a burst of controlled light that can define edges or add a spark to the eyes, blending seamlessly with the ambient glow."In low-light fashion, you're not just illuminating; you're painting with light. Every modifier, every subtle adjustment, is a brushstroke contributing to the final masterpiece."
Don't underestimate the power of
light modifiers
. Grids, snoots, and small softboxes are your best friends for controlling spill and directing light exactly where you need it. This precision in light placement is what elevates a snapshot to an editorial-quality image.Consistency in exposure and color is non-negotiable for editorial work. A reliable
incident light meter
is a fundamental tool that will save you countless headaches in post-production. It measures the light falling on your subject, providing an accurate exposure reading independent of the scene's overall brightness or reflectivity.Similarly,
color calibration tools
are not optional; they are essential. Using a color checker card (like an X-Rite ColorChecker Passport) at the beginning of each shooting scenario ensures accurate color rendition from capture. This reference point is invaluable for establishing a consistent color grade across your entire shoot.Furthermore, regular
monitor calibration
is paramount. What you see on your screen must accurately represent the final output. A calibrated monitor ensures that your color grading and retouching decisions are made on a neutral, consistent display, preventing costly surprises down the line.The digital workflow is where much of your control over consistency is solidified.
Tethered shooting
directly into software like Capture One or Adobe Lightroom is a game-changer. It provides immediate, large-screen feedback, allowing for instant adjustments to lighting, posing, and styling, and facilitates real-time client review.This immediate feedback loop minimizes guesswork and ensures that every shot aligns with the editorial vision. You can apply initial color profiles or presets on the fly, setting a consistent visual tone from the very first frame.
For post-production, a robust suite of tools is essential.
Advanced noise reduction algorithms
within Lightroom or dedicated plugins are critical for maintaining clean files from high ISO captures. Beyond that, masteringcolor grading and selective retouching
in Photoshop allows you to refine the mood and perfect every detail.Finally, and I cannot stress this enough: implement a rigorous
backup strategy
. Editorial work often involves tight deadlines and high stakes. A robust backup system, ideally 3-2-1 (three copies, two different media, one off-site), protects your invaluable work from unforeseen data loss. It's not just a tool; it's peace of mind.Ultimately, these tools and resources are not just pieces of equipment; they are extensions of your creative intent. They empower you to dictate, rather than react to, the challenging conditions of low-light fashion photography. By meticulously selecting and mastering them, you ensure that every image maintains the unwavering quality and consistency demanded by editorial standards.
Frequently Asked Questions (FAQ)
One of the most common questions I receive, especially from photographers transitioning into high-end fashion, revolves around the nuances of low-light conditions. It’s a challenging yet incredibly rewarding space, demanding a blend of technical mastery and artistic vision to consistently deliver editorial-grade imagery.
What's the single most critical factor for achieving editorial quality in low-light fashion photography?
In my experience, the absolute most critical factor isn't just about having the latest high-ISO camera; it's about understanding and mastering light shaping and control, even with minimal power. Many photographers mistakenly believe more light is always the answer in low-light scenarios. However, the true artistry lies in how you sculpt the available light, or strategically introduce artificial light, to define form, mood, and narrative.
“Photography, at its core, is painting with light. In low light, you're not just painting; you're chiseling with a scalpel, making every Lumen count.”
This means going beyond simply illuminating the scene. You need to consider:
- Direction: Where is the light coming from relative to your subject? A slight shift can completely alter facial structure and mood.
- Quality: Is it hard or soft? Diffused light creates gentle transitions, while hard light emphasizes texture and drama.
- Contrast: How do the highlights and shadows play off each other? Editorial quality often hinges on sophisticated contrast management, not just brightness.
- Fall-off: Understanding the inverse square law is paramount. Even a small light source placed strategically can create dramatic fall-off, separating your subject from a dark background without overpowering the ambient mood.
It's about precision. A single speedlight with a grid or snoot, used to pinpoint light on a model's eyes or a garment detail, can elevate an otherwise flat, dark scene into something truly cinematic and editorial.
How do I effectively manage noise (grain) while retaining crucial detail in low-light fashion shots?
Managing noise in low-light fashion is a delicate dance between in-camera technique and post-processing prowess. A common mistake I see is photographers relying solely on post-production to fix a noisy image, often leading to a plastic, over-smoothed look that lacks texture and detail.
To maintain editorial quality, a multi-pronged approach is essential:
- Expose to the Right (ETTR): This is a game-changer. By slightly overexposing your image without clipping highlights, you push the pixel data further up the histogram, effectively recording more light information. This reduces the signal-to-noise ratio, making the noise less prominent and easier to clean in post. Always shoot RAW for maximum latitude.
- Lens Choice: Invest in fast lenses (f/1.2, f/1.4, f/1.8). A wider aperture allows more light into the sensor, enabling lower ISO settings and thus, less noise. This is often a better investment than just chasing higher ISO cameras.
- Strategic Lighting: As discussed, even a subtle kiss of artificial light on your subject can allow you to drop your ISO significantly, maintaining the ambient mood while cleaning up your subject.
- Intelligent Noise Reduction in Post:
- Luminance vs. Chrominance: Understand the difference. Chrominance (color) noise is generally easier to remove without losing detail. Luminance (grayscale) noise requires more finesse.
- Selective Application: Apply noise reduction selectively. Skin tones often benefit from subtle smoothing, but you want to preserve texture in hair, fabric, and background elements. Use masking techniques to apply noise reduction only where it's needed most.
- AI-Powered Tools: Modern AI-driven noise reduction tools (like Topaz DeNoise AI or DxO PureRAW) have become incredibly sophisticated, often achieving results that were impossible just a few years ago. They can recover detail while reducing noise remarkably well, but still require a discerning eye.
Think of noise reduction like seasoning a gourmet dish: too much and you ruin the natural flavors; too little, and it tastes bland. The goal is balance and subtlety.
Is it always necessary to introduce artificial light for editorial low-light fashion, or can ambient light suffice?
While ambient light can create incredibly moody and atmospheric images, for consistent editorial quality, introducing artificial light is almost always necessary, even if subtly. The key word here is "consistent." Ambient light, by its nature, is often unpredictable, fleeting, and can lack the specific direction and punch needed to sculpt a model and garment with precision.
Here’s why I advocate for artificial light in most editorial low-light scenarios:
- Control and Consistency: Editorial shoots demand a specific look and feel that needs to be reproducible across a series. Ambient light changes with time, weather, and location. Artificial light gives you absolute control over intensity, direction, and quality.
- Separation and Dimension: Low ambient light can often flatten a scene, making the model blend into the background. Even a single, well-placed artificial light can create separation, add dimension, and create those coveted catchlights in the model's eyes that bring an image to life.
- Highlighting Detail: Fashion photography is about showcasing garments. Ambient light might illuminate the model, but it rarely highlights the intricate textures, stitching, or unique features of a designer piece with the precision that artificial light can provide.
- Creative Freedom: By adding your own light, you are not merely reacting to the existing conditions; you are actively creating them. This opens up a vast realm of creative possibilities, allowing you to paint with light exactly as you envision.
Consider a scenario where you're shooting in a dimly lit, atmospheric bar. The ambient light might be beautiful but flat. By adding a small, gridded strobe as a rim light from behind the model, and a subtle fill from the front, you can maintain the moody ambiance while giving the model and garment that editorial 'pop' and separation. It's about augmenting, not necessarily overpowering, the natural environment.
What's a common mistake photographers make when directing models in low-light environments?
A common mistake I frequently observe is a lack of adaptation in direction and communication to the specific challenges of a low-light environment. Photographers often direct models as if they were in a brightly lit studio, forgetting that low light impacts both the model's performance and the technical requirements of the shot.
Here are critical considerations and how to avoid common pitfalls:
- Forgetting Model Visibility and Comfort: In dim settings, models might struggle to see clearly, making them less confident in their poses and expressions. They can't always see where the light is falling or how their body is positioned.
- Solution: Ensure there's *some* form of constant light, even a small LED panel, illuminating the model's face so they can see you and their surroundings. Clear, concise verbal cues become paramount.
- Demanding Rapid, Dynamic Poses: Low-light often necessitates slower shutter speeds to gather enough light, even with fast lenses and higher ISOs. Asking for quick, fluid movements will inevitably lead to motion blur.
- Solution: Direct for longer holds, subtle shifts, and more static, sculptural poses. Communicate that holding still is crucial. "Hold that for three seconds, perfect."
- Lack of Pre-Visualization and Communication: If you, the photographer, are struggling to see, imagine how the model feels. Not clearly articulating your vision or the desired mood can lead to frustration.
- Solution: Pre-visualize the shot and communicate the mood, the specific light you're working with, and the effect you want. Use analogies: "Imagine you're lost in thought," or "We're going for a mysterious, dramatic feel here." Show them a reference image if possible.
- Ignoring the Model's Expression in Darkness: It's easy for the photographer to get lost in the technical settings and forget to connect with the model, especially if their face is in shadow.
- Solution: Always prioritize the model's expression. Even in deep shadow, a subtle glint in the eye or the tilt of a head can convey immense emotion. Ensure your key light, no matter how subtle, is hitting the eyes to capture that spark.
Patience, clear communication, and empathy for the model's experience are your most valuable tools when directing in low-light environments. It's a collaborative dance where every movement is deliberate and every expression carefully considered.
What are the optimal camera settings for low-light fashion portraits?
Navigating the nuanced world of low-light fashion portraiture demands more than just a good eye; it requires a profound understanding of your camera's core settings. In my experience, mastering these technical foundations is the bedrock upon which truly editorial-quality images are built, especially when available light is scarce.
When shooting in low light, your first instinct should be to open your aperture as wide as your lens allows, typically ranging from f/1.2 to f/2.8. This maximizes the amount of light hitting your sensor, allowing for lower ISOs and faster shutter speeds.
However, an ultra-shallow depth of field, while beautiful for artistic blur, can be a double-edged sword in fashion. You must ensure critical elements, like the model's eyes or a key garment detail, remain tack-sharp. A common mistake I see is photographers sacrificing essential sharpness for exaggerated bokeh, which can detract from editorial impact.
For full-body or two-shot portraits, I often advise stopping down slightly to f/2.8 or f/4, even in low light, to maintain a more forgiving plane of focus, especially if the model isn't perfectly static. This slight adjustment can make all the difference in achieving consistent sharpness across the frame.
Your shutter speed is a critical balancer, dictating how much light reaches the sensor and how motion is rendered. In low light, the temptation is to slow it down significantly, but this introduces the risk of camera shake and subject motion blur.
For handheld shots, I rarely go below 1/60th of a second, and even then, I rely on image stabilization and a steady stance. If you're aiming for absolute sharpness, particularly with a tripod, you can push this much further, but always be mindful of your subject's movement.
Sometimes, a subtle motion blur can add a dynamic, artistic flair to a fashion portrait, especially when capturing flowing fabrics or a model in movement. This is a deliberate creative choice, not a technical oversight, and requires careful experimentation at speeds like 1/15th to 1/30th of a second.
The ISO setting directly impacts your sensor's sensitivity to light and, consequently, the amount of digital noise in your image. Modern cameras have made incredible strides, allowing usable images at ISOs that were unthinkable a decade ago.
My general approach is to start with the lowest possible ISO and gradually increase it only when aperture and shutter speed limitations are met. Aim to keep it below ISO 3200-6400 for most full-frame cameras to maintain optimal image quality for large prints and editorial usage.
Consider your camera's native ISO range and its 'sweet spot' for noise performance. For instance, some cameras might perform exceptionally well up to ISO 12800, while others introduce noticeable color noise beyond 3200. Knowing your gear's limits is paramount.
Achieving accurate and consistent skin tones in low-light, often mixed-lighting scenarios, is where White Balance becomes your secret weapon. Auto White Balance (AWB) can be unreliable, frequently misinterpreting ambient light sources.
I always recommend setting a Custom White Balance (CWB) using a grey card or an Expodisc under the specific lighting conditions you're shooting in. This ensures color fidelity and reduces significant post-processing corrections, which can degrade image quality.
Alternatively, if time is critical, setting a specific Kelvin temperature (e.g., 3200K for tungsten, 5500K for daylight) can provide a more consistent baseline than AWB. Remember, color is emotion, and getting it right in-camera sets the mood.
Low light presents significant challenges for autofocus systems. Modern mirrorless cameras with advanced eye-tracking AF have been game-changers, but even they have their limits. To maximize your chances:
- Prioritize AF modes that utilize central, cross-type sensors, generally more sensitive. For static portraits, Single-Point AF is often the most precise choice.
- If your camera has a low-light AF assist lamp, use it judiciously to avoid distracting the model.
- In extremely dark conditions, or when shooting through scrims or reflections, don't shy away from Manual Focus with Focus Peaking. This visual aid highlights in-focus areas, providing precision AF might struggle to achieve.
Correct exposure in low light is less about overall brightness and more about exposing for your subject, particularly their skin tones. A common pitfall is letting the camera underexpose to compensate for the dark background.
I primarily use Spot Metering or Center-Weighted Averaging, pointing the metering area at the brightest part of the model's face (usually the forehead or cheekbone). Then, I'll often expose +0.3 to +0.7 stops over what the meter suggests to ensure bright, clean skin tones without blowing out highlights.
This technique, known as 'exposing to the right' (ETTR) when viewing the histogram, pushes the data towards the brighter end, maximizing detail and minimizing noise in the shadows. It provides more flexibility in post-production.
This isn't a 'setting' in the traditional sense, but it's arguably the most critical choice for low-light fashion photography: always shoot in RAW format. RAW files contain uncompressed, unprocessed sensor data, offering immense flexibility in post-production.
In low light, where you're often pushing your ISO and making compromises, the ability to recover shadow detail, adjust white balance, and fine-tune exposure without destructive compression artifacts is invaluable. JPEGs simply don't offer that latitude.
"In the realm of low-light fashion, RAW isn't just an option; it's your insurance policy for maintaining editorial quality when the light challenges every other setting."
Ultimately, optimal settings aren't static; they are a dynamic interplay, a dance between light availability, creative intent, and your camera's capabilities. My advice is to approach low-light fashion with a clear priority: nailing focus and exposure on your subject first, then optimizing for artistic effects.
Practice, review your histograms, and understand how each adjustment affects the others. This iterative process is what elevates a good low-light shot to an editorial masterpiece.
How can I ensure color consistency across different low-light shoots?
The challenge of maintaining color consistency across various low-light fashion shoots is one of the most persistent hurdles for professional photographers, yet it's absolutely non-negotiable for editorial quality. In my experience, clients and art directors expect a cohesive visual narrative, and wildly varying color casts between shoot days or even different setups within the same shoot will immediately undermine your work's credibility.
Before even stepping onto set, your entire workflow must be built on a foundation of rigorous calibration. This starts with your monitor, which must be profiled regularly using a hardware calibrator like a Datacolor Spyder or X-Rite i1Display Pro. Without an accurate display, you're editing blind, and any perceived consistency is purely coincidental.
On set, the cornerstone of color accuracy in low light is a meticulously set custom white balance. Forget auto white balance in these conditions; it's simply too unreliable and will introduce subtle, yet frustrating, shifts. I always advocate for manually setting your white balance using a neutral gray card or a dedicated color checker.
To do this, place your chosen neutral reference card where your subject will be, ensuring it's illuminated by the primary light source you'll be using. Take a reference shot, then use your camera's custom white balance function to set it from that image. This locks in a precise color temperature that accurately reflects the ambient or artificial light.
Beyond white balance, a color checker (like the X-Rite ColorChecker Passport) is your most powerful ally. This isn't just for white balance; it's a critical tool for creating camera-specific profiles that account for how your camera sensor interprets colors under specific lighting conditions.
For every new lighting setup, or even significant changes in ambient light, take a reference shot of the color checker. Ensure it's well-lit and in the same plane as your subject. This creates a digital 'Rosetta Stone' for your post-production, allowing you to establish a consistent color baseline regardless of the shoot's unique low-light challenges.
In post-production, the real magic happens. Using software like Lightroom or Capture One, you can generate a custom DNG profile from your color checker reference shots. This profile then corrects for subtle color shifts and ensures that the colors captured by your sensor are rendered accurately and consistently across all images taken under that specific light.
Here’s a streamlined workflow I’ve refined over hundreds of low-light shoots:
- Shoot RAW: Always, without exception. This provides the maximum amount of data for color correction.
- Reference Shot: Begin each new lighting setup with a shot of your color checker.
- Profile Creation: Ingest your RAW files and create a custom profile from the color checker shot using dedicated software (e.g., X-Rite ColorChecker software).
- Apply Profile: Apply this custom profile to all images taken under that specific lighting condition.
- Sync Settings: Once the profile is applied and initial white balance is set from the checker, sync these foundational settings across all relevant images.
This systematic approach prevents the common pitfall of trying to 'eyeball' color shifts, which is notoriously difficult and inconsistent, especially when working with the often complex and mixed color temperatures found in low-light environments. It’s about building a scientific foundation for your creative vision.
Think of it like a master chef precisely measuring ingredients rather than guessing. While creative intuition is vital for the final dish, the foundational elements – the colors in our case – need to be exact and repeatable for consistent quality.
Finally, remember that environmental factors in your editing space play a crucial role. Work in a room with controlled, neutral ambient light. Regularly soft-proof your images if they are destined for print, using the specific print profile. This holistic approach, from pre-shoot preparation to meticulous post-production, is the only way to genuinely achieve editorial-grade color consistency in the demanding world of low-light fashion photography.
Which post-processing techniques are crucial for editorial quality in dim light?
In my fifteen years navigating the intricate world of fashion photography, I've come to understand that the camera captures the raw material, but it's often in post-processing where the true editorial magic for dim light is forged. This isn't merely about fixing mistakes; it's about elevating an image from good to gallery-worthy, ensuring every pixel contributes to a cohesive, high-quality narrative.The first, and arguably most critical, technique for low-light fashion is a nuanced approach to noise reduction and intelligent sharpening. Pushing ISO inevitably introduces noise, but indiscriminate reduction can strip an image of vital texture, leaving skin looking plastic and fabrics lifeless. My method involves a multi-stage process:
- Luminance vs. Color Noise: Address color noise aggressively, as it's often more distracting. Luminance noise, however, requires a delicate touch. Too much smoothing here eradicates detail.
- Selective Application: I often apply noise reduction more heavily to out-of-focus backgrounds or deep shadows, while preserving finer detail around the model's eyes, hair, and garment textures. Masking is your best friend here.
- Strategic Sharpening: After noise reduction, judicious sharpening is crucial. I prefer a high-radius, low-amount sharpening that enhances micro-contrast rather than adding harsh edges, especially for print.
Next, mastering color grading and white balance correction becomes paramount. Low-light environments are notorious for introducing complex color casts – the sickly green of fluorescent, the orange of tungsten, or the cool blue of moonlight. Achieving editorial consistency across a series demands meticulous attention to these elements.
"Don't just correct, *enhance*. Think about the emotional impact of color. It's the silent storyteller in dim light, guiding the viewer's emotional response to the fashion."
In my experience, this involves not just global adjustments but also targeted HSL (Hue, Saturation, Luminance) tweaks. For instance, I might subtly desaturate distracting background blues while boosting the warmth in a model's skin tones, or use split toning to introduce a specific mood – a cool shadow with a warm highlight for a dramatic, cinematic feel.
Dynamic range optimization is another non-negotiable step. Low-light scenes inherently have deep shadows and often challenging highlights from practical light sources. The goal is to recover detail without introducing an artificial, over-processed look.
- Shadow Recovery: Carefully lift shadows to reveal texture and form, but never to the point where noise becomes dominant or the image loses its intended mood. A common mistake I see is over-lifting, which flattens the image and destroys the sense of depth crucial in low-light photography.
- Highlight Management: Tame blown-out highlights from practical lights or reflections. This preserves detail in key areas, preventing them from becoming distracting white blobs. Remember, a well-managed highlight can be a focal point, drawing the eye.
Perhaps the most artistic and impactful technique is dodging and burning for local contrast and form sculpting. This is where you truly 'paint with light' in post-production, guiding the viewer's eye and enhancing the three-dimensionality of the subject and garment.
For a recent editorial shot in a dimly lit Parisian alleyway, I used dodging to subtly brighten the model's eyes and the intricate lace details on her gown, making them pop against the moody, dark backdrop. Conversely, I burned down areas of the background and the folds of the fabric that weren't meant to be primary focus, deepening the shadows and adding to the dramatic atmosphere. This technique, applied with a light hand and soft brushes, is indispensable for creating depth and drawing attention to key fashion elements.
Finally, consider grain management as an artistic choice. While digital noise is generally undesirable, a carefully applied, subtle film grain can sometimes mask residual digital noise and add a timeless, tactile quality to a low-light fashion image. It’s about distinguishing between ugly digital artifacts and beautiful, intentional texture.
Ultimately, these post-processing techniques are not just about technical correction; they are about refining your vision. They are the tools that transform the challenges of low-light into opportunities for unparalleled editorial quality, delivering images that resonate with depth, mood, and undeniable impact.
Reading Recommendations:
- Unlock Ageless Style: How to Create Womenswear for Every Generation
- Best Activewear for CrossFit Beginners: Crush Your First WOD!
- Unlock Your Style: Solving Fashion Blogger Content Block Issues Fast
- 7 Proven Strategies: How to Market Inclusive Fashion Without Backlash
- Sweaty Feet? Discover the Best Shoe Materials for Ultimate Comfort!
Key Points and Final Thoughts
Having navigated countless low-light fashion shoots over the past fifteen years, I can attest that the greatest misconception is viewing dim conditions as a hurdle rather than a unique aesthetic opportunity. My experience has consistently shown that embracing the challenge transforms it into a powerful tool for crafting truly distinctive narratives.
Achieving consistent editorial quality in these challenging environments hinges on a combination of technical mastery, meticulous preparation, and an unwavering creative vision. It's not about guessing; it's about making deliberate choices that sculpt light and shadow with purpose.
- Technical Acumen: Understand your camera's low-light capabilities deeply, from sensor performance at higher ISOs to the nuances of autofocus in dim settings. Knowledge of prime lenses with wide apertures isn't just preferred; it's often essential for capturing enough light without sacrificing image quality.
- Light Shaping, Not Just Adding: Low light doesn't mean no light; it means *sculpting* the available light or strategically introducing controlled sources. Think about modifiers that focus and direct rather than just broadly illuminate, creating intentional fall-off and mood.
- Tethered Workflow: In my studio and on location, tethering is non-negotiable. It provides immediate, large-screen feedback for critical adjustments to focus, exposure, and composition, ensuring editorial precision and catching subtle issues that might be missed on a small LCD.
"The true expert doesn't just adapt to low light; they orchestrate it. Every shadow, every highlight, becomes a deliberate brushstroke in their visual symphony, meticulously placed to tell the story."
A common mistake I see among less experienced photographers is over-reliance on post-production to 'fix' issues that should have been addressed in-camera. While retouching is a vital part of the editorial process, it should enhance, not salvage, your original capture; true quality begins at the moment of exposure.
Furthermore, the human element cannot be overstated. Low-light conditions demand heightened communication and trust within your team – from the model understanding subtle pose shifts in limited visibility to the MUA ensuring makeup holds up under specific lighting temperatures. A cohesive, well-briefed team dramatically elevates the final output, minimizing errors and maximizing creative flow.
Consistency, the hallmark of editorial quality, is born from a repeatable process, not luck. Document your settings, study your light patterns, and build a mental library of successful approaches. This isn't about rigid adherence, but about having a robust, adaptable foundation from which to innovate and problem-solve on the fly.
In conclusion, low-light fashion photography is a masterclass in intentionality. It rewards patience, technical rigor, and a bold artistic spirit. Embrace its unique constraints, and you'll unlock a realm of visual storytelling that is both profound and utterly captivating, creating imagery that truly stands out in a crowded editorial landscape.


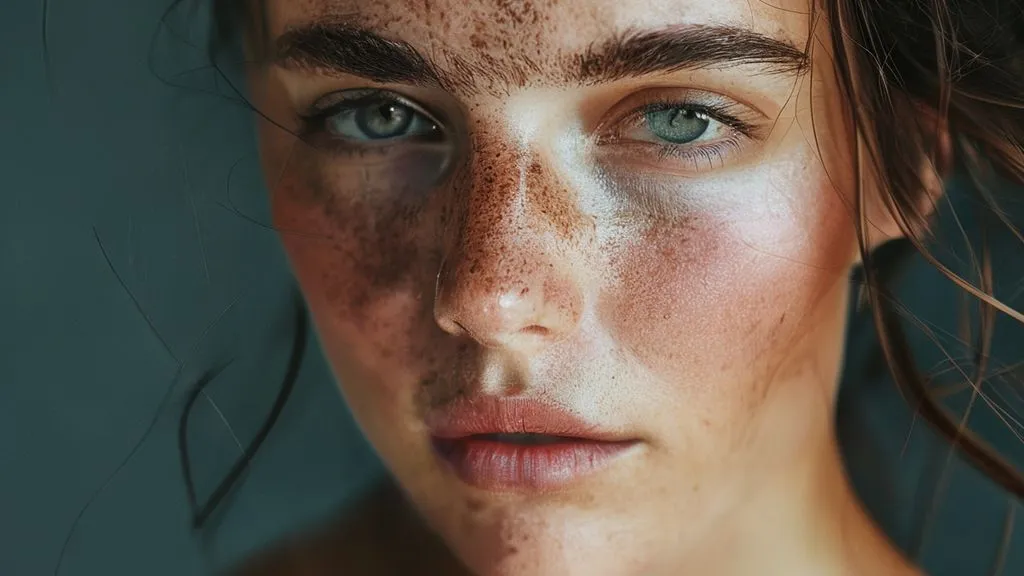
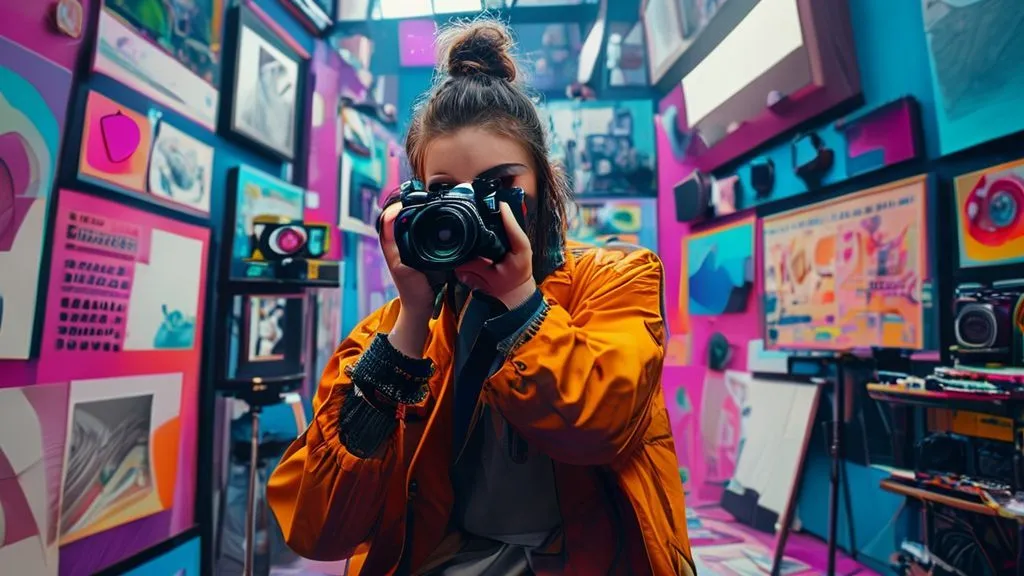
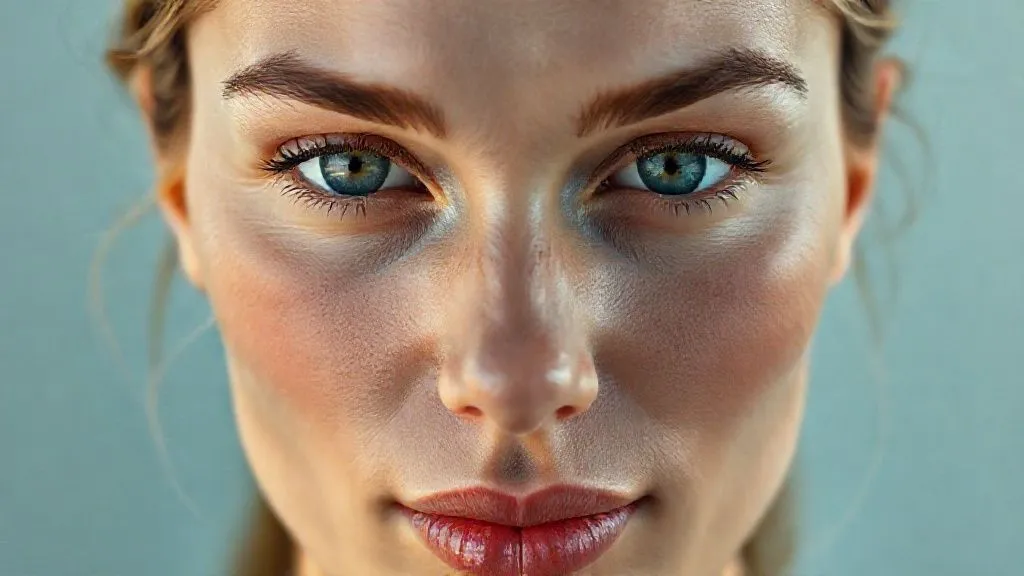
Your email address will not be published. Required fields are marked *