
What's the Quickest Way to Revive Tired Skin Before a Major Shoot?
For over 15 years in the high-stakes world of beauty fashion, I've witnessed firsthand the immense pressure models and talent face, especially when it comes to their skin. There’s nothing quite like the panic in a green room when a model, just hours before a major campaign shoot, looks in the mirror and sees dull, puffy, or tired skin staring back. I've been there, guiding frantic teams and reassuring talent, knowing that a radiant complexion isn't just about aesthetics; it's about confidence, professionalism, and delivering that 'wow' factor under unforgiving studio lights.
The reality is, life happens. Late nights, travel fatigue, stress, or even just a bad reaction to a new product can leave your skin looking far from camera-ready. This isn't just a superficial concern; tired skin can impact makeup application, require more heavy-handed retouching, and ultimately, chip away at the confidence needed to truly shine. It's a common pain point that can derail even the most meticulously planned shoots, and I've seen countless instances where a quick, effective intervention was the make-or-break moment.
That's why I've distilled my years of on-set experience and expert knowledge into a definitive 5-phase emergency skin revival framework. This isn't about magic potions or unrealistic promises. Instead, you'll learn actionable, science-backed strategies, product recommendations, and professional hacks that I personally use and trust. We'll cover everything from immediate cleansing to inner nutrition, ensuring you understand not just what to do, but why it works, transforming tired skin into a luminous, shoot-ready canvas in record time. Get ready to master the art of the pre-shoot glow-up.
Understanding the Enemy: Why Skin Gets Tired So Quickly
Before we dive into solutions, it's crucial to understand the underlying culprits behind tired-looking skin. It’s not just about lack of sleep, though that's certainly a major factor. Our skin is a complex organ, constantly battling environmental stressors, internal imbalances, and the natural aging process.
The Science of Skin Fatigue
At a cellular level, tired skin often presents as dehydration, poor circulation, and increased inflammation. When you're stressed, your body releases cortisol, a hormone that can impair the skin's barrier function, leading to moisture loss and increased sensitivity. Lack of sleep means your skin misses out on its prime repair cycle, hindering cell regeneration and collagen production. Environmental factors like dry air, pollution, and even excessive screen time can also contribute to a dull, lackluster complexion. Blood vessels constrict, reducing oxygen and nutrient delivery, which further exacerbates the problem, leaving skin looking sallow and lifeless.
Expert Insight: "Tired skin isn't just a surface issue; it's a reflection of deeper physiological processes. Addressing hydration and microcirculation is often the fastest route to visible improvement, but never underestimate the power of stress reduction."
Understanding these mechanisms allows us to target our interventions precisely. We're not just masking the problem; we're actively working to restore the skin's natural vitality and function, even under tight deadlines. This holistic approach ensures that the revival is not just superficial but genuinely brings life back to the skin.
Phase 1: The Immediate Cleanse & Prep (1-2 Hours Before)
The foundation of any successful skin revival is a clean, receptive canvas. This phase is about gently clearing away impurities and preparing your skin to absorb the subsequent treatments effectively. Remember, gentleness is key; aggressive scrubbing will only cause redness and irritation.
Gentle Cleansing for a Fresh Canvas
Start with a mild, hydrating cleanser. Avoid anything harsh or stripping, as this can further compromise your skin's barrier. The goal is to remove makeup, dirt, and excess oil without disturbing the skin's natural pH balance.
- Double Cleanse (Optional, if wearing heavy makeup): If you have heavy makeup, begin with an oil-based cleanser or micellar water to dissolve it.
- Hydrating Cleanser: Follow with a cream or gel-based cleanser. Work it into your skin with lukewarm water using gentle, circular motions for about 60 seconds.
- Rinse Thoroughly: Ensure all cleanser is removed. Pat your face dry with a clean, soft towel. Avoid rubbing vigorously.
Exfoliation: The Gentle Brightener
Exfoliation is critical for removing dead skin cells that contribute to dullness. However, before a major shoot, you need a very specific approach: gentle chemical exfoliation or an extremely mild physical scrub. Skip anything abrasive or new to your routine.
- PHA or Lactic Acid Toner: These are my go-to options for a quick, gentle refresh. PHAs (Polyhydroxy Acids) are large molecules that exfoliate the surface without penetrating too deeply, making them suitable for most skin types, even sensitive. Lactic acid is similarly mild and also provides hydration.
- Application: Apply a small amount to a cotton pad and gently swipe over your face, avoiding the eye area. Let it absorb for a minute.
- Avoid: Stronger AHAs (like glycolic acid) or BHAs (salicylic acid) if you're not accustomed to them, as they can cause redness or purging. Definitely avoid harsh physical scrubs with large, irregular particles.

Phase 2: Hydration & Depuffing Powerhouse (45-60 Minutes Before)
This is where the real transformation begins. Intense hydration and targeted depuffing can dramatically improve skin's appearance in a short amount of time, making it look plumper, smoother, and more awake.
The Magic of a Sheet Mask
A high-quality sheet mask is your secret weapon for rapid hydration and an instant glow. Look for masks infused with hyaluronic acid, ceramides, peptides, or vitamin C. They deliver a concentrated dose of active ingredients directly to your skin in a occlusive environment, maximizing absorption.
- Choose Wisely: Opt for hydrating, brightening, or soothing masks. Avoid "detoxifying" or "purifying" masks that might draw out impurities but could also leave your skin feeling dry or irritated before a shoot.
- Application: Apply the mask to your clean, toned face. Ensure it adheres well to every contour.
- Relax & Refresh: Leave it on for 15-20 minutes. This is a perfect time to lie down, close your eyes, and incorporate deep breathing exercises to calm your nervous system. The cooling sensation of the mask further aids in reducing puffiness.
- Post-Mask: Gently pat any remaining serum into your skin. Do not rinse.
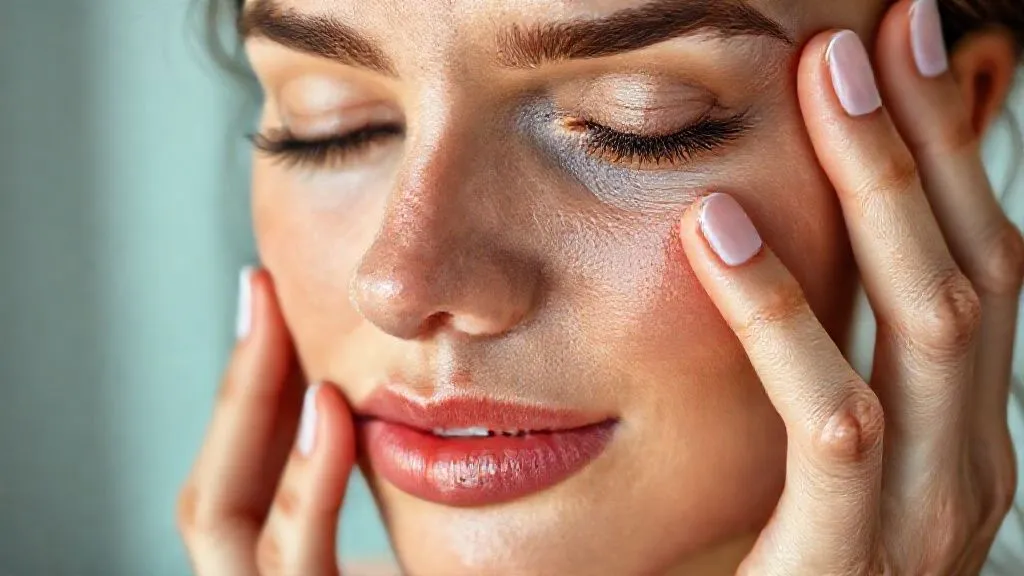
Targeted Eye Care: Banish Puffiness & Dark Circles
The eyes are the window to the soul, and tired eyes can instantly betray a lack of rest. This step focuses on immediate relief for puffiness and brightening the delicate under-eye area.
- Cold Compress or Eye Masks: Apply chilled eye patches (kept in the fridge) or simple cold tea bags (green tea is excellent for its antioxidants and caffeine) for 10-15 minutes. The cold constricts blood vessels, reducing swelling.
- Jade Roller/Gua Sha: Gently massage the under-eye area with a chilled jade roller or gua sha tool. Use light, outward strokes to encourage lymphatic drainage, which helps to depuff.
- Caffeine-infused Eye Serum: Dab a small amount of an eye serum containing caffeine or peptides. Caffeine helps constrict blood vessels, reducing dark circles and puffiness, while peptides can temporarily firm the skin.
| Method | Benefit | Time Required | Pros | Cons |
|---|---|---|---|---|
| Chilled Eye Patches | Rapid depuffing, hydration | 10-15 min | Easy, soothing, effective | Single-use for many types |
| Jade Roller/Gua Sha | Lymphatic drainage, improved circulation | 5-7 min | Reusable, relaxing, boosts product absorption | Requires technique, can irritate if too firm |
| Caffeine Eye Serum | Reduces puffiness & dark circles | Immediate absorption | Targeted, quick-acting, long-lasting effect | Can be drying for some, requires consistent use for full benefit |
Phase 3: Serum & Moisturizer Lock-In (30 Minutes Before)
With your skin cleansed, exfoliated, and deeply hydrated, it's time to layer on targeted treatments and lock in all that goodness with a protective moisturizer. This phase is crucial for achieving that coveted plump, dewy look.
Choosing the Right Serum for Instant Radiance
Serums are concentrated formulations designed to address specific skin concerns. For an emergency glow-up, focus on ingredients that hydrate, brighten, and plump.
- Hyaluronic Acid Serum: A non-negotiable. It draws moisture from the air and deeper layers of your skin, plumping it up and smoothing fine lines almost instantly. Apply it to damp skin for maximum effect.
- Vitamin C Serum: If your skin tolerates it well, a stable Vitamin C serum can provide an immediate brightening boost and antioxidant protection. It helps to even out skin tone and reduce dullness.
- Niacinamide (Vitamin B3): Excellent for calming redness, minimizing pores, and strengthening the skin barrier. It’s a versatile ingredient that can benefit almost any skin type.
Apply 2-3 drops of your chosen serum(s) to your face and neck, gently pressing it into the skin. Allow a minute or two for absorption before moving to the next step.
Moisture Barrier Reinforcement
A good moisturizer acts as a seal, locking in all the beneficial ingredients you've just applied and providing a smooth canvas for makeup. For a shoot, you want something hydrating but lightweight, that won't feel heavy or pill under makeup.
- Gel-Cream or Lightweight Lotion: These formulations provide ample hydration without feeling greasy. Look for ingredients like ceramides, glycerin, or squalane to support the skin barrier.
- Application: Apply an even layer across your face and neck. Gently massage it in until fully absorbed. Don't forget your décolletage!
- Sunscreen (if outdoors): If your shoot is outdoors, a broad-spectrum SPF is non-negotiable. Choose a lightweight, non-pilling formula that won't leave a white cast. Mineral sunscreens with zinc oxide or titanium dioxide are often a good choice for sensitive skin.

Phase 4: The Inner Glow: Nutrition & Mindset (Throughout the Day)
While topical treatments work wonders, true radiance emanates from within. This phase emphasizes the internal support systems that can significantly amplify your skin's vitality, even in a short timeframe.
Hydration from Within: The Water Rule
Dehydration is one of the fastest ways to make skin look tired and dull. Ensuring you're well-hydrated internally is paramount. I always tell my talent: "Think of your skin cells as tiny balloons – they need water to stay plump."
- Consistent Sips: Don't chug a gallon right before the shoot; instead, sip water consistently throughout the hours leading up to it. Aim for plain water, perhaps with a slice of lemon or cucumber for added electrolytes and flavor.
- Avoid Dehydrators: Minimize caffeine, alcohol, and sugary drinks, as these can contribute to dehydration and inflammation.
- Electrolyte Boost: If you feel particularly depleted, a sugar-free electrolyte drink can help your body absorb and retain water more effectively.
Quick Nutrients for Skin Health
While you can't overhaul your diet in a day, certain quick, nutrient-dense snacks can provide an immediate boost of vitamins and antioxidants.
- Antioxidant-Rich Fruits: Berries (blueberries, raspberries), oranges, and kiwis are packed with Vitamin C and other antioxidants that protect skin cells and promote brightness.
- Healthy Fats: A small handful of almonds or walnuts, or a slice of avocado, provides essential fatty acids that support skin barrier function and reduce inflammation.
- Green Juice/Smoothie: A quick green juice (spinach, kale, cucumber, apple) can deliver a concentrated dose of vitamins, minerals, and hydration.
Mini Case Study: Sarah's Pre-Shoot Transformation
Sarah, a rising star in commercial modeling, arrived at a major beauty campaign shoot looking visibly exhausted after a red-eye flight and a week of relentless castings. Her skin was dull, under-eye circles prominent, and she felt her confidence waning. Following my 5-phase emergency protocol, we started with a gentle lactic acid cleanse and a hydrating sheet mask, which immediately reduced redness. Crucially, I ensured she had an electrolyte-rich drink and a small bowl of berries and almonds during the mask application. We followed with a hyaluronic acid serum and a lightweight moisturizer, topped with a caffeine eye serum. Within 90 minutes, her skin was visibly plumper, more radiant, and her under-eyes significantly depuffed. She stepped onto set with renewed confidence, delivering stunning shots that required minimal post-production retouching. This transformation wasn't just about products; it was about a strategic, holistic approach that addressed both external and internal factors.
Phase 5: Final Touches & Makeup Application (Right Before)
The final phase is all about perfecting your revived skin and preparing it for makeup. This isn't about covering up; it's about enhancing the natural glow you've worked so hard to achieve.
Primer Perfection: The Unsung Hero
A good primer is essential for creating a smooth, even canvas and ensuring your makeup lasts. For tired skin, choose a hydrating or illuminating primer that will further enhance your glow.
- Hydrating Primers: Look for ingredients like hyaluronic acid or glycerin. These add an extra layer of moisture and help makeup glide on seamlessly.
- Illuminating Primers: These contain fine pearlescent particles that give your skin a subtle, lit-from-within glow, perfect for photography. Apply sparingly to areas you want to highlight, like cheekbones and the bridge of the nose.
- Application: Apply a thin, even layer of primer after your moisturizer has fully absorbed. Allow it to set for a minute before applying foundation.
Strategic Concealing & Highlighting
Even with revived skin, a little strategic concealing and highlighting can elevate your look to perfection. The goal is to let your natural skin shine through, not to mask it.
- Lightweight Concealer: Use a creamy, hydrating concealer only where needed – typically under the eyes (if any lingering darkness), around the nose, or on any small blemishes. Blend meticulously with a damp beauty sponge or your ring finger.
- Cream Highlighter: Opt for a cream or liquid highlighter for a more natural, dewy finish. Apply to the high points of your face: cheekbones, brow bone, cupid's bow, and inner corner of the eyes. This catches the light beautifully and emphasizes your skin's newfound radiance.
- Setting Spray: A hydrating setting spray can lock everything in place, add a final touch of dewiness, and meld all the layers together for a seamless finish.

Common Pitfalls to Avoid in Your Emergency Routine
In the rush to revive tired skin, it's easy to make mistakes that can do more harm than good. As an industry specialist, I've seen these missteps derail many a pre-shoot prep. Avoiding these common pitfalls is just as important as knowing what to do.
Over-Exfoliation: A Recipe for Disaster
While gentle exfoliation is beneficial, going overboard, especially with harsh physical scrubs or potent chemical exfoliants, can lead to redness, irritation, and a compromised skin barrier. This makes your skin more sensitive to makeup and light, and can actually make it look worse under the camera. Stick to mild options like PHAs or lactic acid, and use them sparingly.
Introducing New Products Last Minute
This is perhaps the biggest no-no. Your skin needs time to adjust to new products, and introducing an untested serum, mask, or moisturizer right before a major shoot is a gamble you cannot afford to take. Allergic reactions, breakouts, or unexpected sensitivities can emerge, leaving you with a bigger problem than just tired skin. Always use products you know and trust, and patch test any new additions well in advance.
Expert Insight: "Never, ever experiment with new skincare products the day of a major shoot. Stick to your tried-and-true favorites. Your skin is not the place for last-minute adventure."
Ignoring Internal Factors
Focusing solely on topical treatments while neglecting hydration, nutrition, and stress management is a missed opportunity. Your skin is a reflection of your overall health. Even the best products can only do so much if your body is screaming for water or rest. A holistic approach, integrating internal wellness, will always yield superior, more natural-looking results.
Skipping Sun Protection (Even Indoors)
While often overlooked for indoor shoots, prolonged exposure to studio lights can still have an impact. More importantly, if you're stepping outside even for a moment, UV exposure can exacerbate any existing skin issues and hinder your revival efforts. A lightweight SPF is always a good idea.
Over-Applying Makeup to Compensate
When skin is tired, there's a temptation to pile on more foundation or concealer. This often backfires, making the skin look cakey and unnatural, especially under high-definition cameras. The goal of this emergency routine is to improve your skin's natural state so that you need less makeup, allowing your radiant complexion to truly shine through.
Expert Insights: Beyond the Quick Fix
While this 5-phase emergency plan is highly effective for immediate results, I'd be remiss not to emphasize the importance of a consistent, long-term skincare strategy. Quick fixes are invaluable for those high-pressure moments, but sustainable radiance comes from dedicated care.
The Long Game: Consistent Skincare for Lasting Radiance
Think of your daily routine as preventative maintenance. A consistent regimen involving gentle cleansing, targeted serums (Vitamin C, retinoids for evening, peptides), robust hydration, and daily SPF is the cornerstone of healthy, resilient skin. This proactive approach minimizes the chances of facing severe tired skin emergencies in the first place. As the American Academy of Dermatology Association emphasizes, a consistent routine tailored to your skin type is crucial for long-term skin health.
The Role of Sleep and Stress Management
No amount of topical product can truly replicate the benefits of adequate sleep. During deep sleep, your skin's repair processes kick into high gear, regenerating cells, increasing blood flow, and producing collagen. Aim for 7-9 hours of quality sleep whenever possible. Similarly, chronic stress can wreak havoc on your skin by increasing inflammation and disrupting hormonal balance. Incorporate stress-reducing practices like meditation, deep breathing, or light exercise into your daily life. Harvard Health Publishing often highlights the undeniable link between stress and skin health, a connection I've observed countless times in my career.
Professional Treatments as a Booster
Consider incorporating occasional professional treatments like hydrating facials, mild chemical peels, or microcurrent treatments into your routine a week or two before a major shoot. These can offer a deeper level of exfoliation, hydration, and cellular stimulation that topical products alone might not achieve. Always consult with a trusted esthetician or dermatologist to determine the best options for your skin.
Embracing a Holistic Lifestyle
Ultimately, glowing skin is often a reflection of a balanced lifestyle. A diet rich in whole foods, regular exercise, sufficient water intake, quality sleep, and effective stress management all contribute significantly to your skin's health and appearance. It's about nurturing your body from the inside out, creating a synergy that topical treatments can then beautifully enhance. Research published in the Journal of Clinical, Cosmetic and Investigational Dermatology consistently points to the multifaceted influences on skin health, underscoring the importance of this holistic view.
Frequently Asked Questions (FAQ)
Q: Can I use a new product right before a shoot for a quick fix? Absolutely not. This is one of the biggest mistakes you can make. New products can trigger unexpected reactions like redness, irritation, or breakouts, which would be far worse than just tired skin. Stick to products you know your skin tolerates well and has responded positively to in the past. Patch test any new product at least a week in advance.
Q: What's the best way to deal with a sudden breakout on shoot day? Resist the urge to pick or squeeze, as this will only worsen inflammation and make it harder to conceal. Instead, gently cleanse the area, apply a spot treatment containing salicylic acid or benzoyl peroxide (if your skin is used to it) for a few minutes, then rinse. Follow with a soothing, non-comedogenic balm. For makeup, use a green color corrector very sparingly to neutralize redness, then a precise, lightweight concealer. The goal is to minimize, not eradicate, without causing further irritation.
Q: How much water should I drink to see a difference in my skin before a shoot? While there's no magic number, aiming for eight glasses (around 2 liters) of water throughout the day leading up to the shoot is a good target. More importantly, focus on consistent sipping rather than chugging large amounts at once. Adding hydrating foods like fruits and vegetables also contributes to overall hydration. You won't see a dramatic overnight transformation, but consistent hydration plumps skin cells and improves overall circulation, which contributes to a healthier glow.
Q: Are ice rollers really effective for depuffing? Yes, absolutely! Ice rollers or chilled facial tools are incredibly effective for depuffing, especially around the eyes and jawline. The cold temperature constricts blood vessels, reducing swelling and redness. They also help stimulate lymphatic drainage, flushing out excess fluid. I always recommend keeping one in the fridge or freezer for those emergency moments. Just ensure it's clean and you're using gentle pressure.
Q: What if I have sensitive skin? What changes should I make to this routine? If you have sensitive skin, tailor this routine with extra caution. Prioritize gentle, fragrance-free products specifically formulated for sensitive skin. Skip any physical exfoliation entirely and opt for a very mild PHA or lactic acid toner only if your skin is accustomed to it, or skip exfoliation altogether. Focus heavily on soothing, hydrating ingredients like ceramides, hyaluronic acid, and colloidal oatmeal. Always introduce new products (even familiar ingredients from new brands) with extreme care, and prioritize calming your skin over aggressive treatments. The goal is to nourish and soothe, not stimulate.
Key Takeaways and Final Thoughts
Reviving tired skin before a major shoot doesn't have to be a desperate scramble. With this 5-phase emergency framework, you now possess the expert knowledge and actionable steps to transform a dull complexion into a radiant, camera-ready glow. Remember these critical takeaways:
- Prepare Your Canvas: Start with a gentle cleanse and a very mild exfoliation to clear dead skin cells.
- Hydrate Intensively: Utilize sheet masks and targeted eye treatments for rapid, concentrated moisture and depuffing.
- Layer Smart: Apply hydrating and brightening serums, then lock it all in with a lightweight moisturizer.
- Nourish from Within: Don't underestimate the power of consistent hydration and nutrient-rich snacks.
- Perfect & Protect: Use illuminating primers and strategic, light-handed makeup to enhance your natural radiance, not mask it.
- Avoid Pitfalls: Never introduce new products last minute, and don't over-exfoliate.
As someone who has navigated countless high-pressure shoots, I can assure you that confidence radiates from within, and feeling good about your skin is a huge part of that. This emergency plan is your toolkit for those crucial moments, but let it also be a reminder that consistent self-care, both internal and external, is the ultimate secret to lasting luminosity. Go forth, embrace your glow, and shine brightly under those lights – you've earned it!
Recommended Reading
- 7 Expert Strategies to Boost Slow-Moving Designer Eyewear Sales Quickly
- Effortless Elegance: How to Choose Casual Menswear for Men Over 40
- The Ultimate Guide: How to Preserve Haute Couture Runway Masterpieces Forever
- Secure That Veil: 7 Expert Steps for Fine, Slippery Bridal Hair All Day
- Project Authority: The Definitive Guide to Boardroom Shirt Collars


Your email address will not be published. Required fields are marked *