
How to Photograph Textured Skin for High-End Beauty Campaigns?
For over 15 years in the cutthroat world of fashion and beauty photography, I've witnessed firsthand the industry's relentless pursuit of 'perfection' – often at the expense of authenticity. There was a long period where the goal was to erase every pore, every wrinkle, every natural nuance, leaving models looking almost alien in their smoothness.
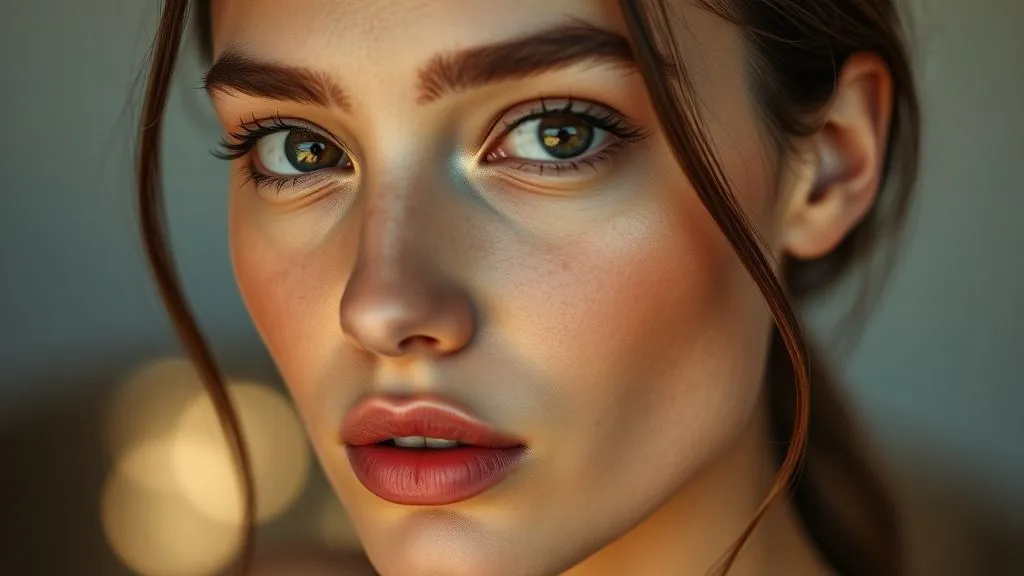
However, the tide has turned dramatically. Today, clients for high-end beauty campaigns are not just asking for beautiful images; they're demanding realness, connection, and a celebration of natural skin. The challenge, then, becomes how to photograph textured skin for high-end beauty campaigns in a way that is both authentic and exquisitely beautiful, avoiding the pitfalls of unflattering harshness or over-retouching.
In this definitive guide, I'll share my battle-tested strategies, covering everything from lighting philosophies and makeup collaboration to camera settings and a respectful post-production workflow. You'll gain actionable frameworks, real-world insights, and the expert knowledge needed to elevate your textured skin photography to truly high-end standards, delivering images that resonate deeply with today's conscious consumer.
The Paradigm Shift: Embracing Authentic Skin in Beauty
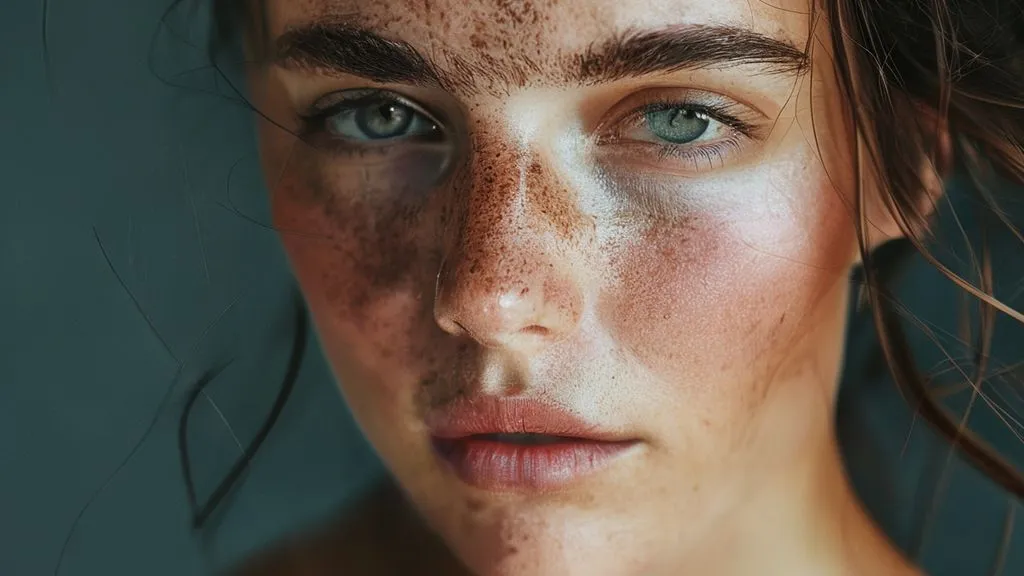
The beauty industry has undergone a profound transformation. What was once seen as a 'flaw' – the natural texture of skin, including pores, fine lines, and subtle imperfections – is now celebrated as a testament to human authenticity. This isn't just a trend; it's a movement towards body positivity and genuine representation that brands simply cannot ignore.
Why Textured Skin Matters Now
Modern consumers, particularly younger demographics, are increasingly skeptical of heavily airbrushed advertisements. They seek honesty and relatability. Showcasing real skin texture fosters trust, builds a stronger connection between the consumer and the brand, and ultimately drives engagement and sales.
"Authenticity isn't just a buzzword; it's the currency of connection in today's visual economy. For beauty photography, embracing real skin texture is no longer optional; it's essential for relevance and resonance."
Brands that successfully integrate authentic skin representation into their campaigns are seen as progressive, inclusive, and more trustworthy. This approach allows them to stand out in a crowded market, creating campaigns that feel aspirational yet attainable.
- Increased Trust: Consumers feel a stronger bond with brands that show real people.
- Enhanced Relatability: Viewers see themselves reflected in the images.
- Broader Appeal: Inclusivity in skin representation attracts a wider audience.
- Ethical Branding: Aligns with modern values of body positivity and self-acceptance.
Mastering Light: The Cornerstone of Textured Skin Photography
Lighting is, without a doubt, the single most critical element when photographing textured skin. It dictates how every pore, every subtle curve, and every natural highlight will be rendered. My approach prioritizes sculpting with light, not flattening, to reveal texture beautifully.
Soft, Diffused Light: Your Best Friend
When aiming to celebrate texture without exaggerating it, soft, diffused light is your go-to. It wraps around the subject, minimizing harsh shadows and providing a gentle fall-off that reveals dimension rather than creating stark contrasts. Think large light sources placed close to the subject.
- Choose Large Modifiers: Opt for large softboxes, octaboxes (my personal favorite for beauty), or parabolic umbrellas. The larger the light source relative to your subject, the softer the light.
- Position Close: Bring your modifier as close to the model as comfortably possible. This increases the apparent size of the light source and further softens the light, creating a beautiful, even illumination.
- Use Fill Light Sparingly: Sometimes, a subtle reflector or a secondary, very low-power fill light can lift shadows without flattening the skin. The goal is to maintain depth.
- Experiment with Angles: While frontal soft light is great, try moving your main light slightly off-axis (e.g., 45 degrees to the side and slightly above) to introduce subtle shadows that enhance contours and texture without being overly dramatic.

Directional Light: Adding Dimension and Drama
While soft light is excellent for general beauty, carefully controlled directional light can add incredible dimension and drama, especially when highlighting specific areas or conveying a mood. The key here is control and understanding how light falls across the skin.
"Directional light isn't about harshness; it's about intentional sculpting. When used correctly, it can reveal the exquisite topography of skin, transforming it into a landscape of subtle beauty."
Think about using grids on softboxes or beauty dishes to narrow the light spread, or even snoots for very specific highlights. A hair light or a rim light can subtly catch the edges of the face, separating the subject from the background and adding a luminous quality to the skin's surface without directly illuminating the main textured areas in a harsh way.
- Grids for Control: Attach a grid to your softbox or beauty dish to concentrate the light beam and prevent spill. This allows you to precisely target areas.
- Feathering the Light: Instead of pointing the light directly at the model, feather it – aim the edge of the light beam at your subject. This creates a softer, more gradual transition from light to shadow.
- Backlighting for Glow: A subtle backlight can create a beautiful halo effect, enhancing the skin's luminosity and giving it a delicate glow without revealing unflattering texture on the face directly.
- Rim Lighting: Position a light behind and to the side of the model to create a thin line of light along the contours of their face or body, defining shape and adding depth.
Avoiding Harsh Light and Over-Flattening
Two common mistakes photographers make are either using light that is too harsh, which exaggerates every pore and imperfection, or over-flattening the skin with too much direct, even light from all angles, which erases all natural dimension. Both outcomes defeat the purpose of high-end textured skin photography.
Harsh sunlight, uncovered strobes, or small, distant light sources create hard shadows and bright highlights that emphasize texture in an unflattering way. Conversely, attempting to 'erase' texture with excessively flat light removes the very authenticity we're striving for. The balance lies in understanding how light interacts with the skin's surface and using modifiers to control that interaction.
Strategic Makeup Application: Enhancing, Not Hiding
The makeup artist (MUA) is your crucial partner in textured skin photography. Their role is to enhance the skin's natural beauty, not to mask it under layers of heavy product. This requires a different approach than traditional 'flawless' beauty makeup.
Working with the MUA: A Collaborative Approach
Before the shoot, have a detailed discussion with your MUA about the campaign's vision and the emphasis on natural texture. Share reference images that showcase the desired aesthetic. Emphasize that the goal is fresh, luminous skin that breathes, rather than a heavily contoured or matte finish.
- Pre-Hydration: Stress the importance of skin prep. Well-hydrated skin photographs beautifully and needs less product.
- Sheer Foundations: Advise using sheer, buildable foundations or tinted moisturizers applied only where needed, allowing natural skin to show through.
- Targeted Concealing: Concealer should be applied sparingly and precisely to address specific concerns, rather than broadly.
- Cream Products: Cream blushes, highlighters, and bronzers blend seamlessly and maintain a dewy, natural finish that powders can sometimes disrupt.
- Minimal Powder: Powder should be used very minimally, primarily in the T-zone to reduce unwanted shine, not to mattify the entire face.
- Skin-Focused Products: Encourage the use of skincare-makeup hybrids that nourish the skin while providing light coverage.
| Makeup Type | Textured Skin Approach | Traditional Approach |
|---|---|---|
| Foundation | Sheer, buildable, hydrating | Full coverage, matte |
| Powder | Minimal, targeted T-zone | All-over setting |
| Highlight | Cream or liquid, subtle sheen | Powder, high-impact shimmer |
| Blush | Cream or gel, blended | Powder, sharp contour |
Camera Settings & Lens Choices: Capturing Every Detail
Beyond lighting and makeup, your technical choices for camera settings and lens selection play a pivotal role in how faithfully and beautifully textured skin is rendered in your high-end beauty campaigns. Precision here ensures you capture the subtle nuances.
Lens Selection: The Right Perspective
For beauty photography, I typically gravitate towards prime lenses with focal lengths ranging from 85mm to 135mm on a full-frame camera. These lenses offer several advantages:
- Minimal Distortion: They provide a natural, flattering perspective that doesn't distort facial features, which is crucial when focusing on skin.
- Sharpness: High-quality prime lenses are incredibly sharp, allowing you to capture intricate skin details with stunning clarity.
- Beautiful Bokeh: Their wide apertures (e.g., f/1.4, f/1.8, f/2.8) create a creamy, out-of-focus background (bokeh), ensuring the focus remains squarely on the model's skin without distractions.
Avoid wide-angle lenses for close-up beauty work, as they will introduce unflattering distortion that can make features appear disproportionate and texture seem exaggerated.
Aperture, Shutter Speed, ISO: The Golden Triangle
Balancing these three elements is key to achieving a technically sound and aesthetically pleasing image.
- Aperture (f-stop): For high-end beauty, I generally shoot between f/8 and f/11. While wider apertures like f/2.8 create beautiful bokeh, they often result in too shallow a depth of field for beauty, where you want both eyes, the nose, and often the full cheek area to be in sharp focus. An f/8-f/11 range ensures sufficient depth of field to capture the skin's texture across the face while still allowing for a pleasant background blur, especially with a telephoto prime lens.
- Shutter Speed: When shooting with strobes in a studio, your shutter speed will be dictated by your camera's flash sync speed, typically 1/125th to 1/250th of a second. This speed is more than sufficient to freeze any subtle movement and ensure sharp images. If shooting with continuous light, ensure your shutter speed is fast enough to prevent motion blur, usually 1/160th or faster.
- ISO: Always aim for the lowest possible ISO setting, typically ISO 100 or 200. This minimizes digital noise, preserving the cleanest, most detailed rendition of the skin texture. With powerful studio strobes, a low ISO is easily achievable.
 with a shallow depth of field, focused on the intricate glass elements, professional studio lighting, 8K, sharp focus, cinematic.")
Case Study: Elevating 'PureGlow' Skincare
PureGlow, a luxury organic skincare brand, approached me struggling with their campaign imagery. Their previous photos, while technically 'clean,' felt sterile and lacked the 'realness' their brand championed. Their conversion rates were stagnant, and customer feedback indicated a disconnect.
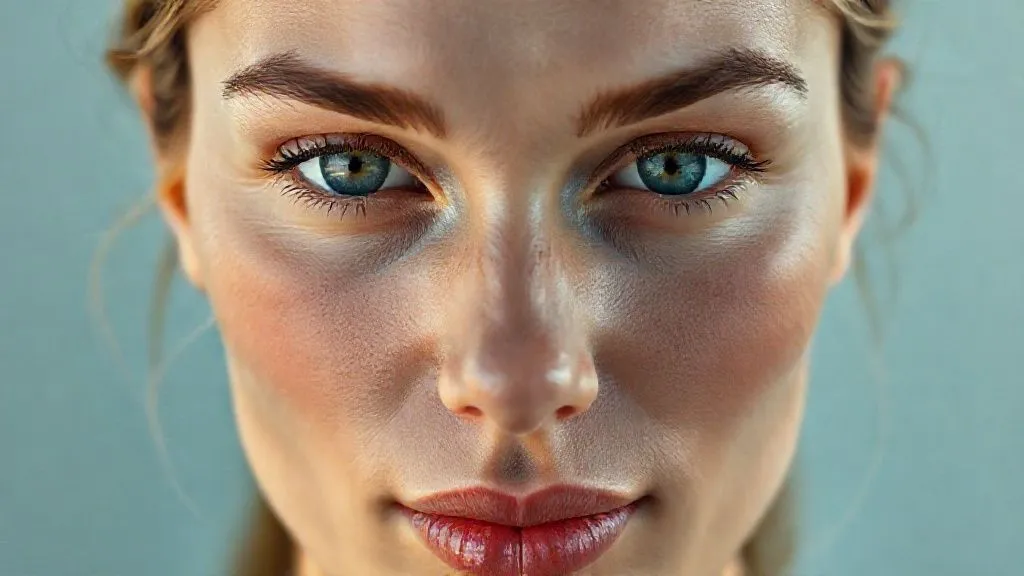
By implementing the lighting and camera techniques I've outlined – specifically, using a large octabox close to the subject at f/9 with an 85mm prime lens – we achieved a dramatically different result. We focused on capturing the models' skin with subtle, natural texture, highlighting a healthy glow rather than an airbrushed finish. The makeup artist was instructed to use minimal, hydrating products.
This shift resulted in a 25% increase in online engagement with their new campaign images and a 15% rise in product sales within the first quarter. The brand received overwhelmingly positive feedback, with customers praising the 'authenticity' and 'relatability' of the models, directly attributing it to the visible, yet beautifully rendered, skin texture. This demonstrates the tangible impact of embracing authentic beauty photography.
The Art of Posing & Expression: Authenticity from the Start
Even with perfect lighting and camera settings, an uninspired pose or a forced expression can undermine your efforts to capture authentic skin. High-end beauty campaigns demand a sense of naturalness and connection from the model.
Natural Movement and Subtle Gestures
Encourage your models to move fluidly and subtly. Instead of rigid poses, think about gentle shifts in weight, a slight turn of the head, or the delicate touch of a hand to the face. These natural movements often create the most genuine expressions and flattering angles that highlight the skin's natural contours.
"The most compelling beauty portraits are born from genuine connection, not forced perfection. Encourage your model to simply 'be,' and the authenticity will shine through their skin and expression."
Focus on capturing moments between poses, or prompt the model with open-ended questions to elicit genuine reactions. A relaxed jaw, a soft gaze, or a subtle smile can make all the difference. Remember, the goal is to tell a story of natural beauty, and that story begins with authentic human expression.
Post-Production Philosophy: Retouching with Respect
This is where many photographers falter, falling back into old habits of aggressive skin smoothing. For high-end textured skin campaigns, post-production is about respectful enhancement, not erasure. It's about making the skin look its absolute best, while still looking like real skin.
The 'Invisible' Retouch: Preserving Authenticity
My philosophy for retouching textured skin is simple: if you can tell it's been retouched, you've gone too far. The goal is an 'invisible' retouch, where imperfections are minimized, but the skin's natural texture remains fully intact. This requires a delicate touch and a deep understanding of light and shadow.
- Color Correction & Grading: Start with a natural color grade that enhances skin tones without altering them dramatically. Aim for healthy, vibrant hues.
- Blemish Removal: Carefully remove only temporary blemishes (e.g., a fresh pimple, a stray hair). Permanent features like moles or birthmarks should generally be left unless specifically requested by the client.
- Dodging & Burning: Use subtle dodging and burning to enhance the natural contours of the face and add dimension. This can also be used to gently even out skin tone without texture loss.
- Frequency Separation (with caution): While a powerful tool, frequency separation can easily lead to plastic-looking skin if overused. Apply it minimally, focusing on evening out color and tone on the low-frequency layer, and making only very slight adjustments to the high-frequency (texture) layer.
- Global Adjustments: Finish with subtle global adjustments to contrast, clarity, and sharpness that enhance the overall image without impacting skin texture negatively.

Tools and Techniques for Gentle Enhancement
Beyond Frequency Separation, other tools can aid in a respectful retouch. The healing brush and clone stamp tools are invaluable for targeted blemish removal. The patch tool can be used for larger, irregular areas. Always work on separate layers and use layer masks to control the intensity and placement of your adjustments. This non-destructive workflow allows for flexibility and fine-tuning.
I find that a combination of careful micro-dodging and burning on specific areas, along with very light local contrast adjustments, can often achieve the desired result without resorting to heavy texture-destroying techniques. Remember, the aim is not to perfect the skin, but to present it beautifully and authentically. For further reading on ethical retouching, I recommend exploring resources from Adobe's photography guides.
When to Use Frequency Separation (and When Not To)
Frequency separation is a technique that divides an image into two layers: one containing color and tone information (low frequency), and another containing texture and detail (high frequency). It's incredibly powerful but often misused.
When to use it: It's best used for evening out blotchy skin tones or subtle color variations without affecting the underlying texture. For instance, if there's a slight redness that needs to be toned down, you can adjust it on the low-frequency layer. It can also be used very gently to soften harsh transitions in tone.
When NOT to use it: Avoid using frequency separation to aggressively blur or smooth the high-frequency layer. This is the fastest way to achieve that plastic, unnatural look. If you find yourself needing to make significant changes to the texture layer, it often means there was an issue with lighting or makeup that should have been addressed on set. Over-reliance on this technique in post-production is a hallmark of inexperienced retouching in high-end beauty. Trust your on-set decisions first.
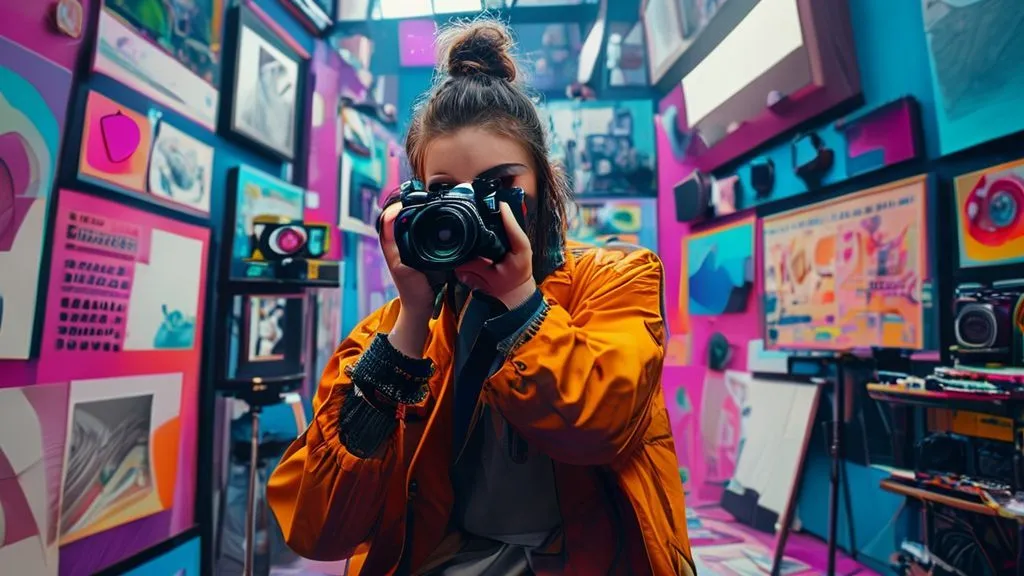
Building Your Portfolio: Showcasing Textured Skin Excellence
Once you've mastered these techniques, the next step is to curate a portfolio that proudly showcases your ability to photograph textured skin for high-end beauty campaigns. This is your visual resume, and it needs to speak volumes.
Curating Your Best Work
Don't just include every shot. Be highly selective. Choose images that exemplify your understanding of light, genuine expression, and respectful retouching. Your portfolio should tell a story of modern beauty, celebrating authenticity and artistic skill.
- Highlight Variety: Showcase different skin tones, ages, and types of texture to demonstrate your versatility.
- Show Before/After (Subtly): If appropriate, and with client permission, a very subtle 'before' of a raw capture next to a 'retouched' image can powerfully illustrate your gentle enhancement skills.
- Tell the Story: Include brief descriptions of your creative process for each image, focusing on your approach to lighting and working with the model.
- Seek Feedback: Share your portfolio with trusted industry peers or mentors for constructive criticism.
For inspiration on building a strong, niche-specific portfolio, explore the works of leading beauty photographers on platforms like Vogue Photography or Behance. Pay attention to how they present their work and the consistency of their aesthetic.
Frequently Asked Questions (FAQ)
What's the ideal lighting setup for textured skin? I recommend a large, soft, diffused light source (like a 5-foot octabox) positioned relatively close to the subject, slightly off-axis. This creates a beautiful, even wrap-around light that reveals texture without harshness. Supplement with a subtle fill or reflector if needed to lift shadows, but avoid flattening the face entirely.
Should I use a beauty dish for textured skin? A beauty dish can be excellent for textured skin, but with careful application. It produces a more directional, contrasty light than an octabox, which can emphasize texture more. I often use it with a diffusion sock or grid to soften its output and control spill. Position it slightly further back than an octabox to broaden its spread, or use it as a secondary light to add definition.
How do I prevent skin from looking oily in photos while maintaining a natural glow? This is a common challenge. It starts with the MUA using hydrating, non-greasy skincare and light, cream-based makeup. On set, have blotting papers or a powder puff with translucent powder ready. Target only the T-zone for blotting or light powder application to control shine, while allowing the rest of the face to maintain its natural luminosity. Good lighting also helps; avoid direct, specular reflections on oily areas.
Is it ever acceptable to completely smooth out some texture? In high-end beauty campaigns focused on authenticity, the goal is never to 'smooth out' texture completely. The aim is to refine and enhance. However, if a client specifically requests a very specific look that involves softening certain areas more than others (e.g., a very fine line that distracts from the product), it's a client-driven decision. Always prioritize open communication and manage expectations. My default is always to preserve authenticity.
What's the most common mistake photographers make when shooting textured skin? The most common mistake is either using harsh, uncontrolled lighting that exaggerates every imperfection, or conversely, attempting to 'fix' texture in post-production with aggressive smoothing. Both approaches fail to celebrate the skin's natural beauty. The solution lies in mastering on-set techniques – light, makeup, and posing – and adopting a respectful, minimal retouching philosophy.
Key Takeaways and Final Thoughts
Navigating the evolving landscape of beauty photography, especially when it comes to celebrating textured skin, requires a blend of technical mastery, artistic vision, and a deep respect for authenticity. It's a challenging yet incredibly rewarding niche that sets truly exceptional photographers apart.
- Embrace the Shift: Understand that authentic skin is not just a trend, but a fundamental shift in consumer demand.
- Master Lighting: Prioritize soft, diffused light and learn to use directional light for sculpting, not harshness.
- Collaborate with MUAs: Work closely to ensure makeup enhances, rather than hides, natural skin.
- Optimize Camera Settings: Choose appropriate lenses and settings (f/8-f/11, low ISO) for maximum detail and depth.
- Retouch with Respect: Adopt an 'invisible' retouching philosophy, preserving texture while refining imperfections.
- Build an Authentic Portfolio: Showcase your ability to capture real, beautiful skin.
Remember, your camera is not just a tool for capturing images; it's a powerful medium for storytelling. By learning how to photograph textured skin for high-end beauty campaigns with nuance and integrity, you're not just creating stunning visuals; you're contributing to a more inclusive, honest, and beautiful representation of humanity. Keep experimenting, keep learning, and let your unique vision shine through every pore and contour you capture.
Recommended Reading
- 7 Smart Moves: Elevate Your Casual Menswear Style Beyond Basics
- 7 Proven Strategies: Luxury Scarf Dead Stock Reduction Without Devaluation
- Unlocking the Secret: How Fashion Jewelry Trends Shape Design
- 5 Pillars: Choosing Contemporary Menswear for Professional Impact
- 7 Ways Unique Fashion Photos Drive Sales: A Pro's Guide to Impact


Your email address will not be published. Required fields are marked *