
How to Consistently Replicate Complex Costume Damage for Reshoots?
For over two decades in the demanding world of film and television, I've witnessed firsthand the sheer panic that ripples through a production when a reshoot is called for, and the crucial costume damage cannot be accurately replicated. It’s a continuity nightmare that can derail schedules, blow budgets, and ultimately, compromise the visual integrity of a story. I’ve seen countless hours wasted, and sometimes, entire scenes scrapped, all because the delicate art of controlled destruction wasn't meticulously documented and understood.
The problem isn't just about making something look 'damaged'; it's about making it look identically damaged, down to the last fray and smudge, across multiple takes, often weeks or months apart. This isn't just a technical challenge; it’s a storytelling imperative. Inconsistent damage breaks the audience's immersion, signaling a lack of attention to detail that can undermine the narrative's emotional weight. It's a pain point that many costume designers, prop masters, and continuity supervisors grapple with constantly.
This article isn't just a guide; it's a deep dive into the methodologies, materials, and mindset required to master this intricate process. I will share the frameworks, practical techniques, and expert insights I've developed and refined over years of trial by fire, ensuring that you can approach any complex costume damage replication with confidence, precision, and an unwavering commitment to visual continuity.
1. The Unseen Art of Pre-Visualization and Comprehensive Documentation
The foundation of consistent damage replication isn't built on guesswork; it's built on rigorous documentation. Before the first tear or splatter, a meticulous plan must be in place. I always emphasize that the real work begins long before the distressing materials even touch the fabric.
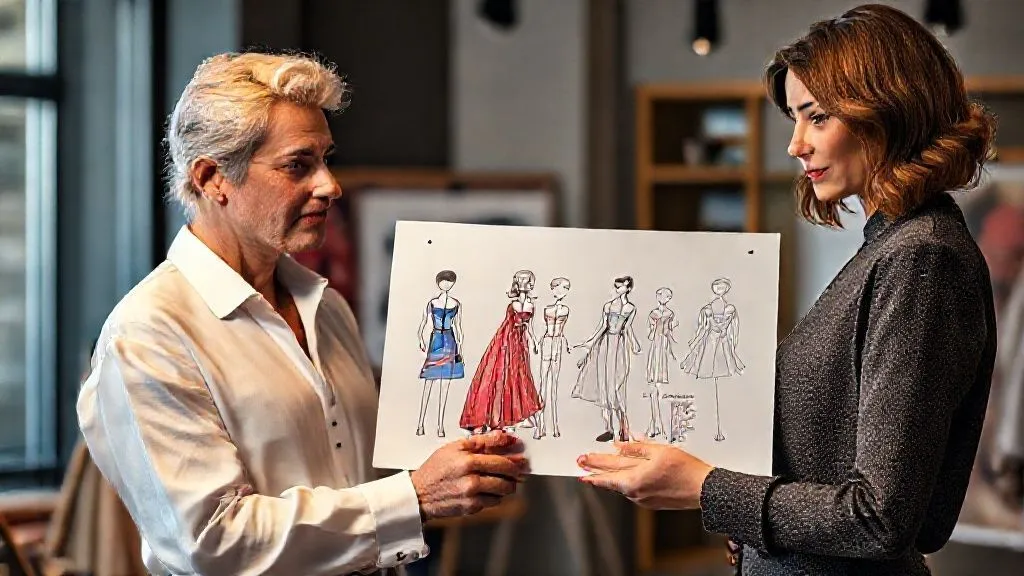
Establishing the Damage Narrative
Every piece of damage tells a story. Is it a fresh bullet hole, a week of desert wear, or the cumulative effect of a brutal fight? Understanding the narrative context of the damage is paramount. This informs the type, severity, and placement of every mark. I always start by asking: What happened to this costume? When did it happen? How did it happen? Who did it happen to?
The Power of Visual Records: Photography and Videography
Your best friend in damage replication is a camera. High-resolution photographs taken from multiple angles – front, back, sides, and detailed close-ups of every significant mark – are non-negotiable. I advocate for a 360-degree photographic record of the costume at every stage of its distressing, especially after significant damage events. Use a consistent lighting setup and a neutral background. Video walkthroughs, especially for complex, layered damage, can capture the way fabric hangs, moves, and reacts, which static photos often miss.

- Standardize Your Shots: Establish a consistent set of angles (e.g., full front, full back, left profile, right profile, 45-degree angles) for every costume.
- Detail Overviews: Capture macro shots of tears, stains, scuffs, and any unique wear patterns.
- Reference Scale: Include a ruler or a consistent scale object in detail shots to accurately gauge size.
- Lighting Consistency: Use the same lighting conditions for all documentation photos to avoid misleading shadows or highlights.
- Video Walkthroughs: Record short videos showcasing the costume from all angles, paying attention to how distressed elements move with the fabric.
The Damage Blueprint: Detailed Schematics and Notes
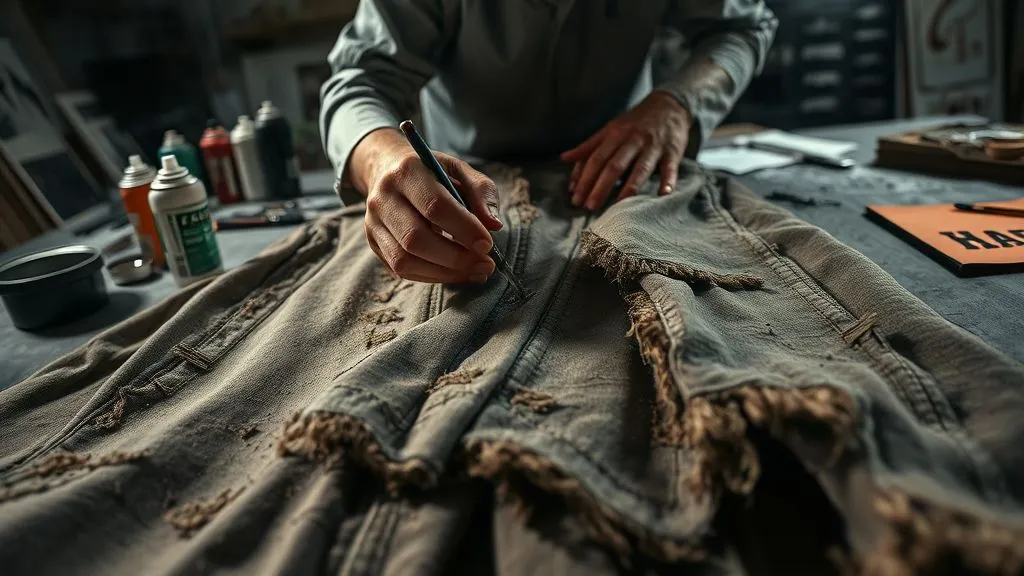
Beyond photos, a physical or digital schematic of the costume, marking all damage points, is crucial. This is your 'damage map'. I use a simple line drawing of the costume and meticulously annotate it with symbols and notes. For stains, note the color, texture, and approximate size. For tears, indicate length, direction, and whether the fibers are frayed or cleanly cut. This isn't just about 'where'; it's about 'how' and 'what'.
“In the realm of costume damage, the most potent tool in your arsenal isn't a power sander or a stain kit; it's the humble camera and a meticulously detailed notepad. Without comprehensive documentation, you're not replicating; you're guessing, and guessing is the enemy of continuity.”
Material and Process Logs
Crucially, document *how* the damage was achieved. What specific products were used (brand, color, dilution)? What tools (sandpaper grit, specific brushes, types of knives)? What techniques (spraying, rubbing, tearing)? This log becomes your recipe book for replication. If you used a specific mud mixture, record its components. If you applied a particular distressing spray, note the number of applications and drying time. This level of detail is what transforms a challenge into a solvable problem.
2. Crafting the Damage Blueprint: A Methodology for Consistency
Once the initial documentation is complete, the next step is to develop a systematic approach to the actual distressing. This isn't a free-for-all; it's a controlled, iterative process.
Layering Damage: The Sequential Approach
Real-world damage rarely happens all at once. It accumulates over time. I always teach a layered approach, simulating the sequence of events. First, general wear and tear (fading, softening). Then, specific event damage (a fresh tear, a blood splatter). This allows for a more organic and believable outcome. It also makes replication easier, as you can work through the layers in reverse or re-apply them in the correct order.
The Master Sample: Your Gold Standard
Create a 'master sample' of the damaged costume. This is the primary reference piece that all subsequent duplicates must match. This master should be handled with extreme care and locked away when not in use. It's the visual benchmark, the source of truth for all replication efforts. Sometimes, for heavily damaged hero costumes, we create multiple 'masters' at different stages of damage to accommodate sequential story beats.
| Damage Type | Technique Examples | Documentation Focus |
|---|---|---|
| General Wear & Tear | Sandpaper, fulling, fabric softener, light fading sprays | Overall texture, color shifts, softened edges |
| Event-Specific Tears/Holes | Razor blades, tearing against grain, controlled burning | Size, shape, fiber direction, surrounding stress marks |
| Stains & Grime | Fuller's earth, paint washes, mud mixtures, coffee/tea | Color, opacity, splatter patterns, absorption into fabric |
| Aging & Patina | Dyes, shoe polish, waxes, weathering powders | Subtle color shifts, sheen changes, accumulation in creases |
Calibration and Swatches
Before working on the actual costume duplicates, practice on identical fabric swatches. This allows you to calibrate your tools and techniques. If you're replicating a specific stain, create multiple swatches until you achieve a perfect match. Document the process for each successful swatch. This minimizes errors on the actual costume and builds confidence.
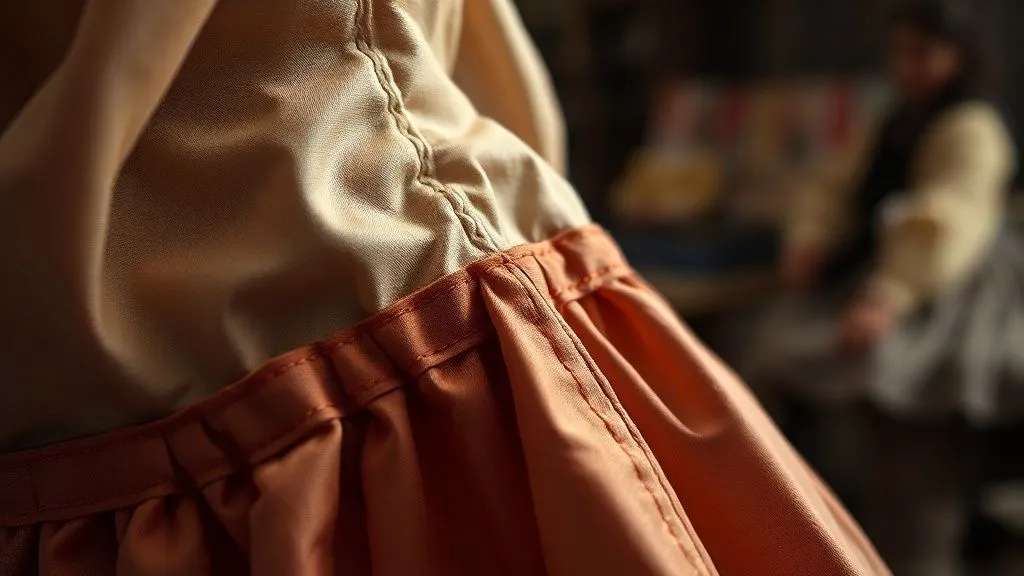
Case Study: The 'Battle-Scarred Knight's Tunic'
Case Study: How 'The Shadowed Citadel' Achieved Seamless Damage Continuity
During the production of the historical fantasy epic 'The Shadowed Citadel,' the lead character, Sir Kael, wore a distinctive leather tunic that accumulated significant damage over the course of the story – from a minor sword slash in act one to a heavily tattered, blood-splattered mess by the climax. The production faced the daunting task of several reshoots for key battle sequences, spanning different damage stages.
By rigorously applying the 'Damage Blueprint' methodology, the costume department achieved remarkable consistency. They started with an initial 'clean' tunic, then systematically applied layers of damage: first, subtle scuffs and dirt from weeks of travel, meticulously documented with 360-degree photos and material logs. Then, for a specific battle, a controlled sword slash was created, with its exact length, depth, and surrounding stress marks recorded in a digital schematic. For the final, heavily damaged version, a precise blood splatter pattern was mapped out, along with specific tears and mud applications, each step noted with product names, dilution ratios, and application methods.
When reshoots were ordered for a mid-story battle, the team referred to their detailed documentation. They were able to recreate the 'mid-damage' tunic with such precision that even the director couldn't discern it from the original footage. This adherence to a structured, documented process saved weeks of potential delays and ensured that Sir Kael's visual journey, complete with his battle scars, remained perfectly consistent, enhancing the film's gritty realism and audience immersion.
3. The Alchemy of Materials: Selecting the Right Tools for Destruction
The choice of materials and tools is as critical as the technique itself. Not all 'dirt' is created equal, and not all fabrics respond the same way to distressing. Your material palette must be extensive and well-understood.
Distressing Agents: Beyond Just 'Dirt'
I've seen costume designers use everything from coffee grounds to artist's pigments. The key is knowing what each agent does. Fuller's earth and various scenic dusts are excellent for dry, dusty environments. Acrylic paints, heavily diluted, can create convincing mud or blood stains. Fabric dyes can achieve sun-faded effects or watermarks. Always test on scrap fabric first. Consider permanence: some damage needs to be washable, others permanent.

Tools of the Trade: From Subtle to Severe
Your toolkit should be diverse. Sandpaper (various grits) for abrasion, wire brushes for fraying, cheese graters for aggressive wear, razor blades for precise cuts, and even heat guns for subtle singeing or fabric manipulation. Each tool leaves a unique 'signature' on the fabric, and understanding these signatures is crucial for accurate replication.
Understanding Fabric Reactions
Different fibers react differently to damage. Natural fibers like cotton and linen fray easily and absorb stains readily. Synthetics can melt, pill, or resist stains. Leather scuffs, scratches, and develops a patina. Always consider the base material when planning your distressing strategy. A technique that works on denim will likely fail on silk.
4. Layering the Narrative: Simulating Wear, Tear, and Trauma
True costume damage isn't just a single event; it's a history. Mastering the art of layering damage creates a believable and replicable result.
General Wear and Tear: The Baseline
Start with the baseline: general wear. This includes softening of the fabric, subtle fading from sun or washing, slight pilling, and minor scuffs. These are the cumulative effects of everyday use. Techniques here include repeated washing, tumbling with abrasive materials (like tennis balls), light sanding, and fabric softeners. This establishes the 'age' of the garment before specific events occur.
Specific Event Damage: Precision and Impact
Once the baseline wear is established, move to specific event damage. This is where your documentation from Section 1 becomes vital. Replicating a specific tear requires matching its length, direction, and the way the fibers break. For stains, match the color, saturation, and splatter pattern. This often involves precise application using brushes, sponges, or even custom stencils for complex patterns.
“Think of costume damage as geological strata. Each layer tells a story of a different epoch. To replicate accurately, you must understand the sequence of these events, applying them in the correct order to build a believable visual history.”
The Art of Weathering: Environmental Effects
Beyond wear and tear, costumes interact with their environment. Mud, dust, rain, sweat, and scorch marks all leave distinct traces. For mud, consider its consistency (wet, dry, caked). For dust, think about accumulation in creases and crevices. According to industry veteran The Costume Designers Guild, understanding the physics of these environmental interactions is key to authentic weathering.
- Start Light, Build Up: Always begin with less damage than you think you need. It's easier to add more than to remove it.
- Work in Stages: Apply one type of damage, document it, then move to the next. This allows for precise replication.
- Use Reference Photos Constantly: Compare your work to the master sample and reference photos at every step.
- Consider Gravity and Movement: Damage should look natural. Dirt accumulates downwards, tears occur at stress points.
5. The Digital Ally: Leveraging Technology for Precision
While distressing is a hands-on craft, modern technology offers invaluable tools for accuracy and consistency, especially when dealing with complex or subtle damage.
Digital Overlay and Comparison
One of my favorite techniques involves digital overlay. After photographing a damaged costume, take a photo of the duplicate in the exact same position and lighting. Overlay the two images in Photoshop or a similar program. Adjust the transparency to quickly spot discrepancies in tears, stains, or wear patterns. This visual feedback is incredibly powerful for fine-tuning replication.
3D Scanning and Mapping
For extremely complex, sculptural damage, 3D scanning can be a game-changer. A high-resolution 3D scan of a damaged costume can capture every wrinkle, tear, and deformation. This data can then be used to create physical molds or even guide robotic distressing for multiple duplicates, ensuring absolute consistency. While costly, for hero costumes with intricate damage that needs to be replicated dozens of times, it's an investment that pays off.

AI-Assisted Damage Analysis (Emerging Technology)
While still in its nascent stages, AI is beginning to be explored for damage analysis. Imagine an AI that can analyze your master damage photos and suggest the most effective tools and techniques for replication, or even identify minute inconsistencies in your duplicates. This is the future of hyper-accurate costume damage replication, promising unprecedented levels of consistency.
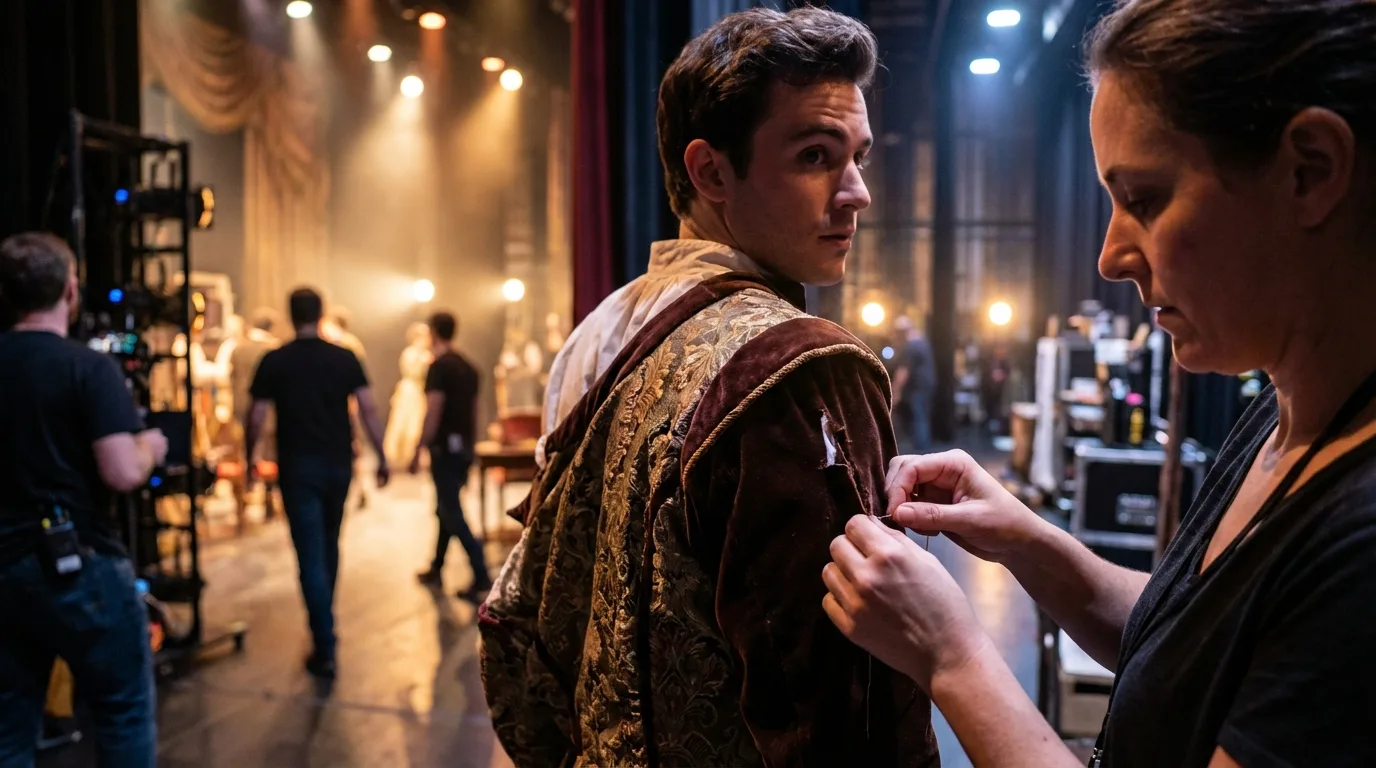
6. On-Set Vigilance: Maintaining Continuity Under Pressure
Even with perfect replication, on-set conditions can introduce new challenges. The continuity team plays a pivotal role in ensuring that the meticulously crafted damage remains consistent throughout filming.
The Continuity Bible: Beyond Just Photos
The costume continuity bible should be a living document, constantly updated. It's not just a collection of photos; it includes detailed descriptions of how the costume should look in each scene, specific damage notes, and even instructions for how actors should interact with the damaged elements. For instance, if a tear in a sleeve is meant to expose a specific part of the arm, that detail must be noted.
Daily Checks and On-Set Repair Kits
Before each take, and especially after action sequences, the costume must be checked against the reference photos. A dedicated on-set damage kit, containing small amounts of all the distressing materials used, is essential for quick touch-ups. This kit should be as organized and documented as your main distressing station. This proactive approach prevents small inconsistencies from escalating into major problems.
“On set, time is a relentless tyrant. Your ability to quickly and accurately assess and touch up costume damage can be the difference between a smooth day and a costly delay. Preparation is your shield against chaos.”
Collaboration with Hair, Makeup, and Props
Costume damage rarely exists in a vacuum. It often needs to align with special effects makeup (e.g., a wound on the skin aligning with a tear in the fabric), hair (e.g., mud splatters), and props (e.g., a weapon that caused a specific tear). Seamless communication and collaboration between these departments are vital for overall visual continuity. A shared damage schematic can be incredibly helpful.
7. Post-Production Harmony: When Damage Meets VFX
Sometimes, damage is augmented or entirely created in post-production. Understanding this synergy is crucial for costume designers, as practical damage often serves as a base for digital enhancements.
Providing Practical Bases for VFX
Even if a blood splatter or a major tear will be enhanced or replaced by VFX, a practical base is often preferred. This gives the visual effects team a realistic foundation to work from, ensuring that the digital elements integrate seamlessly with the physical costume. Communicate early and often with the VFX supervisor about what practical damage is needed and what will be digital.
Color and Texture Matching for Digital Integration
When VFX is involved, the practical damage needs to be meticulously matched in terms of color, texture, and light reflection. This means using specific distressing materials that photograph well and provide good data for the VFX team. For instance, using non-reflective 'blood' for practical applications if the digital blood will have a specific sheen.
| Scenario | Practical Approach | VFX Integration |
|---|---|---|
| Minor Scuffs on Leather Armor | Fine sandpaper, leather wax, documentation with macro photos | Enhance depth, add subtle glints, track movement |
| Large Tear in Fabric, Exposing Flesh | Controlled tearing, fabric manipulation, base layer of 'skin' fabric | Digital wound application, blood spatter, realistic flesh movement |
| Mud-Caked Boots and Trousers | Real mud mixture, Fuller's earth, layering techniques | Add dynamic mud splashes, environmental interaction, subtle texture mapping |
| Bullet Hole with Charred Edges | Controlled burning, small tears, dark pigment around hole | Smoke simulation, internal damage effects, realistic light interaction |
Understanding VFX Limitations and Capabilities
As a costume designer, I find it beneficial to understand the capabilities and limitations of VFX. Sometimes, a complex practical effect is more efficient than a digital one, and vice-versa. A clear understanding of the full production pipeline, from practical application to digital enhancement, leads to more coherent and effective results. This collaborative spirit, as emphasized by publications like The Hollywood Reporter, is key to modern filmmaking.
8. Troubleshooting Common Pitfalls in Damage Replication
Even with the best intentions, things can go wrong. Here are some common issues and how to address them.
Problem: Inconsistent Color or Saturation of Stains
Solution: This often stems from inconsistent mixing ratios or application methods. Always measure your ingredients precisely (e.g., '2 parts water to 1 part pigment'). For application, use consistent tools (e.g., always a specific brush or spray setting). If a stain looks too light, re-apply in thin layers, drying between each, until the desired saturation is reached. If too dark, consider a very light wash with a diluted solvent (test first!).
Problem: Tears or Frays Don't Match Exactly
Solution: This is where your detailed photo documentation and schematics are indispensable. Compare the original tear's length, width, and the direction of the frayed fibers. Use the exact same tools (e.g., specific razor blade, same grit sandpaper). For complex tears, creating a small, disposable stencil from the original tear can guide your cutting on duplicates. Remember, fabric grain plays a huge role; tearing with or against the grain yields different results.
Problem: Damage Looks 'Applied' Rather Than Organic
Solution: This usually means you've skipped the layering process or haven't considered natural accumulation. Real damage isn't perfectly symmetrical or evenly distributed. Focus on gravity (dirt settles downwards), friction points (elbows, knees, shoulders), and environmental effects. Integrate damage with the costume's natural folds and creases. Step back frequently to assess the overall effect rather than focusing too much on individual marks. Reference real-world examples of aged garments.
Problem: Time Constraints on Set for Reshoots
Solution: Prevention is key here. Your on-set kit should be organized for rapid deployment. Pre-mix common solutions (e.g., 'mud' or 'blood' mixtures) in clearly labeled containers. Have duplicates of heavily damaged items ready and prepped to the appropriate damage stage. Communicate any potential challenges to the 1st AD well in advance. Sometimes, a 'good enough' touch-up is better than holding up production for perfection, but this is a judgment call that comes with experience and clear communication with the director and continuity supervisor.
Frequently Asked Questions (FAQ)
Question? What's the most common mistake costume designers make when trying to replicate complex damage?
Answer: In my experience, the single biggest mistake is insufficient documentation. People rely too much on memory or a few quick photos. Without a comprehensive, multi-angle photographic record, detailed schematics, and a precise log of materials and techniques used, replication becomes an educated guess. The second mistake is not understanding the layered nature of damage; they try to apply all damage at once instead of building it up sequentially, which results in a less organic and harder-to-replicate look.
Question? Are there any specific safety considerations when distressing costumes, especially with chemicals or sharp tools?
Answer: Absolutely. Safety is paramount. Always work in a well-ventilated area, especially when using sprays, dyes, or solvents. Wear appropriate personal protective equipment (PPE) such as gloves, masks, and safety glasses. When using sharp tools like razor blades or wire brushes, always cut away from your body and use a stable, protected work surface. Read all product labels for chemical safety warnings. Proper training in tool use is also essential. Never rush when handling dangerous materials or tools.
Question? How do I manage damage replication for multiple identical costumes worn by background actors or stunt doubles?
Answer: This is where standardization and efficiency become critical. For background, you might not need the same level of micro-detail as a hero costume, but consistency is still important. Create a 'damage matrix' or a quick-reference guide. For stunt doubles, ensure their costumes match the hero costume at the exact damage stage for their scene. Often, this means having multiple pre-damaged stunt costumes. Utilize the swatch calibration method extensively, and consider creating small, reusable stencils for repetitive damage patterns (e.g., dirt splatters, specific tears) to speed up the process for many duplicates.
Question? What's the best way to handle damage that needs to change or 'evolve' throughout a scene or film?
Answer: This requires a proactive and highly organized approach. You'll need multiple versions of the costume, each representing a distinct stage of damage. For example, 'Costume A: Pre-Fight', 'Costume B: Mid-Fight', 'Costume C: Post-Fight'. Each stage needs its own complete set of documentation. On set, a meticulous continuity supervisor will track which costume is used for which shot. For continuous takes where damage happens on screen (e.g., a shirt tearing), this often involves hidden pre-scored areas or breakaway fabrics, requiring close collaboration with special effects and the actor. This is a complex dance between preparation and execution. Further insights can be found in resources like Variety's production guides.
Question? Are there any eco-friendly or sustainable approaches to costume distressing?
Answer: Definitely. The industry is moving towards more sustainable practices. Look for non-toxic and biodegradable distressing agents. Instead of harsh chemical dyes, explore natural dyes or pigments derived from plants or minerals. Opt for water-based paints and cleaners. Reusing and repurposing fabrics for distressing tests instead of always using new materials is also a good practice. Furthermore, consider the longevity of your distressing materials; choosing durable, long-lasting products reduces waste from constant reapplication. Supporting companies that prioritize sustainable manufacturing of textile art supplies is also beneficial.
Key Takeaways and Final Thoughts
- Documentation is King: Meticulous photos, schematics, and material logs are the bedrock of consistent replication.
- Layer, Don't Lump: Build damage sequentially, reflecting the narrative of wear and trauma.
- Calibrate & Practice: Use swatches to perfect techniques before touching hero costumes.
- Leverage Technology: Digital overlays and 3D scanning offer unparalleled precision.
- Maintain On-Set Vigilance: A prepared continuity team and an organized kit prevent last-minute crises.
- Collaborate Widely: Seamless communication with VFX, makeup, and props ensures holistic continuity.
- Anticipate & Troubleshoot: Understand common pitfalls and have strategies in place to address them.
Mastering the replication of complex costume damage for reshoots is more than a technical skill; it's an exercise in patience, precision, and proactive planning. It's about honoring the story and ensuring that every visual detail, no matter how small or destructive, contributes to the overall authenticity of the film. By adopting these systematic approaches and embracing a meticulous mindset, you'll not only solve a perennial production headache but also elevate the visual storytelling on every project you undertake. Go forth and create consistent, believable cinematic worlds!
Recommended Reading
- Transforming Tradition: 7 Steps to Modernize Your Bridal Gown Fit
- Mastering Avant-Garde Haute Couture: 7 Steps to Precise Vision Execution
- 7 Sharp Strategies: Ditching Sloppy for Polished Networking Casual
- Verifying True Textile Sustainability: 7 Critical Steps for Innovation
- 7 Pro Steps: Prevent Razor Burn & Ingrown Hairs for Daily Shaving


Your email address will not be published. Required fields are marked *