
How to Authenticate a Disputed Pre-1900 Historical Garment?
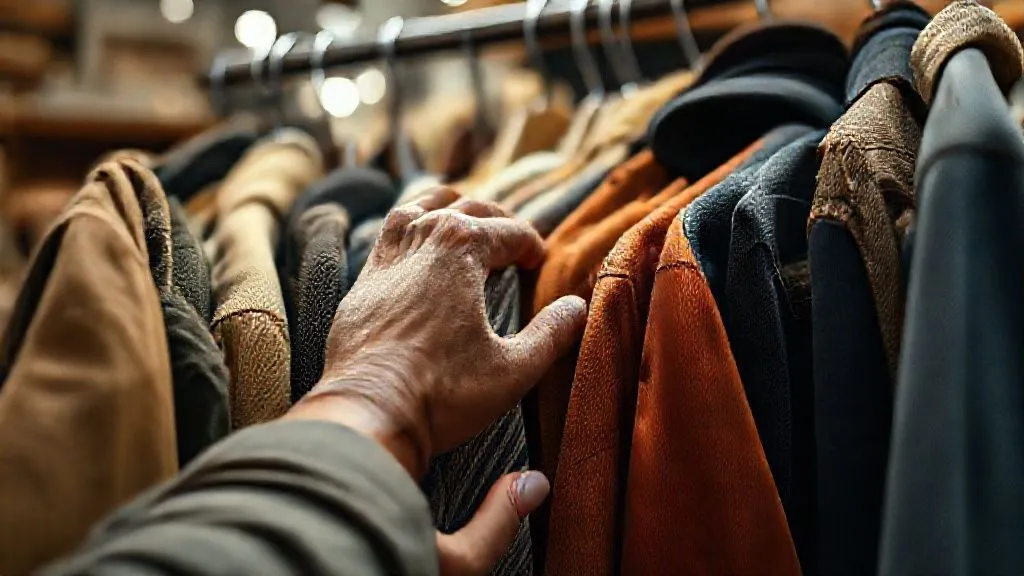
For over two decades in the vintage fashion and textile conservation world, I've witnessed firsthand the passion and pitfalls that come with collecting and valuing pre-1900 historical garments. The thrill of discovering a truly old piece is immense, but the heartbreak of a misattribution or a clever forgery can be devastating, both emotionally and financially. I've been called in countless times to mediate disputes, to settle arguments between collectors, dealers, and institutions over the authenticity of what purports to be a genuine relic from a bygone era.
The problem isn't just about identifying a fake; it's about navigating a labyrinth of historical evidence, textile science, and construction techniques that are often poorly understood by the untrained eye. Many enthusiasts, even seasoned ones, struggle with the nuances of dating, material identification, and interpreting the subtle clues that scream 'authentic' or 'reproduction.' The stakes are high: reputation, investment, and the accurate preservation of history itself hinge on reliable authentication.
That's precisely why I've distilled my years of experience into this definitive guide. You’re not just going to learn theoretical facts; I’m going to walk you through a rigorous, actionable framework – a 7-step process – that I personally employ to cut through the noise and establish the true historical identity of a disputed pre-1900 garment. From the initial visual assessment to advanced scientific analysis and meticulous provenance research, you will gain the expert insights needed to confidently authenticate even the most challenging pieces.
The Foundation: Why Authentication is Crucial in Vintage Fashion
Before we dive into the 'how,' it’s vital to understand the 'why.' Authentic pre-1900 garments are not merely old clothes; they are tangible links to our past, offering insights into societal norms, technological advancements, economic conditions, and artistic expressions of their time. Their value, both cultural and monetary, is inextricably tied to their authenticity.
A misidentified garment can mislead historical research, devalue a collection, or lead to significant financial loss. In my work, I've seen institutions unknowingly display fakes, and collectors pay exorbitant sums for pieces that were, at best, clever reproductions. The integrity of the vintage market and the accuracy of historical narratives depend on our ability to discern the real from the fabricated. This isn't just a technical exercise; it's an ethical imperative for anyone involved with historical textiles.
"Authenticity is the bedrock of historical value. Without it, a relic is merely an object, stripped of its narrative power and its connection to human experience."
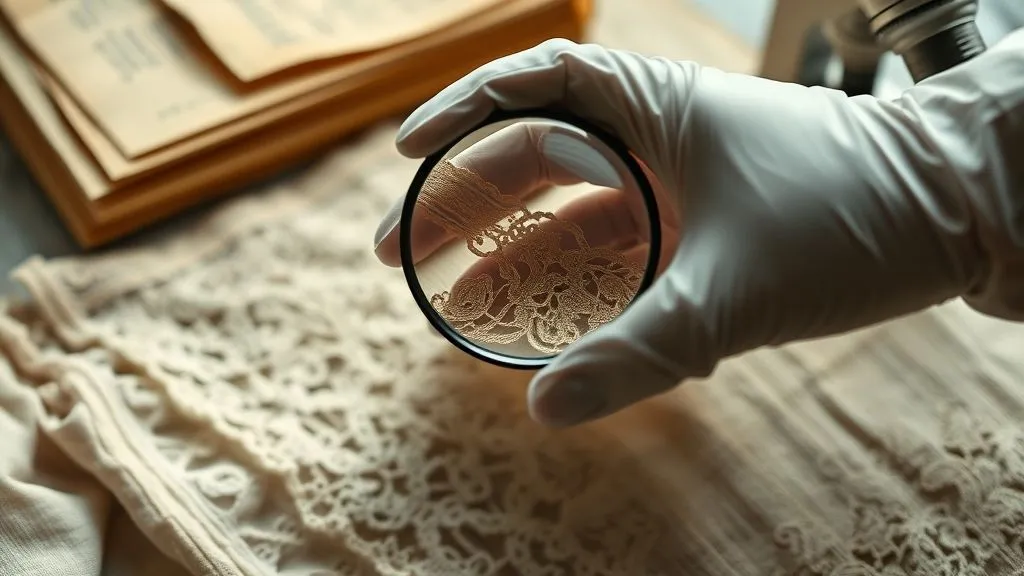
Step 1: The Art of Visual Inspection – A First Look at Authenticity
The first and often most telling step in authenticating a pre-1900 garment is a thorough visual inspection. This isn't a quick glance; it's a methodical examination, almost forensic in its detail. You need keen observation skills and a deep understanding of period-specific details.
Examining Fabric and Weave
Pre-1900 textiles often have characteristics distinct from their modern counterparts. Natural fibers like cotton, linen, wool, and silk were dominant. Look for:
- Hand-spun vs. Machine-spun yarns: Earlier periods often feature irregularities in hand-spun yarns.
- Weave consistency: Hand-woven fabrics may show slight imperfections or variations compared to later machine-woven textiles.
- Fiber type: Synthetics like rayon, nylon, or polyester are immediate red flags for anything purporting to be pre-20th century.

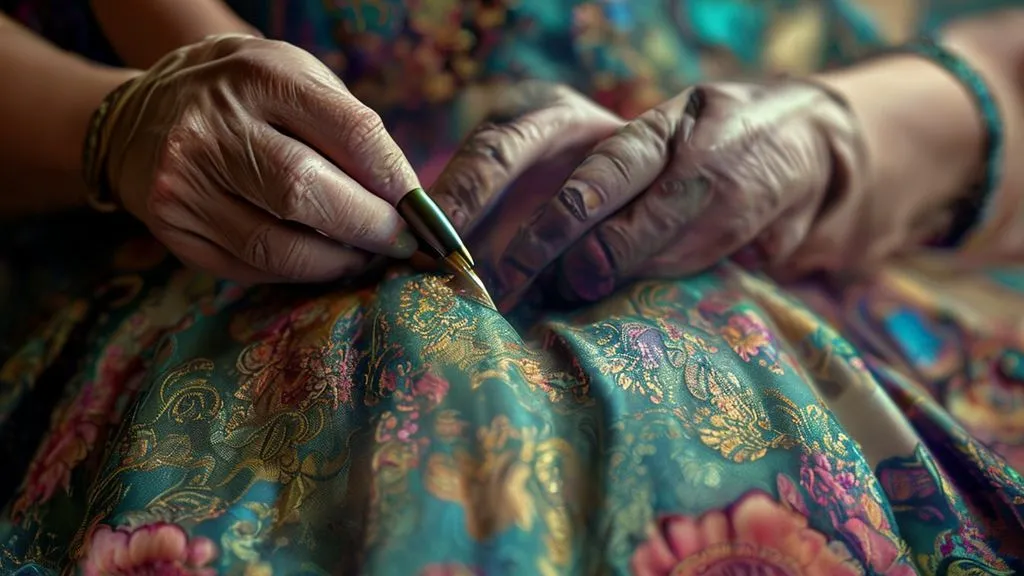
Assessing Construction Techniques and Seams
The way a garment is constructed reveals a wealth of information. Before the widespread advent of sewing machines, hand-stitching predominated. Even after machines became common, specific techniques persisted.
- Hand-stitching: Look for tiny, even stitches, especially on seams, hems, and decorative elements. The thread might be silk, linen, or cotton.
- Seam finishes: Early seams were often raw or simply felled (folded over and stitched) rather than serged or overlocked, which are modern finishes.
- Pattern pieces: Garments from earlier periods might feature more complex pattern pieces to economize on fabric, or simpler, more geometric cuts before tailoring became highly refined.
Hardware and Fastenings: Buttons, Zippers (or lack thereof), Hooks
Fastenings are critical dating clues. Zippers, for instance, were patented in the late 19th century but didn't become widely adopted in clothing until the 1930s. Their presence on a supposed 1850s gown is a definitive indicator of a reproduction or later alteration.
Conversely, buttons, hooks and eyes, and lacing systems evolved significantly. Buttons might be made from shell, bone, wood, glass, or early plastics (like Bakelite, post-1907). Their attachment method is also important; early buttons were often hand-sewn with specific stitches.
| Fastening Type | Common Period | Authenticity Clues |
|---|---|---|
| Lacing (Corsetry, Bodices) | 16th - early 20th C. | Hand-stitched eyelets, natural fiber laces, specific lacing patterns. |
| Hooks and Eyes | 18th - early 20th C. | Small, often handmade metal hooks, hand-sewn attachment, specific shapes for period. |
| Buttons (Shell, Bone, Wood, Metal) | Pre-1900 (various) | Material, hand-sewn attachment, period-specific designs, no plastic. |
| Zippers | Post-1900 (rarely pre-1930s in clothing) | Presence on pre-1900 garment is usually a red flag; examine zipper type if present. |
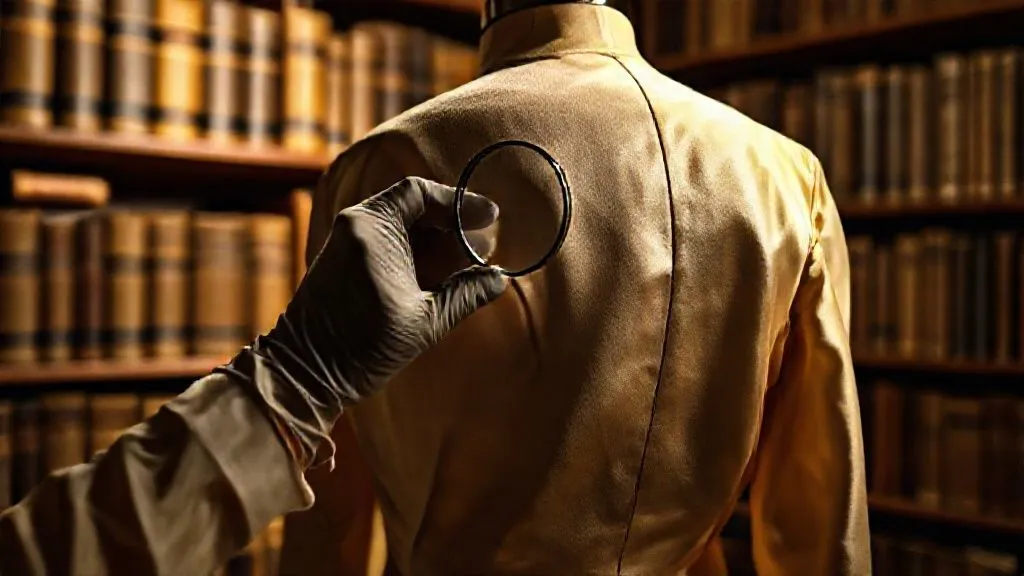
Lining and Internal Structure
Examine the garment's interior. Linings were often made from different, less expensive fabrics (e.g., cotton or linen for a silk outer garment). The way they are inserted, finished, and padded (if applicable for shaping) can provide significant clues about the period and construction practices. Padding, boning (whalebone or steel), and interlinings were used extensively for shaping in many pre-1900 silhouettes.
Step 2: The Science of Material Analysis – Beyond the Naked Eye
While visual inspection is powerful, scientific material analysis provides irrefutable evidence. This often requires specialized tools and expertise, but understanding the principles is key.
Fiber Identification: Microscopy and Burn Tests
Accurate fiber identification is paramount. Synthetics are a dead giveaway for post-WWII items. Natural fibers can be differentiated through:
- Microscopy: Examining fibers under a microscope reveals their unique cellular structures (e.g., cotton's twisted ribbon, wool's scales, silk's smooth rod).
- Burn Test: A small, inconspicuous fiber sample can be burned. Natural fibers have distinct burn characteristics (smell, ash residue) compared to synthetics. This should only be done by an expert on a tiny, non-critical sample.
As The Victoria & Albert Museum, a global authority on textiles, frequently emphasizes in their conservation guides, understanding the inherent properties of historical fibers is fundamental to their preservation and authentication.
Dye Analysis: Uncovering Historical Pigments
Dye chemistry changed dramatically over time. Before the mid-19th century, natural dyes (e.g., indigo, madder, cochineal) were used. The discovery of synthetic aniline dyes in 1856 revolutionized textile coloring. Their presence can pinpoint a garment to the latter half of the 19th century or later.
- Spectroscopy: Advanced techniques like FTIR (Fourier-transform infrared spectroscopy) or HPLC (High-performance liquid chromatography) can identify specific dye molecules.
- Color saturation and fading: Natural dyes often fade differently and have a distinct saturation compared to early synthetic dyes, which can sometimes appear unnaturally vibrant or degrade in unique ways.
Thread Count and Weave Patterns
The density of threads (thread count) and the specific weave pattern can also be indicative of a period. Certain weaves were more prevalent in specific eras due to available technology or fashion trends. For instance, extremely fine, high-thread-count cottons became more common with industrialization.
Step 3: Unraveling Provenance – The Garment's Story
Provenance, the documented history of ownership, is often the most compelling evidence for authentication. It builds a chain of custody that supports a garment's age and origin.
Tracing Ownership and Documentation
Seek out any records associated with the garment:
- Sales receipts or invoices: Especially from reputable dealers or auction houses.
- Family histories: Letters, diaries, photographs, or oral traditions that link the garment to a specific individual or event.
- Museum accession records: If it was ever part of a collection.
Even if documentation is sparse, every piece of the puzzle helps. A garment with a well-documented history from a single, verifiable source is far more trustworthy than one with an obscure past.
The Importance of Contextual Evidence
Contextual evidence involves placing the garment within its historical setting. Does its style align with known fashion plates, paintings, or photographs from the purported period? Are there any labels or markings? While labels are less common on pre-1900 garments, some tailors or dressmakers did use them, particularly in the later 19th century. Researching these names can provide valuable corroboration.
Case Study: The Disputed Regency Gown
Case Study: Verifying the 'Regency Ball Gown'
A prominent collector acquired a white muslin gown, presented as an early 19th-century Regency ball gown. The seller provided a compelling, yet vague, narrative about it belonging to an aristocratic family. However, a dispute arose when a competing dealer questioned its authenticity, citing unusual seam finishes.
I was brought in to authenticate. My initial visual inspection revealed the muslin fabric was indeed period-appropriate, and the overall silhouette matched Regency styles. However, upon closer examination, I noted the machine-stitched seams were remarkably even and consistent, almost too perfect for the early 1800s. While sewing machines existed in rudimentary forms, their widespread use for such fine finishing on a 'ball gown' was highly improbable.
Further investigation into the provenance yielded no concrete documentation beyond the seller's story. Cross-referencing fashion plates from the 1810-1820 period showed subtle discrepancies in the sleeve construction and bodice detailing compared to the disputed gown. A microscopic fiber analysis confirmed it was cotton, but dye analysis was inconclusive due to the white fabric.
The conclusive evidence came from an examination of the thread: while cotton, it was machine-spun with a very tight, uniform twist typical of much later industrial production, not hand-spun or earlier machine-spun threads common in the Regency era. My final assessment was that while the garment was a beautiful and well-made reproduction, likely from the early to mid-20th century, it was not an authentic Regency piece. The collector, though disappointed, appreciated the thorough, evidence-based approach that resolved the dispute.
Step 4: Style, Silhouette, and Period-Specific Details
Fashion history is a detailed chronology of evolving styles. A deep knowledge of these changes is indispensable.
Matching Fashion Eras to Garment Design
Every era has its distinct silhouette, sleeve shapes, necklines, skirt volumes, and embellishment trends. For example, the voluminous crinolines of the 1850s-60s gave way to the bustles of the 1870s-80s, and then the more natural, S-bend silhouette of the 1890s. Does the garment's overall design align perfectly with a specific decade or period? Even subtle deviations can signal a reproduction or a later alteration.

Identifying Anachronisms
An anachronism is an object or detail that doesn't belong to the time period in which it's placed. These are often the easiest ways to spot a fake:
- Modern stitching: Overlocking, zigzag stitches (unless specifically for buttonholes), or highly uniform machine stitching on early pieces.
- Modern materials: Synthetics, plastic buttons, modern elastic.
- Period-inconsistent design elements: A zipper on an 18th-century coat, or a low-slung waist on an Empire-era gown.
"The devil is in the details, and for historical garments, anachronisms are often the loudest whispers of deceit."
Step 5: Wear, Patina, and Damage – Interpreting the Marks of Time
Genuine age leaves genuine marks. Understanding how textiles age and wear is crucial.
Distinguishing Genuine Wear from Artificial Aging
Authentic wear patterns are typically localized to areas of friction (cuffs, collars, hems, underarms) and reflect the way a garment was used. Fading will be uneven, often more pronounced where exposed to light. Artificial aging, on the other hand, often looks too uniform, or deliberately distressed in unlikely places. Chemical treatments to yellow fabric can leave a tell-tale stiffness or odor. A true patina of age is subtle, organic, and reflects decades or centuries of interaction with its environment. The Metropolitan Museum of Art's extensive textile conservation efforts frequently highlight the unique degradation patterns of truly aged materials.
Repairs and Alterations: Clues to a Garment's History
Most pre-1900 garments were valuable and often repaired or altered to extend their lifespan or adapt to changing fashions. These repairs themselves can be historical documents. Look for:
- Period-appropriate repairs: Hand-darning, patches from similar aged fabric, or seams taken in or let out with techniques consistent with the garment's purported era.
- Later alterations: If a garment was altered in a later period (e.g., a Victorian gown shortened in the 1920s), the alteration itself might use modern materials or techniques, but the core garment remains authentic. This adds to its story, rather than detracting from its age.
Step 6: Expert Consultation and Collaborative Review
No single individual knows everything. When faced with a complex or highly valuable disputed garment, collaboration is key.
When to Bring in the Specialists
If your initial investigations leave you with doubts, or if the financial and historical stakes are high, it’s time to consult:
- Textile conservators: For scientific analysis of fibers, dyes, and construction.
- Fashion historians: For expert opinions on style, silhouette, and period context.
- Specialized appraisers: Those with deep experience in antique textiles and costumes.
- Academic researchers: Who may have access to obscure archives or specific knowledge of a niche period or region.
I often collaborate with colleagues from different specializations to build a comprehensive picture. For instance, a fabric expert might confirm the fiber content, while a costume historian dates the cut, and a conservator assesses the wear patterns. This multi-disciplinary approach strengthens the authentication process significantly.
Building a Network of Trust
Cultivate relationships with reputable dealers, collectors, and academic institutions. Attend conferences, join professional organizations, and read scholarly publications. The Costume Society of America, for example, is an excellent resource for connecting with experts and staying abreast of research. A strong network provides invaluable resources for peer review and access to specialized knowledge that can make or break an authentication.
Step 7: Documentation and Reporting Your Findings
The authentication process isn't complete until your findings are thoroughly documented. This report serves as a record of your work and provides transparency.
Creating a Comprehensive Authentication Report
Your report should include:
- Detailed description: Including measurements, materials, construction details, and condition.
- Photographic evidence: High-resolution images of the entire garment, close-ups of key details (seams, fastenings, wear), and any anomalies.
- Analysis of findings: Summarize your observations from visual inspection, scientific tests (if performed), provenance research, and stylistic analysis.
- Conclusion: A clear statement on the garment's authenticity, dating, and any reservations or areas requiring further research.
- Sources cited: Any historical documents, expert opinions, or scholarly articles referenced.
This report becomes a vital document for the garment’s future, whether for insurance, sale, or museum accession. It reflects the rigor and expertise applied to the authentication process.
Ethical Considerations in Disputed Authenticity
Authenticating a disputed garment carries significant ethical responsibilities. Always remain objective, base your conclusions solely on evidence, and be transparent about any limitations in your assessment. It's crucial to separate personal bias or emotional attachment from the scientific and historical facts. My role, as an expert, is to present the truth, even when it's not what a client wishes to hear. This commitment to integrity is the bedrock of trust in our field. As leading conservation science institutes often emphasize, meticulous, unbiased documentation is paramount for ethical practice.
Frequently Asked Questions (FAQ)
Q: Can a single anachronism always deem a garment inauthentic? A: Not always. While a major anachronism (like a zipper on a 17th-century gown) is a strong indicator of inauthenticity, minor anachronisms could sometimes be due to later, period-appropriate repairs or alterations. For example, a button replaced with a slightly later style. The key is to assess the significance and context of the anachronism within the garment's overall construction and evidence.
Q: How reliable are burn tests for fiber identification, and are they safe? A: Burn tests can be very reliable for differentiating major fiber groups (e.g., natural cellulose, natural protein, synthetics) by their smell, flame behavior, and ash. However, they are destructive and should only be performed by a trained professional on a tiny, non-visible fiber sample. For absolute certainty, microscopic analysis or more advanced chemical tests are preferred.
Q: What if a garment has no provenance documentation at all? A: While ideal, strong provenance is not always available for very old pieces. In such cases, the authentication relies more heavily on meticulous material analysis (fibers, dyes, construction), stylistic comparison, and wear patterns. It requires a greater degree of expertise and cross-referencing against known historical examples, but a lack of provenance does not automatically mean a garment is inauthentic.
Q: How do I distinguish between a genuine antique garment and a high-quality reproduction made with period techniques? A: This is one of the most challenging aspects. High-quality reproductions might use period fabrics and hand-stitching. The distinction often lies in subtle details: the genuine patina of age, the specific thread types (even hand-spun threads have variations over time), the subtle degradation of dyes, and microscopic signs of wear that are incredibly difficult to replicate artificially. This is where scientific analysis and expert opinion become indispensable.
Q: Are all repairs considered detrimental to a garment's authenticity or value? A: Absolutely not. Period-appropriate repairs can actually enhance a garment's story and demonstrate its use and value over time. Extensive or poorly executed modern repairs might detract from its aesthetic or historical integrity, but many repairs are simply part of the garment's life cycle and are expected on pieces of significant age.
Key Takeaways and Final Thoughts
- Adopt a Multi-Faceted Approach: No single piece of evidence is usually enough. Combine visual inspection, material science, provenance research, and stylistic analysis.
- Prioritize Detail: The smallest thread, stitch, or button can hold the most significant clues. Train your eye for the minutiae.
- Leverage Expertise: Don't hesitate to consult specialists. Authentication is a collaborative endeavor that benefits from diverse knowledge.
- Document Everything: A thorough report validates your findings and contributes to the garment's ongoing historical record.
- Embrace the Challenge: Authenticating pre-1900 garments is a complex but incredibly rewarding journey into history.
Authenticating a disputed pre-1900 historical garment is more than just identifying an object; it's about piecing together a narrative, preserving a fragment of the past, and ensuring the integrity of our historical understanding. It demands patience, precision, and an unyielding commitment to factual evidence. By following these 7 expert steps, you'll not only resolve disputes but also deepen your appreciation for the intricate beauty and profound stories held within these irreplaceable textile treasures. Keep learning, keep questioning, and continue to safeguard the genuine echoes of history.
Recommended Reading
- 7 Proven Ways: Build Buyer Trust for Authentic 1920s Vintage Pieces
- 7 Proven Strategies: Preventing Smart Clothing Sensor Failure During Repeated Washing
- Safeguarding Haute Couture: 7 Strategies to Prevent Heritage Technique Erosion
- Unlock the Secret: How to Achieve Natural Perfect Skin Beauty Photos
- 7 Master Steps: Invisibly Repairing Haute Couture Hand-Sewn Details


Your email address will not be published. Required fields are marked *