
How to invisibly repair haute couture hand-sewn details?
For over twenty-five years, I've had the distinct privilege of working with some of the world's most exquisite garments, from archival pieces to contemporary runway creations. In this rarefied world, a loose bead, a snagged thread, or a tiny tear isn't just a flaw; it's a potential tragedy that can diminish the value, artistry, and very soul of a haute couture piece. I've witnessed the despair in clients' eyes when a cherished garment suffers even the smallest imperfection, understanding that these aren't just clothes, but wearable art, imbued with countless hours of human skill and passion.
The unique challenges of haute couture repair lie in its very essence: the use of rare, often irreplaceable materials, the intricate hand-sewn embellishments, and the absolute demand for a repair that is, quite simply, undetectable. Unlike ready-to-wear, where a discreet patch might suffice, haute couture demands a restoration so seamless it appears as if no damage ever occurred. The stakes are incredibly high, requiring not just technical skill, but an almost intuitive understanding of the garment's original construction and aesthetic.
This article is born from decades of hands-on experience, countless hours of meticulous work, and a profound respect for the craft. I will walk you through the definitive, expert-level methods for how to invisibly repair haute couture hand-sewn details. We'll explore everything from the initial diagnostic assessment to the most advanced micro-stitching techniques, ensuring that you gain the actionable frameworks and insights needed to preserve these magnificent creations with integrity and artistry.
The Indispensable Art of Initial Assessment and Diagnostics
Before any needle touches fabric, the most crucial step is a thorough and systematic assessment. In my experience, rushing this stage is the biggest mistake an aspiring conservator can make. You're not just looking at damage; you're deciphering the garment's history, its construction, and its material vulnerabilities.
Understanding the Garment's DNA
Every haute couture piece has its own unique story and construction blueprint. I begin by examining the entire garment under varied lighting conditions – natural daylight, diffused light, and even angled raking light to reveal subtle surface irregularities. A magnifying loupe, ideally 10x or greater, is indispensable for scrutinizing individual stitches, thread types, and the weave structure of the fabric. I'm looking for:
- Original Stitching: How were the embellishments initially attached? Are they chain stitch, couching, satin stitch, or a hidden catch stitch? Replicating this is key.
- Thread Composition: Is it silk, cotton, metallic, or a blend? The fiber type dictates its strength, drape, and how it will interact with the original material.
- Fabric Structure: Is it a delicate silk chiffon, a robust duchesse satin, or an embroidered tulle? Understanding the base fabric is paramount for choosing appropriate repair techniques.
- Extent of Damage: Is it a simple loose thread, a missing bead, a tear, or a combination? Documenting every detail is critical.

According to the Victoria and Albert Museum's textile conservation guidelines, meticulous documentation, including photography and detailed notes, is a cornerstone of ethical and effective textile preservation. This initial diagnostic phase is not just about identifying the problem; it's about understanding the solution before you even pick up a tool.
Essential Tools and Materials for Invisible Mending
The right tools are extensions of your hands, and in haute couture repair, precision instruments are non-negotiable. Investing in quality is investing in the garment's future.
My Go-To Toolkit for Delicate Repairs
I've curated my toolkit over decades, and these are the items I consider absolutely essential:
- Ultrafine Needles: Specifically, John James & Sons 'Sharps' or 'Mending' needles in sizes 10-12, and specialized beading needles. Their slender profile minimizes fabric disruption.
- High-Quality Silk Threads: Primarily Gutterman or YLI silk threads. Their natural sheen and strength mimic historical couture threads. A vast color palette is required for perfect matching.
- Jeweler's Loupe or Magnifying Visor: A 10x magnification is crucial for seeing individual fibers and stitches clearly.
- Fine-Point Tweezers: For manipulating individual threads and small embellishments without damaging adjacent areas.
- Embroidery Scissors (Curved Blade): For precise snips close to the fabric without catching other threads.
- Thimbles (Leather or Metal): Essential for pushing needles through dense or multiple layers of fabric safely.
- Acid-Free Tissue Paper: For padding and supporting delicate areas during repair.
- Daylight Lamp: A full-spectrum lamp to ensure accurate color perception, crucial for thread matching.

Remember, the goal is to use tools that are as gentle as they are effective. A blunt needle or a coarse thread can cause more damage than the original imperfection. Here’s a quick overview of specialized tools:
| Tool | Purpose | Key Feature |
|---|---|---|
| Ultrafine Beading Needle | Reattaching micro-beads | Minimal fabric disruption |
| Curved Needle (Appliqué) | Securing delicate lace appliqué | Accessing tight spaces |
| Jeweler's Loupe (10x) | Detail inspection, thread matching | Enhanced visibility |
Mastering Thread Matching and Dyeing Techniques
The cornerstone of invisible repair is the absolute perfect match of thread color and texture. Even a slight discrepancy will betray your work.
The Art of Subtlety
I often tell my apprentices that thread matching is less about finding the exact color and more about understanding how light interacts with the fibers. Natural silk threads, with their inherent luster, often blend better than synthetic alternatives, even if the synthetic appears a closer match on the spool. Always test a small length against the fabric in various lighting conditions.
When an exact match isn't available, subtle dyeing becomes a critical skill. I use professional textile dyes, diluted to a precise degree, and apply them with a fine brush to a length of white or off-white silk thread. This is a painstaking process of trial and error, often requiring multiple attempts to achieve the perfect hue. One must consider:
- Undertones: Is the fabric warm or cool-toned?
- Sheen: Does the existing thread have a matte or lustrous finish?
- Fiber Absorption: Different fibers absorb dye differently.
"The truly invisible repair isn't about hiding a mistake; it's about seamlessly integrating a new element so perfectly that its presence is felt, but never seen. It's a conversation between the hand and the material, guided by an artist's eye." - My personal philosophy on haute couture restoration.

The Art of Micro-Stitching: Techniques for Seamless Integration
This is where the true artistry of invisible repair shines. It's about replicating the original handwork with such precision that your stitches disappear into the fabric's existing texture and embellishment.
Replicating the Original Hand
The first rule of micro-stitching is to understand the original stitch. Haute couture often employs highly specialized stitches:
- Couching: For securing decorative threads or cords to the surface.
- Satin Stitch: For creating smooth, filled areas.
- Backstitch: For strong, continuous lines.
- Catch Stitch: Often used for hemming and invisible joins, especially in linings.
- Beading Stitches: Specific methods for securing beads individually or in strands.
My technique involves working from the underside whenever possible, or using an incredibly shallow 'stab and grab' method on the surface. Each stitch should be no more than 1-2 millimeters long, often less, and should follow the exact path and tension of the original work. The goal is to mimic the existing fabric's 'grain' or 'flow', ensuring the repaired area doesn't pull or pucker, which would immediately give it away.
- Isolate the Area: Use acid-free tissue to support the surrounding fabric, minimizing stress.
- Anchor Discreetly: Begin your thread with a tiny knot hidden within a seam allowance or another secure, invisible spot.
- Match Stitch Direction: If the original stitches run horizontally, your repair stitches must do the same.
- Maintain Tension: Too loose, and it will gap; too tight, and it will pucker. Practice is key to achieving consistent, gentle tension.
- Finish Invisibly: Secure your thread by weaving it back into existing stitches on the underside, trimming excess closely.

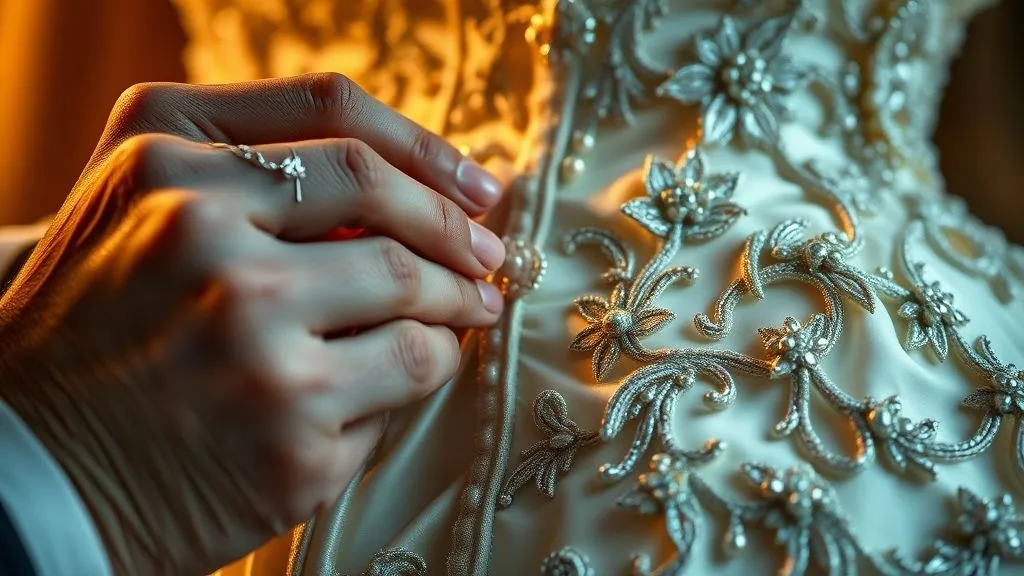
Reattaching Intricate Beadwork and Sequins
Beadwork and sequins are the jewels of haute couture, and their loss can be particularly heartbreaking. Reattaching them requires an understanding of their original placement and the specific stitching techniques used.
The Delicate Dance of Embellishments
Often, beads and sequins are attached with a single, incredibly fine silk thread. When reattaching, I use a beading needle, which is exceptionally thin and long, allowing it to pass through the tiny holes of the beads without damaging them or the surrounding fabric. The key is to replicate the original spacing and pattern precisely.
For sequins, they are usually attached with a single stitch through their center, or sometimes with a tiny seed bead placed over the thread to secure it. If a cluster of beads or sequins has come loose, it's crucial to examine the adjacent areas to understand the sequence and layering. Sometimes, a tiny, almost invisible piece of matching organza or tulle can be used as a stabilizer on the underside of the fabric to provide a stronger anchor point for the new embellishments.
Case Study: The Rescued Beaded Gown
I once received a vintage Dior gown, heavily embellished with thousands of tiny glass beads, that had suffered a tear in the bodice, resulting in a cascade of missing beads. The client was distraught, believing it irreparable. After careful assessment, I identified the tear as a stress point. My team and I first meticulously reinforced the torn fabric from the underside with a sheer silk organza, using hundreds of microscopic 'invisible' stitches. Then, we sourced period-appropriate beads, matching them by size, color, and finish. Over several weeks, we painstakingly reattached each bead, replicating the original pattern and tension. The final result was a seamless restoration; the tear and missing beads were utterly undetectable, and the gown went on to be a highlight in a major archival exhibition, demonstrating that with patience and expertise, even significant damage can be overcome, preserving the garment's historical and artistic value.
Restoring Delicate Lace and Appliqué
Lace and appliqué are often the most fragile elements of haute couture, and their repair demands an almost surgical precision to maintain their ethereal quality.
Invisible Joins and Reinforcements
When repairing lace, the goal is to create an 'invisible join' where new lace seamlessly merges with the old. This often involves:
- Sourcing Matching Lace: This can be the most challenging step. Sometimes, a small, unnoticeable section from another part of the garment (like an inner seam allowance) can be sacrificed, or new lace can be custom-made or dyed to match.
- Fraying Edges: If the damage is a fray, I carefully trim the frayed threads to create a clean edge.
- Overlay and Stitch: The new piece of lace is carefully overlaid onto the damaged area, aligning the pattern. Using a very fine, curved needle, I then hand-stitch the new lace to the old with tiny 'whip stitches' or 'buttonhole stitches' around the motifs, effectively 'grafting' it onto the original. The stitches are placed to follow the existing lace pattern, making them disappear.
- Reinforcement: For delicate appliqué that has come loose, the same micro-stitching techniques apply. Often, the challenge is re-securing it without distorting the underlying fabric.
As textile conservators at institutions like The Metropolitan Museum of Art emphasize, understanding the historical context and construction of the lace is vital. Was it machine-made or hand-made? What kind of ground fabric was used? These details guide the most appropriate repair method.
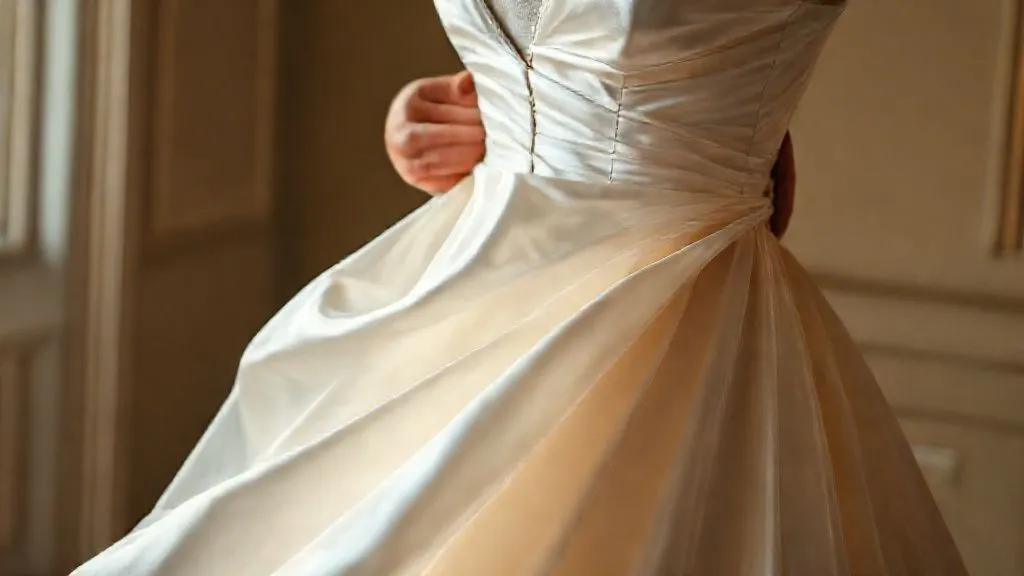
Addressing Tears and Fraying in Embellished Areas
Tears and fraying, especially in areas dense with embellishments, present a unique challenge. The integrity of the fabric must be restored without disturbing the surrounding design.
Reinforcement and Reconstruction
For tears, particularly those in delicate fabrics like silk chiffon or organza, the approach is often multi-layered:
- Stabilization: The first step is to stabilize the edges of the tear. I often use a very fine, sheer silk organza or tulle as a backing patch. This patch is cut slightly larger than the tear and basted in place on the underside.
- Edge-to-Edge Stitching: Using a hair-fine silk thread, I meticulously bring the torn edges together with a series of tiny, almost invisible 'edge-to-edge' or 'ladder' stitches. The goal is not to overlap the fabric but to seamlessly join the raw edges.
- Embellishment Reintegration: If embellishments were displaced, they are carefully reattached over the mended tear, effectively hiding the repair. This often involves lifting existing embellishments, completing the fabric repair, and then re-securing them.
- Fraying: For areas of fraying, I use a tiny amount of a clear, archival textile adhesive (such as Jade 403), applied with a micro-applicator, to secure the loose threads to the underside of the fabric. This prevents further unraveling. This is always a last resort and used with extreme caution to avoid stiffening the fabric.
This method requires immense patience and a steady hand, ensuring that the repair doesn't add bulk or stiffness to the fabric, which would compromise its drape and feel. A study published in the Journal of the Textile Institute often highlights the importance of matching mechanical properties, such as drape and elasticity, during textile repair to maintain the original garment's characteristics.
Post-Repair Care and Preservation
The work doesn't end when the last stitch is sewn. Proper care and preservation are critical to ensuring the longevity of your invisible repair and the garment itself.
Maintaining Masterpieces
I always emphasize to my clients that haute couture requires an elevated level of care. Here are my essential recommendations:
- Archival Storage: Always store haute couture garments in breathable, acid-free garment bags. Avoid plastic, which can trap moisture and accelerate degradation.
- Temperature and Humidity Control: Store in a cool, dark, and dry environment. Extreme fluctuations can damage delicate fibers and embellishments.
- Professional Cleaning Only: Never attempt to clean haute couture at home. Seek out a highly specialized textile conservator or a dry cleaner with specific expertise in delicate, embellished garments. Ask for their track record and methods.
- Gentle Handling: Always handle garments with clean hands, ideally wearing white cotton gloves to prevent oil transfer. Support the garment's full weight when moving it to prevent stress on seams and embellishments.
- Regular Inspection: Periodically inspect the garment for any new signs of stress or damage, especially along seams and heavily embellished areas. Early detection can prevent larger problems.
Just as a conservator meticulously restores a painting, we must ensure that the environment and handling of haute couture pieces are conducive to their continued existence. Neglecting post-repair care can undo even the most perfect invisible mending.
| Care Aspect | Recommendation | Avoid |
|---|---|---|
| Storage | Breathable garment bag, acid-free tissue | Plastic covers, direct sunlight |
| Cleaning | Professional textile conservator only | Home washing, dry cleaning without expert consultation |
| Handling | Wear cotton gloves, support weight | Rough handling, pulling on embellishments |
Frequently Asked Questions (FAQ)
What if I can't find an exact match for the original thread or embellishment? This is a common challenge, especially with vintage pieces. If an exact match is impossible, aim for the closest possible match in fiber type and weight, and consider custom dyeing the thread. For embellishments, sourcing from reputable vintage suppliers or even having a specialist create a replica might be necessary. Sometimes, strategically borrowing a few inconspicuous embellishments from an unseen part of the garment (like a hem allowance) can be an option, but this must be done with extreme care.
Is it ever better to leave a small imperfection than attempt a repair? Absolutely. In some cases, particularly with extremely fragile or historically significant garments, an attempted repair by an inexperienced hand could cause irreversible damage. If the imperfection is stable and doesn't threaten the garment's integrity, and you lack the necessary expertise, it is often better to consult a professional conservator or leave it untouched. The principle of 'do no harm' is paramount in conservation.
How do I identify the original stitching method to replicate it accurately? This requires careful observation under magnification. Look at the length of the stitches, their angle, and how the thread passes through the fabric. Examine areas that are still intact. Often, you can gently probe with a fine needle to feel the path of the original thread. Historical textile references and books on couture construction can also provide valuable insights into period-specific techniques.
What are the biggest mistakes amateurs make when attempting haute couture repairs? The most common mistakes include using the wrong type or weight of thread, incorrect needle size (leading to fabric damage), pulling stitches too tight (causing puckering), failing to match color and sheen perfectly, and not adequately supporting the garment during the repair. Rushing the process and lacking patience are also major culprits.
How do I know if a repair is truly "invisible"? A truly invisible repair will pass the 'touch and sight' test. When you run your finger over the repaired area, there should be no discernible change in texture or drape. Visually, under various lighting conditions, the repaired area should seamlessly blend with the surrounding fabric, with no change in color, sheen, or pattern. A good test is to ask an unbiased, knowledgeable person to find the repair without prior knowledge of its location.
Key Takeaways and Final Thoughts
Preserving haute couture is a profound act of respect for artistry, history, and human ingenuity. The journey to invisibly repair haute couture hand-sewn details is one of patience, precision, and a deep understanding of textile science and traditional craftsmanship. It's a skill honed over years, but accessible to those with dedication.
- Always begin with an exhaustive diagnostic assessment to understand the garment's unique construction and material vulnerabilities.
- Invest in specialized, high-quality tools and materials, particularly ultrafine needles and pure silk threads.
- Master the art of thread matching and subtle dyeing to achieve perfect color and sheen integration.
- Employ micro-stitching techniques that meticulously replicate the original handwork, ensuring seamless blending.
- Approach beadwork, sequins, lace, and tears with tailored, gentle methods of reattachment and reinforcement.
- Prioritize rigorous post-repair care and archival storage to ensure the longevity of both the repair and the garment.
Remember, each stitch you place is a testament to the enduring beauty and value of haute couture. Approach every repair not just as a technical task, but as a conversation with the original artisan, honoring their legacy with every invisible mend. With these principles and dedicated practice, you can confidently undertake the delicate art of haute couture restoration, ensuring these magnificent pieces continue to inspire for generations to come.
Recommended Reading
- Unlock the Secret: How to Pick Cute Outfits for Active Kids That Last!
- Unveiling the Secrets: How Couturiers Achieve Haute Couture Precision
- Unveiling the Secret: Why Choose Organic Cotton for Your Baby's Clothing?
- Slash Kids' Character Apparel Dead Stock: 7 Expert Strategies
- Find Your Perfect Fit: Best Luxury Eyewear Brands for Oval Faces


Your email address will not be published. Required fields are marked *