
How to Achieve Natural Perfect Skin Beauty Photos?
Ever scrolled through social media, admiring seemingly flawless skin in beauty photos, only to feel a pang of frustration trying to replicate it? The digital age, with its filters and heavy retouching, has often skewed our perception of 'perfect' skin, making genuine, natural beauty feel unattainable.
The pursuit of capturing authentic, glowing skin without resorting to extreme digital manipulation is a common challenge for photographers and individuals alike. How do you highlight natural textures, subtle tones, and the inherent radiance of skin, rather than creating an artificial, plastic look? This question drives many to seek techniques that honor true beauty.
This comprehensive guide will unveil the secrets to capturing stunning, natural perfect skin beauty photos. You'll learn the foundational principles of light, preparation, camera settings, and ethical post-processing, empowering you to create images that celebrate genuine beauty and resonate with authenticity. Prepare to transform your approach to beauty photography.
Understanding "Natural Perfect Skin" in Photography
Beyond Flawless: Embracing Authenticity
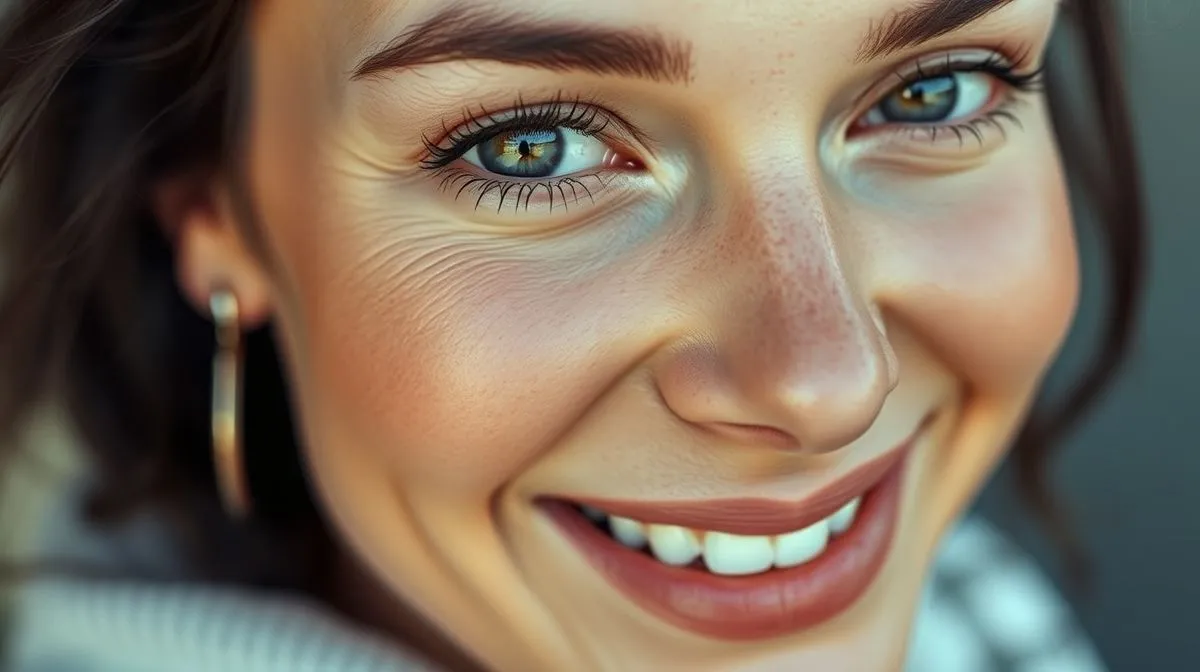
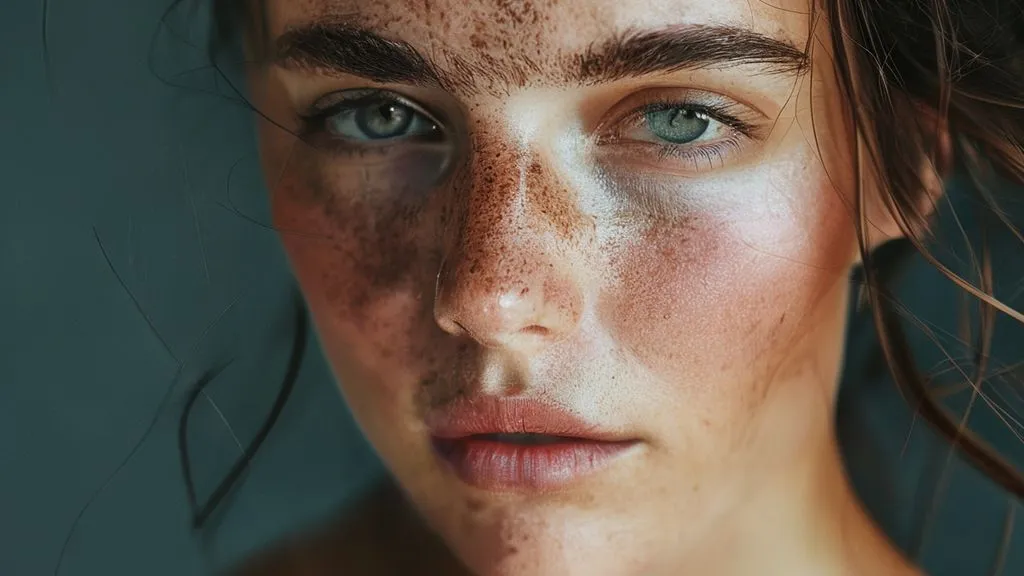
In the realm of photography, "natural perfect skin" isn't about achieving a blemish-free, poreless canvas. Instead, it's about celebrating the skin's inherent qualities: its texture, subtle variations in tone, and the way light interacts with its surface. It's about capturing a healthy glow that emanates from within, rather than being painted on.
True natural beauty photography seeks to convey a sense of realism and relatability. It acknowledges that skin has pores, occasional imperfections, and unique characteristics that make each person distinct. The goal is to enhance, not erase, these natural elements, creating an image that feels honest and beautiful.
The Role of Light in Skin Perception
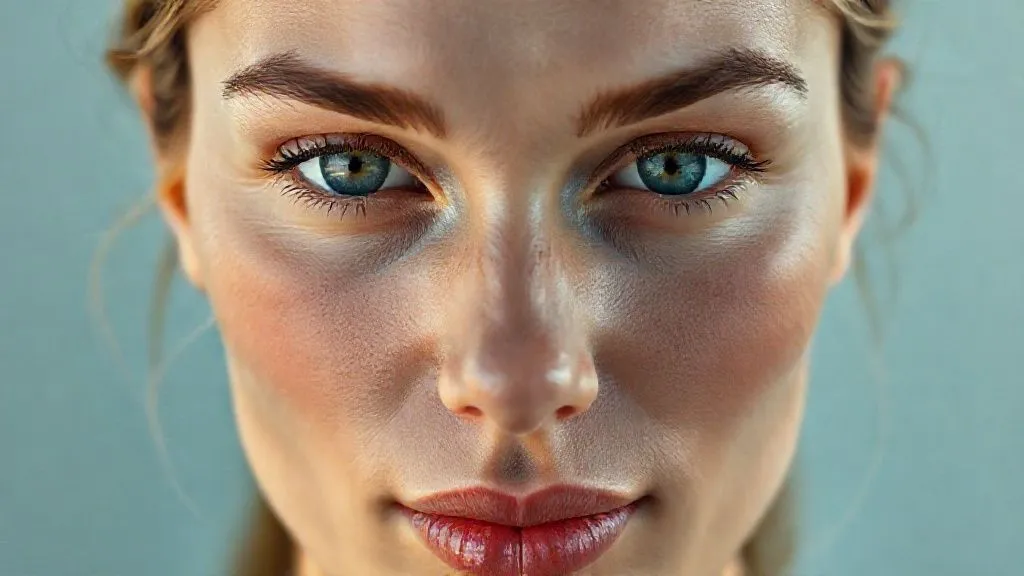
Light is the single most crucial element in photographing skin. It defines contours, reveals texture, and dictates mood. The right light can make skin appear luminous and smooth, while harsh or unflattering light can emphasize imperfections or create unwanted shadows. Understanding how different types of light interact with the skin is fundamental to achieving natural results.
Soft, diffused light is generally preferred for skin photography as it minimizes harsh shadows and creates a gentle, even illumination. This type of light wraps around the subject, creating a flattering glow that enhances natural tones and textures without flattening them or introducing distracting highlights.
Psychology of Natural Beauty
There's a deep psychological resonance with natural beauty. Images that portray genuine, unretouched skin often evoke feelings of trust, authenticity, and relatability. In an age saturated with highly stylized and often unrealistic imagery, a natural approach stands out, fostering a stronger connection with the viewer.
People are drawn to honesty. When skin is presented naturally, it communicates confidence and self-acceptance, which are powerful emotions. By focusing on the inherent beauty of your subject's skin, you're not just taking a photo; you're making a statement about valuing authenticity over artificial perfection.
Pre-Shoot Preparation for Radiant Skin
Skincare Regimen: The Foundation
The journey to natural perfect skin beauty photos begins long before the camera comes out. A consistent and effective skincare routine is paramount. Encourage your subject to hydrate, cleanse, tone, and moisturize regularly. Healthy skin is supple, well-hydrated, and reflects light beautifully, requiring less intervention later.
On the day of the shoot, a fresh, clean face is ideal. Advise against trying new products immediately before the shoot, as they can sometimes cause unexpected reactions. Gentle exfoliation a day or two prior can help achieve a smoother surface, but avoid anything harsh that could irritate the skin.
Hydration and Nutrition: Inner Glow
True radiance often comes from within. Emphasize the importance of adequate hydration and a balanced diet in the days leading up to the shoot. Drinking plenty of water helps keep skin plump and dewy, while nutrient-rich foods provide the vitamins and antioxidants necessary for healthy skin cell turnover.
Suggest avoiding excessive sodium, sugar, and alcohol, which can lead to bloating or dullness. A good night's sleep is also crucial; well-rested skin tends to look fresher and more vibrant, reducing the appearance of dark circles and puffiness.
Makeup Minimalism: Less is More
For natural skin beauty photos, less truly is more when it comes to makeup. The goal is to enhance, not conceal. Focus on evening out skin tone subtly, perhaps with a tinted moisturizer or light foundation, and spot-concealing any noticeable blemishes.
Avoid heavy contouring, excessive powders, or thick layers of product that can obscure natural skin texture. A touch of blush for color, a light mascara, and a natural lip balm are often all that's needed to bring out the best in your subject's features while maintaining a genuine look.
Pre-shoot Checklist:
- Hydrate: Drink plenty of water in the days before.
- Sleep: Ensure adequate rest for fresh skin.
- Skincare: Follow a gentle, consistent routine.
- Cleanse: Arrive with a freshly cleansed face.
- Minimal Makeup: Opt for light enhancement, not heavy coverage.
- Comfort: Wear comfortable clothing that doesn't restrict circulation.
Mastering Natural Lighting Techniques
The Magic of Golden Hour
The 'Golden Hour,' the period shortly after sunrise or before sunset, is renowned for its soft, warm, and diffused light. This low-angle light creates long, flattering shadows and a beautiful, golden glow that is incredibly kind to skin. It naturally enhances complexion, making it appear radiant and healthy.
During the Golden Hour, the light is less intense than midday sun, reducing the risk of harsh highlights and deep shadows. This makes it ideal for capturing natural perfect skin beauty photos, as it minimizes the need for extensive post-processing to correct lighting issues.
Soft Window Light: Studio at Home
If outdoor shooting isn't feasible, soft window light can serve as an excellent natural studio. A large window, especially one facing north (in the Northern Hemisphere) or south (in the Southern Hemisphere) that doesn't receive direct sunlight, provides a consistent, diffused light source throughout the day.
Position your subject near the window, allowing the light to fall gently across their face. You can use a white reflector on the opposite side to bounce light back and fill in any shadows, creating an even more flattering and luminous effect on the skin. This technique is simple yet remarkably effective.
Avoiding Harsh Shadows and Overexposure
Harsh direct sunlight, especially at midday, is the enemy of natural skin photography. It creates strong, unflattering shadows under the eyes and nose, and can lead to overexposed highlights on the forehead or cheeks, blowing out skin detail. This makes the skin appear textured in an undesirable way or completely washed out.
When shooting outdoors during bright conditions, seek open shade—areas where your subject is covered from direct sun but still receives ambient light. Overcast days are also fantastic for skin photography, as the clouds act as a giant natural diffuser, providing soft, even light everywhere. This consistent illumination helps in achieving natural perfect skin beauty photos.
Lighting Types and Their Effects:
- Golden Hour Light: Warm, soft, diffused; enhances glow and skin tone.
- Soft Window Light: Consistent, even, gentle; ideal for indoor portraits.
- Open Shade: Diffused, even; eliminates harsh shadows in bright conditions.
- Overcast Sky: Large, soft light source; produces flat, even illumination, great for skin.
- Backlighting: Creates a halo effect; can make skin glow from behind, but requires fill light for the face.
Camera Settings and Lens Choices for Skin Detail
Aperture for Creamy Bokeh and Sharp Skin
For natural skin beauty photos, a wide aperture (low f-number, e.g., f/1.8 to f/2.8) is often preferred. This creates a shallow depth of field, blurring the background (bokeh) and making the subject's skin stand out sharply against it. It helps isolate the skin, drawing the viewer's eye directly to its texture and tone.
While a wide aperture creates beautiful separation, ensure that the subject's eyes and the key areas of their skin are perfectly in focus. A slight misfocus at such shallow depths of field can ruin the shot. Utilize your camera's single-point autofocus and aim precisely at the eyes or the most prominent part of the skin you wish to highlight.
ISO and Shutter Speed for Clarity
To preserve skin detail and avoid noise, keep your ISO as low as possible (e.g., ISO 100-400). Higher ISO settings introduce digital noise, which can make skin look grainy and detract from its natural smoothness. Only increase ISO when absolutely necessary due to low light conditions.
Your shutter speed should be fast enough to prevent motion blur, both from the subject and from camera shake. For portraits, a general rule of thumb is to use a shutter speed of at least 1/125th of a second, or faster if your subject is moving. This ensures crisp details, allowing the natural textures of the skin to shine through.
Lens Selection: Prime vs. Zoom for Portraits
When selecting a lens for natural skin photography, prime lenses (fixed focal length, e.g., 50mm, 85mm, 100mm) are often favored. They typically have wider maximum apertures, allowing for better low-light performance and more pronounced bokeh. An 85mm or 100mm prime lens is excellent for portraits as it provides a flattering compression and allows you to shoot from a comfortable distance.
While zoom lenses offer versatility, they may not always match the optical quality or wide apertures of primes. However, a high-quality zoom lens like a 24-70mm f/2.8 or 70-200mm f/2.8 can still produce beautiful results, especially if you prioritize flexibility in composition. The key is to choose a lens that renders skin tones accurately and offers good sharpness.
Recommended Camera Settings:
- Aperture: f/1.8 - f/4.0 (for shallow depth of field and creamy bokeh).
- ISO: 100 - 400 (to minimize noise and preserve detail).
- Shutter Speed: 1/125s or faster (to prevent blur).
- White Balance: Custom or Kelvin (to accurately capture natural skin tones).
- Focus Mode: Single-point AF, focused on the eyes.
Posing and Expression to Enhance Natural Beauty
Gentle Angles and Subtle Movements
Posing for natural skin beauty photos isn't about rigid, unnatural stances. Instead, encourage gentle, relaxed angles that highlight the natural contours of the face and body. A slight turn of the head, a subtle tilt of the chin, or a relaxed shoulder can make a significant difference in how light falls on the skin and how flattering the overall image appears.
Avoid overly stiff or forced poses. Instead, allow for subtle movements and transitions between poses. This creates a dynamic yet natural feel, making the skin appear more alive and less static. Think about how the light plays across the skin as the subject subtly shifts.
Capturing Authentic Emotion
Genuine emotion is incredibly powerful in natural beauty photography. A true smile, a thoughtful gaze, or a moment of quiet reflection can make skin appear more vibrant and alive than any artificial lighting or retouching. Engage your subject in conversation, tell a story, or play music to evoke real feelings.
When a subject feels comfortable and authentic, their true self shines through, and this is reflected in their skin's appearance. The eyes sparkle, the cheeks might flush slightly, and the overall expression contributes to a more compelling and naturally beautiful image.
The Power of Eye Contact
Direct eye contact with the camera can create an incredibly strong connection with the viewer. When capturing natural perfect skin beauty photos, encourage your subject to look directly into the lens. This draws the viewer in and allows them to connect with the subject's authentic gaze.
Alternatively, a gaze slightly off-camera can create a sense of introspection or mystery, inviting the viewer to ponder what the subject is looking at. Both approaches are valid, but the key is to ensure the eyes are sharp and expressive, as they often draw attention to the surrounding skin.
Post-Processing for Natural Enhancement, Not Transformation
Subtle Retouching vs. Heavy Manipulation
Post-processing for natural skin beauty photos should be about enhancement, not transformation. The goal is to refine, not reinvent. This means gently addressing temporary blemishes, evening out minor skin tone inconsistencies, and enhancing natural light, rather than smoothing skin to an unrealistic degree or altering facial features.
Tools like the healing brush or clone stamp can be used judiciously to remove temporary imperfections like stray hairs or breakouts. However, avoid excessive use of frequency separation or blurring techniques that erase natural skin texture. The aim is to make the skin look its best, while still looking like real skin.
Color Grading for Healthy Tones
Accurate and pleasing color grading is vital for natural skin tones. Pay close attention to white balance to ensure skin colors are neither too warm (orange/red) nor too cool (blue/green). A neutral white balance often provides the most natural starting point.
Subtle adjustments to saturation, vibrance, and hue can further enhance skin's healthy appearance. For example, a slight increase in warmth can make skin look more vibrant, but be careful not to overdo it, as this can lead to an unnatural orange cast. Aim for a balanced, lifelike representation that complements the natural light captured in the image. For more on color theory, check out Adobe's guide on color theory in photography.
Sharpening and Noise Reduction
Judicious sharpening can bring out the fine details in natural skin, making it appear crisp and defined. Apply sharpening selectively, focusing on areas like the eyes and lips, and use a mask to avoid over-sharpening smooth skin areas, which can introduce unwanted noise or grain. A little goes a long way.
Conversely, if your image has some digital noise (from higher ISO settings), apply noise reduction carefully. Over-aggressive noise reduction can smooth out skin texture too much, leading to a plastic-like appearance. Find a balance where noise is minimized, but natural skin texture is preserved. Remember, the goal is to highlight the natural beauty, not erase it.
Post-processing Principles:
- Spot Healing: Remove temporary blemishes, not permanent features.
- Color Correction: Ensure accurate and flattering skin tones.
- Contrast & Brightness: Enhance natural light and depth.
- Subtle Sharpening: Define eyes and lips without over-texturizing skin.
- Gentle Noise Reduction: Preserve natural skin texture.
- Avoid Over-Smoothing: Retain pores and natural skin characteristics.
Common Mistakes to Avoid in Natural Skin Photography
Over-reliance on Filters
One of the biggest pitfalls in modern photography is the overuse of filters. While some filters can add a stylistic touch, many pre-set filters are designed to dramatically alter skin tones and textures, often leading to an artificial, 'filtered' look that defeats the purpose of natural beauty photography. Resist the urge to apply heavy filters that flatten skin or introduce unnatural color casts.
Instead, learn to make manual adjustments for color, contrast, and tone. This gives you precise control and ensures that your enhancements are subtle and contribute to a genuinely natural aesthetic, rather than detracting from it. Trust your eye and the natural light you've captured.
Ignoring Skin Prep
Neglecting pre-shoot skin preparation is a common mistake that forces more extensive and often less natural-looking post-processing. If the skin isn't well-hydrated, clean, and minimally made up, you'll spend far more time in editing trying to fix issues that could have been avoided. Remember, a good foundation in preparation reduces the need for heavy digital manipulation.
Educating your subject about the importance of skincare, hydration, and minimal makeup will save you significant time and effort, and ultimately lead to more authentic results. The natural glow of well-cared-for skin is something that cannot be perfectly replicated in software.
Poor Lighting Choices
Shooting in harsh, direct sunlight or in very dim, unevenly lit environments without proper light modification is a sure way to compromise natural skin beauty. Harsh light creates unflattering shadows and blown-out highlights, while insufficient light can make skin appear dull and flat, or introduce excessive noise.
Always prioritize soft, diffused light sources. If natural light isn't ideal, consider using diffusers, reflectors, or even simple white sheets to soften and redirect light. Understanding and manipulating light is the most impactful skill for achieving beautiful, natural skin tones and textures in your photographs. For more on light quality, consider resources like Wikipedia's section on lighting in photography.
Frequently Asked Questions (FAQ)
Can I use a phone camera for natural skin photos? Absolutely! Modern smartphone cameras are incredibly capable. Focus on excellent natural lighting, clean lenses, and simple composition. Many phones even offer 'portrait mode' for background blur.
How much retouching is acceptable for "natural" skin? The key is subtlety. Remove temporary blemishes (like a fresh pimple or stray hair) but leave permanent features like moles or freckles. Avoid smoothing out natural skin texture or altering facial structure. The goal is enhancement, not transformation.
What's the best time of day to shoot for natural light? The 'Golden Hour' (shortly after sunrise or before sunset) provides the softest, warmest, and most flattering light for skin. Overcast days also offer beautiful, diffused light throughout the day.
Should I use flash for natural skin photos? Generally, direct on-camera flash is harsh and unflattering for natural skin. If you must use flash, bounce it off a ceiling or wall, or use an off-camera flash with a softbox or diffuser to create a softer, more natural light source. Natural light is always preferred.
What's the most important tip for achieving natural perfect skin beauty photos? Focus on excellent natural lighting and meticulous pre-shoot preparation. These two elements will have the most significant impact on the final look of the skin, minimizing the need for heavy post-processing.
Recommended Reading
- Unlock the Secrets: How to Authenticate Exclusive Luxury Fashion Pieces
- Unlock the Secret: How to Prevent Platinum Jewelry from Scratching Easily
- Bespoke Jewelry Design: Your Ultimate Guide to Getting Started
- Unlock the Secret: How to Choose Formal Wear for a Summer Wedding with Style
- Unlocking the Past: How to Tell if Vintage Jewelry is Truly Valuable
Conclusion
Mastering how to achieve natural perfect skin beauty photos is an art that blends thoughtful preparation, astute lighting techniques, precise camera settings, and judicious post-processing. It's about celebrating the inherent beauty of skin, with its unique textures and tones, rather than striving for an unrealistic, airbrushed ideal. By prioritizing natural light, encouraging proper skincare, employing subtle posing, and embracing a 'less is more' approach to editing, you can consistently capture images that are not only visually stunning but also deeply authentic and relatable. Embrace the beauty of reality, and let your photographs reflect the true radiance of natural skin.


Your email address will not be published. Required fields are marked *