
How to Accurately Pattern a Complex 17th-Century Theatrical Costume?
For over two decades in the demanding world of theatrical costume design, I've witnessed firsthand the exhilaration of bringing history to life on stage, and the frustration when a seemingly perfect sketch fails to translate into a wearable, historically accurate garment. The 17th century, with its opulent fabrics, intricate silhouettes, and specific construction methods, presents a unique set of challenges that can daunt even seasoned designers.
The common pitfalls are many: patterns that don't capture the era's distinctive body line, historical details lost in translation, or costumes that simply don't stand up to the rigors of performance. It’s not enough to simply 'make it look old'; true mastery lies in understanding the engineering behind the elegance, ensuring both authenticity and functionality for the modern performer.
This definitive guide will unravel the complexities of how to accurately pattern a complex 17th-century theatrical costume. We'll explore a proven framework, from deep historical research and deconstruction of period silhouettes to advanced drafting techniques and crucial fitting insights, equipping you with the expert knowledge to craft stunning, historically informed, and performance-ready garments.
Unearthing the Past: Deep Dive into 17th-Century Fashion Research
The foundation of any accurate historical costume begins not with a needle and thread, but with meticulous research. Without truly understanding the socio-cultural context, the materials available, and the construction philosophies of the 17th century, your pattern will merely be a modern interpretation, not a historical recreation.
The Indispensable Role of Primary Sources
Primary sources are your direct window into the past. They offer unfiltered insights into what people wore, how garments were constructed, and the prevailing aesthetic. Relying solely on secondary sources can lead to perpetuating inaccuracies.
- Portraits and Paintings: These are invaluable for understanding silhouettes, fabric choices, embellishments, and how garments were worn. Pay attention to details like sleeve settings, collar shapes, and the drape of skirts.
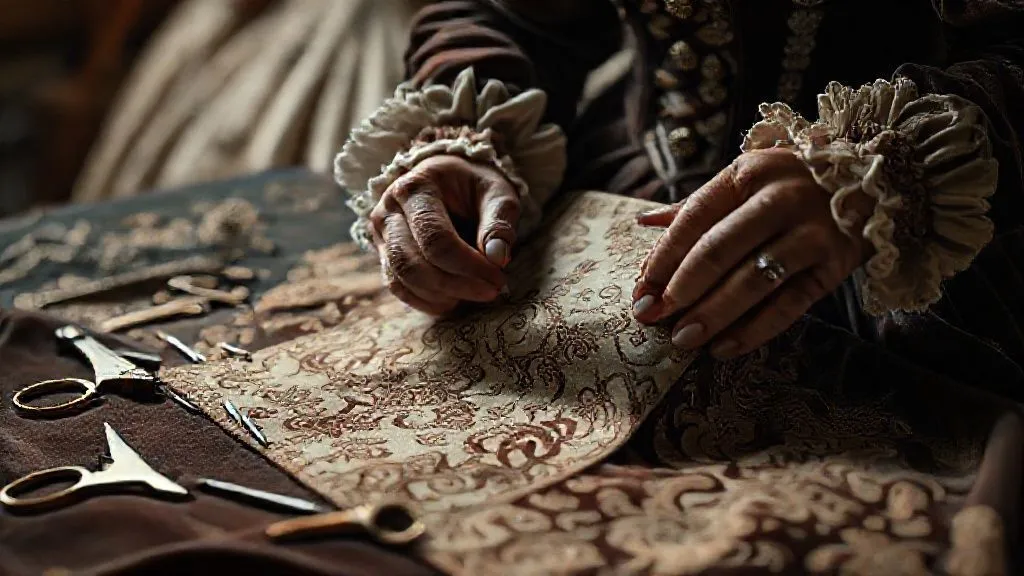
- Extant Garments: Surviving garments from the period, often found in museum collections, provide the ultimate blueprint. Studying their construction, seam lines, and internal structure is irreplaceable.
- Period Inventories and Diaries: Written records can detail fabric types, colours, and even the names of specific garment components, offering linguistic and material insights.
- Fashion Plates and Engravings: While sometimes exaggerated, these offer a glimpse into idealized fashion and specific trends of the time.
In my experience, the most accurate patterns emerge from a synthesis of these sources, cross-referencing visual evidence with written descriptions and, ideally, direct study of extant pieces. According to textile historian Janet Arnold, author of 'Patterns of Fashion', the careful study and documentation of extant garments is the most reliable path to historical accuracy. The Victoria and Albert Museum's extensive collection is an excellent starting point for this kind of visual research.

Actionable Steps for Effective Research:
- Identify Your Specific Era & Region: The '17th century' covers a vast period (1600-1699) and diverse geographies. French court fashion differed significantly from English Puritan attire. Pinpoint your exact needs.
- Curate a Visual Library: Collect high-resolution images of portraits, fashion plates, and extant garments relevant to your specific costume. Organize them by date, region, and garment type.
- Deconstruct Visually: For each image, mentally (or physically, on paper) break down the garment into its core components: bodice, sleeves, skirt, collar, etc. Note the proportions and how they interact.
- Seek Out Scholarly Articles: Academic papers often provide detailed analysis of specific garments or fashion trends, offering insights into construction methods not immediately obvious from images. JSTOR or university libraries are excellent resources.
"Historical accuracy is not about replication; it's about informed interpretation. Understand the rules before you break them, or even bend them, for theatrical effect."
Deconstructing the Silhouette: Understanding Period Garment Construction
The 17th-century silhouette is distinct, evolving significantly from the structured stiffness of the Elizabethan era to the more relaxed, yet still formal, styles of the late Baroque. Understanding the underlying structure and how it was achieved is paramount for how to accurately pattern a complex 17th-century theatrical costume.
Key Garment Components and Their Evolution
The century saw a dramatic shift in fashion, moving from the padded, wide-shouldered doublet and breeches for men, and the stiff bodices and farthingales for women, towards softer, more flowing lines, particularly as the influence of French court fashion grew.
- Men's Doublets: Early 17th-century doublets were often padded, close-fitting, and featured peascod bellies or short skirted tabs. Sleeves could be full and paned. By mid-century, they became shorter, less padded, and often worn open over a waistcoat.
- Breeches: From tight, padded 'trunk hose' to voluminous 'petticoat breeches' and later, narrower 'Rhinegraves' or 'trouser breeches', their shape dictated much of the lower body silhouette.
- Women's Bodices: Early bodices were stiff, often boned, creating a conical shape. Necklines varied from high-necked to wide, square, or rounded. By the mid-century, the 'stomacher' became a prominent feature, and lacing often provided shaping.
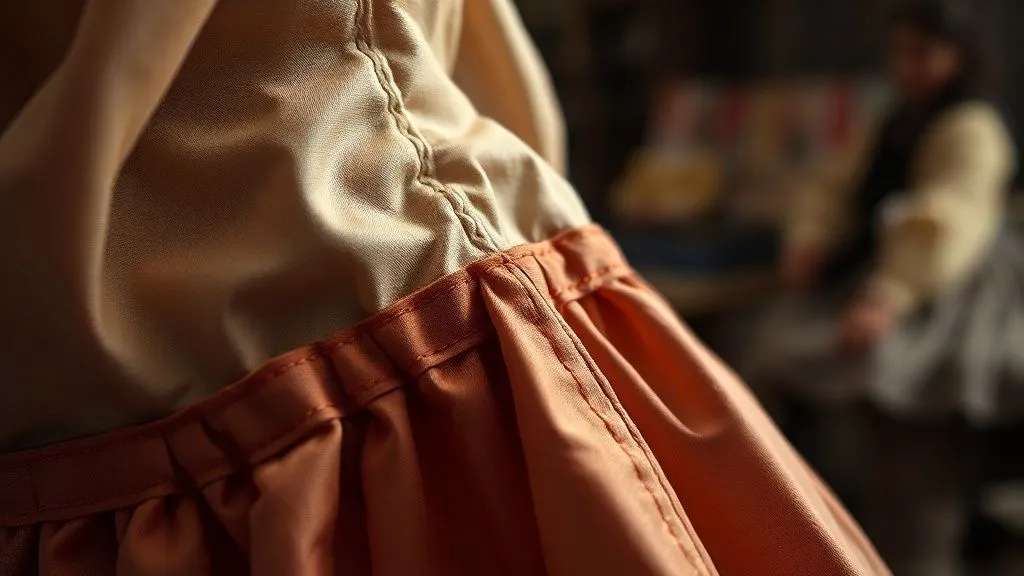
- Skirts (Gowns): Early skirts were supported by French farthingales or bum-rolls, creating a wide, drum-like shape. Later, skirts became fuller, gathered at the waist, and often open to reveal an underskirt, without rigid hooped support.
- Sleeves: Varied wildly – from puffed and slashed to full, elbow-length with deep cuffs (cavalier style), or tight and long. Each style requires specific patterning techniques to achieve the correct volume and drape.
- Collars and Ruffs: The elaborate ruffs of the late 16th century gave way to falling ruffs, then wide, flat 'falling bands' and lace collars, which dramatically altered the neckline and shoulder line.
Case Study: Recreating Louis XIV's Court Attire
Consider a project I once undertook: recreating a ceremonial court costume for a character portraying Louis XIV during his early reign (circa 1660s). The challenge was immense: capturing the youthful flamboyance, the specific proportions of the 'justaucorps' (a long coat), and the elaborate embroidery, all while ensuring the actor could move freely for a demanding dance sequence.
My team began by analyzing multiple portraits of Louis XIV and contemporary French noblemen, focusing on the length of the justaucorps, the placement of the pockets, and the exact width and drape of the sleeves. We noted the subtle flaring of the coat from the waist, achieved not by modern darting, but through a series of gores and pleats. The breeches were the narrower Rhinegrave style, requiring careful calibration of fullness to avoid looking like modern trousers. By meticulously studying the visual evidence and consulting historical tailoring texts, we drafted patterns that mimicked the true cut of the period. The initial muslin toile revealed the need for a slight adjustment in the shoulder width and a subtle curve added to the back seam to allow for the king's characteristic upright, almost arrogant, posture, crucial for the actor's portrayal. This iterative process, deeply rooted in historical deconstruction, allowed us to achieve both authenticity and stage practicality.
Mastering the Measurement: Precision for Period Fit
Modern measurement systems and body ideals differ significantly from those of the 17th century. A successful pattern for a period costume requires not just accurate measurements of the performer, but an understanding of how those measurements translate into the historical silhouette, often aided by period understructures.
Beyond Modern Sizing: Tailoring for the 17th-Century Form
The 17th-century body was often shaped by specific undergarments – corsets (stays) for women, and padding for men's doublets. Your measurements must account for these foundational layers if they are part of the costume.
- Measure Over Undergarments: Always take measurements while the performer is wearing the appropriate period understructure (e.g., a properly fitted pair of stays for a woman's gown, or a padded doublet for a man). This ensures the outer garment fits the *shaped* body, not just the natural body.
- Focus on Key Points: Beyond standard bust, waist, hip, focus on:
- Shoulder Slope and Width: 17th-century shoulders often had a different profile than modern ones, influencing sleeve set.
- Back Length (Neck to Waist): Crucial for bodice and doublet length, especially as waists often sat higher or lower than modern natural waistlines.
- Armscye Depth and Circumference: Period armholes can be surprisingly small or large, impacting sleeve volume and movement.
- Wrist and Forearm Circumference: Essential for fitted sleeves and cuffs.
- Document Everything: Keep meticulous records of all measurements, noting any specific body quirks of the performer.
A common mistake I’ve observed is applying modern ease allowances to historical patterns. 17th-century garments, particularly tailored doublets and boned bodices, often had very little ease, relying instead on precise cutting and shaping. Over-easing can lead to a 'baggy' or ill-fitting costume that loses its period authenticity.
| Measurement Point | Modern Approach | 17th-Century Consideration |
|---|---|---|
| Shoulder Width | Across top of shoulders | Measure over padded doublet/stays; often narrower, higher set |
| Waist Circumference | Natural waist | Measure over stays; waistline can be higher (early) or lower (mid-century) |
| Back Length (Neck to Waist) | C7 to natural waist | Measure to historical waistline, crucial for bodice/doublet length and proportion |
| Armscye Depth | Standard depth for comfort | Often shallower or deeper depending on sleeve style and period, impacts movement |

Drafting the Pattern: From Research to Reality
Once your research is thorough and measurements are precise, the real magic of pattern drafting begins. This is where the two-dimensional blueprint starts to take on the three-dimensional form of a complex 17th-century theatrical costume. It requires a blend of historical understanding and practical pattern-making skills.
Traditional Drafting Methods vs. Modern Adaptation
Historically, patterns were often drafted directly onto the fabric or through a system of geometric shapes derived from body measurements. Today, we have more sophisticated tools, but the principles of shaping fabric to the body remain constant.
- Flat Patterning: This involves drafting patterns on paper using measurements and a specific block (sloper). For 17th-century garments, you'll often need to adapt modern blocks significantly or draft from scratch based on historical patterns like those documented by Janet Arnold.
- Draping: Working directly on a dress form (preferably one padded to a period silhouette), draping involves manipulating fabric to create the desired shape. This method is particularly effective for complex, flowing drapery or asymmetric designs common in the later part of the century.
- Scaling from Historical Illustrations: While challenging, experienced designers can often extrapolate pattern pieces by carefully scaling details from accurate historical illustrations, especially for elements like collars or cuffs.
My preferred method for how to accurately pattern a complex 17th-century theatrical costume often involves a combination: drafting the core structure (bodice, doublet) flat, then draping more fluid elements (sleeves, overskirts) to achieve the correct historical movement and fall.
The Art of Muslin Mock-ups (Toiles)
Never skip the toile. A muslin mock-up is a critical intermediary step that allows you to test the pattern's accuracy, fit, and silhouette without committing expensive final fabric. It's an opportunity to catch and correct errors.
- Draft the Initial Pattern: Based on your research and measurements, create your first draft of the pattern pieces on paper.
- Cut and Construct the Toile: Use inexpensive muslin or calico to cut out and sew the pattern pieces together. Use basic construction methods, not necessarily finished seams.
- Fit on the Performer (with Understructure): Have the performer try on the toile, ensuring they are wearing the correct period undergarments. Pin and mark all necessary adjustments directly onto the toile. Pay attention to:
- Balance: Does the garment hang correctly? Is it pulling anywhere?
- Ease: Is there enough room for movement, but not so much that it loses its shape?
- Silhouette: Does it achieve the desired historical outline?
- Detail Placement: Are necklines, sleeve heads, and waistlines in the correct historical position?
- Transfer Adjustments: Carefully remove the toile, mark all adjustments clearly, and transfer them back to your paper pattern. This is your refined, accurate pattern.
"The toile is your silent critic and your greatest ally. Embrace its feedback, for it saves both time and precious fabric in the long run."
Navigating Fabrics and Embellishments: Authenticity and Practicality
The choice of fabric and the application of embellishments profoundly impact the historical accuracy and visual impact of a 17th-century theatrical costume. It's a delicate balance between historical authenticity and the practical demands of the stage.
Selecting Period-Appropriate Materials
The 17th century was a period of rich textiles. While exact reproductions can be prohibitively expensive for theatrical budgets, knowing the historical options guides your contemporary choices.
- Silks: Brocades, damasks, velvets, satins, and taffetas were highly prized. They offer luxurious drape and sheen. For theatrical use, consider silk blends or high-quality synthetics that mimic the look and feel without the fragility or cost.
- Wool: Broadcloth, serge, and fustian (a cotton/linen blend) were common for more practical garments or for menswear. Wool offers excellent drape and takes dye well.
- Linen and Cotton: Used for undergarments, linings, and simpler clothing. These provide breathability and structure.
- Leather: Often used for doublets, jerkins, and accoutrements, especially for military or riding attire.
When selecting fabrics, always consider how they will move under stage lights and with the performer's actions. A heavy velvet might look authentic, but if it restricts movement or creates too much heat, it's impractical. The Metropolitan Museum of Art's textile collection offers fantastic visual examples of period fabrics.
Embellishment Techniques: Embroidery, Lace, and Trim
17th-century costumes were often richly embellished, reflecting status and wealth. Integrating these details into your pattern and construction is key.
- Embroidery: From intricate goldwork on court garments to crewelwork on simpler pieces, embroidery was widespread. Consider machine embroidery for efficiency, or appliqué for a similar visual effect.
- Lace: Bobbin lace, needle lace, and cutwork adorned collars, cuffs, and edges. High-quality modern lace can replicate the look, or you might consider making simplified versions for close-up work.
- Trim: Braids, ribbons, frogging, and buttons (often decorative rather than functional) were used extensively. Integrate these into your pattern design, noting where they will be applied and how they will affect the garment's structure or drape.
 and intricate lace trims, with a detailed 17th-century embroidery sample in the foreground, 8K, cinematic lighting, sharp focus, depth of field, shot on a high-end DSLR, conveying a rich tactile experience.")
Overcoming Common Pitfalls in 17th-Century Patterning
Even with meticulous research and careful drafting, challenges are inherent in recreating historical garments. Anticipating these can save significant time and frustration.
The Challenge of Limited Documentation
While some periods have abundant surviving garments and detailed patterns, the 17th century can be spottier for certain regions or social classes. This often means making educated guesses or extrapolating from limited evidence. My advice: always document your assumptions and be prepared to justify your choices based on the best available evidence. As costume historian Dr. Susan North often emphasizes, 'It's a process of educated deduction.'
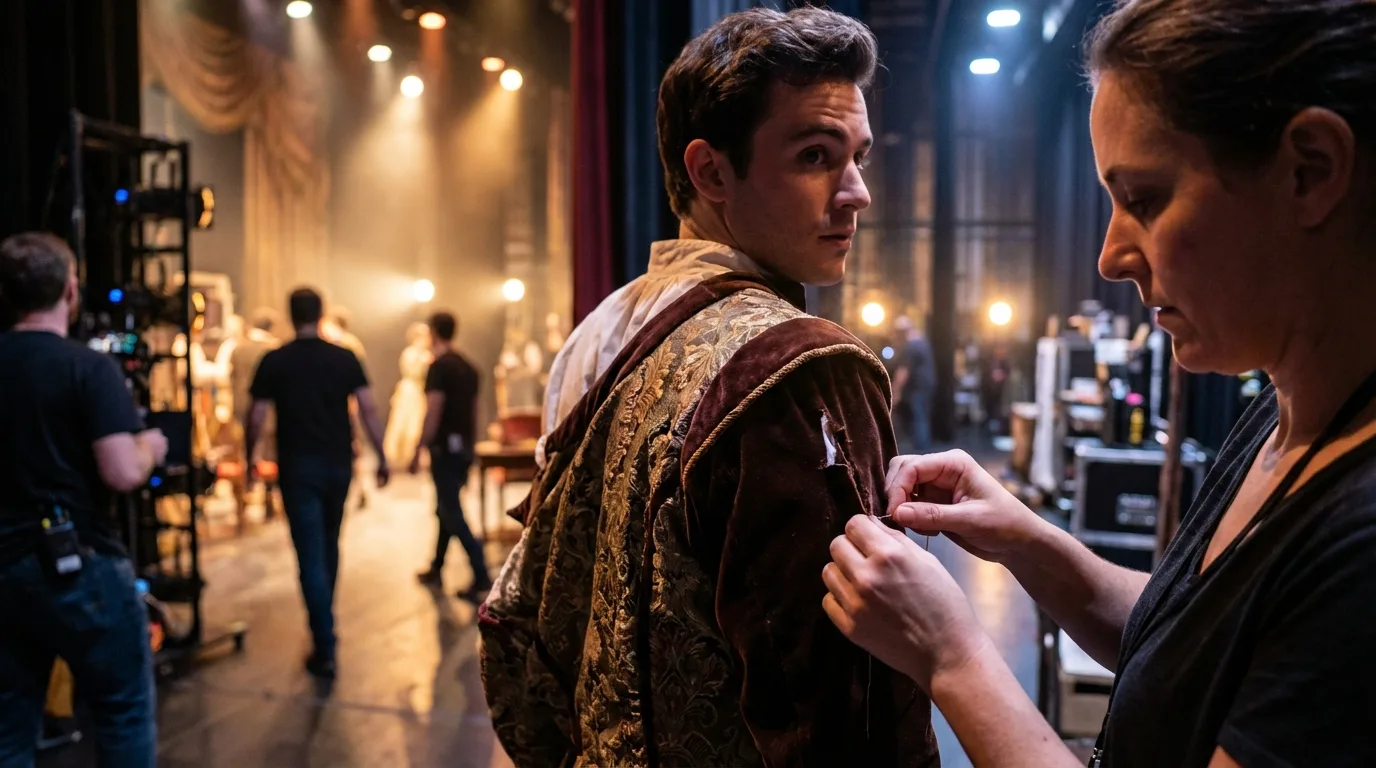
Adapting for Modern Performers
Modern actors have different body types, ranges of motion, and expectations of comfort than their 17th-century counterparts. A historically accurate pattern might be too restrictive for stage combat or dance. This is where the 'theatrical' aspect of costume design comes into play: strategic compromises.
- Hidden Gussets: Incorporate invisible gussets in armscyes or crotches to allow for greater movement without altering the external silhouette.
- Stretch Fabrics: For inner linings or less visible areas, using a fabric with a slight stretch can enhance comfort and durability.
- Adjustable Closures: While historical garments often used ties or hooks, modern theatrical costumes may benefit from zippers or snaps hidden behind decorative closures for quick changes.
Budget and Time Constraints
The elaborate nature of 17th-century garments means they can be time-consuming and expensive to create. Smart patterning can help mitigate these factors.
- Modular Design: Pattern components that can be easily adapted or reused for different characters or productions.
- Strategic Embellishment: Focus detailed embellishment on areas most visible to the audience, using simpler techniques for less prominent parts.
- Fabric Efficiency: Plan your pattern layouts carefully to minimize fabric waste, especially with expensive materials.
Advanced Techniques: Scaling and Digital Patterning
For those looking to push the boundaries of historical patterning, modern technology offers powerful tools to enhance accuracy and efficiency in creating a complex 17th-century theatrical costume.
Scaling from Historical Illustrations
While challenging, scaling patterns from detailed historical illustrations can be a fascinating, albeit advanced, technique. It requires a keen eye for proportion and an understanding of perspective. This involves establishing a known measurement (e.g., the height of a figure if a scale is provided, or an estimated body part measurement) and then using that to proportionally scale other elements of the garment. This method is often employed when extant patterns are non-existent, and one must deduce the pattern from visual depictions alone.
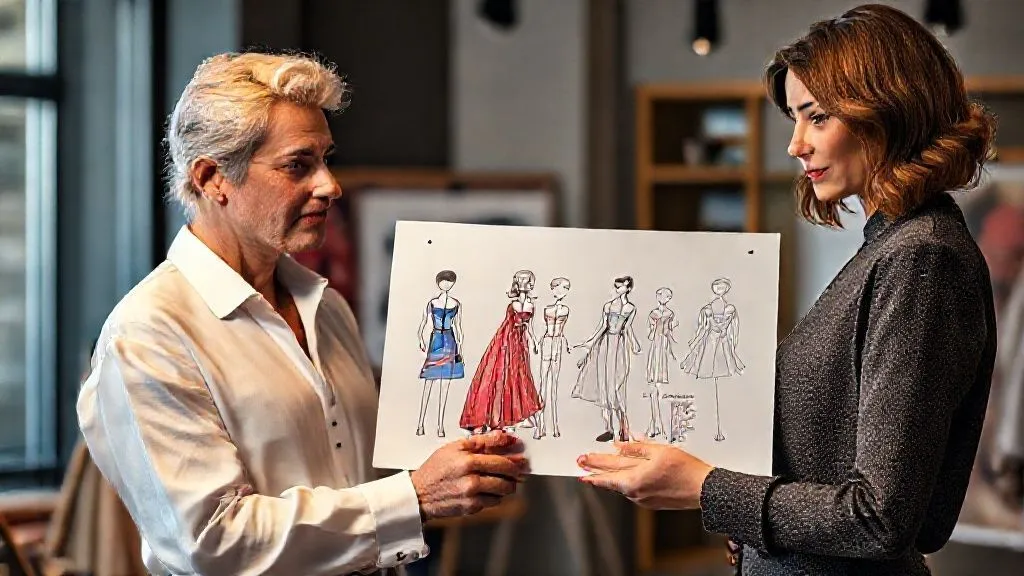
Leveraging CAD for Complex Designs
Computer-Aided Design (CAD) software, specifically pattern-making programs like Optitex, Lectra, or even specialized 3D garment design software, can revolutionize the process. These tools allow for:
- Precision Drafting: Create highly accurate patterns with exact measurements and curves.
- Virtual Draping: Some 3D programs allow you to 'dress' a virtual avatar (which can be customized to period body shapes) with your pattern, simulating fabric drape and fit before cutting a single piece of fabric.
- Grading: Easily scale patterns up or down for different performers, maintaining historical proportions.
- Nesting: Optimize fabric usage by efficiently arranging pattern pieces on a virtual fabric layout.
- Pattern Storage and Modification: Digital patterns are easily stored, modified, and shared, making iterative design and collaboration much simpler.
While the initial learning curve for CAD can be steep, the long-term benefits in accuracy, efficiency, and the ability to visualize complex designs make it an invaluable tool for experienced costume designers tackling intricate historical periods. It allows for a level of precision that manual methods simply cannot match, especially when dealing with the nuanced curves and volumes of 17th-century fashion.

Frequently Asked Questions (FAQ)
What is the best way to start when historical sources for a specific 17th-century costume are limited? When primary sources are scarce, begin by researching the broader fashion trends of the specific decade and region. Look for extant garments or well-documented patterns from neighboring years or countries that share stylistic similarities. Cross-reference with general historical costume texts and expert opinions. Document all assumptions and be prepared to justify your design choices based on the closest available evidence. A comparative approach, analyzing how similar garments were constructed in slightly different contexts, can be very enlightening.
How can patterns for 17th-century costumes be adapted for quick changes or durability in a theatrical production? For quick changes, incorporate hidden modern closures like zippers or snaps along seams that would historically have been laced or buttoned. Use strong, theatrical-grade fabrics that mimic historical textures but offer greater durability and resistance to wear and tear. Strategic reinforcement at stress points, such as armholes and seams, with interfacing or extra stitching, is also crucial. Consider splitting garments into multiple pieces (e.g., a bodice and skirt) if it aids in faster changes, even if historically they might have been one.
What are the most common historical inaccuracies seen in modern theatrical 17th-century costumes? The most common inaccuracies include incorrect silhouette (often due to neglecting proper undergarments), anachronistic fabric choices (e.g., using flimsy modern satins for structured garments), improper sleeve set and volume, and the misplacement or anachronistic use of trimmings and embellishments. Modern interpretations often simplify the complex layering and internal structure, leading to a 'costume-y' rather than historically accurate look. Neglecting the distinct period posture is also a frequent oversight.
How important is understructure (corsetry, farthingales, padding) for achieving an accurate 17th-century silhouette? Understructure is absolutely critical. The 17th-century body shape was dramatically altered by stays (corsets) for women, and padding or specific cuts for men's doublets and breeches. Without these foundational layers, the outer garments will not sit correctly, lose their intended drape, and fail to create the authentic period silhouette. A well-constructed pair of stays, for example, is often more important than the outer gown itself in achieving the desired historical form.
What tips do you have for fitting diverse body types using historical patterns designed for a different era? This requires careful adaptation. Start with the performer's measurements and compare them to the standard historical block you're using. Focus on critical points like shoulder width, back length, and armscye depth, as these are often where modern bodies differ most. Utilize the muslin toile extensively to make adjustments for bust size, hip shape, and natural waist position. For significant differences, you may need to 'blend' historical pattern principles with modern pattern-making techniques like dart manipulation or adding strategic ease, always striving to maintain the external historical silhouette.
Key Takeaways and Final Thoughts
Mastering how to accurately pattern a complex 17th-century theatrical costume is an intricate dance between scholarly research, technical precision, and creative adaptation. It demands a deep respect for history coupled with an acute understanding of the practicalities of performance.
- Research is Paramount: Begin with primary sources to truly understand the period's fashion.
- Deconstruct the Silhouette: Grasp the underlying construction and evolution of key garment components.
- Measure with Precision: Account for period understructures and avoid modern sizing assumptions.
- Embrace the Toile: Use muslin mock-ups extensively to refine fit and shape before committing to final fabrics.
- Balance Authenticity and Practicality: Make informed decisions on fabrics and embellishments that serve both historical accuracy and theatrical needs.
- Anticipate Challenges: Be prepared for limited documentation and adapt patterns for modern performers.
The journey to creating a truly authentic and stunning 17th-century theatrical costume is a rewarding one. It tests your patience, hones your eye for detail, and deepens your appreciation for the artistry of historical dressmakers. By embracing these expert strategies, you're not just creating a costume; you're weaving a tangible piece of history that will captivate audiences and elevate your craft. Continue to learn, to experiment, and to push the boundaries of what's possible, and your designs will speak volumes.
Recommended Reading
- Reverse Chronic Skin Inflammation: 7 Steps to Holistic Gut Health
- 7 Pro Secrets: How to Prevent Intricate Gel Nail Art Chipping?
- 7 Strategies: Adapting Vintage Silhouettes for Every Modern Body Type
- 7 Proven Metrics: How to Prove ROI of Personalized Fashion Tech Investments?
- Beyond 1000: Scaling Hyper-Personalized Skincare Formulation


Your email address will not be published. Required fields are marked *