
Achieving Realistic Period Costume Textile Aging Quickly on Budget?
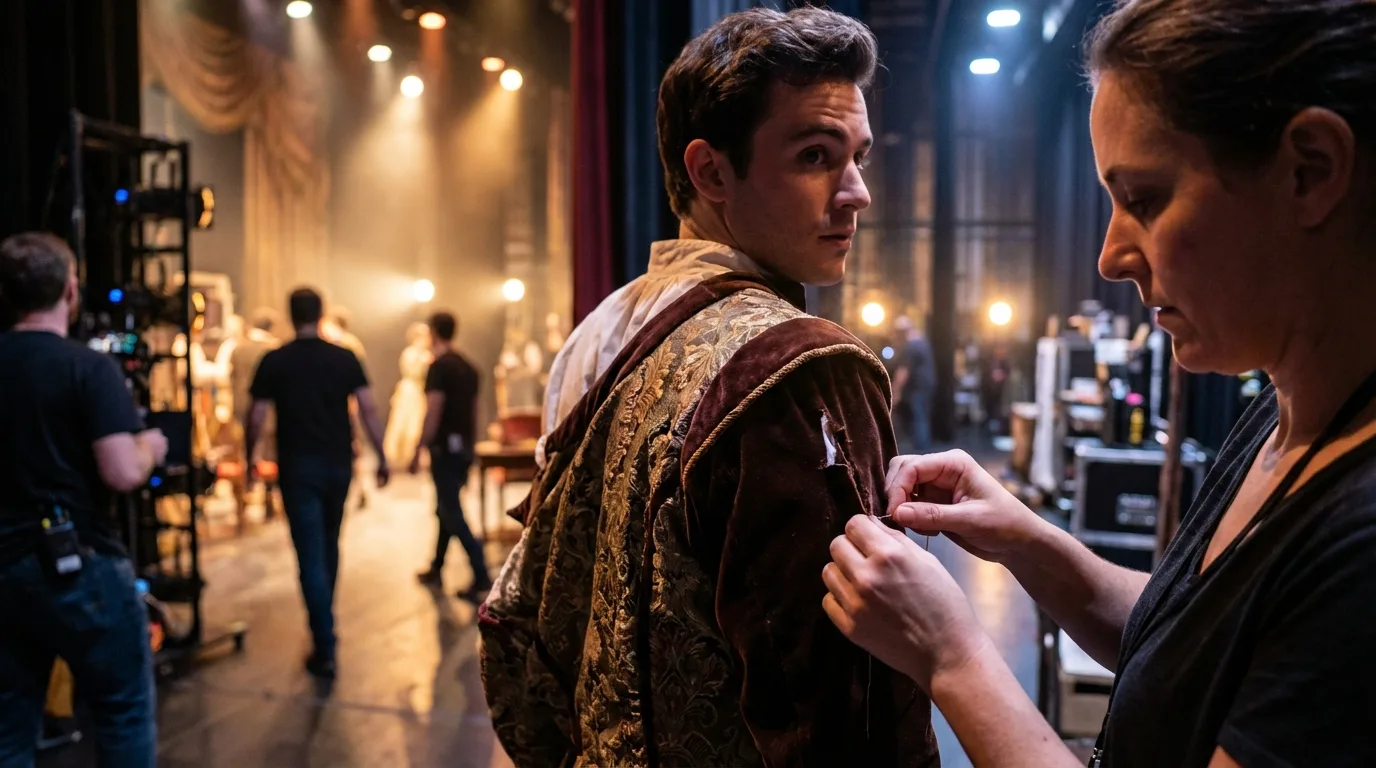
For over two decades immersed in the intricate world of costume design for film, theatre, and historical reenactment, I’ve witnessed firsthand the profound impact that authentic textile aging can have on a character, a scene, and an entire narrative. It’s the difference between a costume that simply exists and one that tells a story, imbued with history, wear, and lived experience.
The challenge is perennial: how do you transform a pristine bolt of fabric into a garment that whispers tales of a bygone era, all while battling the relentless clock and a constrained budget? Many emerging designers, and even some veterans, find themselves struggling with the dichotomy of needing a historically accurate, beautifully aged piece, but lacking the time or financial resources for traditional, slow methods.
In this definitive guide, I'll pull back the curtain on the industry's most effective, budget-friendly, and rapid techniques for achieving realistic period costume textile aging quickly on budget. We'll explore everything from understanding historical wear patterns to ingenious material applications, ensuring your period costumes resonate with unparalleled authenticity and impact.
Why Authentic Aging Matters: Beyond Just 'Looking Old'
The art of costume aging, often referred to as 'breakdown' in the industry, is far more than just making something look dirty or torn. It’s about visual storytelling. Every stain, every fray, every faded patch should contribute to the character's backstory, their environment, and their emotional state. A truly aged costume speaks volumes without a single line of dialogue.
I've seen productions where magnificent sets and stellar acting were undermined by costumes that looked fresh off the rack, jarring the audience out of the historical moment. Conversely, a perfectly aged garment can elevate a performance, grounding the character in their world. This isn't just about aesthetics; it’s about psychological immersion for both the actor and the audience.
“A costume isn't just clothing; it's a second skin, a historical artifact that breathes life into a character. Authentic aging is its soul.”
Neglecting this crucial step can lead to costumes that appear flat, unconvincing, and ultimately, undermine the entire production's realism. It's a subtle art, but its absence is glaringly obvious. For further reading on the impact of costume on character, I recommend exploring resources from institutions like The Victoria and Albert Museum's fashion archives.
The Foundation: Understanding Textile History and Wear Patterns
Before you even think about applying a single technique, the most critical step for achieving realistic period costume textile aging quickly on budget is thorough research. Understanding how different fibers and weaves behaved historically, how people lived, and what activities they performed is paramount.
Consider the fabric itself: a coarse linen peasant tunic will age differently than a delicate silk court gown. Wool tweed will pill and felt, while cotton will fade and thin. Research specific period illustrations, extant garments in museum collections, and historical texts that describe daily life. Where would a blacksmith's apron show grease and scorch marks? How would a traveler's cloak weather a journey?
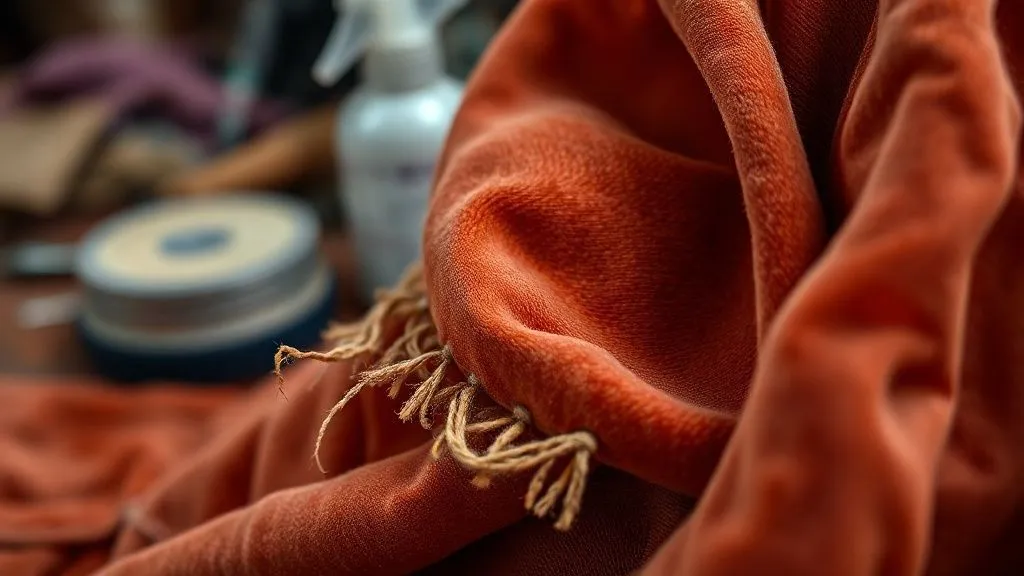
Case Study: The Duke's Faded Velour
I recall a project where we were tasked with aging a luxurious velour smoking jacket for a 19th-century duke. The initial instinct might have been to simply scuff it up. However, research into the habits of gentlemen of that era revealed that such garments were often worn in smoky studies, by fireplaces, and during long evenings of reading or card games. The fabric, being a pile weave, wouldn't necessarily fray heavily but would likely show concentrated areas of compression and subtle fading where it rubbed against chair backs, where elbows rested, or near the lapels from handling. A light, smoky patina and a slight sheen reduction in these areas, achieved with very fine sandpaper and a matte spray, proved far more authentic than artificial tears, telling a story of quiet, sophisticated wear rather than rough abuse.
Knowing your fabric and its historical context informs every decision you make. For deeper dives into historical textile properties, academic journals and resources from institutions like the Textile Society of America are invaluable.
Budget-Conscious Chemical & Dye Techniques for Rapid Aging
When time and money are tight, judicious use of common household items and inexpensive art supplies can create dramatic aging effects. These methods are excellent for achieving realistic period costume textile aging quickly on budget.
- Tea & Coffee Stains: The classic for a reason. Brew strong black tea or coffee (instant works too for speed). Apply with spray bottles, sponges, or by dipping. Great for overall yellowing, water marks, or specific 'sweat' stains. Coffee tends to give a warmer, browner tone, while tea is more yellowish.
- Fabric Paint Washes: Thin acrylic or fabric paints (earth tones, grays, black) with water to create washes. Apply sparingly with sponges or spray bottles. This allows for precise control over grime, dust, and general discoloration without relying on dyeing the entire garment.
- Controlled Bleaching: For cottons and linens, a highly diluted bleach solution (e.g., 1 part bleach to 10-20 parts water) can create sun-fading or light damage. ALWAYS test on a scrap first. Apply with a spray bottle, let it sit for moments, then neutralize with a baking soda solution or rinse thoroughly. This is a powerful tool but requires extreme caution.
- Mud & Grime Pastes: Mix Fuller's earth (a clay powder, often used in beauty products, very affordable) with water, a touch of dark pigment, and a binder like spray adhesive or fabric medium. This creates a realistic, dry mud effect that can be applied to hems, knees, and cuffs.
Safety First: Essential Precautions for Textile Aging
Working with dyes, pigments, and especially bleach, requires diligence. Always wear gloves, eye protection, and work in a well-ventilated area. Keep a spray bottle of water and baking soda solution handy when using bleach to neutralize it quickly if needed. Remember, these chemicals can damage your skin, eyes, and lungs. For more comprehensive safety guidelines when working with chemicals in an artistic context, consult resources like OSHA's safety publications.
| Method | Pros | Cons | Speed | Cost |
|---|---|---|---|---|
| Tea/Coffee Dye | Natural, safe, cheap, good for overall tint | Limited color range, can be uneven | Fast | Very Low |
| Fabric Paint Wash | Precise, wide color range, durable | Can feel stiff if overused | Medium | Low |
| Diluted Bleach | Rapid fading, authentic look | Dangerous, irreversible, fabric damage risk | Very Fast | Very Low |
| Fuller's Earth Paste | Realistic dry mud/dust, non-damaging | Can rub off if not sealed | Fast | Low |
Mechanical Distressing: Simulating Years of Wear in Minutes
Beyond chemical treatments, physical manipulation is key to achieving realistic wear and tear. This is where you simulate friction, tears, and thinning that would naturally occur over time.
- Sandpaper & Wire Brushes: These are your best friends. Fine-grit sandpaper can soften edges, create subtle fades, and thin fabric on high-wear areas like elbows, knees, and cuffs. Coarser grits or a wire brush can create more aggressive fraying and breakdown on sturdy fabrics like denim or canvas.
- Cheese Graters & Rasps: For heavier distressing on robust fabrics, a cheese grater can create impressive tears and abrasions quickly. Use with caution to avoid overdoing it.
- Dremel Tools: A Dremel with a sanding drum or wire brush attachment can precisely target small areas for thinning, fraying, or creating small holes. Excellent for detailing around buttonholes or seams.
- Fraying & Pulling Threads: Use tweezers, seam rippers, or even your fingers to pull individual threads from hems, cuffs, and seams. This creates natural-looking fraying, especially effective on woven fabrics.
- Scoring with Blades: A sharp craft knife can be used to lightly score fabric, creating micro-abrasions that simulate stress points without fully tearing. This is particularly good for areas that would wrinkle and rub.
Remember to always work on a protected surface and wear appropriate safety gear when using sharp tools or power tools. The goal is controlled damage, not accidental injury. Practicing on scraps is non-negotiable.
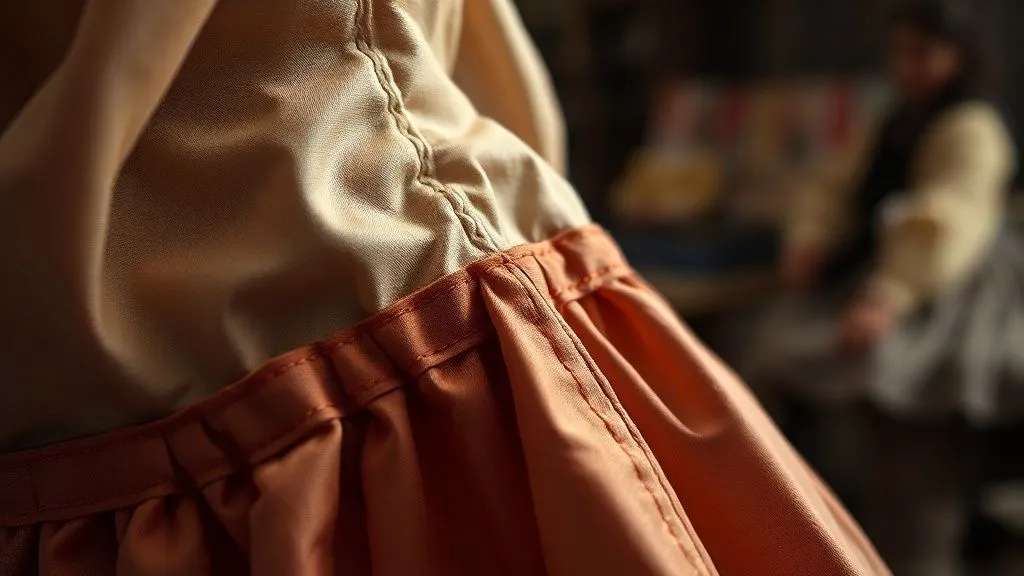
Layering & Dirt Application: The Art of Grime and Patina
The final layer of realism often comes from the thoughtful application of dirt, grime, and environmental effects. This is where a costume truly becomes part of its world.
- Fuller's Earth & Dry Pigments: As mentioned, Fuller's earth is fantastic for dust. Combine with powdered pigments (available at art supply stores) in shades of brown, black, and gray to create specific soil types or soot. Apply with large brushes, then set with a very light mist of hairspray or matte spray for durability.
- Spray Paint & Airbrushing: Highly diluted spray paints (matte finish) or an airbrush can create subtle gradients of fading, shadows, and dirt accumulation. Use stencils for specific patterns like splash marks or boot scuffs.
- Glycerin for Sweat: A mixture of glycerin and water, applied with a spray bottle, creates realistic sweat marks that appear wet but dry without staining.
- Grease & Oil Stains: A mixture of dark brown/black fabric paint, thinned with water and a tiny bit of glycerin, can simulate grease. Dab it on with a sponge in irregular patterns, focusing on areas like hands, collars, or workwear.
- Wax & Scorch Marks: For specific effects like candle wax drips, use actual candle wax (melted and carefully drizzled). For scorch marks, light application of black dry pigment or very diluted black fabric paint can work, or even carefully singe a tiny area with a heat gun for extreme realism (extreme caution required!).

Strategic Repair & Mending: Telling a Story with Every Stitch
Beyond simply damaging a garment, consider the history of its repairs. In many historical periods, clothing was a significant investment, and garments were repaired, patched, and mended until they could no longer be worn. Incorporating visible mending into your aging process adds incredible depth and realism, making the costume feel truly lived-in.
- Darning: For holes in knitted garments (like socks or sweaters) or even woven fabrics, darning with contrasting or slightly off-color thread can indicate a repair made by hand.
- Patches: Adding patches made from slightly different fabric, perhaps from an older, worn piece of the same garment, can tell a story of resourcefulness. Secure with visible, hand-stitched seams.
- Reinforced Seams: Show where seams might have come undone and been hastily re-stitched, perhaps with cruder thread or a less refined technique.
- Mended Tears: Instead of just a raw tear, show a tear that has been sewn back together, perhaps unevenly, indicating a repair under duress or by an unskilled hand.
“An authentically aged costume doesn't just show damage; it reveals resilience, care, and the ongoing saga of its owner's life through every mended seam.”
These details elevate the costume from merely 'old' to 'historically enduring'. It's a powerful narrative tool that often goes overlooked.
Quick Aging Masterclass: A Step-by-Step Budget Workflow
To pull all these techniques together for achieving realistic period costume textile aging quickly on budget, I've outlined a streamlined workflow. This sequence ensures efficiency and prevents common mistakes.
- Step 1: Research & Plan (1-2 hours): Understand the character, period, environment, and fabric. Create a mood board of aged textiles. Decide on specific wear patterns.
- Step 2: Swatch Testing (1-3 hours): NEVER apply directly to the costume. Always test all techniques on scraps of the EXACT same fabric. Document your results for reference. This is crucial for avoiding costly mistakes and perfecting your process.
- Step 3: Base Discoloration (1-4 hours): Apply overall washes of tea, coffee, or diluted fabric paint to achieve general yellowing, fading, or a dingy base tone. This sets the stage for further aging.
- Step 4: Mechanical Distressing (2-5 hours): Focus on high-wear areas. Use sandpaper, wire brushes, and dremels to thin, fray, and abrade cuffs, hems, collars, and stress points. Create any necessary tears or holes.
- Step 5: Detail Grime & Patina (2-6 hours): Apply specific dirt, mud, grease, and sweat stains using Fuller's earth, pigments, and paint washes. Build up layers gradually, from lightest dust to heaviest grime.
- Step 6: Strategic Repairs (1-3 hours): Integrate any darning, patching, or mending that tells a specific story about the garment's history.
- Step 7: Sealing & Final Inspection (1-2 hours): Apply a matte fabric sealant or a light mist of hairspray to set dry applications. Inspect under various lighting conditions. Adjust as needed.
This systematic approach allows for iteration and refinement, ensuring that each step builds upon the last, resulting in a cohesive and believable aged effect without wasting precious time or materials.
Avoiding Common Pitfalls: What NOT to Do When Aging Costumes
While the goal is to achieve realistic period costume textile aging quickly on budget, there are several common mistakes that can instantly undermine your efforts:
- Uniform Aging: The biggest giveaway of artificial aging is when wear and tear are evenly distributed across the garment. Real wear is always concentrated in specific areas.
- Over-Aging: Sometimes less is more. An overly distressed garment can look theatrical and cartoonish rather than genuinely old. Subtlety is key.
- Ignoring Fabric Type: Trying to fray a tightly woven satin like a coarse linen will look unnatural. Understand how your specific fabric would age.
- Unrealistic Damage: Tears in illogical places, or clean, sharp cuts instead of frayed, worn edges, break the illusion. Damage should make sense for the character and their life.
- Lack of Layering: Applying all dirt or fading at once often looks flat. Real wear builds up in layers over time.
- Forgetting to Test: Skipping the swatch test is a recipe for disaster. Different fabrics react differently to the same techniques.
- Neglecting Sealing: If your dirt and grime aren't properly sealed, they can rub off on actors, other costumes, or the set, creating a new, unintended problem.
“The most convincing aging is often the most subtle, suggesting a history rather than screaming for attention. Authenticity lies in observation, not exaggeration.”
Always step back and view your work from a distance, and under different lighting, to catch these common errors. A fresh pair of eyes from a colleague can also be invaluable.

Frequently Asked Questions (FAQ)
How do I age delicate fabrics like silk or lace without destroying them? For delicate fabrics, avoid harsh mechanical distressing. Focus on very diluted tea/coffee washes for subtle discoloration, gentle airbrushing with fabric paint for shadows and patina, and minimal, careful fraying with tweezers. Consider using a fine mist of water and a heat gun to create subtle shrinkage or crinkling, but always test on a hidden area or scrap first.
What are the most common mistakes beginners make in costume aging? Beginners often make textiles look uniformly dirty, apply too much damage without a clear narrative, or use methods unsuitable for the fabric type. They might also neglect safety precautions or skip crucial swatch testing, leading to irreversible damage.
Can I reverse aging if I go too far? Reversing aging is extremely difficult, if not impossible, especially with bleaching or heavy mechanical damage. This underscores the importance of starting subtly, building layers, and rigorously testing on scraps. For discoloration, sometimes a mild fabric brightener or a different dye bath might mitigate effects, but it's rarely a full reversal.
What's the best way to make a new textile look genuinely sun-faded? True sun-fading involves UV exposure. For rapid effects, a very diluted bleach solution (as described earlier) applied with a spray bottle in areas that would naturally fade (shoulders, back) and then neutralized, is effective for cottons/linens. For other fabrics, light airbrushing with very pale, desaturated fabric paints can simulate a sun-bleached look.
How do I ensure the aging effects are permanent and won't rub off on actors or sets? For dry applications like Fuller's earth or pigments, a light, even spray of matte fabric sealant, hairspray, or scenic fixative is essential. For wet applications like paint washes, ensure they are fully dry and consider heat-setting if the fabric paint instructions recommend it. Always do a rub test on an inconspicuous area before costume deployment.
Key Takeaways and Final Thoughts
Achieving realistic period costume textile aging quickly on budget is an art form that blends historical knowledge, material science, and creative application. It's a skill that transforms mere clothing into powerful narrative elements, enriching every production they grace.
- Research is Foundation: Understand historical context and fabric behavior before you begin.
- Test Relentlessly: Always use scraps to avoid irreversible mistakes and refine your techniques.
- Layer Your Effects: Build up aging gradually, from base discoloration to mechanical wear and specific grime.
- Prioritize Safety: Always use appropriate personal protective equipment, especially with chemicals.
- Embrace Storytelling: Every aged detail should contribute to the character's journey and world.
- Subtlety Over Exaggeration: Realistic aging is often understated and nuanced.
- Budget-Friendly Materials: Utilize common, inexpensive items creatively for maximum impact.
As an industry specialist, I can confidently say that mastering these techniques will not only save you time and money but will also elevate the quality and authenticity of your costume designs. The magic lies in making the new look ancient, the pristine appear weathered, and the fabricated feel undeniably real. Go forth, experiment safely, and let your textiles tell their untold stories.
Recommended Reading
- 7 Artistic Strategies: Monetizing Unique Contemporary Jewelry Designs
- 5 Rapid Methods: Urgent Costume Breakdown to Age Denim Fast Realistically
- 7 Proven Methodologies: Early Identification of Lasting Menswear Trends
- 5 Ways to Stop Self-Cleaning Sportswear Failing from Sweat
- 7 Strategies: Brand Vintage Clothing as a Timeless Investment Piece


Your email address will not be published. Required fields are marked *