
What to do when antique lace crumbles during restoration?
For over two decades in the vintage fashion and textile conservation world, I've witnessed the full spectrum of emotions that come with handling antique apparel. Few moments are as heart-stopping, however, as when a precious piece of antique lace, an heirloom steeped in history, begins to crumble right before your eyes during restoration. That delicate whisper of history, so resilient through centuries, suddenly turns to dust, threatening to take with it not just fabric, but memories and an irreplaceable artistic legacy.
That heart-sinking moment, a conservator's nightmare, is a common reality for many who embark on the noble, yet treacherous, journey of preserving antique textiles. The fragility of aged fibers, often unseen until the moment of crisis, can turn a hopeful restoration project into a desperate rescue mission. It's a test of patience, skill, and an understanding of materials that only years of hands-on experience can truly impart.
But despair not, my fellow custodians of history. In this definitive guide, I will share the exact frameworks, actionable steps, and expert insights I've developed over my career to navigate this exact challenge. You'll learn not just what to do when antique lace crumbles during restoration, but how to approach these delicate pieces with the respect and technical prowess they demand, transforming potential loss into a triumph of preservation.
Understanding the Enemy: Why Antique Lace Crumbles
Before we can truly address the crisis, we must understand its root causes. Antique lace, often crafted from organic fibers like linen, cotton, or silk, is inherently susceptible to degradation over time. I've seen countless pieces where the very structure that once made them exquisite now betrays them, turning threads into brittle fragments.
The primary culprit is usually a combination of factors. First, **fiber degradation** itself: cellulose (cotton, linen) and protein (silk) fibers naturally break down due to hydrolysis and oxidation, losing tensile strength and becoming brittle. Second, **environmental damage**: prolonged exposure to light (especially UV), extreme fluctuations in temperature and humidity, and pollutants in the air (like sulfur dioxide) accelerate this decay. Third, **improper storage**: folding instead of flat storage, acidic storage materials, or even insect infestations can inflict irreversible damage. Finally, **previous repairs** using unsuitable materials like strong glues or synthetic threads that degrade differently can create stress points, leading to localized crumbling. Understanding these underlying issues is the first step in formulating an effective rescue strategy.
Expert Insight: Prevention is always easier than cure. The best restoration begins with meticulous preventative care. Once a fiber matrix begins to fail, the clock starts ticking faster.
Different fiber types present unique challenges. Linen and cotton lace, while durable in their prime, become stiff and prone to snapping when dry and brittle. Silk lace, particularly net or bobbin lace, is notorious for 'shattering' into tiny pieces, a phenomenon known as 'silk weighting' where metallic salts used historically to add body actually accelerate its decay. Identifying the fiber type is crucial for selecting appropriate restoration methods. I often perform a microscopic examination or a simple burn test (on a tiny, non-critical fragment) to confirm the fiber composition before proceeding.

Immediate Crisis Management: First Aid for Fragile Lace
The moment you discover crumbling lace, your actions in the next few minutes are critical. Panic is natural, but a calm, methodical approach is paramount. Think of yourself as an emergency responder for textiles.
Assessment and Documentation
My first rule of thumb is always: **document everything**. Before you touch anything beyond the absolute necessity, record the state of the lace.
- Visual Inspection: Carefully observe the extent and pattern of the crumbling. Is it localized to an edge, or is the entire piece uniformly degraded?
- High-Resolution Photography: Take detailed photographs from multiple angles, including close-ups of the damaged areas. These serve as invaluable references for repair and for insurance purposes.
- Detailed Notes: Record observations about the fiber type (if known), the type of lace, environmental conditions, and any suspected causes of damage. Sketch diagrams if helpful.
Containment and Isolation
Once documented, your priority is to prevent further physical stress and contamination.
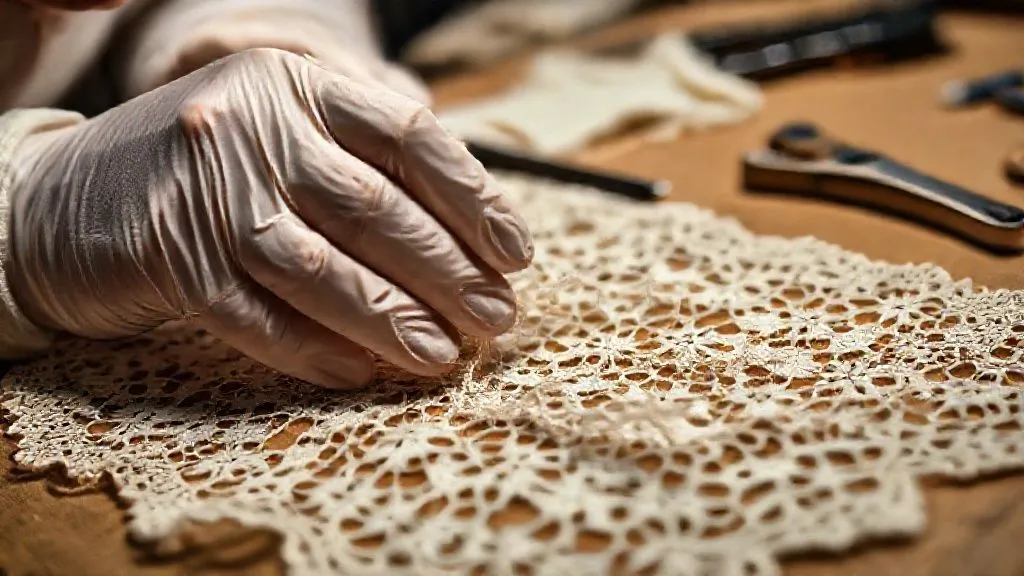
- Gentle Handling: Wear clean, lint-free cotton or nitrile gloves. Avoid direct skin contact, as oils and acids from your hands can exacerbate degradation.
- Provide Support: If the lace needs to be moved, slide a piece of acid-free board or stiff archival paper underneath it. Never lift by a single point or edge.
- Isolate and Protect: Place the lace, still on its support, into an acid-free archival box or carefully wrap it in acid-free tissue paper. Ensure it lies flat, with no folds or creases that could cause more breakage.
This initial phase, while seemingly simple, lays the groundwork for all subsequent restoration efforts. Skipping it is like a surgeon operating without an X-ray – you're working blind. According to the American Institute for Conservation (AIC), proper documentation is a cornerstone of ethical and effective conservation practices, providing a permanent record of an object's condition and treatment for future reference. Learn more about conservation standards from the AIC.
| Aspect of Damage | Observation | Immediate Action | Long-Term Implication |
|---|---|---|---|
| Fiber Type | Brittle, powdery, or shattering | Identify fiber (if possible), avoid flexing | Dictates chemical and physical treatment approach |
| Extent of Crumbling | Localized (e.g., edges) or Widespread | Map affected areas, contain loose fragments | Influences repair strategy: spot repair vs. overall stabilization |
| Color & Discoloration | Yellowing, browning, or staining | Note exact hues and locations | Indicates chemical degradation, potential for future fragility |
| Previous Repairs | Visible stitches, glue, or patches | Assess integrity of old repairs | May need careful removal or integration into new work |
The Restoration Toolkit: Essential Supplies for Delicate Repair
Approaching crumbling antique lace without the right tools is like trying to defuse a bomb with a butter knife – futile and potentially disastrous. My workbench is a testament to years of trial and error, a collection of specialized instruments that make delicate work possible. For anyone tackling this challenge, a well-stocked toolkit is non-negotiable.
First and foremost, **magnification** is critical. A jeweler's loupe, a headband magnifier, or even a stereo microscope will allow you to see the individual threads and their precise points of breakage. This level of detail is impossible with the naked eye and is essential for accurate intervention. Next, you'll need an array of **fine needles**. I use everything from traditional sewing needles in sizes 10-12 to specialized beading needles and even micro-needles designed for insect pinning. The goal is to find a needle that can pass through the existing lace structure without causing further damage.
For thread, **fine silk crepeline thread** (often 20/2 or 30/2 weight) is my go-to for its strength, fineness, and ability to blend seamlessly. It's crucial to select a thread that is weaker than the original lace threads, ensuring that the repair thread will break before the antique lace itself in case of future stress. **Acid-free tissue paper** and **acid-free archival board** are vital for support and storage. You'll also need **conservation-grade adhesives** like methylcellulose or a very dilute textile adhesive, applied with micro-spatulas or fine paintbrushes, but these should be used sparingly and only when other methods are insufficient. Finally, **blunt-tipped tweezers** and **small, sharp scissors** (like embroidery scissors) complete the basic setup. Every tool must be clean and free of rust or residue.
Stabilization Techniques: Preventing Further Deterioration
Once you've documented the damage and gathered your tools, the immediate next step is stabilization. This isn't about repair yet; it's about halting the decay and providing structural integrity to prevent further loss. In my experience, rushing to repair before stabilization is a common mistake that often leads to more damage.
Humidification and Relaxation
One of the most effective initial steps for brittle lace is controlled humidification. Dry, brittle fibers are prone to snapping. I use a humidification chamber – a simple sealed container with a tray of distilled water (not touching the lace) – to slowly and gently introduce moisture. This makes the fibers more pliable and less likely to break during handling. Never spray water directly onto the lace, as this can cause shrinkage or staining. The process is slow, often taking several hours, but it's crucial for relaxing the fibers. According to textile conservation guidelines, a relative humidity of 50-60% is ideal for most organic fibers, allowing them to relax without promoting mold growth.
Support Netting and Backing
This is where the magic truly happens for severely degraded lace. The goal is to create an invisible, supportive scaffold. My preferred method involves using a fine, sheer silk crepeline or conservation-grade nylon tulle, dyed to match the lace's original color as closely as possible. This material acts as a 'second skin,' holding the fragile lace together.
- Preparation: Cut a piece of support netting slightly larger than the damaged lace. If dyeing, ensure it's completely dry and colorfast.
- Placement: Gently lay the lace flat on a clean, stable surface (like an acid-free board). Carefully place the support netting over the damaged area, aligning its weave with the lace's original grain.
- Basting/Couching: Using your fine silk thread and needle, begin to 'couch' (stitch) the lace to the netting. This involves making tiny, almost invisible stitches that pass over the lace threads and through the netting, securing the lace without piercing its original fibers. The stitches should follow the contours and patterns of the lace, effectively creating a new, strong foundation. This process is painstaking, often taking many hours, but it's the most respectful and reversible method of stabilization.
Conservation Adhesives
While I generally prefer stitching for reversibility, there are instances where a conservation adhesive is necessary – for example, when fibers are too degraded to take a stitch, or to hold down particularly stubborn, curling fragments. I typically use a very dilute solution of methylcellulose or a heat-set adhesive like B-72, applied with an ultra-fine brush. The key is minimal application, using just enough to secure the fragment, and ensuring the adhesive is reversible and pH neutral. Always test on a non-critical area first.
Case Study: Rescuing the 'Victorian Veil'
I once received a Victorian wedding veil, a family heirloom from the 1880s, which had been stored improperly for decades. The silk net, once exquisite, had shattered in multiple areas, literally falling apart into dust at the slightest touch. The client was heartbroken, believing it was beyond repair. My approach started with painstaking documentation and gentle humidification. I then dyed a fine silk crepeline to match the veil's aged ivory hue. Over 80 hours, I meticulously couched the crumbling silk net onto the new support, following every curve and pattern of the original design. The result was a veil that, while still showing its age, was now stable, wearable, and had regained its structural integrity. The client wept with joy, seeing her great-grandmother's veil brought back from the brink of oblivion. This demonstrated that even the most fragile pieces can be stabilized with patience and the right techniques.
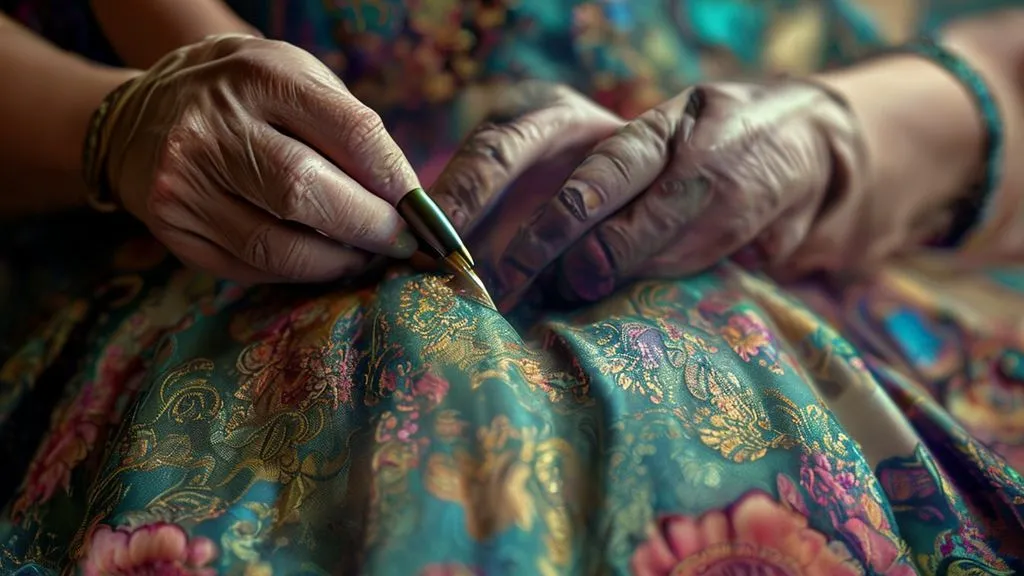
Reconstruction and Repair: Advanced Techniques for Missing Areas
Once stabilization is complete, you can consider the more intricate work of reconstruction. This stage often requires not just technical skill but also an artist's eye to match the original craftsmanship. When antique lace crumbles during restoration and leaves significant gaps, these advanced techniques become essential.
Needle Lace Techniques
For areas where the original lace pattern is completely missing, but the surrounding pattern is intact, traditional needle lace techniques can be employed. This involves using a needle and fine thread to recreate the missing elements stitch by stitch, mirroring the surrounding design. This is an extremely time-consuming process that requires a deep understanding of historical lace construction, but it offers the most authentic reconstruction. I've often spent days recreating a single missing flower or leaf motif, ensuring every loop and picot matches the original.
Darning and Infilling
Darning is a technique commonly used for mending holes in woven fabrics, but it can be adapted for lace. For areas where the structural integrity is compromised but some original threads remain, fine darning stitches can be used to bridge gaps and reinforce weak points. Infilling involves carefully weaving new threads into the existing lace structure to fill small holes or reinforce weakened areas, making sure the new threads are virtually indistinguishable from the old. The key is to match the thread weight, color, and tension perfectly to avoid creating a 'patchwork' appearance.
Patching with Donor Lace
Sometimes, the damage is too extensive for individual thread reconstruction. In such cases, patching with 'donor lace' – a small piece of antique lace of the same type, era, and as similar a pattern as possible – becomes an option. This requires meticulous sourcing and careful integration. The donor piece is carefully cut to fit the missing area, and its edges are then meticulously stitched or couched to the original lace, blending it as seamlessly as possible. Ethical considerations are paramount here; the donor lace must be clearly documented, and its use should be minimal and justifiable. As textile conservator Nancy Wyatt often emphasizes, all repairs should be distinguishable upon close inspection, yet visually integrated, to maintain the historical integrity of the piece.
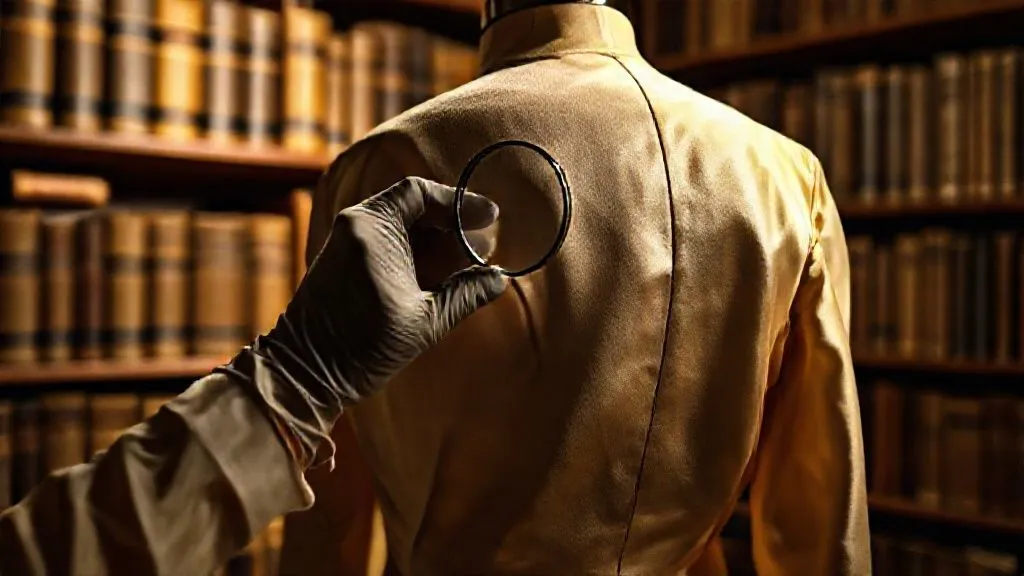
Mounting and Support: Preserving the Repaired Piece
After the laborious process of stabilization and repair, the final step is to ensure the piece is properly mounted and stored for long-term preservation. A beautifully restored piece of lace can quickly degrade again if not given the right support and environment.
Custom Mounts and Frames
For display, I highly recommend custom-made archival mounts. This involves carefully stitching the lace (via its support netting, if used) onto a fabric-covered, acid-free board. The board is then placed within a conservation-grade frame, with UV-filtering glass or acrylic. The stitching should be done with fine silk thread, strategically placed to support the lace without distorting it. The frame should also allow for air circulation to prevent moisture buildup.
Archival Storage Boxes
For pieces not on display, storage in acid-free archival boxes is essential. These boxes protect the lace from light, dust, and environmental fluctuations. Always lay the lace flat, interleafing with acid-free tissue paper if multiple layers are stored together. Avoid folding at all costs, as creases can become permanent stress points, leading to future crumbling. The box should be stored in a stable environment, away from direct sunlight, heat sources, and damp areas.
- Prevents physical stress: A proper mount eliminates the need for handling the delicate lace directly.
- Protects from environmental factors: UV-filtering glass and archival boxes shield against light, dust, and pollutants.
- Maintains structural integrity: Evenly distributed support prevents sagging or distortion over time.
- Facilitates safe viewing: Allows appreciation of the textile without risking damage.
Long-Term Care: Ensuring Your Antique Lace Endures
Restoration is not a one-time event; it's a commitment to ongoing care. To ensure your antique lace endures for generations to come, consistent long-term care is vital. Ignoring these principles can negate all the painstaking work of restoration, leading you right back to the question of what to do when antique lace crumbles during restoration.
Environmental Control
This is perhaps the single most important factor. Textiles thrive in stable conditions. Maintain a consistent temperature (ideally 68-72°F or 20-22°C) and relative humidity (50-55%). Avoid attics, basements, and exterior walls where temperature and humidity fluctuate wildly. Keep the lace away from direct sunlight and artificial lights that emit UV, as light exposure is a major accelerator of fiber degradation. Consider UV-filtering films on windows or display cases.
Safe Handling Protocols
Even after restoration, handle antique lace as little as possible. When you must handle it, always wear clean cotton gloves to prevent transferring oils, dirt, and acids from your hands. Support the entire piece, never allowing it to dangle or put stress on individual points. Avoid wearing jewelry that could snag delicate threads.
Regular Inspections
Periodically inspect your antique lace for any signs of renewed degradation, pest activity (moths, carpet beetles), or environmental issues. Early detection can prevent minor problems from becoming catastrophic. If you notice any changes, consult with a professional textile conservator immediately. Remember, proper storage and environmental control are your best defenses against future damage. The Smithsonian Institution's Museum Conservation Institute provides excellent resources on environmental controls for collections, emphasizing the importance of stability over absolute values. Refer to their guidelines for best practices.
The Ethical Dilemma: When to Stop and When to Preserve Imperfection
As a conservator, I often grapple with an ethical tightrope: how much intervention is too much? When antique lace crumbles during restoration, the urge to 'make it perfect' can be strong. However, true conservation prioritizes preservation and historical integrity over aesthetic perfection. This means embracing the concept of 'minimal intervention.'
Minimal intervention dictates that any treatment should be the least invasive necessary to stabilize the object and prevent further deterioration. It respects the object's history, including its signs of age and wear. A perfectly 'new-looking' repair might erase valuable historical evidence or introduce materials that are incompatible with the original, causing more harm in the long run. The goal is not to hide the age or history of the lace, but to ensure its survival.
Expert Insight: A visible, respectful repair that ensures the longevity of an antique textile is far more valuable than an invisible, aggressive repair that compromises its historical integrity or accelerates its decline.
I've learned to accept that some damage is part of an object's story. Sometimes, the most responsible action is simply to stabilize the crumbling areas and provide archival support, leaving the evidence of its journey intact. This approach requires humility and a deep understanding of the object's significance. It's about being a custodian, not a creator. Knowing when to stop, when to accept an imperfection as part of the narrative, is a hallmark of an experienced conservator. This ethical framework guides every decision I make when faced with fragile, crumbling antique lace, ensuring that its legacy is honored rather than rewritten.
Frequently Asked Questions (FAQ)
Q: Can I wash antique lace that is crumbling?
A: Absolutely not, unless under the strict guidance of a professional conservator. Washing crumbling lace will almost certainly lead to catastrophic loss. The fibers are too weak to withstand the mechanical stress of water, and the act of drying can cause severe shrinkage or further disintegration. Stabilization must occur before any consideration of cleaning, and even then, dry cleaning or localized surface cleaning is usually preferred over immersion.
Q: What is the best type of thread to use for repair?
A: For most lace repairs, I recommend using the finest possible silk crepeline thread (e.g., 20/2 or 30/2 weight) or a very fine, conservation-grade nylon monofilament thread. The key is that the repair thread should be weaker than the original lace threads so that if the lace is ever stressed again, the repair thread will break first, protecting the original material. The color should be matched as closely as possible, and the thread should be stable and pH neutral.
Q: How do I choose a professional conservator for antique lace?
A: Look for conservators accredited by reputable organizations like the American Institute for Conservation (AIC) or the International Council of Museums – Committee for Conservation (ICOM-CC). They should specialize in textiles and, ideally, have experience with lace. Ask for their portfolio, references, and a detailed treatment proposal outlining their methods, materials, and ethical approach. A good conservator will prioritize minimal intervention and reversibility.
Q: Is it possible to reverse damage from previous bad repairs?
A: Sometimes, yes, but it's often more challenging than original restoration. Removing old, damaging repairs (like those made with strong glues, inappropriate threads, or non-archival materials) requires extreme care. Each case is unique, and the potential for further damage during removal must be weighed against the benefits. This is definitely a task for an experienced professional.
Q: What if I can't find matching donor lace for patching?
A: If an exact match for donor lace is impossible, you have a few options. You can opt for needle lace reconstruction to recreate the missing pattern, which is labor-intensive but authentic. Alternatively, you can use a sheer, plain support fabric (like silk crepeline) to stabilize the area, making the repair visually apparent but structurally sound. The choice often depends on the extent of the damage and the aesthetic goals, always prioritizing preservation.
Key Takeaways and Final Thoughts
The moment antique lace crumbles during restoration can be daunting, but it is not the end of the line for these precious artifacts. My experience has taught me that with the right knowledge, tools, and a patient, methodical approach, even the most fragile pieces can be stabilized and given a new lease on life.
- Immediate Action is Key: Document, contain, and stabilize the lace to prevent further loss.
- Understand the 'Why': Identify the causes of degradation to inform your treatment plan.
- Invest in the Right Tools: Precision instruments are non-negotiable for delicate work.
- Prioritize Stabilization: Support netting and controlled humidification are your best friends.
- Embrace Ethical Conservation: Minimal intervention and reversibility protect the object's history.
- Ensure Long-Term Care: Proper environmental control and handling are crucial for enduring preservation.
Remember, you are not just repairing fabric; you are safeguarding a piece of history, a whisper from the past. Approach each thread with reverence and each challenge with determination. Your efforts ensure that these intricate works of art continue to tell their stories for generations to come. The journey of restoration is a profound act of respect, and with these expert insights, you are now better equipped to undertake it successfully.
Recommended Reading
- The Secret to Effortless Sophistication: How to Infuse Timeless Elegance into Casual Wear
- 5 Smart Design Strategies for Kids' Activewear: Growth Without Compromise
- The Ultimate Guide: How to Identify Rare Unique Vintage Clothing Finds
- 7 Viral Strategies: Turning Crowded Fashion Events into Unique Content Gold
- 7 Pillars: How to Prevent Streetwear from Losing Niche Appeal


Your email address will not be published. Required fields are marked *