
What's the best method to repair intricate antique filigree?
For over three decades in the intricate world of jewelry design and restoration, I've witnessed the profound beauty and inherent fragility of antique filigree. It's a testament to human artistry, a whisper from the past, woven with threads of precious metal. But with that beauty comes a unique challenge: when these delicate masterpieces suffer damage, their repair demands not just skill, but an almost reverential understanding of their historical context and construction.
The heartbreak of a broken filigree piece is something many collectors and inheritors experience. Unlike solid pieces, filigree's openwork structure of fine wires and tiny granules makes it extraordinarily vulnerable to bending, breaking, or losing its components. A single misplaced pressure, an accidental drop, or even years of natural wear can devastate its intricate patterns, leaving owners wondering if their cherished heirloom can ever truly be whole again without losing its soul.
This is precisely why I've dedicated countless hours to mastering the art of filigree restoration. It's not about a quick fix; it's about a methodical, patient, and deeply knowledgeable approach. In this comprehensive guide, I'll share the most effective, expert-backed methods I've honed over my career for repairing even the most intricate antique filigree. We'll delve into precise techniques, explore the critical tools, and discuss the nuances that differentiate a successful, historically sensitive repair from one that diminishes the piece's value and integrity. Prepare to unlock the secrets to preserving these timeless treasures.
Understanding the Anatomy of Antique Filigree
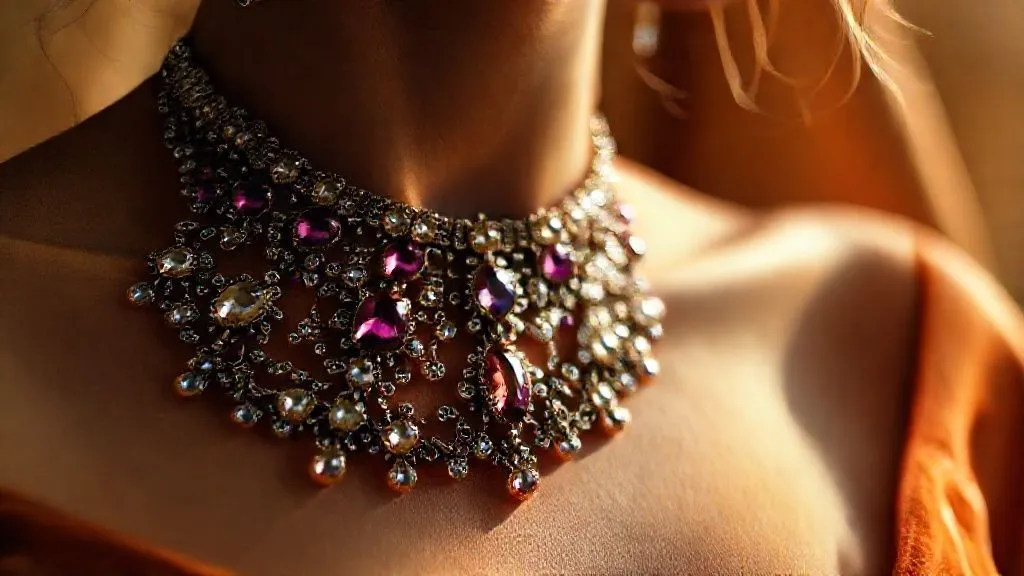
Before we can even consider repair, we must first understand what we are working with. Antique filigree is not merely decorative; it's an engineering marvel of its time. Imagine artisans, often centuries ago, painstakingly drawing precious metals into threads finer than human hair, then twisting, curling, and soldering these threads into breathtaking lace-like patterns. Often, tiny spheres of metal, known as granules, are fused onto these wires to add texture and sparkle, creating a truly three-dimensional effect.
The Delicate Dance of Wires and Granules
The primary materials for antique filigree were typically high-karat gold (often 20k-22k for its malleability and rich color) and fine silver. These metals, while beautiful, are inherently softer than modern alloys, making them more prone to deformation and wear over time. The structural integrity relies entirely on the thousands of microscopic solder joints that hold the intricate network together. Each joint is a potential point of failure, especially after decades or centuries of use and environmental exposure.
"Antique filigree is more than jewelry; it's a sculptural narrative, a testament to human patience and artistic vision. Repairing it isn't just a technical task; it's a dialogue with the past, demanding respect for its original craftsmanship."
Understanding the specific metal alloy, the original construction methods, and the historical context of a piece is paramount. Was it Roman, Byzantine, Victorian, or Art Nouveau? Each era brought its own stylistic nuances and technical approaches, which directly influence the most appropriate and effective repair strategy. Without this foundational knowledge, even the most skilled hands risk compromising the authenticity and value of the piece.
- Historical Significance: Each piece carries a story, influencing repair choices.
- Material Composition: Dictates melting points, malleability, and cleaning methods.
- Construction Method: Reveals how the piece was originally assembled, guiding deconstruction and reassembly.
- Fragility Factor: The very nature of fine wires and granules makes every touch critical.
Initial Assessment: The Crucial First Step in Filigree Restoration
In my experience, rushing into a repair without a thorough assessment is the most common and often irreversible mistake. This initial phase is where the true detective work begins, laying the groundwork for a successful restoration. It's not just about identifying the break; it's about understanding the entire ecosystem of damage and potential weaknesses.
Visual Inspection and Magnification
The first step involves a meticulous visual inspection, ideally under high magnification (10x loupe, 30x microscope, or even higher for extremely fine work). I'm looking for every crack, every missing granule, every bent wire, and every compromised solder joint. I document everything, often with high-resolution photography, creating a detailed 'damage map' of the piece. This helps in planning the repair sequence and anticipating challenges. Pay close attention to areas that might look intact but show signs of stress or previous, amateur repairs.
Material Identification: Gold, Silver, and Beyond
Accurately identifying the metal composition is non-negotiable. Is it 18k gold, 22k gold, sterling silver, or perhaps a less common alloy? This dictates the type of solder, flux, and heat required. For example, repairing a high-karat gold filigree with a low-karat solder can lead to a visible color mismatch and a weaker joint. Sometimes, a piece might be gold-plated or vermeil, which requires an entirely different approach to avoid stripping the plating. If in doubt, a small, discreet scratch test with acid can confirm the karat, or better yet, send a tiny sample for XRF analysis if the piece warrants such precision. Understanding the metal's properties is foundational to choosing the correct repair method. For detailed insights into metal identification, I often refer to resources from institutions like the Gemological Institute of America (GIA).

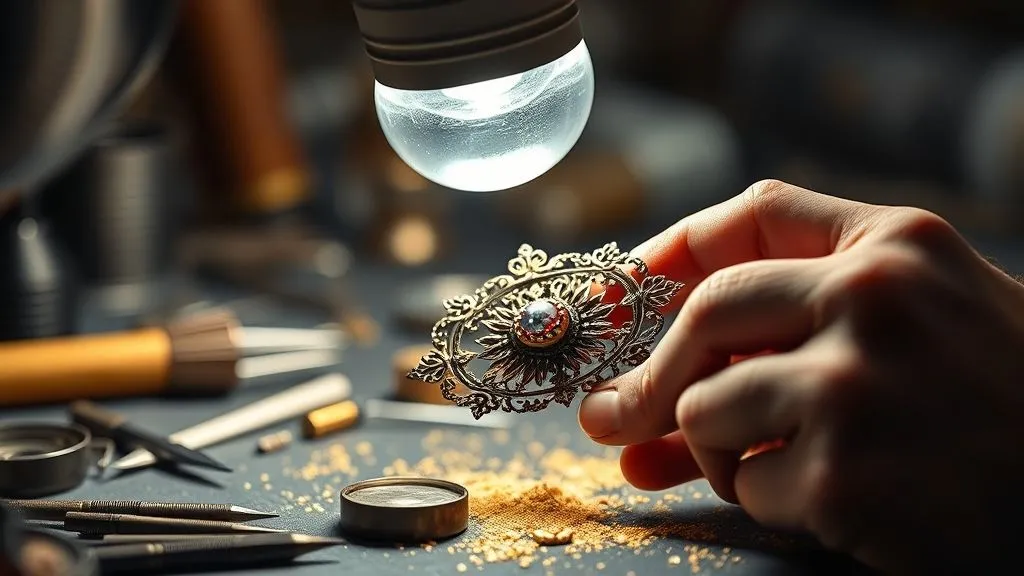
Method 1: Micro-Soldering for Structural Integrity
Micro-soldering is often the backbone of antique filigree repair, a time-honored technique that, when executed flawlessly, can seamlessly mend breaks and reattach components. It requires immense precision, steady hands, and an intimate understanding of heat control.
Choosing the Right Solder and Flux
The choice of solder is critical. It must match the base metal's color and karat as closely as possible, and its melting point must be lower than the base metal but high enough to ensure a strong, durable bond. For gold, jewelers use different karats of gold solder (e.g., 14k, 18k, 22k) in various hardnesses (hard, medium, easy). For silver, silver solder is used, also in different melting ranges. Flux is equally important; it cleans the metal surfaces, prevents oxidation during heating, and allows the solder to flow smoothly. Borax-based fluxes are common, but specialized fluxes exist for specific metals and temperatures. Never skimp on quality here; an inferior solder or flux can ruin the entire repair.
The Micro-Soldering Process: A Step-by-Step Approach
- Preparation & Cleaning: Thoroughly clean the broken area using an ultrasonic cleaner (with caution for delicate pieces), steam, or a soft brush with denatured alcohol. Any dirt, grease, or oxidation will prevent the solder from flowing properly.
- Alignment & Fixturing: This is perhaps the most challenging step for intricate filigree. The broken pieces must be perfectly aligned and held securely in place. I often use specialized tweezers, fine wire, or even dental wax to create temporary fixtures. Precision is key; even a fraction of a millimeter misalignment will be glaringly obvious.
- Applying Flux: Using a very fine brush or a toothpick, apply a tiny amount of flux precisely to the joint area. Avoid over-applying, as excess flux can obscure vision and leave residue.
- Positioning Solder: Cut a tiny pallion (small piece) of solder, often no larger than a grain of sand, and place it directly on the fluxed joint. For extremely fine work, I might even use powdered solder mixed with flux into a paste.
- Controlled Heating: Using a very fine-tipped torch (like a 'Little Torch' with a #0 or #1 tip), apply heat gently and evenly to the surrounding metal, not directly to the solder. The goal is to bring the base metal up to temperature, allowing it to draw the solder into the joint by capillary action. Watch the solder closely; it will “flash” or “flow” when it reaches its melting point and is drawn into the joint. Remove the heat immediately.
- Quenching & Pickling: Once cooled slightly, quench the piece in water (if appropriate for the metal and design) and then immerse it in a warm pickling solution (e.g., Sparex) to remove oxidation and flux residue.
- Rinse & Inspect: Thoroughly rinse the piece and inspect the joint under magnification. It should be seamless, with no excess solder or gaps.
| Solder Type | Melting Point Range (°C) | Best Use | Considerations |
|---|---|---|---|
| 22k Gold (Hard) | 870-900 | High-karat gold filigree, initial strong joints | Requires significant heat, good color match for 22k-24k gold. |
| 18k Gold (Medium) | 750-780 | General 18k gold filigree repairs, subsequent joints | Versatile, good color match for 18k gold. |
| Sterling Silver (Easy) | 680-700 | Delicate silver filigree, final small repairs | Lowest melting point, good for heat-sensitive areas, but can be weaker. |
| Platinum (Medium) | 1350-1400 | Platinum filigree, requires specialized equipment | Very high melting point, difficult to work with without proper tools and experience. |
Method 2: Laser Welding – Precision for the Unreachable
In the last two decades, laser welding has revolutionized antique jewelry repair, offering a level of precision that traditional soldering simply cannot match, especially for intricate filigree. It's often the answer to the question: What's the best method to repair intricate antique filigree? when traditional methods are too risky.
Advantages and Limitations of Laser Technology
Laser welding uses a highly focused beam of light to create a micro-weld, generating intense heat in an extremely localized area. This means the surrounding metal remains cool, minimizing the risk of heat-related damage to adjacent filigree, stones, or heat-sensitive components like enamel. It's particularly invaluable for:
- Proximity to Gemstones: Welding extremely close to heat-sensitive stones without removal.
- Delicate Filigree: Repairing fine wires and granules without causing distortion or melting adjacent structures.
- Joining Dissimilar Metals: While challenging, laser can sometimes join metals that are difficult to solder.
- No Solder Required: Often, the laser can melt and fuse the existing metal, creating a 'cleaner' joint with no solder line.
However, laser welding is not a panacea. It requires a significant investment in equipment, and operating it demands specialized training and a different set of skills than torch work. It's also not ideal for filling large gaps or creating extensive structural supports. According to a study published in the Journal of Materials Science, laser welding offers superior control over heat-affected zones, which is critical for preserving the integrity of historical artifacts.
When to Choose Laser Over Traditional Soldering
I typically opt for laser welding when:
- The repair area is incredibly small or confined.
- There are heat-sensitive gemstones or organic materials (like pearls or coral) that cannot be easily removed.
- The filigree is so fine that torch heat would cause widespread melting or distortion.
- I need to add a single granule or a tiny section of wire with absolute minimal impact.
- A previous solder repair has failed, and I want a 'cleaner', stronger bond.
While expensive, the precision and safety offered by laser welding often make it the best method to repair intricate antique filigree, particularly for high-value or exceptionally delicate pieces.
Method 3: Mechanical Repair – Reforming and Reinforcing
Not every filigree problem involves a clean break. Often, antique pieces suffer from deformation – bent wires, crushed sections, or misshapen elements due to accidental pressure or long-term wear. In these cases, mechanical repair, a delicate dance of reforming and reinforcing, becomes paramount.
Gentle Manipulation and Tool Selection
This method relies on an arsenal of extremely fine, specialized tools and an exceptionally light touch. I use custom-made burnishers, miniature forming pliers with smooth jaws, and fine picks to gently coax bent wires back into their original shape. The key here is patience and understanding the metal's memory. Applying too much force too quickly can cause the wire to snap or further distort the surrounding filigree. It's about gradual, incremental adjustments, often under high magnification.
For example, if a delicate filigree scroll has been flattened, I might use a tiny, rounded burnisher to gently push the metal from the underside, slowly restoring its curvature. For intricate wire knots, a very fine pick can be used to untangle and realign the individual strands without damaging their delicate structure. This process is akin to a surgeon performing micro-surgery; every movement is precise, deliberate, and aimed at preserving the existing material.
 to gently reshape a bent filigree wire on an antique silver pendant. The tools glint under the light, emphasizing their precision, with a blurred background of a workbench. Depth of field highlights the delicate interaction between tool and filigree. Shot on a high-end DSLR.")
Reinforcement Techniques for Added Longevity
Sometimes, simply reforming a bent section isn't enough, especially if the area remains a point of weakness. In such cases, I consider subtle reinforcement. This might involve:
- Hidden Support Wires: Carefully soldering a tiny, almost invisible support wire to the underside of a particularly vulnerable section, blending it seamlessly into the existing design.
- Strengthening Solder Joints: If an area has multiple fragile solder points, a very thin wash of appropriate solder can be applied to reinforce them without obscuring detail.
- Re-granulation: If granules have been dislodged or worn away, new, perfectly matched granules can be fused onto the existing structure, adding both aesthetic completeness and localized strength.
The goal is always to restore structural integrity without altering the original aesthetic or historical character of the piece. This often means working from the back or underside, ensuring any reinforcement is discreet and respectful of the original craftsmanship.
Method 4: The Art of Replication – When Original Elements are Lost
What's the best method to repair intricate antique filigree when parts are completely missing? This is where the repair moves beyond mending and into the realm of artistic replication. It's a challenging but deeply rewarding aspect of restoration, demanding both technical skill and an artist's eye for historical detail.
Creating New Filigree Elements
When a section of filigree is entirely absent, the restorer must become a master artisan, recreating the missing elements to seamlessly integrate with the original. This involves:
- Pattern Analysis: Meticulously studying the existing filigree pattern to understand its rhythm, scale, and specific motifs. High-resolution photographs and even 3D scanning can aid in this.
- Wire Drawing: If the original wire gauge is unusual, it might be necessary to draw new wires to match precisely, using traditional methods or modern wire-drawing machines.
- Element Fabrication: Recreating individual scrolls, rosettes, or other filigree components by hand, bending and twisting the new wires to mimic the original style.
- Granulation: If the piece originally featured granulation, new granules must be created (often by melting small pieces of metal into spheres) and fused onto the newly fabricated filigree.
- Integration: The new element is then carefully soldered or laser-welded into the existing structure, ensuring perfect alignment and minimal visible joins. Color matching is crucial here, as any discrepancy will stand out.
Case Study: The Rescued Victorian Brooch
I once received a stunning Victorian gold filigree brooch that had lost an entire quadrant of its intricate floral motif. The owner was distraught, believing it to be beyond repair. After a thorough assessment, I realized that while challenging, replication was possible. I spent days meticulously studying the remaining three quadrants, sketching the missing section, and analyzing the wire gauges and granule sizes. I then drew new 20k gold wires to match the original, and painstakingly hand-formed each tiny scroll and leaf. I created hundreds of minute gold granules, fusing them onto the newly formed filigree. The new quadrant was then micro-soldered into place, and after careful finishing, it was virtually impossible to distinguish the restored section from the original. The client was overjoyed, and the brooch, once deemed lost, regained its historical integrity and beauty. As jewelry historian Dr. Emily Jenkins notes in her work on Victorian craftsmanship, "The true measure of a restorer's skill lies not just in their technical prowess, but in their ability to respect and replicate the silent language of the original artisan." This sentiment perfectly encapsulates the spirit of such detailed replication work.
This method demands not just technical proficiency but a deep understanding of historical jewelry styles and techniques. It's about honoring the past while bringing a damaged piece back to life. I often consult historical texts and museum archives, like those from the Victoria and Albert Museum, for reference when undertaking such complex recreations.
Method 5: Conservation Techniques – Preserving Patina and History
Repairing filigree isn't just about fixing breaks; it's also about preserving its historical character, which often includes its patina. What's the best method to repair intricate antique filigree while maintaining its age-old charm? The answer lies in thoughtful conservation.
Cleaning and Patina Preservation
Antique jewelry, especially filigree, often develops a natural patina – a subtle darkening or oxidation that forms on the metal surface over decades or centuries. This patina is part of the piece's history and character, and aggressively removing it can diminish its antique value. My approach to cleaning is always conservative:
- Gentle First: I start with the least abrasive methods possible: warm water with a mild, pH-neutral soap, applied with a very soft brush.
- Avoiding Ultrasonics: Ultrasonic cleaners, while effective for some jewelry, can be disastrous for filigree. The vibrations can dislodge fragile granules, open old solder joints, or even cause wires to snap. I almost never use them for antique filigree.
- Steam Cleaning: A gentle steam cleaner can be effective for removing dirt from crevices, but again, extreme caution is needed to avoid thermal shock or dislodging components.
- Chemical Dips: Tarnish-removing dips should be used sparingly, if at all. They can strip away precious patina and leave the metal with an unnatural, uniform shine that doesn't belong on an antique. If used, it must be for a very brief duration, followed by immediate and thorough rinsing.
The goal is to clean away surface grime and dirt, revealing the original detail, without sacrificing the rich, aged character of the metal.
Protective Coatings and Storage
Once repaired and cleaned, antique filigree benefits from protection against future tarnish and damage. A very thin layer of micro-crystalline wax (like Renaissance Wax) can be applied to create a barrier against moisture and air, slowing down the tarnishing process and offering a subtle protective sheen. This is particularly useful for silver filigree. Proper storage is equally vital:
- Store pieces individually in soft pouches or compartmentalized boxes to prevent rubbing and entanglement.
- Use anti-tarnish strips, especially for silver, to absorb airborne sulfur compounds.
- Keep jewelry in a stable environment, away from extreme temperature fluctuations and humidity.

Post-Repair Finishing and Polishing
The final stages of antique filigree repair are just as critical as the initial assessment. A flawless repair can be undermined by improper finishing, leading to a piece that looks 'repaired' rather than 'restored.'
Gentle Cleaning and Buffing
After all soldering, welding, and mechanical work is complete, the piece needs a final, thorough cleaning to remove any residual flux, polishing compounds, or fingerprints. Again, gentle methods are key. I use soft bristle brushes, cotton swabs, and appropriate cleaning solutions for the specific metal. For polishing, I employ very soft buffing wheels or felt bobs with extremely fine polishing compounds, always working at low speeds and with a light touch. The goal is to restore a natural luster, not to create a mirror-like shine that would be out of place on an antique. Over-polishing is a common pitfall; it can erode delicate filigree wires, soften sharp details, and remove valuable patina. It's a fine balance between revealing the piece's inherent beauty and respecting its age.
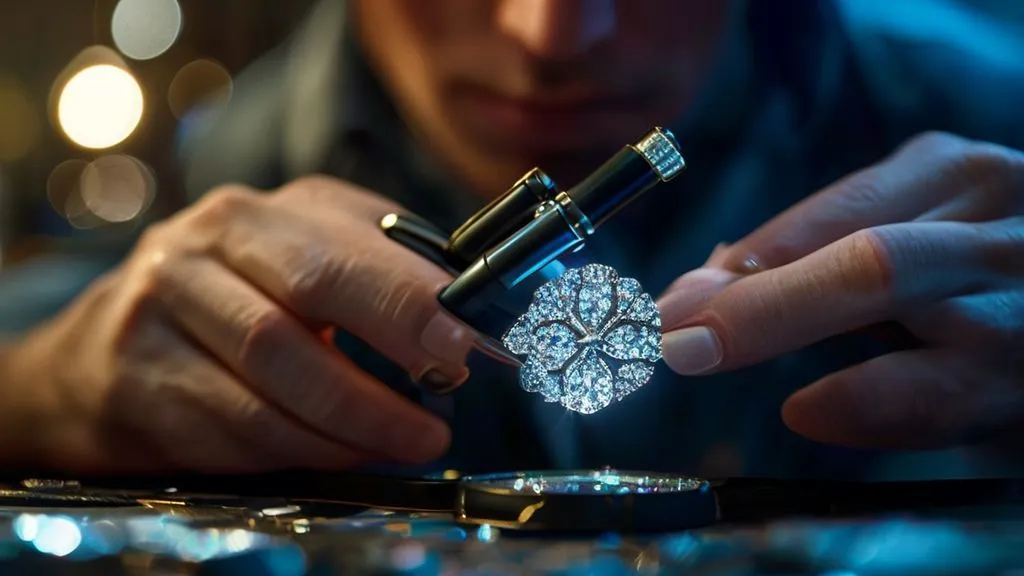
Final Inspection: Ensuring Seamless Integration
Every repaired piece undergoes a rigorous final inspection under high magnification. I'm looking for:
- Seamless Joins: Are the new repairs invisible? Is there any excess solder?
- Color Match: Does the repaired area blend perfectly with the original metal?
- Structural Integrity: Is the piece robust? Are there any remaining weak points?
- Detail Preservation: Have all the intricate details of the filigree been maintained?
- Patina Consistency: If patina was preserved, does it look natural and consistent?
Only when I am completely satisfied that the repair is undetectable and the piece's integrity is fully restored, do I consider the work complete. This meticulous attention to detail at every stage is what defines the best method to repair intricate antique filigree.
| Cleaning Agent | Use Case | Risks | Effectiveness |
|---|---|---|---|
| Warm Water & Mild Soap | General grime, surface dirt | Minimal, ensure thorough drying. | High for superficial cleaning. |
| Denatured Alcohol | Grease, oil, light residue | Can strip some finishes, test first. | Good for specific contaminants. |
| Pickling Solution (e.g., Sparex) | Removing oxidation/flux post-soldering | Acidic, requires careful handling and neutralization. | Essential for clean solder joints. |
| Micro-crystalline Wax (e.g., Renaissance Wax) | Protective coating, subtle sheen | None, if applied sparingly. | Excellent for long-term protection and enhancing luster. |
Avoiding Common Pitfalls in Antique Filigree Repair
Even with the best intentions, mistakes can happen. Having seen countless pieces come through my workshop with previous, less-than-ideal repairs, I can highlight some of the most common pitfalls to avoid:
- Over-Polishing: As mentioned, this is a cardinal sin. It removes metal, softens details, and strips away historical patina, drastically reducing the piece's value and character.
- Using Incorrect Solder: Using solder with the wrong karat, color, or melting point will result in a visible, weak, or discolored joint.
- Excessive Heat: Too much heat, or heat applied unevenly, can melt delicate wires, distort the filigree, or cause adjacent solder joints to fail.
- Improper Alignment: A misaligned repair is immediately obvious and detracts significantly from the piece's aesthetic.
- Rushing the Process: Filigree repair demands patience. Rushing leads to shortcuts, which invariably lead to mistakes.
- Lack of Material Knowledge: Not knowing the precise metal composition can lead to using incompatible repair materials or methods.
- Ignoring Patina: Treating an antique as if it were a modern piece, scrubbing away its history, is a disservice to the artifact.
"In antique filigree repair, patience is not just a virtue; it's a fundamental requirement. Every rushed decision, every skipped step, leaves a permanent mark on the piece's story."
The key to success is a combination of technical skill, historical awareness, and an almost meditative patience. Always remember that you are not just fixing metal; you are preserving a piece of art, history, and often, deep personal sentiment.

Frequently Asked Questions (FAQ)
How do I know if my filigree piece is repairable? Almost all filigree pieces are repairable to some extent, but the extent of damage dictates the complexity and cost. A piece with a clean break is generally easier to repair than one with extensive missing sections or severe deformation. The most important factor is finding a restorer with specialized experience in antique filigree. They can assess the damage, identify the metal, and determine the feasibility and best method to repair intricate antique filigree without compromising its integrity.
Can I repair intricate antique filigree myself? Unless you are a trained professional jeweler with extensive experience in antique restoration and specialized tools, I strongly advise against attempting filigree repair yourself. The wires are incredibly delicate, the solder joints are minute, and the risk of irreversible damage is extremely high. A single wrong move can turn a repairable piece into one that is significantly devalued or even destroyed. Leave this work to the experts who possess the necessary skills, equipment, and historical understanding.
What's the difference between laser welding and micro-soldering for filigree? Micro-soldering uses a torch to heat the metal and flow a solder alloy into the joint, creating a bond. It's a traditional, highly skilled technique. Laser welding, on the other hand, uses a focused beam of light to melt and fuse the existing metal (or a tiny filler wire) in an extremely localized spot, with minimal heat transfer to the surrounding area. Laser welding offers superior precision for very small, delicate areas or near heat-sensitive stones, while micro-soldering is often used for larger structural repairs or when laser access is difficult. Both are essential tools in a restorer's arsenal.
How do I ensure the repair doesn't devalue my antique piece? To ensure a repair doesn't devalue your piece, choose a reputable, experienced antique jewelry restorer. They should prioritize conservation over aggressive repair, using historically appropriate materials and techniques. The repair should be virtually invisible, structurally sound, and should not remove original material or patina unnecessarily. Always ask for their approach, see examples of their work, and ideally, get a written estimate detailing the proposed methods. A good repair enhances value by restoring integrity; a poor one detracts from it.
What's the best way to clean my antique filigree at home without causing damage? For most antique filigree, the safest home cleaning method is simply warm water with a very mild, pH-neutral soap (like dish soap). Use a soft-bristled brush (like a soft toothbrush or even a watercolor brush) to gently work away dirt. Rinse thoroughly under lukewarm running water and dry immediately with a soft, lint-free cloth. Avoid ultrasonic cleaners, abrasive polishes, or harsh chemical dips, as these can easily damage delicate filigree wires, dislodge granules, or strip away valuable patina. For tarnished silver filigree, a quick, gentle wipe with a jeweler's rouge cloth can be used, but avoid aggressive rubbing.
Key Takeaways and Final Thoughts
Repairing intricate antique filigree is an art form, a blend of scientific precision and historical reverence. It demands an expert's hand, a meticulous eye, and an unwavering commitment to preserving the original integrity and beauty of these irreplaceable treasures. By understanding the nuances of filigree construction, employing the right methods – from micro-soldering and laser welding to mechanical reform and thoughtful replication – and always prioritizing conservation, we ensure these whispers from the past continue to tell their stories for generations to come.
- Assessment is Paramount: Never skip a thorough, magnified inspection and material identification.
- Choose the Right Method: Micro-soldering, laser welding, mechanical repair, and replication each have their specific strengths.
- Prioritize Conservation: Preserve patina and historical character through gentle cleaning and protective measures.
- Seek Expertise: Intricate filigree repair is not a DIY task; trust experienced professionals.
- Patience and Precision: These are the non-negotiable virtues for successful restoration.
The journey of restoring an antique filigree piece is deeply satisfying, connecting us to the artisans of yesteryear. It’s a testament to enduring craftsmanship and the power of dedicated restoration. So, as you gaze upon your cherished antique filigree, remember that with the right approach and the right hands, its beauty can be meticulously and respectfully brought back to life, ensuring its legacy continues.
Recommended Reading
- Streetwear Sales Stalling? 7 Expert Fixes for Stagnant Accessory Growth
- 7 Savvy Ways to Update Classic Accessories Without Looking Outdated
- Smart Fabrics: 7 Ways to Halt Uneven Fading & Boost Durability
- 5 Steps to Resolve Custom Engagement Ring Appraisal Disputes Fairly
- How to Slash Luxury Women's Shoe Returns by 40%: 7 Expert Tactics

Your email address will not be published. Required fields are marked *