
Introduction: Solving Inconsistent Skin Tones from Mixed Lighting in Fashion Editorials?
For over two decades in the demanding world of fashion photography, I’ve witnessed countless stunning concepts fall short due to one insidious problem: inconsistent skin tones caused by mixed lighting. It’s a subtle yet pervasive issue that can undermine the professionalism and visual integrity of an entire editorial spread, leaving models looking unnatural and the overall aesthetic compromised.
The challenge arises when different light sources – be it ambient daylight, tungsten lamps, fluorescent fixtures, or even multiple flashes with varying color temperatures – converge on your subject. Each light source casts its own color hue, creating a chaotic canvas where skin tones shift from warm to cool, green to magenta, making your subjects appear sickly or unevenly lit. This isn't just a minor inconvenience; it’s a critical flaw that can distract viewers and diminish the impact of your carefully crafted images.
In this definitive guide, I will share my battle-tested strategies and expert insights on how to master this complex challenge. You'll learn not just theoretical concepts, but actionable frameworks, practical on-set techniques, and advanced post-production workflows that will empower you to consistently achieve flawless, natural-looking skin tones, ultimately solving inconsistent skin tones from mixed lighting in fashion editorials and elevating your work to new professional heights.
Understanding the Enemy: The Physics of Mixed Lighting and Skin Tones
Before we can conquer mixed lighting, we must first understand its fundamental principles. The core issue lies in the concept of color temperature, measured in Kelvin (K). Different light sources emit light at different color temperatures, from the warm glow of a candle (around 1800K) to the cool blue of an overcast sky (around 6500K).
Color Temperature and Its Impact on Skin
Our cameras, much like our eyes, interpret these color temperatures. However, unlike our incredibly adaptable brains, cameras need a reference point – a white balance setting – to accurately render colors. When multiple light sources with vastly different color temperatures illuminate your subject, your camera struggles to find a single, correct white balance point, leading to color casts and, inevitably, inconsistent skin tones. A tungsten bulb might cast an orange hue, while a window might bring in a cooler, bluer light, resulting in a model’s face having a warm side and a cool side.
Identifying Common Mixed Light Sources in Fashion Editorials
In a typical fashion editorial setting, mixed lighting scenarios are incredibly common. You might be shooting in a studio with a mix of strobes and continuous practical lights, or on location where natural daylight streams through a window, competing with indoor artificial lighting. Even subtle reflections from colored walls or props can introduce unwanted color shifts. Identifying these disparate sources is the first crucial step in gaining control.
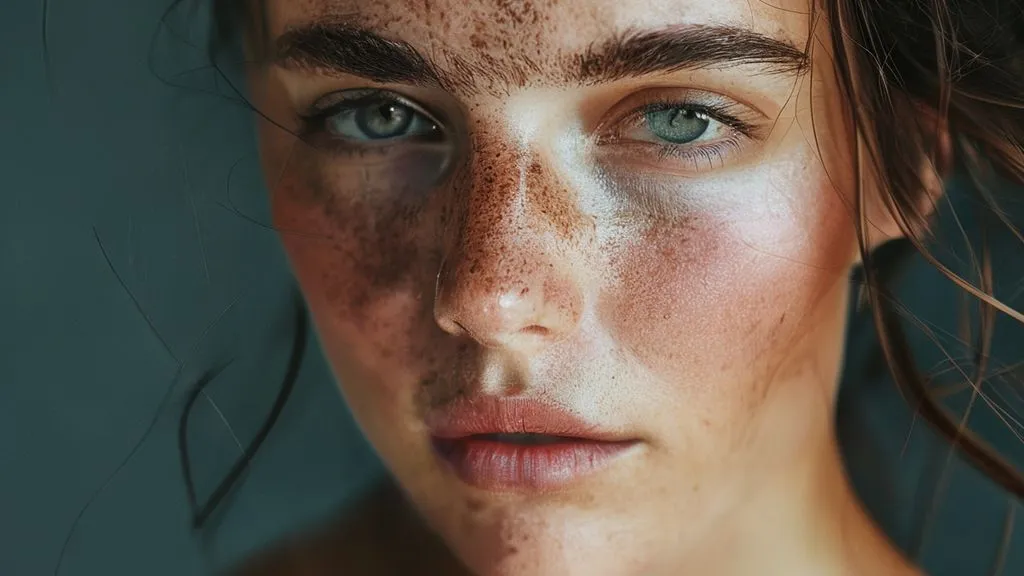
 and half by cool daylight (blue cast), creating a stark color temperature difference down the center. Professional photography, 8K, cinematic lighting, sharp focus, depth of field, shot on a high-end DSLR.")
Pre-Production Mastery: Planning for Skin Tone Consistency
True mastery over mixed lighting begins long before you ever press the shutter. It starts in the planning phase, where proactive decisions can mitigate most issues before they even arise. This is where your experience and foresight truly shine.
Location Scouting with Light in Mind
When scouting locations, I always pay meticulous attention to the existing light sources. Are there large windows? What direction do they face? What kind of artificial lighting is present (fluorescent, LED, tungsten)? How much control do I have over these sources (can I turn them off, dim them, or cover them)? My goal is always to minimize the number of conflicting color temperatures or, failing that, to understand exactly what I'm up against. A detailed light diagram of the location can be invaluable.
Gear Selection: Gels, Modifiers, and Meters
The right tools are indispensable. Gels are your best friends for color correction, allowing you to match the color temperature of artificial lights to ambient light, or vice-versa. A reliable color temperature meter can provide precise readings of all light sources, helping you choose the correct gels.
- Invest in a comprehensive gel kit: Include full CTO (Color Temperature Orange), CTB (Color Temperature Blue), and various strengths of each, along with plus green and minus green gels for fluorescent lights.
- Utilize light modifiers: Softboxes, umbrellas, and diffusers not only shape light but can also help blend disparate sources by softening their edges and reducing harsh color transitions.
- Carry a reliable color temperature meter: Tools like the Sekonic C-800 series provide precise readings of all light sources, including ambient, allowing you to make informed gelling decisions.
- Bring a grey card or color checker: These provide an essential neutral reference point for both on-set white balance and post-production color correction.
According to a study published by ResearchGate on Color Temperature and Image Perception, accurate color temperature rendering significantly impacts perceived image quality and viewer emotion. This underscores the critical importance of pre-production planning.
| Light Source | Color Temp (K) | Correction Gel |
|---|---|---|
| Daylight (Clear Sky) | 5500-6000 | None (Standard) |
| Overcast Sky | 6500-7500 | CTO (slight warming) |
| Tungsten/Incandescent | 2700-3200 | Full CTB |
| Fluorescent (Cool White) | 4000-5000 | Minus Green |
| Flash/Strobe | 5500-5600 | Match Ambient |
On-Set Strategies: Proactive Solutions for Flawless Tones
Once you're on set, your ability to react and implement solutions in real-time is paramount. This is where experience truly pays off, allowing you to make quick, informed decisions that save hours in post-production.
White Balance Calibration: The First Line of Defense
Your camera's white balance setting is your primary tool for neutralizing color casts. While auto white balance (AWB) has improved, it often struggles with mixed lighting. I always advocate for custom white balance or, at the very least, a preset that matches your dominant light source.
- Shoot a grey card: Place a neutral grey card or a color checker in the scene, under the light that will illuminate your subject. Take a reference shot.
- Set custom white balance: In your camera's menu, use this reference shot to set a custom white balance. This tells your camera what true neutral grey looks like under your specific lighting conditions.
- Monitor constantly: If lighting conditions change (e.g., sun moves, new lights are introduced), reshoot your grey card and reset your custom white balance.
Gelling Your Lights: Unifying Color Temperatures
This is arguably the most effective on-set strategy for solving inconsistent skin tones from mixed lighting in fashion editorials. The goal is to make all your light sources, both natural and artificial, speak the same color language. If you have dominant daylight (5500K) coming through a window, you'll want to gel your strobes or continuous lights with a CTO (Color Temperature Orange) gel to warm them up and match the daylight. Conversely, if tungsten (3200K) is your dominant light, you might gel your strobes with a CTB (Color Temperature Blue) gel.
Case Study: How "Serene Styles" Achieved Unity
I once worked on an editorial for "Serene Styles" in a beautiful, old mansion. The challenge was a mix of large windows (daylight, 6000K) and antique chandeliers (tungsten, 2800K). Instead of battling two distinct color temperatures, we decided to unify everything to a daylight balance. We used full CTB gels on all the tungsten practicals, effectively cooling them down to match the daylight. For our strobes, we used no gels, allowing them to blend seamlessly with the daylight. The result? Perfectly consistent skin tones across the entire series, saving days of painful color correction in post. This proactive gelling approach was a game-changer for the entire production.
Strategic Placement and Feathering
Sometimes, simply turning off conflicting lights isn't an option. In such cases, strategic light placement and feathering become crucial. By positioning your primary light source to overpower or selectively illuminate your subject, you can minimize the influence of problematic ambient light. Feathering your light – aiming it slightly past your subject so only the edge of the light beam hits them – can create a softer, more even spread, reducing harsh color transitions on the skin.

Camera Settings and In-Camera Techniques
Beyond white balance, several other camera settings and in-camera techniques can significantly aid in achieving consistent skin tones.
Shooting RAW: Your Post-Production Lifeline
This is non-negotiable. Always, always shoot in RAW. Unlike JPEGs, RAW files contain all the uncompressed data captured by your camera's sensor. This gives you immense flexibility in post-production, especially when it comes to correcting white balance and color casts. A JPEG bakes in the camera's white balance decision, making drastic changes much more difficult and destructive.
Exposure and Dynamic Range
Proper exposure is vital. Underexposed images can introduce noise and make color correction more challenging, while overexposed areas can lose crucial skin tone information. Aim for an exposure that preserves detail in both the highlights and shadows of your subject's skin. Leveraging your camera's dynamic range settings (if available) can also help maintain detail across varying light levels, providing more latitude for color adjustments.
Using Color Checkers and Grey Cards
Even with meticulous on-set gelling and custom white balance, a color checker or grey card shot at the beginning of each lighting setup is invaluable. This provides a scientific reference point for accurate color correction in post-production, especially when dealing with subtle skin tone inconsistencies. As renowned photography educator Joe McNally often emphasizes, these tools are your insurance policy.
- Place the color checker: Position the color checker or grey card within the scene, under the same lighting conditions as your subject.
- Fill the frame: Take a photo where the color checker fills a significant portion of the frame, ensuring it's evenly lit.
- Repeat for each lighting change: If you move locations, change light sources, or even if the natural light shifts significantly, take a new reference shot.
Post-Production Power: Correcting and Refining
Even with the most rigorous on-set strategies, post-production is where you fine-tune and perfect your skin tones. This is where the magic happens, transforming good captures into flawless editorial images.
Advanced White Balance Adjustments in RAW
In your RAW converter (e.g., Lightroom, Capture One, Adobe Camera Raw), use the white balance eyedropper tool on your grey card or a neutral area of the skin to establish a precise white balance. From there, you can make subtle adjustments to the temperature (warm/cool) and tint (green/magenta) sliders to achieve the desired look. Remember, a slight adjustment here can have a profound impact on skin tones.
Targeted Skin Tone Correction (HSL, Hue/Saturation)
For more localized or specific color issues, tools like the HSL (Hue, Saturation, Luminance) panel or Hue/Saturation adjustment layers are incredibly powerful. You can selectively target the orange and red hues (which typically make up skin tones) and adjust their hue to neutralize unwanted color casts, their saturation to make them more vibrant or muted, and their luminance to brighten or darken them. Be subtle; over-editing can quickly make skin look artificial.

Global Adjustments vs. Localized Tweaks
Start with global adjustments (like overall white balance) to get the image as close as possible. Then, for stubborn areas of inconsistent skin tones, move to localized adjustments. This might involve using a brush tool to selectively desaturate a green cast on a model's neck or warm up a cool patch on their cheek. Frequency separation is another advanced technique that allows for incredibly precise skin tone and texture adjustments without affecting each other.
| Workflow Step | Tool/Technique | Goal |
|---|---|---|
| RAW Conversion | White Balance eyedropper, Temp/Tint sliders | Neutralize overall color cast |
| Global Skin Tone Refinement | HSL (Hue/Saturation/Luminance) adjustments for Reds/Oranges | Even out dominant skin tone colors |
| Localized Correction | Adjustment brushes, Frequency Separation | Address specific color inconsistencies or blemishes |
| Final Polish | Vibrance/Saturation, Curves, Sharpening | Enhance overall look and prepare for output |
The Human Element: Communication and Collaboration
As an experienced industry specialist, I’ve learned that technical prowess alone isn't enough. Effective communication and collaboration with your team are just as crucial for success, especially when solving inconsistent skin tones from mixed lighting in fashion editorials.
Briefing Your Team (Stylists, MUAs)
Before the shoot, have a clear discussion with your makeup artist (MUA) and stylist. Explain the lighting challenges you anticipate and how they might affect skin tones and fabric colors. A good MUA can use specific foundations, concealers, and powders to help unify skin tones, especially under challenging mixed lighting. Stylists can avoid overly reflective or color-casting fabrics if they understand your lighting plan. This synergy is invaluable.
Client Expectations and Education
Manage client expectations upfront. If you anticipate a particularly challenging mixed lighting scenario, communicate this. Show them examples of what inconsistent skin tones can look like and explain your strategies for mitigating it. Educating your client builds trust and ensures they appreciate the effort you put into achieving flawless results, rather than being surprised by unexpected color shifts.
Avoiding Common Pitfalls and Advanced Tips
Even seasoned photographers can fall into traps. Here are some insights to help you navigate complex lighting scenarios.
The Dangers of Auto White Balance
While convenient, auto white balance is often the culprit behind inconsistent skin tones in mixed lighting. Your camera tries to average out the scene, and with multiple color temperatures, this average is rarely accurate or consistent from frame to frame. Always aim for a custom white balance or a preset that closely matches your dominant light source.
Leveraging Light Meters for Consistency
Beyond color temperature, a reliable incident light meter is essential for consistent exposure across your frames, especially when moving between different lighting setups or locations. Consistent exposure helps maintain the integrity of skin tones, making color correction much simpler. As experts at Profoto Academy often demonstrate, precise light metering is fundamental to professional results.
In my experience, the single biggest mistake photographers make when facing mixed lighting isn't a lack of technical skill, but a lack of proactive planning. Anticipate the challenges, equip yourself with the right tools, and communicate clearly. This foresight is your most powerful asset in the battle against inconsistent skin tones.
Advanced Tip: Using Gradients and Masks
In post-production, don't shy away from using gradient filters or radial masks to make localized white balance or color adjustments. For instance, if a window on one side of the frame is casting a cool blue, you can apply a radial mask with a slight warming white balance adjustment to just that area on the model's face, blending it seamlessly with the rest of the image.
. Professional photography, 8K, cinematic lighting, sharp focus on the light meter, depth of field, shot on a high-end DSLR.")
Frequently Asked Questions (FAQ)
Q: Can I really fix severe mixed lighting issues in post-production if I didn't gel on set? While shooting RAW gives you significant latitude, severe mixed lighting issues are incredibly challenging and time-consuming to fix perfectly in post. You might be able to correct the dominant color casts, but subtle color shifts and transitions on the skin can be very difficult to unify naturally. It's always best to get it as right as possible in-camera to save countless hours and achieve superior results.
Q: What if I'm shooting on a budget and can't afford expensive gels or a color meter? Even on a budget, you can make significant improvements. Simple colored cellophane can act as a rudimentary gel (though less precise). For white balance, a piece of white paper or a grey t-shirt can serve as a custom white balance target. The key is awareness and making the most of what you have, prioritizing unifying your dominant light sources.
Q: How do I handle mixed lighting when the light sources are constantly changing, like at an outdoor event? For dynamic environments, continuous monitoring is key. Shoot a grey card frequently as light changes. In post, you'll likely need to make per-image or per-sequence white balance adjustments. Consider using a consistent, powerful strobe as your main light source to overpower ambient changes, or embrace the variability if it suits the editorial's aesthetic.
Q: Is there a specific color profile or camera setting that helps with skin tones in mixed lighting? While some camera picture styles offer 'neutral' or 'portrait' modes that might slightly flatter skin, they don't solve mixed lighting issues. The most critical setting is shooting RAW. For color profiles, working in a wide gamut space like Adobe RGB during editing (and sRGB for web delivery) ensures you retain as much color information as possible.
Q: My model's skin looks green under fluorescent lights. What's the quickest fix? The green cast from fluorescent lights is common. On set, use a 'minus green' gel (magenta-tinted) over your lights or the fluorescent fixtures themselves. In post, in your RAW converter, adjust the 'tint' slider towards magenta to neutralize the green. You can also target the green hues in the HSL panel and reduce their saturation.
Key Takeaways and Final Thoughts
Mastering inconsistent skin tones from mixed lighting in fashion editorials is a cornerstone of professional photography. It demands a blend of technical understanding, meticulous planning, and creative problem-solving. By internalizing the strategies we've discussed, you'll elevate your work and command greater control over your images.
- Prioritize Pre-Production: Plan your lighting, scout locations, and select appropriate gear (especially gels) to minimize on-set surprises.
- Unify On-Set: Use custom white balance and, crucially, gel your artificial lights to match the dominant ambient light source.
- Shoot RAW with References: Always capture RAW files and use a grey card or color checker for precise post-production correction.
- Refine in Post: Leverage advanced RAW editing tools, HSL adjustments, and localized corrections to perfect skin tones.
- Communicate: Work closely with your team and clients to manage expectations and achieve a cohesive vision.
Remember, every mixed lighting scenario is a puzzle, but with the right knowledge and tools, you can solve it. Embrace the challenge, apply these techniques, and watch as your fashion editorials achieve a new level of polish and consistency. Your models, your clients, and your audience will thank you for the beautifully rendered, natural skin tones that define truly exceptional fashion photography.
Recommended Reading
- Unlocking Value: 7 Steps to Accurately Appraising 1950s Couture Resale
- Unveiling the Secrets: What Techniques Elevate Haute Couture Craftsmanship?
- 7 Practical Steps: Sustainable Fast Womenswear Cycles Revealed
- Avant-Garde Bridal? 7 Ways to Perfect Bespoke Accessory Harmony
- 7 AI Personalization Strategies to Halve Your Fashion E-commerce Returns


Your email address will not be published. Required fields are marked *