
Safely Restoring Damaged Vintage Accessories for Maximum Resale Profit?
For over two decades in the vintage fashion world, I've witnessed countless enthusiasts and aspiring entrepreneurs stumble at the same critical juncture: understanding that not all damage is a death knell, and not all restoration is created equal. The difference between a forgotten relic and a highly sought-after treasure often lies in the nuanced art of thoughtful, safe restoration. It's a skill that can transform a dusty attic find into a significant source of income.
The allure of vintage is undeniable, but so too is the challenge of its age. Scratches, tarnishes, missing components, and faded glory can significantly depress an item's market value. Many shy away from damaged pieces, fearing irreversible harm or a poor return on investment. Yet, in my experience, these are precisely the items that hold the most untapped potential for those willing to learn the right techniques.
This guide isn't just a collection of tips; it's a comprehensive framework designed to arm you with the knowledge, actionable steps, and expert insights needed for safely restoring damaged vintage accessories for maximum resale profit?. We'll explore everything from initial assessment to final presentation, ensuring every effort you make contributes directly to enhancing an item's beauty, integrity, and ultimately, its market value. Prepare to unlock the hidden profits in pieces others overlook.
The Foundational Pillars: Assessment and Ethical Sourcing of Vintage Accessories
Before any tool touches a vintage piece, a thorough and honest assessment is paramount. This initial stage dictates not only the restoration approach but also the ultimate viability and profitability of the project. Rushing this step is a common mistake I've seen lead to costly errors.
Initial Condition Assessment: Beyond the Surface
When I first encounter a damaged vintage accessory, my immediate goal is to understand its story and its structural integrity. This involves a multi-faceted inspection:
- Identify the Material Composition: Is it genuine leather, plated metal, bakelite, celluloid, or a delicate textile? Different materials demand entirely different care. Misidentification can lead to irreparable damage.
- Categorize the Damage: Is it surface-level tarnish, deep scratches, structural breaks, missing components, or material degradation (e.g., dry rot in leather, fraying fabric)? Document every flaw meticulously.
- Assess Authenticity and Originality: Are all parts original? Has it been previously 'repaired' poorly? An item's value often hinges on its originality, even with some wear.
- Determine Feasibility of Restoration: Can the damage be safely and effectively addressed without compromising the item's historical integrity or incurring prohibitive costs? Sometimes, a piece is beyond economic repair.
- Estimate Potential Resale Value Post-Restoration: Research similar, restored items in good condition on reputable vintage marketplaces or auction sites. This helps set realistic expectations for profit.
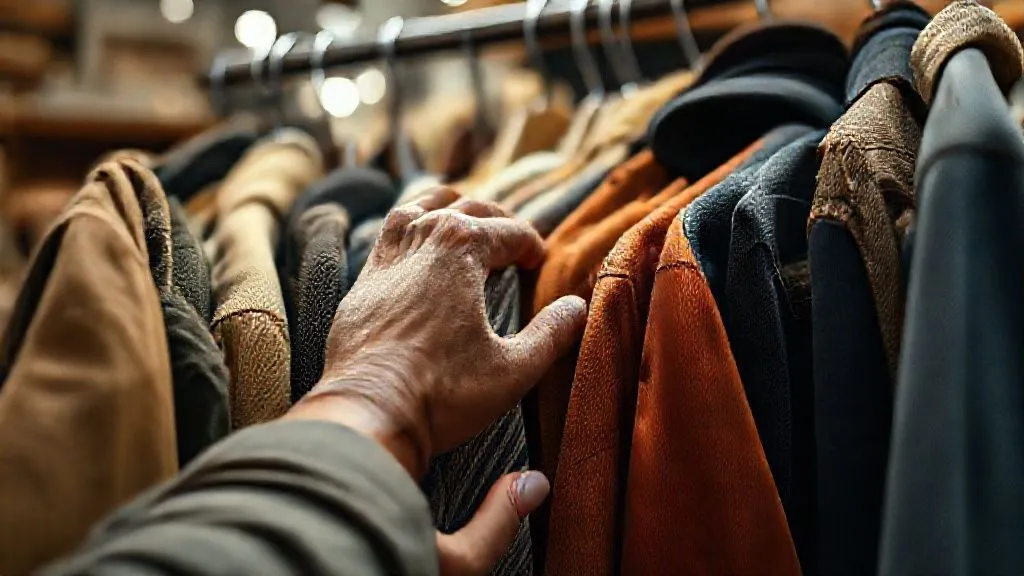
Ethical Sourcing & Value Identification
Sourcing is as critical as restoration. I always advise looking for pieces with inherent quality, even if damaged. A high-quality designer handbag with a broken clasp is often a better investment than a pristine, mass-produced item. As conservation experts at institutions like the Smithsonian often emphasize, understanding an item's history and provenance adds significant value.
Consider the 'story' of the piece. Does it have a recognizable brand, a unique design, or historical significance? These factors can dramatically increase its appeal and eventual resale price. I've found that pieces from certain eras (e.g., Art Deco, Mid-Century) or by specific designers (e.g., Miriam Haskell, Chanel, Hermes) often justify more intensive restoration efforts.
Expert Insight: "The true art of vintage restoration isn't about making an item 'new' again, but about preserving its history while enhancing its beauty and functionality. Authenticity, even with signs of age, is often more valuable than a heavily over-restored piece."

Essential Tools & Supplies: Your Restoration Arsenal
Just as a chef needs the right knives, a vintage restorer needs the appropriate tools and supplies. Investing in quality, specialized items is not an expense; it's an investment in your ability to achieve professional, profitable results. Generic household cleaners or harsh abrasives are almost always a recipe for disaster.
Basic Toolkit for General Restoration
My restoration workbench typically includes these foundational items:
- Microfiber Cloths: Essential for gentle cleaning and polishing without scratching.
- Soft Brushes: Various sizes, from old toothbrushes to fine artist's brushes, for dusting and applying cleaners.
- Jeweler's Loupe/Magnifying Glass: For inspecting intricate details and tiny flaws.
- Tweezers and Small Pliers: For delicate handling, straightening, or reattaching components.
- Cotton Swabs and Cotton Balls: For precise application of cleaning solutions.
- Non-abrasive Polishing Cloths: Specifically for metals.
- Disposable Gloves: To protect your hands and prevent transferring oils to delicate items.
Specialized Cleaners & Repair Agents
This is where precision matters. Using the wrong chemical can permanently damage fragile vintage materials. Always test in an inconspicuous area first.
- Silver Polishing Cloths & Pastes: Specifically formulated for silver, avoiding harsh abrasives.
- Mild Soaps (e.g., pH-neutral dish soap, castile soap): Diluted for general cleaning of robust metals or some plastics.
- Leather Cleaners & Conditioners: Designed to nourish and protect vintage leather without stripping its natural oils. Look for lanolin or natural wax-based products.
- Fabric Spot Cleaners: Gentle, enzyme-free options for vintage textiles.
- Jewelry Cleaning Solutions: Specific types for gold, diamonds, or delicate stones. Avoid dipping porous stones like pearls or opals.
- Adhesives: archival-quality, non-yellowing glues for specific materials (e.g., E6000 for costume jewelry, fabric glue for textiles).
- Distilled Water: For rinsing or diluting, as tap water can contain minerals that leave residue.
For more in-depth information on specific material care and recommended products, I often consult specialized resources. For instance, understanding the nuances of different metals and their reactions to cleaning agents is crucial. Organizations like the Gemological Institute of America (GIA) offer invaluable insights into the care of gemstones and precious metals, which directly translates to vintage jewelry restoration.

Mastering Cleaning Techniques: Gentle Yet Effective
Cleaning is often the first and most impactful step in restoration. It's also where the most damage can occur if approached incorrectly. My mantra is always: start gentle, assess, and escalate cautiously.
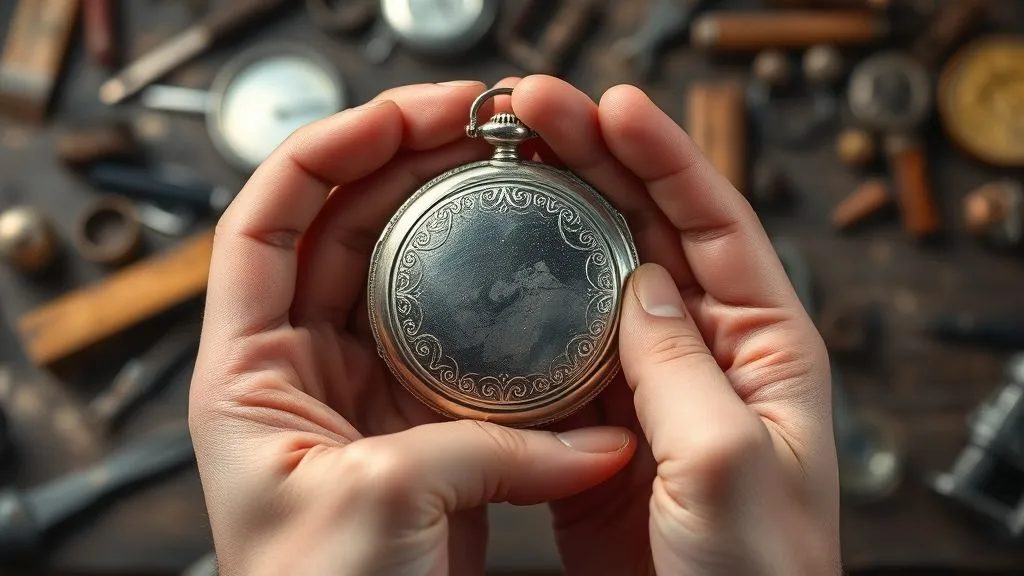
Cleaning Delicate Metals (Silver, Gold, Brass)
Tarnish is common on vintage metals, especially silver. Here's my preferred approach:
- Dust First: Use a soft brush to remove any loose dirt or dust.
- Targeted Cleaning for Silver: For light tarnish, a silver polishing cloth is often sufficient. For heavier tarnish, a mild silver paste applied with a cotton swab or soft cloth, followed by gentle buffing, works wonders. Never use abrasive scrubbers. For intricate pieces, a silver dip can be used very sparingly, but I generally advise against it as it removes the patina that some collectors value.
- Gold and Gold-Plated Items: A very mild solution of pH-neutral soap and warm distilled water is usually best. Gently wipe with a soft cloth, then rinse with distilled water and dry thoroughly. Be extremely careful with gold plating, as aggressive cleaning can strip it.
- Brass and Copper: These metals can be cleaned with a specialized brass cleaner or a mixture of lemon juice and baking soda (applied sparingly and rinsed quickly) for natural solutions. Again, gentle application and thorough rinsing are key.
- Patina Preservation: For some pieces, particularly brass or bronze, the aged patina is desirable. Aggressive cleaning can diminish its character. Always consider if the tarnish adds to the item's historical appeal before removing it entirely.
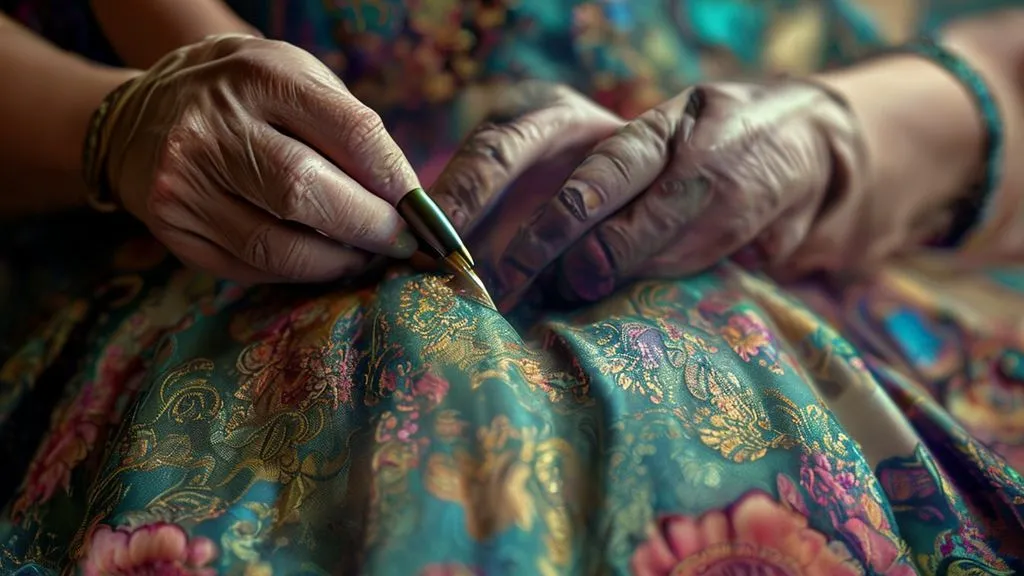
Restoring Textiles and Leather
These organic materials require a different level of care due to their susceptibility to water damage, shrinking, or cracking.
Case Study: How 'Vintage Finds by Eleanor' Revived a 1920s Beaded Bag
Eleanor, a seasoned vintage dealer, acquired a stunning 1920s flapper bag. Its intricate beadwork was intact, but the silk lining was heavily stained and brittle, and the silver frame was tarnished. Most would have deemed it unsalvageable. Eleanor, however, saw its potential. She carefully detached the lining, hand-washed it using an enzyme-free textile cleaner and cold distilled water, gently laid it flat to dry, and then meticulously re-stitched it with period-appropriate silk thread. The silver frame was gently polished using a non-abrasive paste. The result? A once-forgotten bag, valued at $75 in its damaged state, sold for $450 after her careful restoration, demonstrating a significant profit margin purely from her expertise and patience.
For leather, always start with a gentle wipe-down to remove surface dirt. Then, apply a high-quality leather cleaner, followed by a nourishing conditioner. For stiff or cracked leather, multiple, thin applications of conditioner over several days can slowly rehydrate it. For vintage textiles, spot cleaning with a specialized cleaner is often safer than full immersion. If washing is necessary, use cold water, a pH-neutral detergent, and air dry flat to prevent stretching or shrinking.
Addressing Gemstones and Beads
Different stones have different needs. Harder stones like diamonds, sapphires, and rubies can tolerate mild soap and water. Softer or porous stones such as pearls, opals, turquoise, and amber should only be wiped with a damp, soft cloth and never submerged or exposed to harsh chemicals. Vintage glass beads can usually be cleaned with mild soap and water, but ensure no water gets trapped in stringing holes if the string is delicate. Always dry thoroughly.
| Material Type | Recommended Cleaner | Caution |
|---|---|---|
| Sterling Silver | Silver Polishing Cloth/Paste | Avoid abrasive scrubbers, monitor patina removal |
| Gold/Gold Plated | Mild pH-neutral Soap & Water | Be gentle with plating, avoid harsh chemicals |
| Leather (Soft) | Leather Cleaner & Conditioner | Test in inconspicuous area, don't oversaturate |
| Vintage Silk/Textiles | Enzyme-free Spot Cleaner | Avoid harsh rubbing, air dry flat |
| Porous Gemstones (e.g., Pearls) | Damp Soft Cloth | Never submerge, avoid chemicals |
Strategic Repair & Preservation: Beyond Cleaning
Once an item is clean, the next phase involves careful repair and preservation. This step often requires a steady hand, patience, and a deep understanding of the item's original construction.
Minor Repairs: Fastenings, Seams, and Adhesives
Many vintage accessories suffer from minor mechanical failures that are easily remedied. A loose clasp on a necklace, a missing button on a jacket, or a detached strap on a handbag can significantly reduce its appeal. I focus on:
- Clasps and Fastenings: Often, a pair of fine-tipped pliers is all that's needed to gently reshape or tighten a clasp. For missing clasps, sourcing period-appropriate replacements is key.
- Stitching and Seams: For fabric or leather items, careful hand-stitching with appropriate thread (matching color and weight) can reinforce weak seams or reattach lining. For advanced techniques, I sometimes refer to guides on high-end textile and leather restoration to ensure durability and aesthetic appeal.
- Adhesives: When reattaching stones to costume jewelry or securing embellishments, use a clear, archival-quality adhesive that won't yellow over time. Apply sparingly with a toothpick or a fine needle.
Structural Reinforcement: A Delicate Balance
Some items may require more robust intervention, such as reinforcing the internal structure of a vintage handbag or repairing a cracked bakelite bracelet. This is where expertise truly shines.
- Internal Bag Frames: For bags with metal frames, gentle reshaping or securing loose screws can restore functionality.
- Jewelry Settings: If a stone is loose in its setting, a skilled jeweler might be needed to gently re-crimp the prongs. This is often beyond DIY capabilities and worth the professional investment for valuable pieces.
- Cracked Plastics/Resins: For materials like Bakelite, celluloid, or early plastics, hairline cracks can sometimes be stabilized with specialized glues, but significant breaks are challenging to repair invisibly. It's often better to disclose the repair honestly.
Expert Insight: "The goal of structural repair is not to erase the item's age, but to ensure its stability and usability. An honest, well-executed repair is always preferable to a botched attempt at invisibility."

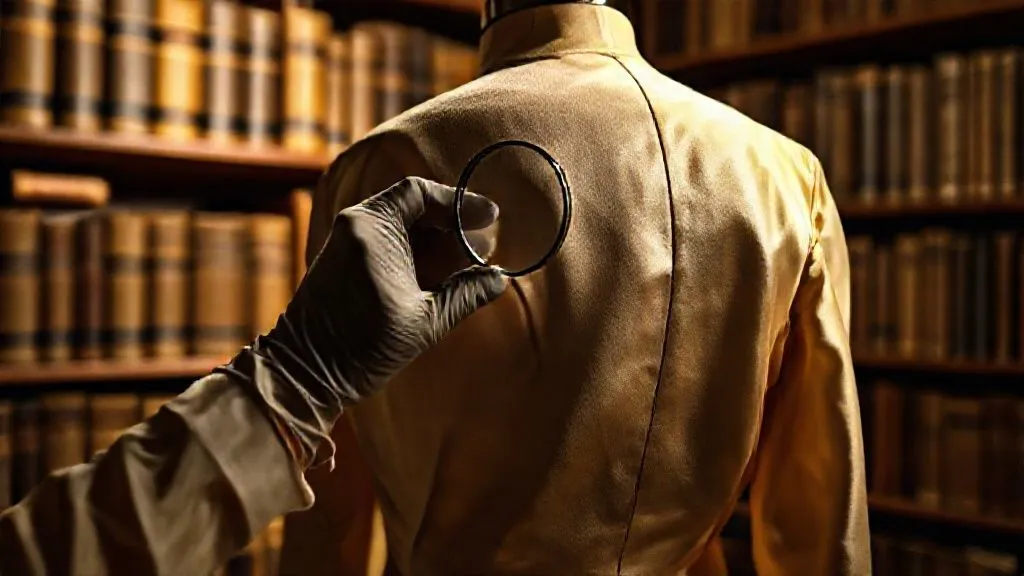
Documentation & Presentation: Elevating Resale Value
Once restored, the way you document and present your vintage accessory is crucial for achieving maximum resale profit. This stage is about storytelling and building trust with potential buyers.
Before & After: The Power of Visual Storytelling
One of the most compelling ways to demonstrate the value you've added is through clear 'before and after' photographs. This visual narrative highlights your expertise and the transformation of the item. I always take detailed photos of the item in its damaged state from multiple angles, then repeat the process after restoration. This isn't just about showing the fix; it's about showcasing the potential that buyers might otherwise overlook.
Professional Photography & Compelling Descriptions
High-quality photography is non-negotiable. Use natural light, a clean background, and capture the item from all angles, highlighting its unique features and, importantly, its restored condition. Good photos convey professionalism and attention to detail. Beyond visuals, a compelling and honest description is vital:
- Detailed Condition Report: Be transparent about the item's original condition, the restoration work performed, and any remaining imperfections. Honesty builds trust.
- Material & Era Specifics: Clearly state the materials, estimated era, and any known designer or provenance.
- Measurements: Provide accurate dimensions for wearability and fit.
- Care Instructions: Offer simple guidelines for maintaining the item's restored condition.
- Highlighting Uniqueness: Emphasize what makes this piece special – its rarity, design, or historical context.
For inspiration on how top-tier items are presented, I often look at auction house listings from places like Christie's or Sotheby's. Their detailed descriptions and high-resolution imagery set the standard for conveying value and authenticity.
| Documentation Step | Purpose |
|---|---|
| High-Resolution 'Before' Photos | Demonstrate transformation, justify value added |
| High-Resolution 'After' Photos | Showcase restored beauty, capture details |
| Detailed Condition Report | Build buyer trust, manage expectations |
| Material & Era Specifics | Inform buyers, authenticate item |
| Accurate Measurements | Ensure fit/wearability, reduce returns |
| Care Instructions | Preserve restoration, enhance customer satisfaction |
Pricing Strategies for Maximum Profit
After all the meticulous work, pricing your restored vintage accessory correctly is the final step to ensuring maximum resale profit. This isn't just about covering costs; it's about valuing your expertise and the unique appeal of the item.
Market Research & Competitive Analysis
Never price in a vacuum. I always conduct thorough market research:
- Compare to Similar Items: Look at recently sold items (not just listed ones) on platforms like eBay, Etsy, and specialized vintage sites. Filter by condition: 'restored,' 'excellent,' 'good.'
- Consider Rarity & Demand: Is your item a common find or a rare gem? High demand for specific eras or designers allows for premium pricing.
- Factor in Restoration Costs: Calculate the cost of your materials and, crucially, your time. Your expertise is valuable.
- Analyze Platform Fees: Account for listing fees, selling fees, and payment processing fees of your chosen sales platform.
Highlighting Authenticity and Restoration Quality
Your detailed documentation and transparent story about the restoration process become powerful selling points. Emphasize:
- The 'Safe' Aspect: Reassure buyers that the restoration was done with archival-quality materials and methods, preserving the item's integrity.
- Expertise: Briefly mention the care and skill involved. This differentiates your item from amateur repairs.
- Value Proposition: Frame the price not just as the item's cost, but as an investment in a unique, well-preserved piece of history that has been thoughtfully brought back to life.
Remember, a slightly higher price point, justified by superior restoration and presentation, can often attract more serious and appreciative buyers who understand the true value of a carefully curated vintage piece. It's about selling the story and the quality, not just the item itself.

Common Pitfalls to Avoid in Vintage Restoration
Even with the best intentions, missteps can occur. Learning from common mistakes is a vital part of mastering the art of restoration and ensuring you truly achieve safely restoring damaged vintage accessories for maximum resale profit?
Over-Restoration vs. Preservation
This is perhaps the most significant trap. Over-restoring an item – making it look brand new – can strip away its history, character, and ultimately, its vintage appeal and value. Collectors often prefer items with a gentle patina or honest signs of age, rather than those that look factory-fresh. My advice is always to aim for preservation and sensitive repair, not total transformation. A good restoration enhances, it doesn't erase.
Using the Wrong Products
As I've emphasized, using harsh chemicals, abrasive cleaners, or incorrect adhesives can cause irreversible damage. A single wrong product can permanently alter a material's texture, color, or structural integrity. Always verify product suitability for vintage materials and perform spot tests.
Impatience and Rushing the Process
Vintage restoration demands patience. Rushing cleaning, drying, or repair steps often leads to mistakes. For example, not allowing a leather conditioner to fully absorb, or attempting to force a repair, can cause more damage than the original flaw. Take your time, allow for proper drying and curing, and if you feel frustrated, step away and return with a fresh perspective.
Frequently Asked Questions (FAQ)
Q: How do I know if a vintage accessory is worth restoring, or if it's beyond repair?
A: This requires a careful balance of material assessment, rarity, and market demand. If the core structure is severely compromised, or if the cost of repair (time and materials) far exceeds its potential restored value, it might be 'beyond economic repair'. However, rare designer pieces, even with significant damage, often justify more extensive restoration due to their inherent value. Always prioritize structural integrity and the ability to maintain authenticity.
Q: What are the biggest risks when cleaning delicate vintage textiles like silk or lace?
A: The biggest risks are shrinking, tearing, color bleeding, and damaging fragile fibers. Always test any cleaning solution on an inconspicuous area first. Opt for cold water, pH-neutral, enzyme-free detergents, and gentle hand washing if necessary. Avoid harsh scrubbing, wringing, or machine washing. Air dry flat on a clean towel to maintain shape and prevent stretching.
Q: Is it always better to use vintage-specific repair materials, or can modern alternatives be suitable?
A: While period-appropriate materials are ideal for authenticity, modern archival-quality alternatives are often superior in terms of stability and longevity. For instance, a modern, non-yellowing, reversible adhesive might be preferable to an unreliable vintage glue. The key is to choose materials that are chemically stable, compatible with the vintage item, and won't cause future degradation. Transparency about materials used is crucial.
Q: How much 'patina' should I leave on a vintage metal item, particularly silver or brass?
A: This is a subjective but critical decision. Patina, the natural darkening that occurs with age, is often highly valued by collectors as it authenticates the item's age. For some pieces, particularly those with intricate details where patina enhances definition, I recommend a very light cleaning that removes only the surface grime, leaving the deeper patination. For items where tarnish obscures the design or makes it unsightly, a more thorough (but still gentle) cleaning is appropriate. Always consider the item's style, era, and typical collector preferences.
Q: What are the legal implications of restoring branded vintage items for resale? Do I need to worry about copyright or trademark?
A: Generally, reselling legitimately acquired, original branded vintage items, even if restored, falls under the 'first sale doctrine' and is permissible. You are selling a used item, not manufacturing a new one or misrepresenting it. However, it is crucial to be transparent about any repairs or modifications made. Never attempt to counterfeit or pass off a heavily altered item as original. Always accurately describe the item's brand, condition, and any restoration work performed to avoid misleading buyers.
Key Takeaways and Final Thoughts
- Thorough Assessment is Non-Negotiable: Before any restoration, understand the item's materials, damage, and potential value.
- Invest in Quality Tools & Knowledge: Specialized cleaners and tools are essential for safe, effective, and profitable restoration.
- Prioritize Gentleness & Preservation: Always start with the least invasive methods. The goal is to enhance, not erase, an item's history.
- Document Your Work: 'Before and after' photos and transparent descriptions build trust and justify higher prices.
- Price Strategically: Factor in your expertise, market demand, and the item's unique story.
- Avoid Common Pitfalls: Guard against over-restoration, using incorrect products, and rushing the process.
The journey of safely restoring damaged vintage accessories for maximum resale profit? is one of patience, learning, and a deep appreciation for history and craftsmanship. It's a rewarding endeavor that not only breathes new life into forgotten treasures but also unlocks significant financial opportunities. By applying these expert insights and actionable steps, you're not just repairing items; you're becoming a steward of vintage heritage, creating value, and building a profitable niche. Embrace the challenge, hone your skills, and watch as those overlooked pieces transform into your next success story.
Recommended Reading
- 7 Proven Strategies: Attract High-End Fashion Brands for Review Collaborations
- Beyond the Shine: How to Identify Truly Sustainable Jewelry Brands Now
- Safeguarding Rare Vintage Textiles: 7 Strategies to Halt Irreversible Display Damage
- 7 Red Carpet Style Mistakes: How They Ruin a Business Professional's Image
- Unveiling the Secrets: What Techniques Elevate Haute Couture Craftsmanship?


Your email address will not be published. Required fields are marked *