
Re-glue Delaminated Sole on Goodyear-Welted Shoe Professionally? Understanding the Challenge
For over three decades in the footwear industry, specializing in high-end repairs, I've seen countless pairs of Goodyear-welted shoes come through my workshop. These aren't just shoes; they're often investments, cherished companions built for longevity. It's a testament to their superior construction that they endure years of wear, yet even the sturdiest foundations can sometimes falter.
The sight of a delaminated sole – where the outer sole begins to separate from the midsole or the welt – can be disheartening. It’s a common pain point for owners of premium footwear, transforming a proud stride into a hesitant shuffle. This isn't merely a cosmetic flaw; it compromises the shoe's integrity, waterproofing, and comfort, threatening to shorten the lifespan of an otherwise magnificent pair.
But here's the good news: a delaminated sole on a Goodyear-welted shoe is often a repairable issue, provided you approach it with the right knowledge, tools, and technique. In this definitive guide, I'll share my expert insights, outlining the professional steps, specific materials, and crucial considerations for a successful re-glue. You'll learn not just *how* but *why* certain methods are paramount, ensuring your beloved shoes are restored to their former glory, ready for many more miles.
The Anatomy of a Goodyear Welt: Why It Matters for Repair
Before we delve into repair, it's essential to understand what makes a Goodyear welted shoe unique. Unlike simpler cemented constructions, a Goodyear welt involves a complex, multi-layered assembly that significantly impacts how we approach repairs. At its core, the upper leather is stitched to a canvas rib on the insole, and then a strip of leather (the 'welt') is stitched to both the upper and the insole rib.
This welt then becomes the anchor point for stitching the midsole and outsole. The cavity formed between the insole and midsole is typically filled with cork, providing comfort and insulation. This intricate stitching, rather than just glue, is what gives Goodyear-welted shoes their legendary durability and resoleability. When we talk about delamination, we're usually referring to the separation of the outsole from the midsole, or less commonly, the midsole from the welt.
Understanding this construction is vital because it informs our choice of adhesives, preparation techniques, and clamping methods. We're not just sticking two pieces of rubber together; we're dealing with leather, cork, and potentially different sole materials, all of which react uniquely to various glues and pressures. A professional repair respects this complexity, ensuring the repair integrates seamlessly with the original craftsmanship.
Identifying the Extent of Delamination: Assessment is Key
The first step in any professional repair is a thorough assessment. Just as a doctor diagnoses before prescribing, a cobbler evaluates the damage to determine the best course of action. This isn't just about spotting the obvious separation; it's about understanding its cause, depth, and the overall health of the surrounding materials.
Begin with a visual inspection. Carefully examine the entire perimeter of the sole. Is the delamination localized to one spot, or is it widespread? Is it just the very edge, or has it penetrated deeper into the sole? Gently flex the shoe to see how the separation behaves. Sometimes, what looks like a minor separation can indicate a larger underlying issue.
A 'tap test' can be surprisingly informative. Lightly tap around the sole with a small hammer or even your knuckle. A solid, uniform sound indicates good adhesion, while a hollow sound suggests delamination beneath the surface. For deeper insights, you might carefully use a thin, blunt tool – like a butter knife or a specialized sole spreader – to gently probe the separated area. Be cautious not to force it or create new damage. This assessment helps you gauge the required adhesive quantity and the extent of surface preparation needed.

The Right Tools and Adhesives for a Professional Job
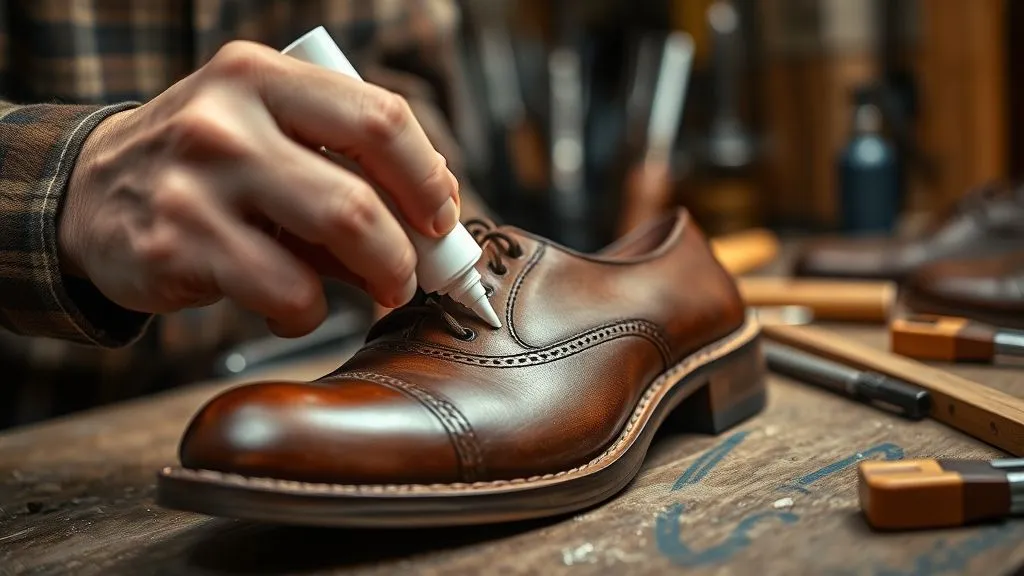
Attempting to re-glue a Goodyear-welted sole with general-purpose glues is a common mistake I've seen countless times, often leading to more extensive damage or a short-lived fix. A professional repair demands professional-grade materials. The choice of adhesive is paramount, as it needs to bond effectively with leather, rubber, and potentially synthetic sole materials, while remaining flexible and durable.
For sole re-gluing, industrial-strength contact cements are typically my go-to. Brands like Barge Cement (specifically the All-Purpose Cement or Infinity Cement) are industry standards, known for their strong, flexible, and long-lasting bonds. Other excellent options include certain polyurethane-based adhesives (like Sika-bond variants) or specialized shoe repair glues. These are designed to withstand the dynamic stresses of walking, temperature fluctuations, and moisture exposure, unlike superglues or wood glues.
Beyond the adhesive, a few key tools are indispensable: a stiff brush or spatula for even glue application, fine-grit sandpaper (100-220 grit) for surface preparation, masking tape to protect areas you don't want glued, and most critically, clamps or a sole press to apply consistent, even pressure during curing. A heat gun (used on a low setting) can also be useful for activating certain adhesives or making the sole material more pliable. Always prioritize safety: work in a well-ventilated area and wear appropriate gloves and eye protection.
| Adhesive Type | Primary Use | Key Benefit | Curing Time (Approx.) |
|---|---|---|---|
| Contact Cement (e.g., Barge) | Rubber, Leather, EVA Soles | Strong, flexible, durable bond, excellent for dynamic stress. | 24-72 hours |
| Polyurethane (e.g., Sika-bond) | Rubber, Leather, Synthetic Soles | Excellent water resistance, strong bond, good flexibility. | 24-48 hours |
| Cyanoacrylate (Super Glue) | Temporary, small repairs only | Fast drying | Minutes (but brittle) |
Step-by-Step Professional Re-gluing Process
This is where precision and patience truly pay off. Follow these steps meticulously to ensure a lasting, professional-grade repair. Remember, rushing any stage can compromise the entire effort.
Preparation: The Foundation of Success
- Clean the Surfaces: Using a stiff brush or a damp cloth, thoroughly clean any dirt, debris, or old adhesive residue from both the sole and midsole surfaces. For stubborn residue, a specialized adhesive remover or a small amount of acetone (test in an inconspicuous area first) can be used, but ensure it doesn't damage the leather.
- Roughen the Surfaces: This is a critical step for mechanical adhesion. Using 100-150 grit sandpaper, lightly scuff both the sole and midsole surfaces that will be bonded. This creates microscopic valleys for the adhesive to key into, dramatically improving bond strength. Wipe away any sanding dust with a clean, dry cloth or compressed air.
- Masking (Optional but Recommended): If you're concerned about excess glue squeezing out, apply masking tape along the edges of the sole where it meets the upper. This provides a clean line and protects the leather from accidental adhesive spills.
Applying the Adhesive: Precision is Paramount
- Even Coating: Apply a thin, even layer of your chosen contact cement to *both* the delaminated sole surface and the corresponding midsole surface. Use a small brush, spatula, or applicator. Avoid globs or uneven patches. The goal is complete, uniform coverage.
- Allow to Tack Up: This is perhaps the most misunderstood step with contact cements. Do NOT press the surfaces together immediately. Allow the adhesive to dry until it's 'tacky' to the touch – usually 10-20 minutes, depending on the adhesive and ambient conditions. It should feel sticky but not transfer to your finger. This 'open time' allows the solvents to evaporate, creating a much stronger bond upon contact.

Bonding and Clamping: The Critical Moment
- Precise Alignment: Carefully align the sole with the midsole. Once contact cement touches, it bonds almost instantly and is very difficult to reposition without compromising the bond. Take your time to get the alignment perfect.
- Apply Pressure: Once aligned, firmly press the sole and midsole together. Then, apply consistent, even pressure using specialized shoe clamps or a sole press. If you don't have these, heavy-duty C-clamps with protective blocks can work, or even wrapping the entire shoe tightly with elastic bandages or rubber strips. Ensure pressure is applied evenly across the entire re-glued area.
- Curing: Allow the shoe to remain clamped for the adhesive's recommended curing time, typically 24 to 72 hours. Resist the urge to check it too soon. Full bond strength develops over time, and disturbing it prematurely can weaken the repair. After removing clamps, carefully peel off any masking tape.
Common Pitfalls and How to Avoid Them (Expert Insights)
In my experience, the biggest enemy of a successful shoe repair isn't the damage itself, but impatience and a lack of understanding of material science. Rushing a bond is like trying to build a house without proper foundation – it will inevitably crumble.
I've seen many well-intentioned DIY attempts fall short due to a few recurring mistakes. Avoiding these pitfalls is crucial for a professional outcome when you re-glue delaminated sole on Goodyear-welted shoe professionally.
- Insufficient Surface Preparation: Not cleaning or roughing up the surfaces adequately is the number one reason for bond failure. Glue needs a clean, porous surface to adhere properly.
- Applying Glue Too Thickly or Unevenly: More glue isn't always better. A thick, uneven layer can trap solvents, prevent proper curing, and create weak spots.
- Not Allowing Glue to Tack Up: Pressing contact cement together while it's still wet will result in a weak, temporary bond. The 'tacky' stage is non-negotiable for strength.
- Inadequate or Uneven Clamping Pressure: The bond forms under pressure. Without consistent, firm clamping across the entire glued area, parts of the sole will remain weakly attached.
- Premature Use: Taking the shoes out for a walk before the adhesive has fully cured is a recipe for disaster. Give it the full recommended time.
Case Study: The Enthusiastic DIYer's Redemption
I once had a client, Mr. Henderson, bring in a pair of cherished English oxfords. He'd tried to fix a minor sole delamination himself with super glue. The result? A brittle, unsightly white residue that cracked and failed within days, and worse, the super glue had hardened the surrounding leather, making a proper repair more challenging. He was devastated.
After carefully removing the old, failed adhesive and meticulously preparing the surfaces – a process that took longer than the actual re-gluing – I applied a professional-grade contact cement and clamped the shoes for 48 hours. The outcome was a seamless, durable bond that restored the shoe's integrity without any visible trace of the previous mishap. Mr. Henderson learned that while the intent was good, re-glue delaminated sole on Goodyear-welted shoe professionally requires specific knowledge and materials. He was thrilled to have his shoes back, good as new.
When to Call a Professional Cobbler: Knowing Your Limits
While this guide empowers you with the knowledge to perform a professional re-glue, there are specific scenarios where calling a seasoned cobbler is not just advisable, but essential. Recognizing these limits is a mark of true shoe care expertise.
If the delamination is extensive, covers a large portion of the sole, or involves multiple layers (e.g., the midsole separating from the welt), the repair becomes significantly more complex. Structural damage, such as a cracked shank or a compromised welt stitch, also falls outside the scope of a simple re-gluing. In these cases, specialized tools, deep experience, and potentially a full re-sole are required.
Furthermore, if your shoes are made from exotic leathers (e.g., alligator, stingray) or have intricate designs, the risk of damaging them during a DIY repair increases exponentially. A professional cobbler possesses the expertise to handle these delicate materials and complex constructions without causing further harm. Their specialized sole presses and clamping jigs also ensure uniform pressure that's hard to replicate at home, leading to a superior, longer-lasting bond. When in doubt, always seek a professional opinion. Organizations like the Shoe Service Institute of America can help you locate certified cobblers in your area.
Maintaining Your Goodyear-Welted Shoes to Prevent Future Delamination
Prevention is always better than cure. Once you've successfully managed to re-glue delaminated sole on Goodyear-welted shoe professionally, adopting a robust maintenance routine will significantly extend the life of your repair and prevent future issues. Remember, these shoes are built to last, but they require active care.
- Regular Cleaning and Conditioning: Keep the leather uppers clean and supple with appropriate cleaners and conditioners. Dry leather can become brittle and contribute to stress on the sole adhesion.
- Use Shoe Trees: Always insert cedar shoe trees after wearing. They absorb moisture, maintain the shoe's shape, and help prevent the sole from curling or deforming, which can stress adhesive bonds.
- Rotate Your Footwear: Avoid wearing the same pair of shoes every day. Giving them a day or two to rest allows internal moisture to evaporate fully, which is crucial for the longevity of all shoe components, including the sole adhesion.
- Avoid Extreme Conditions: While Goodyear-welted shoes are robust, prolonged exposure to excessive moisture (e.g., walking through deep puddles for extended periods) or extreme heat can weaken adhesives and damage materials. If they do get wet, allow them to air dry naturally, away from direct heat.
- Timely Minor Repairs: Address any minor separations or damage promptly. A small delamination is far easier and less costly to fix than a widespread failure.
For more comprehensive guidance on shoe care, I often recommend consulting resources from reputable shoemakers or leather care specialists. A good starting point is often a brand's own care guide, such as those provided by Allen Edmonds.
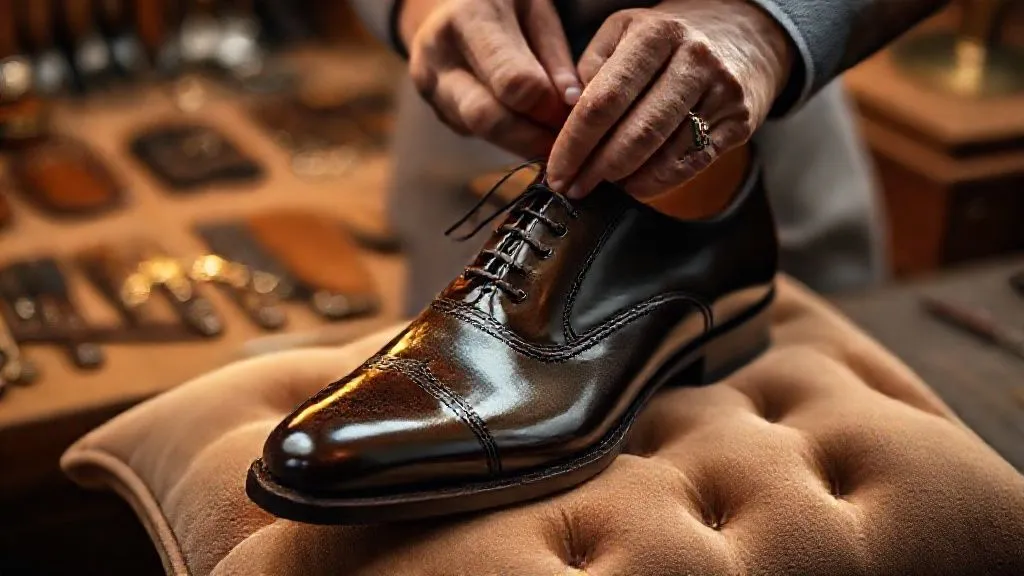
 neatly organized in the background. Cinematic lighting, sharp focus, depth of field, conveying luxury and meticulous care. Shot on a high-end DSLR, 8K hyper-detailed.")
Frequently Asked Questions (FAQ)
Can I use super glue for delaminated soles? I strongly advise against using super glue (cyanoacrylate) for sole delamination, especially on Goodyear-welted shoes. While it offers a quick, strong bond, it's very brittle and lacks the flexibility required for a shoe sole. It will likely crack and fail quickly, and can harden the surrounding leather, making a proper, flexible repair much more difficult for a professional later on.
How long does a re-glued sole last? If performed professionally with the correct adhesive and technique, a re-glued sole can last for several years, often as long as the original bond would have. It largely depends on the quality of the repair, the adhesive used, and the wearer's habits. Regular maintenance also plays a significant role in its longevity.
What if the welt itself is damaged, not just the sole? If the welt itself is damaged, cracked, or separating from the upper, this is a more serious issue that typically requires a professional cobbler. Repairing a welt involves specialized stitching and often a more extensive rebuild, which is beyond the scope of a simple re-glue and requires expert tools and skills.
Is sole delamination covered under shoe warranty? This depends entirely on the shoe manufacturer and the age of the shoe. Many premium brands offer warranties against manufacturing defects. If the delamination occurs relatively early in the shoe's life and isn't due to excessive wear or misuse, it might be covered. Always check your shoe's specific warranty policy.
What's the difference between re-gluing and a full re-sole? Re-gluing addresses a partial separation of the existing sole layers. A full re-sole, on the other hand, involves removing the entire outsole (and sometimes the midsole) and replacing it with new material. A re-sole is typically done when the outsole is worn through, or when the delamination is so severe or widespread that re-gluing isn't a viable long-term solution. Goodyear-welted shoes are particularly well-suited for multiple re-soles.
Key Takeaways and Final Thoughts
Restoring a delaminated sole on a Goodyear-welted shoe is a task that demands respect for the craftsmanship involved and a meticulous approach. It's not a quick fix but a careful process that, when executed correctly, can breathe new life into your cherished footwear. Here are the critical takeaways:
- Assessment is Paramount: Understand the extent and nature of the delamination before attempting any repair.
- Choose the Right Tools & Adhesives: Industrial-grade contact cements and proper clamping are non-negotiable for a lasting bond.
- Patience is a Virtue: Meticulous surface preparation, proper 'tack up' time, and full curing are crucial steps that cannot be rushed.
- Know Your Limits: For extensive damage or complex constructions, a professional cobbler's expertise is invaluable.
- Preventative Care Pays Off: Regular maintenance significantly extends the life of both your original soles and any repairs.
Your Goodyear-welted shoes are a testament to enduring quality, and with the right care and attention, they can serve you faithfully for years, even decades. Don't let a delaminated sole be their undoing. Embrace the knowledge shared here, apply it diligently, and walk confidently, knowing you've given your footwear the professional treatment it deserves. For a deeper dive into Goodyear welt construction, consider exploring authoritative resources such as the Wikipedia page on Goodyear Welt.
Recommended Reading
- Unlock Profit: 7 Strategies for Sourcing Unique Gift Accessories
- The Secret to Effortless Sophistication: How to Infuse Timeless Elegance into Casual Wear
- Authenticating Vintage Chanel: 7 Expert Steps Without Original Papers
- 7 Steps: Translate Abstract Script Themes to Conceptual Costume Design
- Unlock the Secret: How to Prevent Platinum Jewelry from Scratching Easily

Your email address will not be published. Required fields are marked *