
How to Restore Heavily Damaged Vintage Textiles for Resale?
For over two decades in the sustainable fashion and vintage industry, I've witnessed the incredible transformation of what many would dismiss as irreparable. There's a profound satisfaction, and indeed significant profit, in breathing new life into textiles that carry the whispers of history.
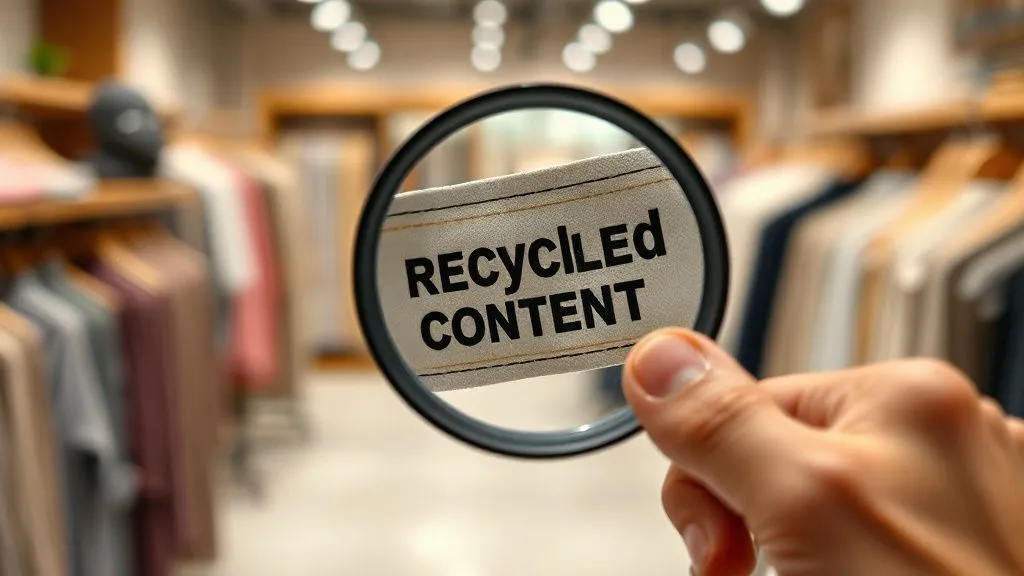
The common misconception is that heavily damaged vintage textiles are beyond saving – destined for the landfill or relegated to dusty corners. This perspective often leads aspiring vintage sellers or enthusiasts to overlook truly valuable pieces, missing out on unique opportunities to contribute to a circular economy while building a thriving business.
In this definitive guide, I will share the meticulous, expert-level strategies and techniques I've honed over years to restore even the most heavily damaged vintage textiles. You'll learn not just what to do, but how to approach each challenge with the precision and patience required to transform seemingly lost causes into highly desirable, resalable treasures.
The Art of Initial Assessment: Unveiling a Textile's True Potential
Before any needle touches fabric or any cleaning agent is applied, the most critical step is a thorough, unbiased assessment. I've seen countless well-intentioned restoration efforts go awry simply because the initial diagnosis was flawed.
1. Comprehensive Fabric Identification:
- Fiber Content: Is it silk, wool, cotton, linen, rayon, or a blend? Each fiber reacts differently to cleaning agents, heat, and repair techniques. A burn test (on an inconspicuous thread) or microscopic analysis can confirm identity.
- Weave Structure: Is it a delicate lace, a sturdy twill, a fluid satin, or a textured velvet? The weave dictates how the fabric will behave under stress and how repairs should be approached.
- Dye Stability: Conduct a patch test with a damp white cloth in an unseen area to check for color bleeding. This is paramount before any wet treatment.
2. Detailed Damage Mapping:
- Type of Damage: Categorize tears (rips, snags), holes (moth, abrasion), stains (oil, protein, rust, mildew, dye bleed), fading (UV, chemical), structural weakness (rot, embrittlement), and previous, often poor, repairs.
- Extent and Location: Document every imperfection. Is the damage localized or widespread? Is it in a prominent area or easily concealed?
- Severity: Distinguish between minor wear and tear versus extensive structural compromise.
3. Feasibility and Economic Viability Assessment:
Based on your detailed assessment, ask yourself: Is this piece truly restorable without losing its original character or becoming a Frankenstein's monster? More importantly, will the time, effort, and cost of restoration yield a profitable return? Sometimes, a heavily damaged piece is best left as a study piece or for parts.

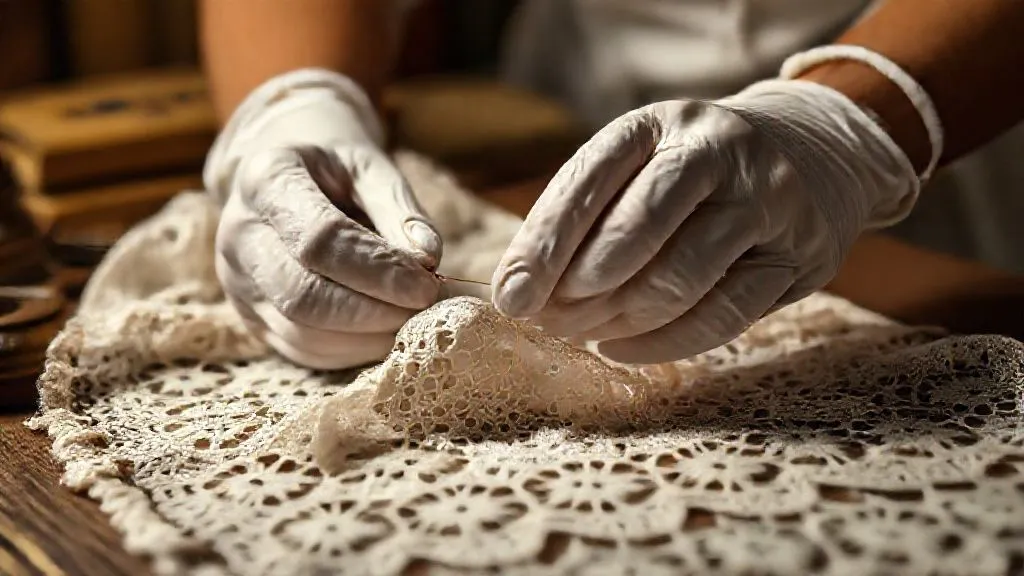
Pre-Restoration Protocols: Gentle Cleansing for Fragile Fabrics
Cleaning a heavily damaged vintage textile is not like washing everyday clothes; it's a delicate dance between preservation and purification. My mantra here is 'do no harm.' Aggressive cleaning can cause irreversible damage, so proceed with extreme caution.
1. Dust and Debris Removal:
- Gentle Vacuuming: Use a low-suction vacuum cleaner with a mesh screen over the nozzle to prevent accidental suction of loose fibers or embellishments.
- Soft Brushing: A very soft-bristled brush can carefully dislodge surface dirt. Always brush in the direction of the weave.
2. Patch Testing for All Solutions:
Every single cleaning agent, from distilled water to specialized stain removers, must be patch-tested on an inconspicuous area first. Observe for color change, fiber degradation, or texture alteration for at least 24 hours.
3. Controlled Wet Cleaning (If Applicable):
- Distilled Water Only: Tap water contains minerals and chlorine that can react with old fabrics.
- pH-Neutral Soaps: Use only conservation-grade, pH-neutral soaps designed for delicate textiles.
- Immersion vs. Spot Cleaning: For overall soiling, controlled immersion in a basin of lukewarm distilled water with minimal soap might be necessary. For localized dirt, careful spot cleaning with cotton swabs can be more appropriate.
- Support During Washing: Always support the entire textile, especially when wet, as it becomes incredibly fragile. Use a fine mesh screen or a clean sheet to lift and transfer.
- Rinsing: Rinse thoroughly in multiple changes of distilled water until no suds or discoloration appear.
4. Drying:
Air-dry flat on a clean, absorbent surface (like white towels) away from direct heat or sunlight. Reshape the garment gently as it dries. Never tumble dry vintage textiles.
The greatest restoration begins not with repair, but with respect for the original material and its history. Understanding a textile's past informs every decision you make for its future.
For more in-depth scientific approaches to textile cleaning, I often refer to resources from institutions like the American Institute for Conservation (AIC), which provides invaluable guidelines for professional conservators.
Mastering Structural Integrity: From Rips to Resale Ready
Addressing structural damage is where true craftsmanship shines. The goal is to stabilize the fabric and make repairs as invisible or as aesthetically pleasing as possible, without compromising the textile's integrity or historical value.
1. Darning: The Art of Re-Weaving:
Darning is essentially recreating the weave. For heavily damaged areas, especially holes, this is often the most appropriate technique.
- Choose Your Thread: Select a thread that matches the original fiber content, weight, and color as closely as possible. Silk thread on silk, fine wool on wool. Sometimes, taking a thread from an unseen seam allowance is ideal.
- Stabilize the Edges: If the edges of the hole are frayed, gently trim loose threads and stabilize them with a tiny running stitch or a very fine fusible interfacing on the reverse, if appropriate for the fabric.
- Create a Grid: Using a darning needle, create a series of parallel running stitches across the hole, extending slightly into the intact fabric around it. These are your warp threads.
- Weave Across: Now, weave your needle under and over the warp threads, alternating rows, to create a new fabric patch. Maintain even tension.
- Finishing: Once the hole is filled, secure the threads on the reverse side. The goal is a repair that is strong and, ideally, blends seamlessly.
2. Patching: Reinforcement and Concealment:
For larger areas of damage, or when darning isn't feasible, patching offers a robust solution. The key is to use a patch fabric that is period-appropriate, matches in weight and drape, and is either invisible or intentionally decorative (visible mending).
- Invisible Patching: Involves carefully matching fabric, often from an unseen part of the garment (like a hem allowance), and meticulously hand-stitching it from the reverse side, blending the edges into the original fabric.
- Visible Mending: A growing trend in sustainable fashion, where the patch is intentionally visible, often using contrasting thread or fabric to highlight the repair as a feature. This can be a valid approach for resale if marketed correctly as an artistic restoration.
3. Re-weaving: For Extensive Losses:
True re-weaving, where individual warp and weft threads are replaced across a significant loss, is a highly specialized skill, often requiring professional conservators. It's labor-intensive and expensive, but for museum-quality pieces or extremely valuable items, it can be justified.
The Science of Stain Removal: Erasing the Marks of Time
Stains are arguably the most common and challenging form of damage. Successfully removing them requires patience, knowledge of chemistry, and a systematic approach. Remember the 'do no harm' principle from cleaning.
1. Identify the Stain:
Before you treat, you must identify. Is it grease, blood, rust, ink, mildew, or an unknown discoloration? The age of the stain also matters. Older stains are often more set.
2. Targeted Treatments:
- Protein Stains (Blood, Food): Use enzymatic cleaners (pre-soaks, detergents) in cool water. Avoid heat, which can set protein stains permanently.
- Oil/Grease Stains: Solvents like mineral spirits or specialized degreasers. Apply sparingly, work from the outside in, and blot.
- Rust Stains: Oxalic acid (use with extreme caution and ventilation) or commercial rust removers designed for fabric. Test extensively.
- Mildew/Mold: Mild bleach solutions (for whites only, extreme caution), hydrogen peroxide, or oxygen-based bleaches. Sunlight can also help, but prolonged exposure can fade colors.
- Dye Transfer/Bleed: Sometimes, a color run can be reversed with specific dye removers, but this is incredibly risky on multi-colored items.
3. Application Techniques:
- Blot, Don't Rub: Rubbing can spread the stain and damage fibers.
- Work from Outside In: Prevents the stain from spreading outwards.
- Layering: For stubborn stains, repeated, gentle applications are better than one aggressive attempt.
- Rinse Thoroughly: Always rinse the treated area to remove all chemical residues.
Safety Note: Always work in a well-ventilated area, wear gloves, and follow product instructions precisely when using chemical stain removers. Some chemicals can be hazardous to both the textile and your health.
| Stain Type | Recommended Treatment | Caution |
|---|---|---|
| Grease/Oil | Solvent (e.g., mineral spirits, dry cleaning fluid), then gentle detergent wash. Blot, do not rub. | Flammable, test dye stability. |
| Protein (Blood, Food) | Enzymatic cleaner, cool water soak. For fresh stains, cold water immediately. | Avoid heat, which sets protein. Test for colorfastness. |
| Rust | Oxalic acid solution (diluted), commercial rust remover for fabric. Apply with cotton swab. | Highly corrosive, use gloves & ventilation. Test aggressively. |
| Mildew/Mold | Oxygen bleach (for whites/colorfast), hydrogen peroxide. Sunlight exposure can help. | Can damage delicate fibers, test in inconspicuous area. Avoid on silk/wool. |
| Dye Transfer | Commercial dye remover (last resort), repeated gentle washing in warm water with pH-neutral soap. | Extremely risky, can strip original color. Test thoroughly. |
Reviving Color and Luster: Dyeing and Fading Correction
Fading and uneven color are common issues in vintage textiles. Restoring vibrancy can significantly enhance resale value, but it requires an expert touch and a deep understanding of dyes.
1. Assessing Color Loss:
Is the fading uniform, or are there distinct sun-faded areas? Has the entire garment dulled, or only specific parts? Sometimes, a faded patina adds to the vintage charm; know when to leave it.
2. Spot Dyeing and Blending:
For localized fading, spot dyeing is an option. This involves carefully mixing custom dye colors to match the original, unfaded areas of the garment. I often use artist's acrylics (diluted and heat-set for permanence) or specific fabric paints applied with a fine brush or airbrush for a seamless blend.
3. Full Garment Dyeing:
If the entire garment is uniformly faded, and you're confident in the fabric's ability to take dye, a full re-dye can be transformative. This is best for solid-colored items or those where the original pattern is minimal.
- Choose the Right Dye: Select dyes appropriate for the fiber content (e.g., fiber-reactive dyes for cotton/linen, acid dyes for silk/wool).
- Prepare the Fabric: Ensure the textile is scrupulously clean and free of any sizing or finishes that might impede dye absorption.
- Controlled Dye Bath: Follow dye manufacturer instructions precisely, but always err on the side of caution with vintage pieces. Use a large enough vessel for even immersion.
- Rinse and Set: Rinse thoroughly until the water runs clear, then use a dye fixative if recommended.
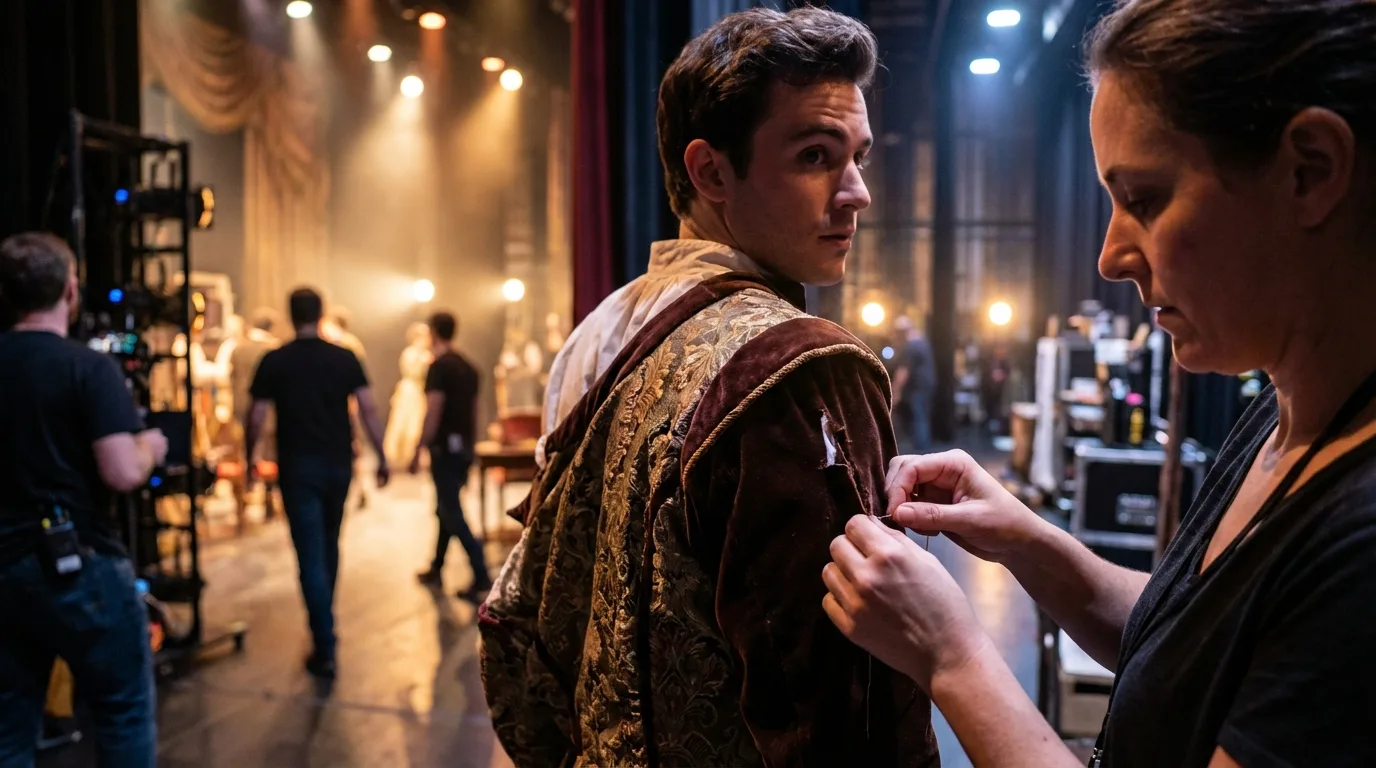
Case Study: The Rescued Victorian Velvet Gown
I once encountered a magnificent Victorian velvet gown, its deep burgundy hue severely sun-faded across one shoulder and down one side. Many would have deemed it unsalvageable for high-end resale. My team and I began with meticulous spot-cleaning, then carefully matched a custom dye blend. Using a fine airbrush technique, we gradually built up the color in the faded areas, blending seamlessly into the original fabric. This painstaking process took weeks, but the result was a stunning revival, allowing the gown to fetch a premium price at auction, proving that even extensive color correction can be economically viable when executed with precision and expertise.
The Finishing Flourish: Pressing, Steaming, and Odor Elimination
The final steps are crucial for presenting a restored textile in its best light. A perfectly repaired garment can still look neglected if it's wrinkled or smells musty. This is where professional presentation truly comes into play.
1. Professional Pressing:
- Know Your Fabric: Different fibers require different heat settings and moisture levels. Silk and wool need lower heat and a press cloth; cotton and linen can tolerate higher heat.
- Steam vs. Dry Iron: A steam iron is often preferred for vintage textiles as it's gentler and helps relax fibers. For delicate or textured fabrics like velvet, steaming is preferred over direct ironing.
- Pressing Technique: Always press on the reverse side where possible. Use a clean, white pressing cloth to protect the fabric from direct heat and prevent scorching or shine.
- Shape Retention: Use tailor's hams and seam rolls to maintain the garment's original shape as you press.
2. Steaming:
A garment steamer is invaluable for removing wrinkles from delicate fabrics that can't withstand direct iron heat, or for refreshing items. Hold the steamer a few inches away and allow the steam to penetrate and relax the fibers.
3. Odor Elimination:
Vintage items often carry lingering odors from storage, smoke, or mildew. Eliminating these is paramount for resale.
- Air Circulation: The simplest and often most effective method is prolonged airing in a well-ventilated, shaded area.
- Activated Charcoal: Place activated charcoal packets or bowls of activated charcoal near the garment in a sealed container or garment bag for several days or weeks.
- Ozone Treatment (Professional Only): For severe odors, professional ozone treatment can be highly effective, but it must be done by specialists as ozone can be damaging to some fibers and is harmful to humans.
- Fabric Refreshers: Use sparingly and test first. Many commercial refreshers only mask odors.

Strategic Valuation and Presentation for Resale
Successfully restoring a heavily damaged vintage textile is only half the battle; the other half is effectively valuing and presenting it for resale. My experience has taught me that transparency and professional presentation are key to maximizing your return.
1. Documenting the Restoration Process:
Keep a detailed log of every step: before photos, cleaning methods, repair techniques, materials used, and after photos. This documentation adds immense value and trust for potential buyers, especially for significant pieces. It allows you to justify your pricing.
2. Professional Photography and Staging:
- High-Resolution Images: Invest in good lighting and a quality camera. Showcase the garment from multiple angles, including close-ups of texture and details.
- Before & After Shots: These are incredibly powerful in demonstrating the transformation and the skill involved.
- Lifestyle or Mannequin Shots: Present the garment in an appealing context. A well-styled mannequin or a carefully composed flat lay can make a huge difference.
3. Crafting Compelling Descriptions:
- Honest and Detailed: Describe the item's history, original condition, the restoration work performed, and its current state. Highlight the improvements and any remaining imperfections.
- Storytelling: Weave a narrative around the piece. What era is it from? What makes it special?
- Measurements: Provide precise measurements to aid buyers.
4. Pricing Strategies:
Pricing a restored item involves balancing the original value, the cost of materials and labor, and the market demand for similar items. Research comparable sales. A well-restored piece can often command a price significantly higher than an unrestored, heavily damaged one, but typically not as high as a pristine original.
Transparency about restoration enhances trust and often justifies a higher price point, especially in the discerning vintage market. Buyers appreciate knowing the journey a piece has taken.
Understanding market trends and consumer demand is also crucial. Resources like Business of Fashion or Vogue Business often provide insights into the growing sustainable and vintage luxury markets.
Common Restoration Pitfalls and Expert Avoidance Strategies
Even seasoned experts encounter challenges. Recognizing common pitfalls before they happen can save you time, money, and heartache.
1. Over-Cleaning or Using Incorrect Chemicals:
- Pitfall: Aggressively cleaning or using harsh chemicals that strip original finishes, damage fibers, or cause irreversible color changes.
- Avoidance: Always conduct patch tests. Start with the gentlest method and gradually escalate only if necessary. When in doubt, consult a professional conservator.
2. Underestimating Time and Skill Required:
- Pitfall: Taking on a project that is beyond your current skill level or underestimating the hours involved, leading to frustration, burnout, or a subpar result.
- Avoidance: Be realistic about your capabilities. For highly complex repairs (like extensive re-weaving), consider outsourcing to a specialist. Practice on less valuable items first.
3. Invisible Mending That Isn't:
- Pitfall: Executing a repair intended to be invisible, but it stands out due to mismatched thread, poor technique, or puckering.
- Avoidance: Invest in the right tools and materials. Practice darning and patching extensively. Sometimes, accepting a visible mend that is beautifully executed is better than a poorly disguised 'invisible' one.
4. Not Knowing When to Stop:
- Pitfall: Over-restoring a piece to the point where it loses its vintage character or becomes too 'new' looking, diminishing its appeal to collectors.
- Avoidance: Embrace the patina. Acknowledge that some imperfections are part of the textile's story. The goal is preservation and stabilization, not erasure of history.
5. Neglecting Proper Documentation:
- Pitfall: Failing to photograph 'before' conditions or document the restoration process, which can hinder both learning and resale value.
- Avoidance: Make documentation an integral part of your workflow. It's not just for buyers; it's a critical tool for your own growth and expertise.

Frequently Asked Questions (FAQ)
Q: Is it always worth restoring heavily damaged textiles for resale? A: No, not always. The decision hinges on several factors: the item's historical significance, the rarity of the textile, the extent and type of damage, and the potential market value post-restoration versus the cost (time and materials) of the restoration itself. A thorough initial assessment (as discussed in H2.1) is crucial to determine economic viability. Sometimes, a piece is better preserved as a study item or for parts if the restoration cost outweighs potential profit.
Q: How do I know if a stain is permanent or can be removed? A: While no guarantee exists without trying, the age and type of stain are key indicators. Older, set-in stains (especially protein or rust) are generally harder to remove completely. If a stain has caused fiber degradation or discoloration that has altered the actual dye of the fabric, it's likely permanent. Always start with the least invasive method, test extensively, and be prepared that some ghosting or faint marks might remain, which can sometimes be camouflaged by careful dyeing or repair.
Q: What are the most common mistakes beginners make when attempting to restore vintage textiles? A: Beginners often err by being too aggressive with cleaning (using harsh chemicals, hot water, or scrubbing), attempting repairs beyond their skill level, failing to properly identify the fabric type before treatment, and not conducting patch tests. Rushing the process and underestimating the time and patience required also lead to poor results. My advice is always: start small, practice on less valuable items, and prioritize preservation over perfection.
Q: Should I outsource some restoration tasks to specialists? A: Absolutely. For highly valuable or extremely delicate pieces, or for specific challenges like extensive re-weaving, professional textile conservators or specialized repair services are invaluable. Knowing when to call in an expert is a sign of true professionalism and often leads to a superior outcome, protecting your investment and reputation. Always research and choose conservators with experience in historical textiles. You can find accredited professionals through organizations like the Textile Conservation Workshop or similar national bodies.
Q: How do I price a restored vintage item for resale, considering the restoration cost? A: Pricing should reflect the item's inherent vintage value (rarity, designer, era), the condition it was in before restoration, the quality and extent of the restoration work, and current market demand. Calculate your material costs and assign an hourly rate for your labor. Research prices of similar, well-preserved vintage items. While a restored item won't typically fetch the price of a pristine original, it will command significantly more than its pre-restoration state. Be transparent in your listing about the restoration, showcasing your 'before and after' journey to justify the value. Consider the emotional value and unique story your restoration adds.
Key Takeaways and Final Thoughts
- Thorough Assessment is Paramount: Never skip the initial identification and damage mapping. It dictates every subsequent step.
- Prioritize Gentle Methods: Always start with the least invasive cleaning and repair techniques. 'Do no harm' is your guiding principle.
- Master Specific Techniques: Invest time in learning darning, stain removal chemistry, and careful pressing. These are your core skills.
- Document Everything: Your restoration journey adds value and builds trust with potential buyers.
- Know When to Outsource: Recognize the limits of your own expertise and seek professional help for complex challenges.
- Embrace the Story: Restoration isn't about erasing history, but enhancing it. A well-restored piece tells a richer story.
Restoring heavily damaged vintage textiles for resale is a challenging yet incredibly rewarding endeavor. It demands patience, precision, and a deep respect for the craftsmanship of the past. By applying these expert strategies, you're not just repairing fabric; you're preserving history, promoting sustainability, and transforming forgotten treasures into cherished heirlooms for a new generation. Go forth, restore with confidence, and let the beauty of these textiles shine once more.
Recommended Reading
- 7 Proven Strategies: How to Resolve Severe Contact Lens Dryness for Daily Wear?
- Unlock the Secret: How to Care for Contemporary Jewelry Materials?
- Gen Z & 90s Nostalgia: 7 Ways to Market Your Retro Brand Effectively
- Unlocking Editorial Magic: How to Develop a Visual Story for Fashion
- 7 Proven Strategies: How to Prevent Exclusive Haute Couture Designs from Being Copied?


Your email address will not be published. Required fields are marked *