
How to Repair Moth-Eaten Collectible Silk Without Visible Damage?
For over two decades in the vintage fashion and textile conservation world, I've witnessed the profound heartbreak that comes with discovering moth damage on a cherished piece of collectible silk. It's not just a hole; it’s a breach in history, a threat to an irreplaceable artifact. The fear of making it worse, of leaving a visible scar on something meant to be pristine, is a common and very real concern among collectors.
The problem isn't just the physical damage, but the emotional distress of potentially losing a piece of fashion history, whether it’s a rare Fortuny gown, a delicate Art Deco scarf, or a significant designer piece. Standard repair methods often leave obvious marks, devaluing the item and compromising its aesthetic integrity. This challenge often leaves collectors feeling helpless, believing the damage is irreversible without professional intervention, or worse, that the item is forever marred.
But what if I told you there are nuanced, expert-level techniques that allow you to repair moth-eaten collectible silk without visible damage, restoring its original beauty and value? In this definitive guide, I will share the meticulous frameworks, step-by-step processes, and insider insights I’ve honed over years of working with priceless textiles, empowering you to approach these delicate repairs with confidence and achieve truly invisible results.
Understanding the Enemy: Moth Damage and Silk's Vulnerability
Before we can repair, we must understand. Moth damage isn't always a gaping hole; it can manifest in several insidious ways, each requiring a tailored approach. Identifying the specific type of damage is the first critical step towards an invisible repair.
Identifying Different Types of Moth Damage
- Clean Holes: These are typically small, round, or irregular holes where threads have been completely consumed. They are often the easiest to spot and, paradoxically, sometimes the most straightforward to repair invisibly if small enough.
- Grazing: This is where the surface fibers have been eaten, leaving a thinned, weakened area without a full hole. The weave might appear fuzzy or translucent. This damage is particularly challenging because it affects the integrity without a clear edge to work with.
- Tunneling: Moths can eat through multiple layers of folded fabric, creating a series of aligned holes or weakened paths. This is common in stored garments and requires careful unfolding and repair of each layer.
- Threadbare Areas: Over time, repeated moth activity in one area can lead to a generally weakened, sparse weave, making the fabric highly prone to tearing.
Why Silk is So Susceptible
Silk, a natural protein fiber, is a gourmet meal for common textile pests like clothes moths and carpet beetles. Its luxurious texture and protein composition make it highly attractive. Furthermore, the delicate nature of many silk weaves—from the sheer whisper of chiffon to the subtle sheen of charmeuse—means that even minor damage can be catastrophic. Unlike wool, which has a natural elasticity and crimp that can sometimes hide repairs, silk's smooth, lustrous surface and tight, often uniform weave make any disruption immediately apparent. This is why the pursuit of an truly invisible repair is paramount for collectible silk.

The Golden Rule: Assessment and Preparation
I often tell my apprentices that the success of an invisible repair lies 80% in the preparation and 20% in the execution. Rushing this stage is the most common mistake I've seen collectors make, leading to visible, unsatisfactory results. Patience and meticulousness here are non-negotiable.
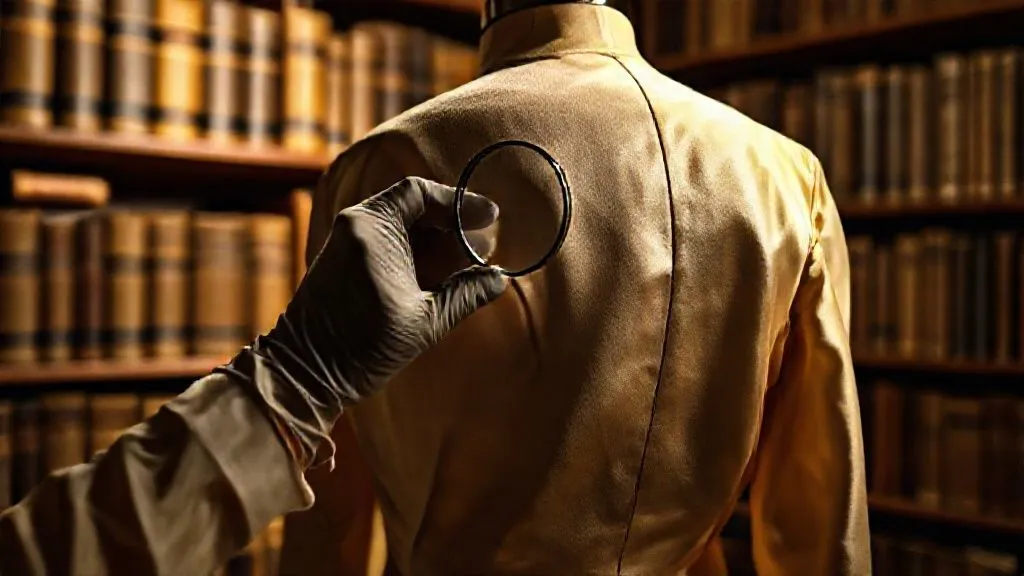
Initial Inspection and Documentation
- Isolate the Item: Immediately separate the damaged silk item from other textiles to prevent further infestation.
- Thorough Visual Inspection: Under strong, natural light (and ideally, magnification), examine every inch of the garment. Look for all signs of damage, not just the obvious holes. Check seams, folds, and hidden areas where moths love to nest.
- Document Everything: Photograph the damage from multiple angles, noting size, location, and type of damage. This serves as a baseline and helps track your progress.
- Assess Fabric Type and Weave: Identify the specific silk weave (e.g., plain weave, satin, twill, crepe). This will dictate your repair strategy. Note the direction of the warp and weft threads.
- Determine Fabric Stability: Gently test the surrounding fabric. If it's severely weakened or brittle, attempting a repair might cause more harm. In such cases, professional conservation is often the only viable path.
Gentle Cleaning: A Crucial First Step
Before any mending begins, the silk must be impeccably clean. Any residual dirt, oils, or moth larvae/eggs will compromise the repair and potentially lead to future issues. This process must be done with extreme care, especially for antique or delicate silks.
- Dust Removal: Use a soft brush (like a cosmetic brush) or a low-suction vacuum cleaner with a mesh screen attachment to gently remove surface dust and debris.
- Spot Cleaning: For localized stains, use a very mild, pH-neutral textile cleaner specifically designed for silk, applied with a micro-fiber cloth. Always test on an inconspicuous area first.
- Full Immersion (If Appropriate): For items that can withstand it, a gentle hand wash in lukewarm water with a silk-specific detergent can be beneficial. However, for truly fragile or historically significant pieces, consulting a professional textile conservator for wet cleaning or dry cleaning is advisable. As the Metropolitan Museum of Art's textile conservation guidelines often emphasize, preservation begins with careful handling.
- Drying: Lay the silk flat on a clean, absorbent towel, gently rolling to remove excess water. Air dry away from direct heat or sunlight.
Essential Tools and Materials for Invisible Mending
The right tools are not just helpful; they are absolutely indispensable for achieving an invisible mend. Think of them as extensions of your expert hands.
Needles, Threads, and Fabric Patches
- Finest Needles: You will need a selection of the finest 'sharps' or 'betweens' needles, typically sizes 10-12. These are incredibly thin and sharp, designed to slip between silk threads without snagging or creating new holes.
- Matching Silk Thread: This is arguably the most critical material. You need a thread that perfectly matches the original silk in color, fiber content, and importantly, thickness and twist. Often, this means unraveling a thread from an inconspicuous seam allowance of the garment itself, or from a donor piece of identical silk. Synthetic threads, even color-matched, will often reflect light differently and be visible.
- Donor Fabric: For patching, you'll need a piece of silk that is an exact match to the original in weave, weight, color, and fiber. This is often sourced from an unseen area of the garment (e.g., an inside hem, underarm seam) or from a sacrifice garment.
- Stabilizers: A temporary, sheer, acid-free fusible interfacing (applied with minimal heat) can sometimes be used on the reverse side for very fragile areas, but it must be applied with extreme caution and reversibility in mind.
Magnification and Lighting
Your naked eye, however keen, will not suffice for truly invisible mending. You need to see the individual threads.
- Magnifying Lamp: A high-quality magnifying lamp with adjustable brightness is essential. It provides both magnification and shadow-free illumination.
- Jeweler's Loupe: For even finer detail, a jeweler's loupe (10x or 20x) can be invaluable for inspecting thread direction and placement.
- Good Lighting: Work in an area with excellent, even lighting. Natural daylight is ideal, supplemented by adjustable task lighting.
| Tool/Material | Purpose | Expert Tip |
|---|---|---|
| Finest Sharps Needles | Precise, non-damaging stitching | Size 10-12; test on scrap first |
| Matching Silk Thread | Seamless color & texture integration | Source from garment or identical donor |
| Donor Silk Fabric | Invisible patching for holes | Exact match in weave, weight, color |
| Magnifying Lamp | Enhanced visibility of individual threads | Adjustable brightness, shadow-free |
Advanced Techniques for Invisible Silk Repair
This is where the true artistry of invisible mending comes into play. It requires patience, a steady hand, and a deep understanding of textile structure. Remember, the goal is not just to close a hole, but to recreate the original weave.
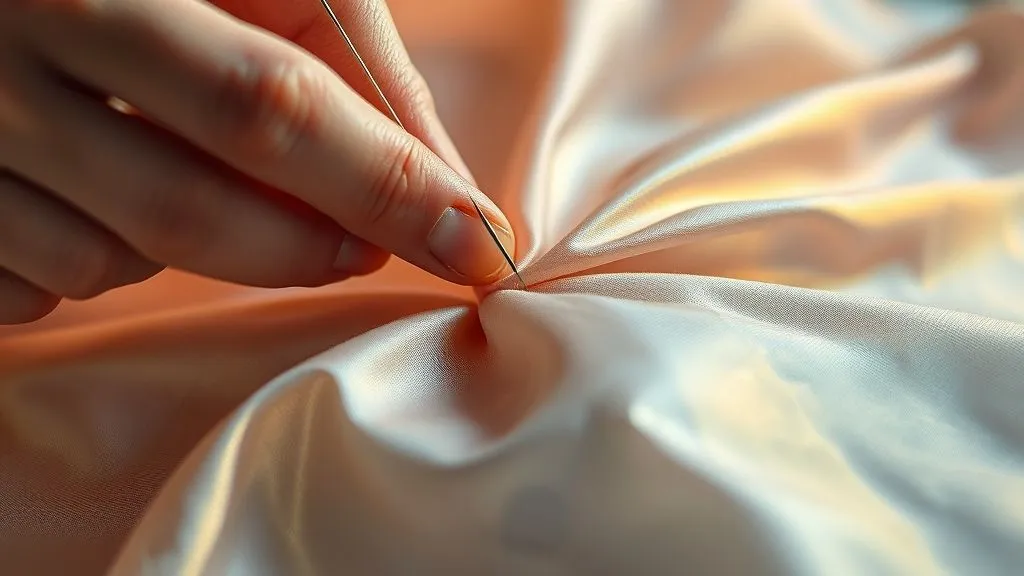
The Art of Thread-by-Thread Re-weaving
This technique is the gold standard for small holes (up to about 1 cm) where the surrounding fabric is stable. It's labor-intensive but yields the most invisible results.
- Prepare the Hole: Gently trim any frayed, loose threads around the edge of the hole. Use fine-tipped scissors.
- Stabilize the Area: Place the damaged area over a piece of contrasting, stable fabric (like fine linen) stretched taut in an embroidery hoop. This provides a stable base.
- Extract Donor Threads: Carefully unravel warp and weft threads from an inconspicuous seam allowance or a matching donor piece of silk. These threads will be your repair material.
- Recreate the Warp: Using your finest needle and a single strand of donor thread, weave new warp threads across the hole, mimicking the original weave direction. Secure each new thread invisibly into the surrounding intact fabric, ideally by splitting existing threads.
- Recreate the Weft: Once the warp threads are in place, begin weaving the weft threads over and under the new warp threads, again following the original pattern. This step is critical; each pass must be tight but not distorting.
- Secure and Finish: Once the hole is filled, carefully secure the ends of the new threads into the surrounding fabric, ensuring no knots or visible ends.
Patching with Donor Fabric: The "Inlay" Method
For larger holes or areas of significant weakness, the inlay method using a perfectly matched donor fabric is often the best solution. This is a form of appliqué that aims for seamless integration.
- Prepare the Damage: Carefully trim the moth-eaten area into a clean, geometric shape (e.g., a square or rectangle) to create precise edges.
- Cut the Donor Patch: Cut a patch from your donor silk that is slightly larger than the trimmed hole. Ensure the grainline of the patch perfectly matches the grainline of the original garment.
- Align and Baste: Carefully align the patch under the hole. Pin or baste it in place from the reverse side, ensuring perfect grain alignment.
- Invisible Stitching: Using a single strand of matching silk thread and your finest needle, employ a micro-ladder stitch or a very fine whipstitch to join the edges of the patch to the edges of the hole. The stitches should be almost imperceptible, catching only a few fibers from each edge. Work slowly and meticulously.
- Secure Reverse Side: On the reverse side, you can use a few very fine, widely spaced stitches to secure the patch's raw edges to the garment's underlying threads, or use a tiny amount of a reversible textile adhesive (acid-free, museum-grade) if the item is not intended for washing.
Strategic Stitching: Minimizing Visual Impact
Sometimes, a full re-weave or inlay isn't feasible or necessary. For grazing or very small, isolated weak spots, strategic stitching can reinforce and conceal damage.
- Darning with a Twist: Traditional darning often creates a visible patch. For silk, use incredibly fine silk thread and work in tiny, almost microscopic stitches, following the weave pattern. Instead of building a dense patch, aim to reinforce the existing weakened threads.
- Thread Splitting: When securing repair threads, instead of piercing through the fabric, try to split existing threads with your needle. This allows the new thread to lie within the fabric's structure, making it less visible.
- Underlying Support: For areas of general weakness, a very sheer, stable silk organza or crêpeline can be invisibly hand-stitched to the reverse side as a permanent support layer.
"The true mark of an expert textile conservator isn't just their ability to repair, but their unwavering commitment to preserving the original integrity and story of the piece. Every stitch should be a whisper, not a shout." - My mentor, Dr. Anya Sharma, Textile Historian.
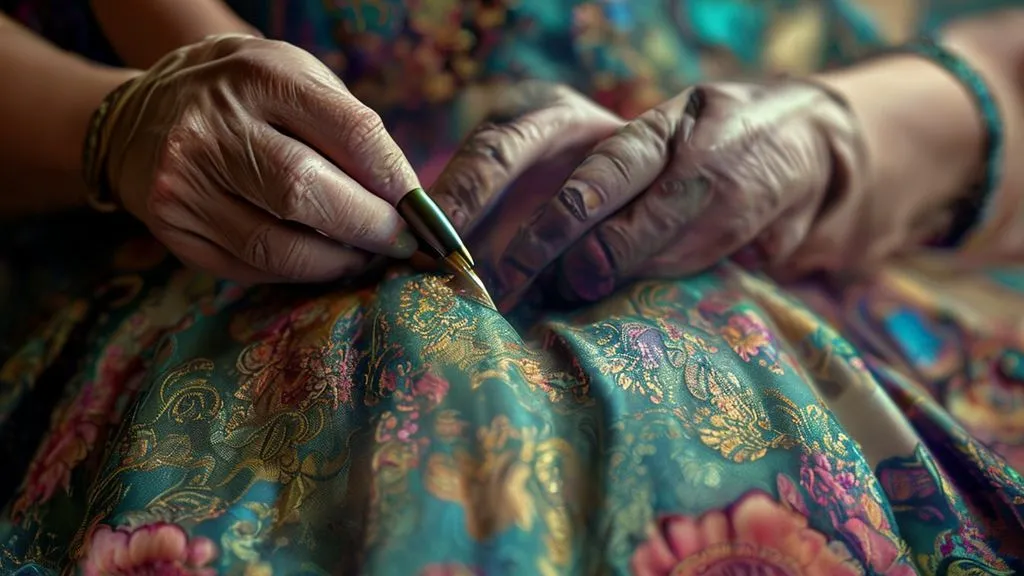
Case Study: Restoring a 1920s Fortuny Delphos Gown
I once had the privilege of working on a stunning 1920s Fortuny Delphos gown, a true icon of vintage fashion, that had suffered multiple small moth holes and areas of grazing on its delicate pleated silk. The owner was devastated, believing its value was severely compromised. By implementing the techniques I've outlined, specifically a combination of thread-by-thread re-weaving for the smaller holes and strategic, almost invisible darning for the grazed areas, we were able to restore the gown. Each repair was meticulously executed under high magnification, using threads painstakingly unraveled from the gown's generous hem allowance. The result was a triumph; the damage became virtually undetectable, preserving the gown's unique pleating and ensuring its historical and monetary value remained intact. This meticulous process, taking over 80 hours, exemplifies the dedication required for truly invisible repairs on high-value collectible silk.

Post-Repair Care and Long-Term Preservation
Once your invisible mend is complete, the job isn't quite finished. Proper post-repair care solidifies your work and, crucially, prevents future damage.
Setting the Repair: Steam and Pressure
After completing the stitching, the repair area might appear slightly puckered or textured. Gentle heat and pressure are key to blending the new threads with the old.
- Humidification: Lightly mist the repair area with distilled water, or place a damp, clean pressing cloth over it.
- Gentle Pressing: Using a low-heat iron (silk setting), gently press the repair area. Avoid dragging the iron; instead, lift and press. The goal is to relax the fibers and integrate the repair. For delicate pleats or textures, use a steamer from a distance, allowing the steam to relax the fabric without direct contact.
- Cooling: Allow the silk to cool completely before handling, as this sets the fibers in their new position.
Storage Solutions to Prevent Future Damage
An invisible repair is only as good as its long-term protection. Preventing future moth infestations is paramount.
- Cleanliness is Key: Ensure both the garment and its storage area are immaculately clean. Moths are attracted to dirt and body oils.
- Acid-Free Storage: Store collectible silk in acid-free tissue paper and archival boxes or garment bags. This protects the fabric and creates a barrier against pests.
- Environmental Control: Moths thrive in warm, dark, undisturbed environments. Store items in a cool, dry, well-ventilated area. Consider using a dehumidifier if humidity is an issue.
- Natural Repellents: Cedar blocks or lavender sachets can act as mild deterrents, but they are not foolproof. Avoid direct contact with fabric as oils can stain.
- Regular Inspection: Periodically inspect your collection, especially items stored for long periods. Early detection is your best defense against widespread damage. For more on pest management, consult resources like the American Institute for Conservation's pest management guidelines.
When to Seek Professional Restoration
While these techniques provide a pathway to invisible repairs, it's crucial to recognize the limits of DIY. There are instances where professional intervention isn't just recommended, but essential.
Recognizing Your Limits
I've always advocated for empowering collectors, but also for humility. If the damage is extensive, involves structural integrity (e.g., a load-bearing seam), or if the silk is exceptionally brittle, fragmented, or historically significant (e.g., museum-grade artifacts), attempting a DIY repair might cause irreversible damage. Similarly, if you lack the patience, steady hand, or access to perfectly matching materials, a professional will achieve superior results.
What a Professional Conservator Offers
A professional textile conservator brings a wealth of specialized knowledge, equipment, and experience:
- Advanced Techniques: They have access to highly specialized techniques like microscopic thread-matching, precise dyeing, and advanced fabric stabilization methods.
- Specialized Materials: Conservators often have a vast inventory of vintage and specialty threads, or the ability to custom-dye threads to an exact match.
- Ethical Approach: Their work adheres to conservation ethics, prioritizing reversibility and minimal intervention, ensuring the long-term preservation and historical integrity of the item.
- Environmental Control: They work in controlled environments that minimize further degradation.
For truly irreplaceable pieces, the investment in professional conservation is always worthwhile. You can find accredited conservators through organizations like the American Institute for Conservation of Historic and Artistic Works.

Frequently Asked Questions (FAQ)
Can all moth-eaten collectible silk be repaired invisibly? While many types of moth damage on collectible silk can be repaired with near-invisibility using advanced techniques, extensive damage, severely brittle fabric, or areas with complex patterns can pose significant challenges. The success depends heavily on the type of silk, the extent of the damage, and the skill of the repairer. Very large holes or widespread grazing might require professional intervention to achieve truly invisible results.
What if I can't find matching donor fabric or thread for my vintage silk? This is a common challenge. For thread, carefully unravelling a few inches from an inconspicuous seam allowance or hem of the garment itself is often the best solution. If that's not possible, sourcing vintage silk fabric or threads from reputable textile suppliers that specialize in antique materials might be necessary. Custom dyeing a modern silk thread to match can also be an option, but requires expertise. For donor fabric, consider using a piece from an unseen part of the garment if possible, or search for vintage silk swatches that match exactly in weave, weight, and color.
How do I prevent future moth infestations in my silk collection? Prevention is multi-faceted. Key steps include thorough cleaning of garments before storage, using acid-free archival storage materials (boxes, tissue, garment bags), maintaining a cool, dry, and dark storage environment, and regular inspection of your collection. Vacuuming storage areas frequently and avoiding storing food near textiles also helps. Natural repellents like cedar or lavender can offer some deterrent, but should not be relied upon as the sole solution. Integrated Pest Management (IPM) strategies are recommended for serious collectors.
Are there specific types of silk that are harder to repair invisibly? Yes, highly textured silks like shantung or raw silk, very sheer silks like chiffon or organza, and silks with intricate weaves (e.g., brocade, jacquard) can be more challenging. The texture or sheerness makes it difficult to blend new threads seamlessly, while complex weaves require an intimate understanding of the original pattern to recreate. Satin weaves, due to their long floats, can also show disruptions more easily.
What's the difference between re-weaving and darning, and which is better for invisible repair? Re-weaving involves meticulously recreating the original fabric structure, thread by thread, effectively replacing the damaged section. It aims for complete invisibility and is the superior method for small, clean holes on stable fabric. Darning, while also weaving new threads, traditionally involves building up a patch over the hole, which can be visible. For invisible repair, darning techniques must be adapted to be extremely fine and blend seamlessly with the existing weave, often reinforcing rather than fully replacing. For collectible silk, re-weaving is generally preferred for its unobtrusive nature.
Key Takeaways and Final Thoughts
Repairing moth-eaten collectible silk without visible damage is not merely a technical skill; it's an act of respect for history, artistry, and craftsmanship. It demands patience, precision, and an unwavering commitment to detail. Here are the most critical takeaways:
- Meticulous Preparation: Thorough inspection, documentation, and gentle cleaning are foundational to any successful invisible repair.
- Right Tools & Materials: Invest in the finest needles, perfectly matched silk threads, and appropriate magnification to achieve professional results.
- Advanced Techniques are Key: Master thread-by-thread re-weaving and the inlay method for seamless integration of repairs.
- Prevention is Paramount: Implement robust storage and pest control strategies to protect your cherished silks from future damage.
- Know When to Seek Help: Recognize the limits of DIY and don't hesitate to consult professional textile conservators for complex or highly valuable pieces.
Embarking on the journey to repair moth-eaten collectible silk without visible damage is a challenging yet incredibly rewarding endeavor. It connects you intimately with the textile, allowing you to breathe new life into a piece of history. Approach each mend with a conservator's mindset—respectful, precise, and dedicated to preserving the story woven into every thread. Your patience and skill will ensure these beautiful artifacts continue to inspire for generations to come.
Recommended Reading
- 7 Elite Strategies: Acquire Exclusive Clientele for Haute Couture
- Haute Couture: Is Exclusive Design Investment a Smart Move?
- How to Safeguard Luxury Drops: 5 Strategies Against Brand Erosion
- Unlocking Feminine Style: The Essential Characteristics You Need to Know
- 7 Expert Checks: Quickly Spot Advanced Replica Luxury Handbags


Your email address will not be published. Required fields are marked *