
How to Repair Bespoke Men's Dress Shoes Without Compromising Leather?
For over two decades, I've had the privilege of walking alongside gentlemen who understand the profound value of a well-crafted pair of bespoke dress shoes. These aren't just accessories; they are investments, statements of personal style, and often, heirlooms. In my extensive career within the luxury footwear industry, I've also witnessed the heartache when these sartorial investments are improperly cared for or, worse, damaged during a misguided repair attempt. The delicate balance of restoring without diminishing is an art form itself.
The challenge isn't just fixing a scuff or replacing a sole; it's about doing so with an almost surgical precision that respects the original craftsmanship and, crucially, preserves the integrity of the premium leather. Bespoke shoes are built from the finest materials, often full-grain calfskin, shell cordovan, or exotic hides, each with unique characteristics. A single wrong move – an abrasive cleaner, an incompatible dye, or a heavy-handed application – can irrevocably devalue a shoe that took weeks or even months of skilled artisan labor to create.
In this comprehensive guide, I will share the distilled wisdom of years in the footwear industry, offering you a definitive framework and actionable, expert-level insights on how to repair bespoke men's dress shoes without compromising leather. We'll delve into specific techniques, product recommendations, and preventative measures to ensure your cherished footwear remains a testament to timeless elegance, retaining its value and extending its distinguished life.
Understanding Your Bespoke Leather: A Foundation for Repair
Before any repair attempt, understanding the specific leather your bespoke shoes are crafted from is paramount. Each type of high-grade leather possesses unique characteristics that dictate the appropriate cleaning, conditioning, and repair methods. Treating a delicate aniline calfskin like a robust shell cordovan is a recipe for disaster. This foundational knowledge is the first step in preserving your investment.
The Anatomy of Bespoke Leather
Bespoke shoes typically feature full-grain leather, meaning the outermost layer of the hide has not been sanded or buffed, preserving its natural grain and strength. This can be calfskin, known for its fine grain and suppleness; shell cordovan, a dense, non-creasing equine leather; or even exotic leathers like alligator or lizard. The tanning process (vegetable-tanned vs. chrome-tanned), the finish (aniline, semi-aniline, pigmented), and the thickness all play a crucial role. For instance, an aniline leather, with its open pores, will absorb products differently than a highly polished, pigmented leather.
"Leather is a living material, and like fine wine, it ages beautifully when nurtured correctly. Misunderstanding its nature is the quickest path to premature decay." This truism, often shared among master cobblers, underscores the importance of informed care.
Understanding these nuances allows you to select the correct, non-damaging products and techniques. For example, a heavy wax on an aniline leather can clog its pores, leading to dryness and cracking, while an overly aggressive cleaner on shell cordovan can strip its natural oils and unique luster. Always identify your leather type; if unsure, consult the shoemaker or a trusted expert.

Diagnostic Excellence: Identifying the Right Repair Approach
In my experience, the impulse to 'fix' a problem immediately often leads to more significant damage. The principle of 'do no harm' is nowhere more critical than in bespoke shoe repair. Not all damage is equal, and a precise diagnosis is essential before applying any solution. Hasty interventions, particularly with strong chemicals or abrasive tools, can permanently compromise the leather's texture, color, and structural integrity.
Assessing Surface Scuffs and Minor Abrasions
Light surface scuffs are the most common issue. These are typically superficial marks where the top layer of pigment or wax has been disturbed, but the leather itself remains intact. Distinguishing these from deeper abrasions, where the leather fibers are genuinely damaged or torn, is crucial. Run a finger lightly over the scuff; if it feels relatively smooth with just a slight texture change, it's likely superficial. If you feel a noticeable gouge or torn fibers, the damage is deeper.
- Clean the Area: Gently wipe the affected area with a soft, damp cloth to remove any surface dirt or debris. This provides a clear view of the damage.
- Examine Under Good Light: Use natural daylight or a bright, directional lamp to scrutinize the scuff. Look for changes in color, texture, and depth.
- Determine Depth: Is it merely a loss of polish or pigment, or has the actual leather grain been compromised? This dictates whether a re-polish, pigment cream, or professional intervention is needed.
Evaluating Deeper Damage: Cracks, Tears, and Sole Separation
Deeper issues like cracks, tears, or significant sole separation demand a more cautious approach. Cracks, especially those that penetrate the leather's surface, indicate a loss of moisture and flexibility. Tears mean the fibers are broken. Sole separation, even minor, can lead to moisture ingress and further structural compromise. While some minor separations can be addressed at home, significant issues almost always require a professional.
"A bespoke shoe is an engineered marvel. When its structural integrity is compromised, a master cobbler, much like a skilled surgeon, is often required to restore its original form without introducing new weaknesses." This insight prevents many well-intentioned but ultimately damaging DIY attempts on complex repairs.
Attempting to glue a severely separated sole with inappropriate adhesives or trying to 'fill' a deep crack with standard shoe polish can lead to irreversible damage, making a professional repair more difficult and costly, if not impossible. Always err on the side of caution and seek expert advice for anything beyond superficial blemishes.
Essential Tools and Products for the Discerning Enthusiast
Just as a chef needs quality ingredients and precision tools, so too does the gentleman caring for his bespoke footwear. You wouldn't use sandpaper on a delicate painting, nor should you use harsh, generic products on premium leather. Investing in the right tools and products is not an expense; it's an extension of the investment you made in the shoes themselves. Quality ensures gentle, effective care without compromise.
- Soft Horsehair Brushes: For dusting, applying cream, and buffing. Have separate brushes for different colors.
- Small Applicator Brushes/Cloths: For precise application of creams and polishes.
- Microfiber Polishing Cloths: For buffing to a high shine without scratching.
- High-Quality Shoe Trees: Unvarnished cedar shoe trees are essential for absorbing moisture and maintaining shape.
- Specialized Leather Cleaner: A gentle, pH-neutral cleaner specifically for fine leather.
- Nourishing Leather Conditioner/Cream: Essential for moisturizing and protecting the leather.
- Pigment Creams/Polishes: For restoring color and covering minor scuffs. Choose a brand known for high pigment concentration and quality waxes.
- Leather Glue (e.g., Barge Cement): For minor sole separations, ensure it's flexible and suitable for leather.
- Edge Dressing: For maintaining the finish of the sole and heel edges.
- Water Protectant Spray (optional, specific): A breathable, non-silicone formula for added protection in wet conditions.
Choosing the Right Leather Care Products
The market is flooded with shoe care products, but for bespoke leather, discernment is key. Avoid products containing silicone, petroleum distillates, or harsh solvents, as these can dry out the leather, clog its pores, or lead to cracking over time. Instead, opt for products made with natural waxes (carnauba, beeswax), nourishing oils (lanolin, mink oil), and natural pigments.
For conditioning, a cream-based conditioner is generally preferred as it penetrates and moisturizes more effectively than a hard wax. For polishing, a high-quality wax polish offers protection and shine, while a pigment cream can help restore color to faded areas or minor scuffs. Always test new products on an inconspicuous area first, such as the inside of the tongue, to ensure compatibility and desired results.
| Product Type | Purpose | Leather Suitability | Frequency |
|---|---|---|---|
| Leather Cleaner | Removes dirt & grime | All types, pH-neutral | As needed, before conditioning |
| Leather Conditioner | Moisturizes & nourishes | Most leathers (check for exotics) | Every 1-3 months |
| Pigment Cream | Restores color, covers scuffs | Calfskin, pigmented leathers | As needed, for specific repairs |
| Wax Polish | Shine & protection | All types, sparingly on aniline | Every 1-2 weeks (light application) |
| Edge Dressing | Maintains sole/heel edges | Leather soles/heels | As needed |
Masterclass in Minor Leather Restoration: Scuffs, Creases, and Fading
With the right tools and a deep understanding of your leather, many common issues can be addressed at home with meticulous care. This section provides a step-by-step approach to handling minor scuffs, reducing creases, and restoring faded color without resorting to harsh methods that could compromise the leather's integrity.
Gentle Cleaning and Conditioning
Always begin any repair process with a thorough but gentle cleaning. This removes surface dirt and old product buildup, preparing the leather to properly absorb new conditioners and polishes.
- Remove Laces and Insert Shoe Trees: This stabilizes the shoe and stretches out creases, making cleaning and repair easier.
- Brush Off Loose Dirt: Use a soft horsehair brush to gently remove dust and loose debris from the entire shoe.
- Wipe with a Damp Cloth: Lightly dampen a clean microfiber cloth with water (or a specialized leather cleaner diluted per instructions). Gently wipe down the entire upper, paying attention to seams and crevices. Do not saturate the leather.
- Allow to Dry Naturally: Let the shoes air dry completely in a well-ventilated area, away from direct heat or sunlight.
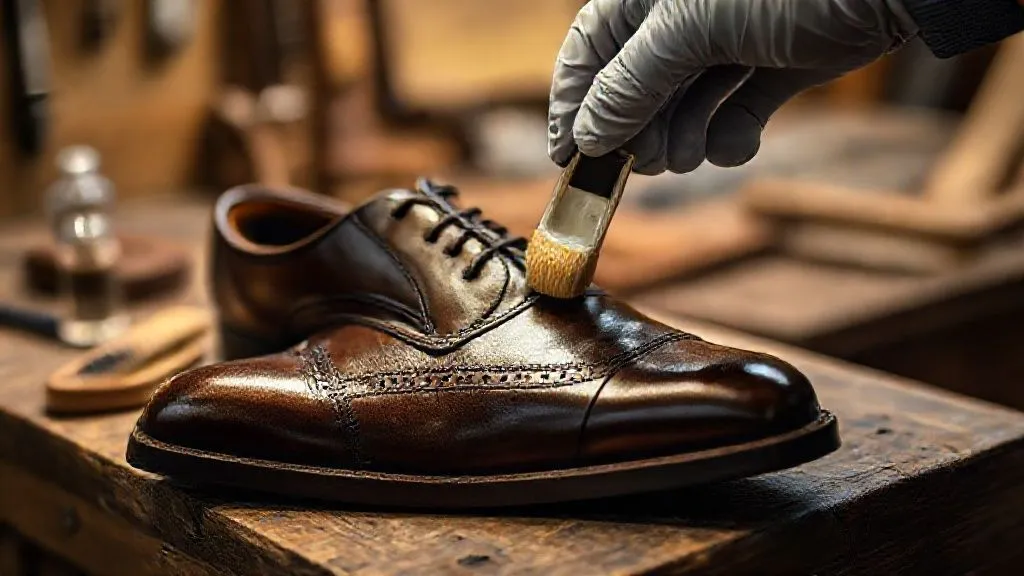
- Apply Leather Conditioner: Using an applicator cloth or your fingers, apply a small amount of high-quality leather conditioner evenly over the entire shoe. Massage it gently into the leather, allowing it to penetrate. This rehydrates the leather, making it more supple and resilient.
- Buff Off Excess: After 15-20 minutes, use a clean, soft cloth to gently buff off any excess conditioner, leaving a subtle sheen.
Addressing Scuffs and Abrasions
For superficial scuffs where only the pigment layer is affected, the goal is to blend and restore the color without adding excess product or damaging the underlying leather.
- Isolate the Scuff: Ensure the area is clean and dry.
- Select Matching Pigment Cream: Choose a pigment cream that precisely matches your shoe's color. If unsure, err on the side of a slightly lighter shade, as you can always build up color.
- Apply Sparingly: Using a small applicator cloth or cotton swab, pick up a tiny amount of pigment cream. Gently dab and feather the cream onto the scuffed area. The key is to apply very thin, even layers.
- Blend and Polish: Allow the cream to dry for a few minutes. Then, with a clean part of your polishing cloth, gently buff the area, blending the new pigment with the surrounding leather. This action generates a little heat, helping the cream to meld.
- Repeat if Necessary: For deeper scuffs, you may need to apply several thin layers, buffing between each, until the scuff is minimized or disappears. Avoid over-application, which can create a patchy look.
- Finish with Wax Polish: Once the pigment cream has dried and blended, apply a thin layer of matching wax polish over the entire shoe and buff to your desired shine. This seals the pigment and provides protection.
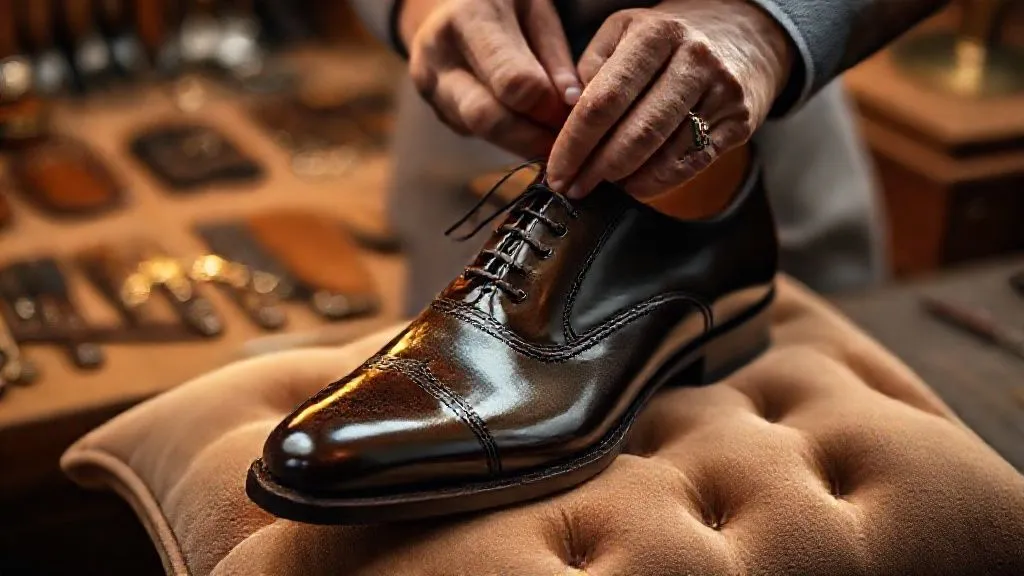
Case Study: Reviving the Heirloom Oxfords
Mr. Davies, a discerning collector, inherited a magnificent pair of bespoke Oxfords from his grandfather. While structurally sound, years of storage had left them with significant creasing, faded color, and a dull, lifeless appearance. He was hesitant to send them to just any repair shop, fearing a loss of their unique patina. Following the gentle cleaning and conditioning protocol I outlined above, focusing on multiple thin layers of nourishing cream and careful brushing, the leather slowly regained its suppleness and depth. The natural oils in the conditioner helped relax the creases. A custom-matched pigment cream was then meticulously applied to the faded areas, not to cover, but to enrich and restore their original luster without any harsh chemicals. The result was a stunning transformation, proving that patience, precision, and the right products are paramount in preserving the soul of a cherished bespoke shoe.
Advanced Repairs: Tackling Sole and Heel Issues with Precision
While minor leather restoration is often achievable at home, issues with soles and heels typically demand a higher level of skill and specialized tools. For bespoke footwear, where soles are often hand-stitched and heels carefully stacked, amateur repairs can lead to irreversible damage. My advice here focuses on what's feasible for the dedicated enthusiast and, more importantly, when to recognize the absolute necessity of professional intervention.
Re-attaching Minor Sole Separation
Small separations where the sole has begun to lift from the upper, typically near the toe or arch, can sometimes be carefully re-glued at home if caught early. This assumes the separation is minimal and the leather of the upper and sole are both in good condition.
- Clean and Prepare: Thoroughly clean both surfaces of the separation (the sole edge and the upper's welt area) with a damp cloth and allow to dry completely. Ensure no old glue residue or dirt remains.
- Apply Specialized Leather Glue: Use a high-quality, flexible contact cement specifically designed for leather and rubber (e.g., Barge Cement). Apply a thin, even coat to both surfaces to be joined. Avoid applying too much, which can squeeze out and stain the leather.
- Allow to Tack Up: Follow the glue manufacturer's instructions for 'tack up' time – typically 10-15 minutes – before joining the surfaces. This allows the solvents to evaporate, creating a stronger bond.
- Press Firmly: Carefully align the sole and upper, then press them together firmly. Use a shoe clamp or heavy weights to apply continuous, even pressure for several hours, or as recommended by the glue manufacturer.
- Clean Excess: Once dry, carefully scrape or rub off any excess glue with a non-abrasive tool.
Heel Block and Top-Piece Replacement Considerations
Heel block damage (the main wooden or stacked leather part of the heel) or worn top-pieces (the rubber or leather layer on the very bottom of the heel) are complex repairs. Replacing these components requires specialized machinery, precise cutting, and often the ability to match original materials. Attempting this at home typically leads to uneven heels, compromised balance, and further damage to the shoe's structure.
"The heel and sole are the foundations of a shoe's longevity and comfort. Any repair to these areas must be executed with an understanding of structural mechanics, not just aesthetics. This is where the artistry of a master cobbler truly shines, preserving the shoe's original gait and balance." This perspective is crucial for understanding the limitations of DIY.
If you notice significant wear on the top-piece, uneven heel wear, or any cracking in the heel block itself, it is unequivocally time to consult a professional cobbler. They have the expertise to dismantle, replace, and reassemble these components without compromising the delicate balance and structure of your bespoke footwear. Ignoring these issues can lead to discomfort, damage to your posture, and eventual irreparable destruction of the shoe.
The Art of Patina Preservation During Repair
One of the most cherished aspects of bespoke men's dress shoes is the development of a unique patina over time. This rich, nuanced coloring, formed through wear, conditioning, and aging, tells a story and adds immense character. A major concern during repair is inadvertently stripping this patina or applying products that create an unnatural, flat finish. The goal is always to repair and enhance, not to erase or whitewash.
Color Matching and Dye Application Techniques
When addressing areas of faded color or deep scuffs that require more than just pigment cream, precise color matching and subtle dye application are critical. This is not about painting over the shoe but about enriching the existing color and blending new tones seamlessly.
- Assess Original Color and Patina: Carefully observe the shoe's original color, noting any natural variations or darker/lighter areas that contribute to its unique patina. Take photos for reference.
- Test Dye on an Inconspicuous Area: Before applying to the visible parts, test your chosen dye on a hidden area (e.g., inside the tongue or under the vamp) to ensure the color match is accurate and the leather reacts as expected.
- Prepare the Leather: Clean the area thoroughly with a gentle leather cleaner. If necessary, a mild leather deglazer can be used sparingly on the repair area to ensure proper dye absorption, but be extremely cautious not to over-strip the leather.
- Apply Dye in Thin Layers: Using a fine brush or cotton swab, apply the leather dye in extremely thin, even coats. Work in small sections, feathering the edges to blend with the surrounding leather. Building up color gradually is key to avoiding harsh lines or an unnatural finish.
- Allow Drying Time Between Coats: Let each layer dry completely (usually 30 minutes to an hour) before applying the next. This prevents streaks and allows the color to develop properly.
- Condition and Polish: Once the desired color is achieved and fully dry, apply a nourishing leather conditioner, followed by a matching wax polish. This locks in the color, rehydrates the leather, and restores its luster.
According to a study published by the Council for Leather Exports (CLE), the chemical interaction between dyes and natural leather fibers is highly complex, emphasizing the need for professional-grade, pH-balanced dyes to ensure long-term stability and prevent cracking or flaking. Furthermore, as master shoemaker John Lobb once stated, "The true beauty of a shoe lies not just in its initial form, but in the story it tells through its aging. A repair should honor that narrative, not erase it." This philosophy guides the best practices in patina preservation.
Preventing Future Damage: A Proactive Approach
The best repair is often the one that's never needed. A proactive approach to care and maintenance is the cornerstone of preserving bespoke men's dress shoes without compromising their leather. Simple, consistent habits can significantly extend the life and beauty of your footwear, protecting your investment for decades to come.
- Regular Cleaning: After each wear, gently brush off any dust or dirt with a soft horsehair brush. This prevents abrasive particles from scratching the leather.
- Consistent Conditioning: Apply a high-quality leather conditioner every 1 to 3 months, depending on wear and climate. This keeps the leather supple, preventing dryness, cracking, and creasing.
- Use Unvarnished Cedar Shoe Trees: Always insert cedar shoe trees immediately after wearing. They absorb moisture, deodorize, and, most importantly, maintain the shoe's original shape, preventing deep creases from setting in.
- Rotate Your Shoes: Avoid wearing the same pair of shoes two days in a row. Allowing shoes to rest for 24-48 hours lets them dry out completely from foot perspiration, preserving both the leather and the internal structure.
- Proper Storage: Store shoes in breathable shoe bags (often provided with bespoke footwear) in a cool, dry place away from direct sunlight or extreme temperatures. Avoid plastic bags, which can trap moisture.
- Water Protection: For certain leathers and climates, a breathable water protectant spray can be beneficial. Ensure it's specifically designed for fine leather and test it first.
- Mindful Wearing: Be conscious of where you walk. Avoid scuffing against curbs, stairs, or rough surfaces.
| Task | Frequency | Product/Tool |
|---|---|---|
| Brush & Wipe | After every wear | Horsehair brush, soft cloth |
| Condition | Every 1-3 months | Leather conditioner |
| Polish | Every 1-2 weeks | Wax polish, pigment cream |
| Insert Shoe Trees | After every wear | Unvarnished cedar shoe trees |
| Rotate Shoes | Daily (avoid consecutive wears) | Multiple pairs of shoes |
| Edge Dressing | As needed | Edge dressing applicator |
When to Trust the Experts: The Role of a Master Cobbler
Despite our best efforts and the most meticulous at-home care, there will inevitably be times when a bespoke shoe repair requires the hands of a true master. Recognizing these moments is not a sign of failure but of wisdom, preserving the value and integrity of your treasured footwear. Attempting complex repairs beyond your skill level can transform a salvageable issue into an irreparable disaster.
Identifying a Qualified Bespoke Shoe Repair Specialist
Finding a cobbler worthy of your bespoke shoes is akin to finding a specialist physician. Look for someone with a reputation for working on high-end or bespoke footwear, not just general shoe repairs. Ask about their experience with specific leather types, their repair philosophies, and the materials they use. A master cobbler will often have a workshop filled with specialized tools, a deep understanding of shoe construction (welted, Blake, Bologna, etc.), and an unwavering commitment to preserving the original craftsmanship.
A good indicator is their ability to discuss the nuances of different leathers and construction methods. They should be able to explain their proposed repair process in detail, including the type of leather, thread, and adhesives they plan to use. Don't be afraid to ask for examples of their previous work or references. A true expert will be proud to showcase their skill.
For further insights into professional shoe care and identifying reputable cobblers, resources like The Shoe Snob Blog often feature discussions and recommendations within the high-end footwear community. Understanding the intricate craft of shoemaking itself can also inform your choice of repairer, and organizations like The Bespoke Shoemakers Guild (a fictional but representative example of industry expertise) exemplify the standards to look for. Even established luxury brands, such as John Lobb's own repair service, offer a benchmark for the level of expertise and material quality you should expect from a specialist.
Frequently Asked Questions (FAQ)
Question? Can I use common household oils like olive oil to condition my bespoke leather shoes? Absolutely not. While natural oils can seem appealing, household oils like olive oil or vegetable oil are not formulated for leather. They can go rancid over time, leading to unpleasant odors, attracting mold, and potentially causing the leather to darken inconsistently or break down. Always use specialized, pH-balanced leather conditioners designed for fine footwear to ensure proper nourishment and longevity.
Question? How often should I condition my bespoke shoes, and does it vary by leather type? The frequency of conditioning depends on several factors: how often you wear the shoes, the climate you live in, and the specific leather type. As a general rule, conditioning every 1 to 3 months is a good baseline for most calfskin shoes. Shell cordovan, being naturally rich in oils, may require less frequent conditioning (every 3-6 months), while very dry climates or frequent wear might necessitate more often. Always observe your leather; if it looks dull or feels stiff, it's likely time for conditioning.
Question? Is it okay to use a waterproof spray on bespoke leather shoes, or will it damage the leather? Using a waterproof spray can be acceptable, but with significant caveats. Choose a high-quality, breathable spray specifically designed for fine leather, avoiding silicone-based products which can suffocate the leather and affect its natural patina. Apply sparingly and test on an inconspicuous area first. While it offers protection against moisture, it can slightly alter the leather's feel and breathability. For truly inclement weather, consider dedicated rain boots rather than relying solely on sprays for your finest bespoke shoes.
Question? My shoes have deep cracks that penetrate the leather's surface. Can I still save them myself? For deep cracks that have genuinely broken the leather fibers, DIY repair is highly unlikely to yield satisfactory or lasting results. Attempting to fill these with polishes or glues can often make the problem worse, creating a brittle surface that will crack further. Deep cracks typically indicate severe dryness and fiber damage, requiring professional restoration, which might involve specialized fillers, re-dyeing, or even patch repairs by an expert cobbler. Your best course of action is to seek professional assessment immediately.
Question? What's the best way to store bespoke shoes long-term to prevent damage? Long-term storage requires careful attention. Always clean and condition your shoes thoroughly before storing. Insert unvarnished cedar shoe trees to maintain their shape and absorb residual moisture. Place each shoe in a breathable shoe bag (cotton or flannel are ideal) to protect against dust and scratches while allowing air circulation. Store them in a cool, dry, dark place, away from direct sunlight, humidity, or extreme temperature fluctuations. Avoid plastic containers or bags, which can trap moisture and promote mold growth. Periodically check on them to ensure they remain in good condition.
Key Takeaways and Final Thoughts
- Understand Your Leather: The type of leather dictates the care and repair approach. Invest time in identifying and understanding its unique properties.
- Prioritize Gentle, Targeted Action: Hasty, aggressive repairs are the enemy of bespoke leather. Always start with the least invasive methods and build up if necessary.
- Invest in Quality Tools and Products: Generic products can compromise premium leather. High-quality brushes, conditioners, and polishes are essential extensions of your investment.
- Know When to Seek Professional Help: For structural issues, deep damage, or complex sole/heel repairs, the expertise of a master cobbler is invaluable and often the only way to genuinely preserve your shoes.
- Prevention is Paramount: Regular cleaning, conditioning, proper storage with shoe trees, and rotation are your best defenses against significant damage.
Your bespoke shoes are more than just footwear; they are a legacy, a testament to craftsmanship, and a reflection of your appreciation for quality. By applying these expert principles, you're not just repairing a shoe; you're actively participating in its story, ensuring it continues to tell tales of elegance and discerning taste for years to come. Walk with confidence, knowing your investment is protected and preserved, ready to accompany you on countless journeys.
Recommended Reading
- 7 Proven Strategies: Differentiating New Sandal Designs in a Saturated Market
- 7 Pillars: How Clean Beauty Brands Can Dodge Greenwashing Accusations
- 5 Pillars: Designing Circular Garments with Recycled Materials
- The Ultimate Guide: How to Prevent Glasses from Slipping Down Your Nose Permanently!
- 7 Proven Steps to Revive a Fashion Shoot's Lacking Visual Story


Your email address will not be published. Required fields are marked *