
How to Make Makeup Last on Oily Skin for 12+ Hours Under Studio Lights?
For over two decades in the demanding world of beauty fashion, from high-pressure editorial shoots to grueling film sets, I've witnessed the unique challenges that studio environments pose for makeup artists and talent alike. The relentless heat from powerful studio lights, combined with the natural tendencies of oily skin, creates a perfect storm for makeup meltdown. It's a problem I've tackled countless times, often with clients needing their look to remain pristine for 12, even 16 hours straight.
The struggle is real: foundation that seems to slide off by lunchtime, concealer creasing under the intense glare, and a persistent, unwelcome sheen that demands constant blotting. This isn't just about aesthetics; it's about confidence, professionalism, and the sheer frustration of seeing your hard work (or your artist's) deteriorate before your eyes. Traditional makeup routines simply don't stand a chance against these extreme conditions.
But here's the good news: achieving truly long-lasting, immaculate makeup on oily skin under studio lights for 12+ hours isn't a myth. It's an attainable reality, but it requires a strategic, multi-layered approach that goes beyond just using 'long-wear' products. In this definitive guide, I'll share the expert frameworks, product insights, and real-world techniques I've honed over years to ensure your makeup not only survives but thrives under the most challenging conditions.
Understanding the Enemy: Oily Skin, Heat, and Humidity
Before we can conquer the challenge, we must first understand the forces at play. Oily skin, at its core, is characterized by an overproduction of sebum, a natural oil produced by the sebaceous glands. While sebum is essential for skin health, excess production leads to that familiar greasy shine, enlarged pores, and a predisposition to breakouts.
The Science of Sebum Production
Our sebaceous glands are highly responsive to various stimuli – hormones, genetics, diet, and even stress can influence sebum output. Under normal conditions, this oil forms a protective barrier. However, when you introduce external factors like heat and humidity, the skin's natural response can be exacerbated. Heat causes pores to expand, potentially increasing oil flow, while humidity can make the skin feel even more 'slippery' and contribute to makeup breakdown.
The Impact of Studio Lights and Environment
Studio lights, whether they are tungsten, LED, or HMI, generate significant heat. This heat directly impacts the skin, stimulating sweat glands and further increasing sebum production. Moreover, the concentrated light can highlight texture and shine, making even a slight amount of oil appear more prominent on camera. It's a compounding effect: more oil, more sweat, more visible shine, and faster makeup degradation.
In my experience, you can't just treat the symptoms of oily skin in a studio; you must address the root causes and build a defensive strategy from the very first step. Prevention, in this scenario, is far more effective than trying to constantly cure the meltdown.
The Foundation of Flawlessness: Pre-Makeup Skin Prep
Think of your skin as a canvas. A poorly prepped canvas will never hold paint as well as one that's been meticulously prepared. For oily skin under studio lights, this initial stage is non-negotiable for achieving 12+ hours of wear.
- Deep Cleanse: Start with a gentle yet effective cleanser that removes excess oil without stripping the skin. Look for ingredients like salicylic acid or witch hazel, but use them sparingly if your skin is sensitive. A clean base is paramount.
- Tone and Balance: Follow with an astringent or balancing toner. This helps to further remove residual oil, tighten pores, and prepare the skin for subsequent products. I often recommend alcohol-free options to avoid over-drying, which can paradoxically trigger more oil production.
- Lightweight, Mattifying Moisturizer: This is crucial. Many with oily skin skip moisturizer, fearing more shine, but this is a mistake. Dehydrated skin can produce more oil to compensate. Choose a lightweight, oil-free, mattifying gel or lotion. Apply a thin layer and allow it to fully absorb for 5-10 minutes.
- Strategic Priming: This is where the magic truly begins. For oily skin under studio lights, you need a primer that acts as a barrier, smooths texture, and controls oil. Silicone-based primers create a silky barrier, while mattifying primers often contain ingredients like dimethicone or silica to absorb oil throughout the day.
Case Study: How Acme Model Agency Extended Makeup Wear
Acme Model Agency faced persistent complaints from their talent about makeup melting during long commercial shoots, leading to costly touch-ups and reshoots. Their models, many with naturally oily skin, struggled to maintain a fresh look for the required 12-hour days. By implementing a strict pre-makeup skin prep protocol – emphasizing a salicylic acid cleanser, a hydrating yet mattifying serum, and a high-performance silicone-based primer – they saw a dramatic improvement. Models reported their makeup lasting an average of 4-5 hours longer without significant shine, significantly reducing on-set touch-up time and saving the agency an estimated 15% in production costs over a quarter. This demonstrated the immense power of a foundational, proactive approach.
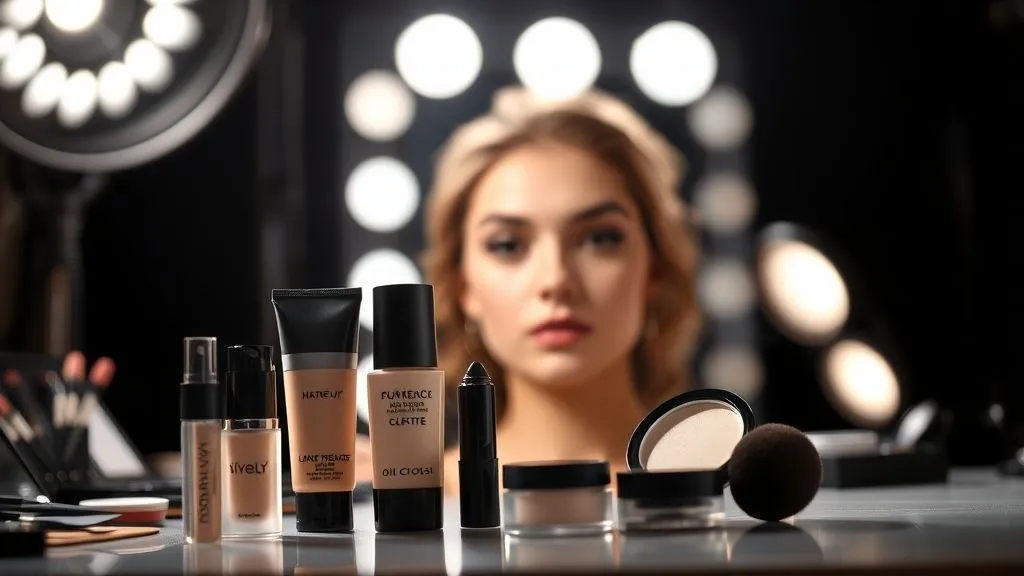
 meticulously arranged on a clean, minimalist vanity. The textures of the products are visible, perhaps a gel moisturizer or a silky primer. Cinematic lighting illuminates the scene, highlighting the labels and the sleek packaging, sharp focus on the products, depth of field blurring a subtle reflection, shot on a high-end DSLR, conveying precision and the promise of a flawless base.")
Strategic Product Selection: Your Oily Skin Arsenal
The right products are your armor in this battle. Don't just grab anything labeled 'long-wear'; understand what ingredients and formulations truly make a difference for oily skin in extreme conditions.
Primers: The Non-Negotiables for Longevity
As mentioned, primers are critical. For severe oiliness and heat, I often layer a pore-filling primer in problem areas (like the T-zone) with an overall mattifying primer. Look for ingredients like silica, corn starch, or even salicylic acid in some formulations. These help absorb oil and create a smooth, even surface for foundation.
Foundations: Oil-Free, Long-Wear, and Transfer-Resistant Formulas
This is arguably the most important product. You need a foundation specifically designed for oily skin and extended wear. Key characteristics include:
- Oil-Free: Obvious, but essential.
- Matte or Semi-Matte Finish: Avoid dewy or radiant foundations, which will exacerbate shine.
- Long-Wear/12+ Hour Formulas: These are formulated with polymers and film-formers that create a flexible, durable layer on the skin.
- Transfer-Resistant: Crucial for avoiding marks on clothing or hands during a busy shoot.
- Non-Comedogenic: To prevent breakouts during extended wear.
I often find that hybrid formulas, which offer both oil control and some flexibility, perform best. According to the American Academy of Dermatology, selecting non-comedogenic products is vital for managing oily and acne-prone skin, especially when worn for long durations.
Concealers, Powders, and Setting Sprays: Locking It All In
- Concealers: Opt for long-wearing, full-coverage, and crease-resistant formulas. Apply sparingly and set immediately.
- Powders: Translucent, finely milled setting powders are your best friend. Ingredients like silica or rice powder are excellent for oil absorption. I prefer pressing powder into the skin rather than sweeping for maximum longevity.
- Setting Sprays: Not all setting sprays are created equal. For oily skin and long wear, you need a heavy-duty, film-forming setting spray. These often contain polymers that create a flexible, breathable film over the makeup, essentially locking it in place.
| Product Category | Key Ingredients for Oily Skin | Benefit for Studio Wear |
|---|---|---|
| Primer | Silica, Dimethicone, Corn Starch | Oil absorption, pore blurring, creates barrier |
| Foundation | Oil-free, Film-formers, Pigments | Long-wear, transfer-resistant, matte finish |
| Setting Powder | Talc, Silica, Rice Powder | Absorbs oil, mattifies, sets liquid products |
| Setting Spray | Polymers (e.g., PVP, Acrylates Copolymer) | Locks makeup, creates a durable film, extends wear |
Application Techniques for Bulletproof Wear
Even the best products will fail if applied incorrectly. The technique is just as important, if not more so, than the product itself when aiming for 12+ hours of wear on oily skin under studio lights.
- Thin Layers are Key: Resist the urge to pile on foundation. Multiple thin layers, allowed to dry slightly between applications, will always outperform one thick layer. This builds coverage without adding bulk, which is prone to slipping.
- Press, Don't Rub: When applying foundation, concealer, or powder, use a pressing or stippling motion with a damp beauty sponge or a dense brush. This 'pushes' the product into the skin, ensuring better adhesion and preventing streaking or lifting.
- The Art of 'Baking': This technique, popularized by drag artists, involves applying a generous amount of loose translucent powder to areas prone to creasing and oiliness (under eyes, T-zone) and letting it 'bake' or sit on the skin for 5-10 minutes. The warmth of the skin helps the powder meld with the foundation and concealer, setting it firmly. After baking, lightly dust off the excess.
- Targeted Powdering: Don't powder your entire face indiscriminately. Focus on the T-zone, chin, and any other areas that tend to get oily. Use a small, fluffy brush for precision, pressing the powder in.
- Setting Spray Application: After all powder products are applied, generously mist your face with a high-performance setting spray. Hold the bottle at arm's length and spray in an 'X' and 'T' motion. Allow it to air dry completely, or gently fan your face. This creates that crucial protective film.
Remember, less is often more when it comes to long-wear makeup. Over-applying products, especially powders, can lead to a cakey finish that is more prone to cracking and looking heavy under intense lights.
As many celebrity makeup artists attest, layering and precision are the hallmarks of truly enduring makeup applications.
The Studio Environment: Battling Heat, Sweat, and Shine
Even with the best prep and products, the studio environment itself presents ongoing challenges. Proactive management is essential for makeup to last on oily skin for 12+ hours under studio lights.
Cooling Strategies on Set
Whenever possible, communicate with the production team about maintaining a cool environment. Small personal fans for talent during breaks are invaluable. Keeping chilled towels or face mists (to be used *before* makeup application or during bare-face breaks, not over finished makeup) can also help manage body temperature and reduce initial sweat production.
Blotting Papers and Powder Puffs: Your Best Friends
These are the unsung heroes of on-set makeup maintenance. Blotting papers are designed to absorb excess oil without disturbing makeup. They are lightweight and discreet. For more significant shine, a clean, dry powder puff can be gently pressed onto oily areas to absorb oil before any powder is added. Always blot or press; never rub.
Waterproof and Smudge-Proof Formulas (Mascara, Liner)
While the focus is often on foundation, don't overlook eye makeup. Sweat and oil can cause mascara to smudge and eyeliner to migrate. Invest in truly waterproof mascaras and long-wearing gel or liquid eyeliners that are resistant to humidity and heat. Setting eye makeup with a light dusting of translucent powder can also help prevent creasing and smudging.

Mid-Shoot Maintenance & Touch-Up Tactics
Even with the most rigorous initial application, some level of maintenance is almost always required over a 12-hour shoot. The key is knowing *how* and *when* to touch up without ruining the base.
The Art of Blotting (Don't Rub!)
As soon as you see any shine emerging, reach for blotting papers. Gently press them onto the oily areas, lift, and repeat with a fresh sheet until the shine is gone. Do not drag or rub, as this will lift your makeup. This is your first line of defense.
Powder Application: When and Where
If blotting isn't enough, or if a significant amount of time has passed, a very light dusting of translucent powder can be applied. Use a small, fluffy brush or a clean powder puff. Again, press the powder onto the skin in targeted areas, rather than sweeping. A common mistake is to re-powder without blotting first, which can lead to a cakey, textured look.
Refreshing Setting Sprays
For a complete refresh without re-applying makeup, a light mist of a hydrating or mattifying setting spray can sometimes revive the look. Be cautious not to overdo it, as too much liquid can break down existing makeup. Some artists even keep a small, clean beauty sponge handy to gently press the setting spray into the skin immediately after misting.
Your Essential Touch-Up Kit for 12+ Hours
- Blotting papers (a large stack!)
- Small compact of translucent pressed powder with a puff or small brush
- Mini setting spray
- Q-tips for minor smudges
- Lipstick/lip gloss for reapplication
- Small, clean beauty sponge
Advanced Strategies & Pro Secrets
Beyond the basics, there are several advanced techniques that veteran makeup artists employ to guarantee makeup longevity under extreme conditions. These are the nuances that truly set professional work apart.
Mixing Mediums for Enhanced Durability
For foundations that need an extra boost of staying power, I sometimes mix a drop of a dedicated makeup mixer or a long-wear liquid enhancer. These products are formulated with film-forming agents that can transform a regular foundation into a super-long-wear version. Always test a small amount first to ensure compatibility and avoid altering the foundation's shade or texture too much.
The Power of Eye Primer (Even for Under-Eye Concealer)
While typically used on eyelids, a tiny amount of a good eye primer can work wonders under the eyes, especially for those prone to creasing or oily under-eye areas. It creates a smooth, gripping base for concealer, helping it adhere better and resist migration. Just be sure to use a very, very thin layer.
Strategic Layering of Cream and Powder Products
This is a technique often used for contour and blush. Applying a cream contour or blush first, blending it seamlessly, and then lightly setting it with a matching powder product (powder contour over cream contour, powder blush over cream blush) creates an incredibly durable, multi-dimensional effect. The cream provides depth and adherence, while the powder seals it in, ensuring it lasts for hours without fading or shifting.
Understanding the chemistry behind cosmetic formulations, as discussed by experts in cosmetic chemistry publications, reveals how film-forming polymers and oil-absorbing ingredients work synergistically to create these long-lasting effects.

Frequently Asked Questions (FAQ)
Question: Can I use a face oil if I have oily skin, especially when I need makeup to last for 12+ hours?
Answer: While it seems counterintuitive, some lightweight, non-comedogenic face oils (like squalane or jojoba) can actually help balance oily skin by signaling to your sebaceous glands that they don't need to produce as much oil. However, for a 12+ hour wear under studio lights, I would generally advise against using a face oil directly under your makeup. If you do use one as part of your skincare routine, ensure it's applied hours before makeup or only at night. For pre-makeup prep, stick to oil-free, mattifying moisturizers and primers.
Question: What's the difference between a mattifying primer and a pore-filling primer, and do I need both?
Answer: A mattifying primer primarily focuses on absorbing excess oil and creating a shine-free surface, often containing ingredients like silica. A pore-filling primer, on the other hand, contains ingredients (often silicones) that physically smooth out enlarged pores and fine lines, creating a blurred effect. For extreme longevity on oily skin under studio lights, I often recommend using both: apply the pore-filling primer specifically to areas with visible pores (like the T-zone) and then follow with a thin layer of a mattifying primer over the entire face. This dual approach addresses both texture and oil control effectively.
Question: How often should I blot my face without disturbing my makeup during a long shoot?
Answer: The frequency depends on your skin's oil production and the intensity of the studio environment. As a general rule, blot as soon as you notice visible shine, typically every 2-3 hours for very oily skin under hot lights. The key is to blot gently and precisely. Don't wait until your face is visibly greasy, as this makes it harder to remove oil without disturbing your makeup. Early and frequent blotting is more effective than aggressive, infrequent blotting.
Question: Are setting sprays really necessary for 12+ hour wear, or can a good powder suffice?
Answer: For 12+ hour wear under studio lights, a high-performance setting spray is absolutely necessary and should be considered non-negotiable. While powder helps set liquid products and control initial shine, a true film-forming setting spray creates a flexible, protective barrier over all your makeup. This barrier helps fuse the layers, prevent transfer, and significantly extend wear, especially against sweat and humidity, in a way that powder alone cannot achieve. Think of it as the top coat for your nail polish – it seals everything in.
Question: What about body makeup for oily skin under studio lights? Does the same advice apply?
Answer: Yes, much of the same advice applies, but with some crucial modifications. Body makeup for studio lights also needs to be long-wearing, transfer-resistant, and ideally waterproof. Prep is still key: ensure skin is clean and dry. Use a setting powder and a heavy-duty setting spray designed for body makeup. However, body skin tends to be less oily than facial skin, and the texture is different. Look for body-specific foundations or concealers that are formulated to be rub-proof and sweat-resistant. The challenge with body makeup is often more about transfer onto clothing than oil control, so a strong setting spray is paramount.
Key Takeaways and Final Thoughts
Mastering makeup longevity on oily skin under studio lights for 12+ hours is a refined skill that combines meticulous preparation, strategic product choices, and precise application techniques. It's a comprehensive approach that leaves no stone unturned.
- Pre-empt the Problem: Start with thorough, oil-controlling skin prep.
- Choose Wisely: Invest in high-performance, long-wear, oil-free formulas for every step.
- Layer with Purpose: Build thin layers and utilize techniques like baking and pressing.
- Manage the Environment: Implement cooling strategies and proactive blotting.
- Seal the Deal: Finish with a robust, film-forming setting spray.
This isn't just about making makeup last; it's about empowering models and talent to feel confident and look their absolute best, even under the most challenging professional conditions. With these expert strategies, you're not just applying makeup; you're engineering a resilient, flawless look that stands the test of time, heat, and the camera's unforgiving eye. Embrace these methods, and watch your studio work transform from a battle against shine into a triumph of enduring beauty.
Recommended Reading
- Best Sneakers for Walking All Day: Ultimate Comfort Guide
- Master 5 Steps: Authenticate & Value Rare Vintage Designer Finds Fast
- 7 Steps: Translate Abstract Script Themes to Conceptual Costume Design
- 5 Proven Strategies: Scaling Daily Fashion Content Without Losing Quality
- 7 Steps to Sustainable Sourcing for Performance Activewear: A Complete Guide


Your email address will not be published. Required fields are marked *