
How to fix inconsistent skin tones across a fashion editorial
For over two decades in the demanding world of fashion photography post-production, I've witnessed the silent killer of many a brilliant editorial concept: inconsistent skin tones. It's a subtle flaw, often overlooked in the initial excitement of a shoot, but it can undermine the entire narrative and professionalism of your work.
This isn't just about a minor color shift; it's about breaking the visual flow, distracting the viewer, and ultimately diminishing the perceived quality of your entire creative effort. When a model's skin color shifts from one image to the next, it screams 'amateur' to the discerning eye, regardless of how stunning the wardrobe or composition might be. It erodes trust and impacts your brand's reputation.
In this definitive guide, I'll walk you through a systematic, expert-level framework designed to not only fix inconsistent skin tones across a fashion editorial but to prevent them from happening in the first place. We’ll cover everything from meticulous pre-production planning to advanced post-production techniques, ensuring your fashion narratives are always seamless and visually cohesive.
The Root Causes of Skin Tone Inconsistency in Fashion Editorials
Before we dive into the solutions, it’s crucial to understand the 'why.' In my experience, skin tone inconsistencies rarely stem from a single error but rather a confluence of factors, often originating long before an image ever hits the editing suite.
Lighting Variations: The Unseen Saboteur
Whether you're shooting on location with unpredictable natural light or in a studio with complex artificial setups, lighting is the primary culprit. Subtle shifts in the sun's position, clouds passing overhead, or even minor adjustments to a strobe's power or modifier can drastically alter how skin tones are rendered. Mixed lighting—combining natural daylight with artificial fill—is particularly notorious for creating color cast nightmares.
Camera Settings & White Balance Drift
Even the most advanced cameras aren't foolproof. Auto white balance, while convenient, can be wildly inconsistent, especially in rapidly changing environments. Manual white balance settings, if not rigorously maintained, can drift between shots, leading to subtle but noticeable color shifts that affect skin. Forgetting to calibrate your monitor or working on an uncalibrated screen can also exacerbate these issues, making you 'see' consistency where none exists.
Wardrobe & Environment Color Casts
This is often overlooked. A vibrant red dress or a lush green backdrop can subtly reflect color onto the model's skin, creating an unwanted color cast that's tricky to remove. Similarly, shooting indoors with strong wall colors can bounce ambient light onto skin, pulling it away from its natural hue. I've seen countless instances where a stunning wardrobe choice inadvertently complicated the post-production process.
Unoptimized Post-Production Workflows
Sometimes, the problem isn't the shoot itself, but how the images are handled afterward. A haphazard editing process, where each image is treated in isolation without a master reference or consistent methodology, guarantees inconsistency. Relying solely on presets without fine-tuning, or having multiple retouchers work on an editorial without strict guidelines, are common pitfalls.
Expert Insight: Prevention is always better than cure. Addressing these root causes during pre-production and on-set will drastically reduce your post-production workload and yield superior results. A consistent vision starts long before the first shutter click.
Pre-Production: Laying the Foundation for Consistency
True consistency in an editorial begins long before the camera even leaves its bag. My approach emphasizes meticulous planning and communication, treating every element as a variable that needs control.
Strategic Lighting Planning and Execution
For studio shoots, diagram your lighting setup precisely. Note power settings, modifier choices, and distances. For on-location shoots, scout thoroughly, noting sun paths and potential reflectors/absorbers. If natural light is your primary source, plan your shoot times to leverage consistent light conditions, such as the 'golden hour' or overcast days for softer, more uniform illumination.
- Create a Lighting Diagram: Sketch out your light sources, modifiers, and their positions relative to the model.
- Standardize Settings: If using artificial lights, aim for consistent power output and color temperature across all lights.
- Control Ambient Light: In studios, block out external light. On location, use flags or scrims to manage harsh sunlight.
- Test, Test, Test: Do test shots with your model or a stand-in to confirm lighting consistency before the main shoot.
White Balance Calibration On-Set
This is non-negotiable. Auto white balance is a gamble; manual white balance is a must. Use a reliable grey card or color checker chart. I always advise my teams to capture a reference shot with the card in the same lighting conditions as the model, at the beginning of each setup or whenever lighting shifts significantly.

This simple step provides an invaluable anchor point for post-production, allowing you to establish a perfectly neutral white balance that will serve as your baseline for all subsequent color adjustments. According to industry best practices, a properly exposed grey card shot can save hours of corrective work later.
Wardrobe & Location Color Management
Discuss potential color casts with your stylist and art director. If a strongly colored garment or backdrop is essential, plan for it. Sometimes, simply adjusting the model's distance from a colored wall can mitigate reflection. Be aware of reflective surfaces that might bounce unwanted colors onto the skin. Proactive identification of these issues allows for on-set adjustments rather than painful post-production fixes.
Expert Insight: Communication is paramount. A comprehensive pre-production meeting involving the photographer, stylist, hair & makeup artist, and retoucher ensures everyone is aligned on the visual goals and potential challenges for skin tone consistency.
In-Capture: Minimizing Deviations During the Shoot
Even with meticulous pre-production, the dynamic nature of a fashion shoot means constant vigilance is required. The goal during capture is to minimize the variables that can lead to skin tone inconsistencies.
Tethered Shooting for Real-Time Feedback
If possible, always shoot tethered to a laptop. This allows you and your team to see images instantly on a calibrated monitor, identifying any subtle shifts in lighting or color casts as they happen. It's an immediate feedback loop that empowers you to make corrections on the fly, preventing a cascade of inconsistent images. I've personally saved entire shoots by catching a rogue light spill on a tethered screen.
Reference Shots & Grey Card Usage
Beyond the initial white balance shot, periodically capture additional grey card or color checker references throughout the shoot, especially if you move locations, change lighting setups, or take a significant break. These serve as invaluable checkpoints for your post-production team, ensuring accurate color reproduction regardless of the session's length or complexity.
Consistent Model Positioning
Subtle changes in a model's pose or angle to the light source can dramatically alter how light falls on their skin, creating perceived inconsistencies. Guide your model to maintain consistent positioning relative to your key light. If you need different angles, adjust your lighting setup or camera position rather than relying solely on the model's movement to achieve the desired effect.
| Checklist Item | Status | Notes |
|---|---|---|
| Calibrate Monitor (Pre-Shoot) | Done | Crucial for accurate color perception. |
| Shoot Tethered | Done | Real-time feedback for immediate corrections. |
| Capture Grey Card (Each Setup) | Done | Essential for accurate white balance baseline. |
| Monitor Lighting Consistency | Done | Watch for shifts, especially with natural light. |
| Review Images Periodically | Done | Catch inconsistencies early. |
| Communicate with Team | Done | Stylist, MUA, and photographer alignment. |
| Backup Reference Shots | Done | Store grey card shots separately for easy access. |
The Post-Production Workflow: A Systematic Approach to Correction
Even with the best on-set practices, post-production is where you truly refine and unify the visual narrative. My workflow is built on a methodical approach that prioritizes consistency from the very first edit.
Initial Culling and Batch Adjustments
Begin by culling your images, selecting only the strongest shots. Once selected, apply initial global adjustments in your RAW converter (e.g., Lightroom, Capture One). Start with white balance, using your grey card reference shots as a guide. Then, make basic exposure, contrast, and highlight/shadow adjustments. The goal here is to get all images to a consistent baseline before diving into localized corrections.
Raw Conversion and Color Profile Management
Ensure you're working with a consistent color profile across all images. For most fashion work, Adobe RGB or ProPhoto RGB during RAW conversion offers a wider gamut for editing. Adobe's documentation on color settings provides excellent guidance on maintaining color integrity from capture to output. Avoid converting to sRGB too early, as this limits your color manipulation capabilities.
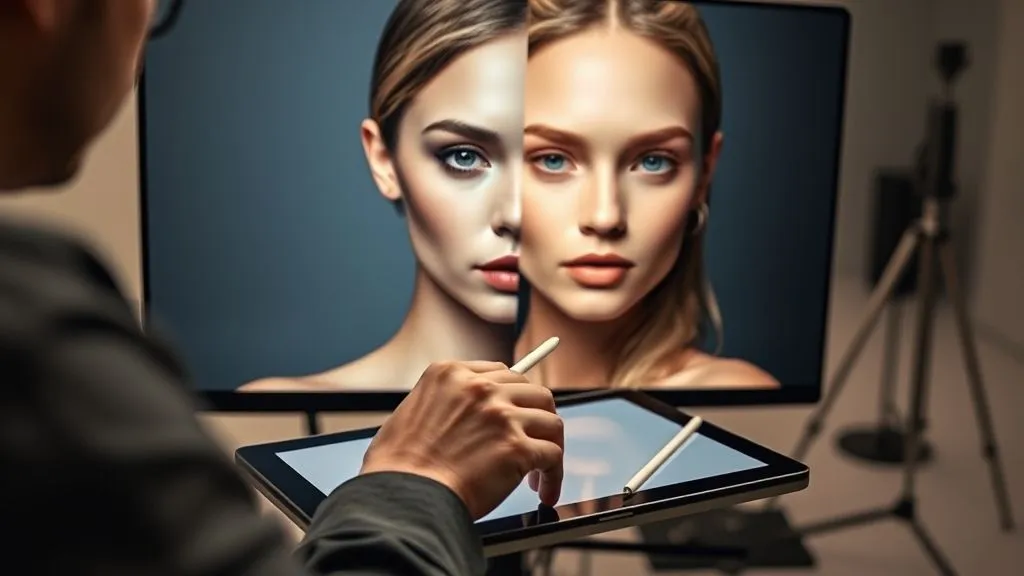
Expert Insight: Always work non-destructively. Utilize adjustment layers, smart objects, and masks in Photoshop. This preserves your original image data and allows for endless tweaks and refinements without degradation, which is crucial when trying to fix inconsistent skin tones across a fashion editorial.
Advanced Techniques for Precise Skin Tone Matching
Once you have a solid baseline, it’s time for the precise work. This is where the art and science of retouching truly merge to achieve flawless consistency.
Using Color Samplers and Target Values
One of my most reliable methods involves using color samplers. Identify a 'master' reference image—the one with the most ideal skin tone. Then, use the info panel to sample key skin areas (mid-tones, highlights, shadows) for their RGB or LAB values. Apply these target values to other images using curves or selective color adjustments. This is not about making every skin tone identical, but bringing them into a harmonious range.
- Select a Reference Image: Choose the image with the most desirable skin tone as your benchmark.
- Sample Key Skin Areas: In Photoshop's Info panel, use the Color Sampler Tool to get RGB/LAB values from mid-tone, highlight, and shadow areas of the skin.
- Apply to Other Images: Open a different image from the editorial. Using Curves or Selective Color adjustment layers, nudge the colors until your sampled areas match the reference values as closely as possible.
- Refine with Masks: Use layer masks to apply these adjustments only to the skin areas, preventing impact on wardrobe or background.
Frequency Separation for Texture and Color
Frequency separation is a powerful technique that allows you to separate the high-frequency details (texture, pores, fine lines) from the low-frequency details (color, tone, general luminosity). This enables you to correct color shifts and inconsistencies on the low-frequency layer without affecting the skin's natural texture, a common pitfall of less sophisticated methods. It's a cornerstone of high-end fashion retouching.
Selective Color and Hue/Saturation Adjustments
These adjustment layers are your best friends for fine-tuning skin tones. Selective Color allows you to target specific color ranges (e.g., Reds, Yellows, Neutrals) and adjust their constituent CMYK or RGB values. Hue/Saturation is excellent for shifting the overall hue or saturation of skin-specific colors. For instance, if skin looks too magenta, you can subtly shift the reds and yellows away from magenta.
The Power of Adjustment Layers and Masks
As mentioned, always use adjustment layers. They are non-destructive and allow you to refine your changes with masks. You can paint in or out the effects of an adjustment layer, ensuring that your skin tone corrections are applied precisely where needed and blend seamlessly with the rest of the image. This precision is vital for maintaining a natural, believable look.

For more in-depth tutorials on these techniques, I often recommend resources from Fresh Tutorials or specific sections on the Retouching Academy website, which offer comprehensive guides on advanced skin retouching.
Ensuring Cohesion Across the Entire Editorial
The true test of your skill isn't just correcting one image, but ensuring every single photograph in the editorial feels like part of a unified whole. This requires a holistic approach.
Developing a Master Reference Image
Once you've perfected the skin tones on your chosen 'master' image, keep it open as a constant visual reference. Periodically compare other images against it, not just for color, but for overall luminosity and contrast. This visual anchor helps prevent you from drifting off course as you work through the remaining shots, ensuring that you consistently fix inconsistent skin tones across a fashion editorial.
Batch Processing with Refined Presets
After developing your core adjustments for skin tone in a few key images, consider creating a custom preset in Lightroom or Capture One. This preset can then be applied as a starting point to similar images, significantly speeding up your workflow. Remember, presets are a starting point, not a finishing line; always fine-tune each image individually after batch application.
Final Review and Client Approval Loop
Before delivering the final editorial, conduct a thorough review. Display all images side-by-side (or in a contact sheet format) to catch any lingering inconsistencies. It's often helpful to have a fresh pair of eyes review the set. Present the refined editorial to your client, emphasizing the meticulous consistency achieved. This not only builds trust but also showcases your commitment to excellence.
Case Study: Elevating 'Vogue Italia' with Unified Tones
In a high-stakes editorial for a major fashion publication, my team was tasked with unifying skin tones across 20 images shot over three days in varying natural light conditions. The initial RAW files showed a spectrum of warm, cool, and magenta casts. By implementing the systematic approach outlined above—starting with precise grey card white balance, followed by targeted color sampling and selective adjustments in Photoshop—we achieved a seamless, cohesive look. The client specifically praised the 'effortless consistency' of the skin tones, which elevated the entire narrative and contributed to the editorial's widespread positive reception. This resulted in securing a repeat contract and strengthening our reputation as a go-to studio for challenging color correction projects.
Expert Insight: Client feedback is invaluable. Always present a cohesive set, clearly explaining the meticulous efforts taken to ensure visual harmony. This reinforces your expertise and commitment to their vision.
Tools of the Trade: Software and Plugins for Skin Tone Correction
While the techniques are paramount, having the right tools makes the job smoother and more efficient. Here are the essential software and plugins I rely on:
Adobe Photoshop & Lightroom
These are the industry standards. Lightroom (or Camera Raw in Photoshop) is your initial gateway for global adjustments, white balance, and color profile management. Its ability to sync settings across multiple images is invaluable for establishing a consistent baseline. Photoshop is where the heavy lifting happens: adjustment layers (Curves, Selective Color, Hue/Saturation), frequency separation, and precise masking are its strengths. Its non-destructive workflow is critical for high-end retouching.
Capture One Pro
Many fashion photographers swear by Capture One Pro for its superior RAW processing and advanced color tools. Its 'Color Editor' and 'Skin Tone' tools are exceptionally powerful for isolating and refining specific color ranges, making it a formidable contender for achieving consistent skin tones. The ability to create custom color profiles for specific cameras and lenses also provides an edge in maintaining consistency from the outset.
Specialized Plugins
While not strictly necessary, plugins can significantly speed up certain aspects of skin retouching. Imagenomic Portraiture is popular for its ability to smooth skin while preserving texture. Nik Collection's Color Efex Pro offers powerful color grading tools that can be adapted for skin tone adjustments. Always use plugins judiciously and with a light hand, ensuring they complement your manual adjustments rather than replacing them.
| Software/Tool | Key Feature for Skin Tone | Pros | Cons |
|---|---|---|---|
| Adobe Photoshop | Adjustment Layers, Masks, Frequency Separation, Selective Color | Industry standard, ultimate control, non-destructive workflow | Steep learning curve, subscription based |
| Adobe Lightroom | Global White Balance, HSL, Sync Settings | Batch processing, excellent organization, quick global adjustments | Less precise local control than Photoshop, subscription based |
| Capture One Pro | Color Editor, Skin Tone Tool, Advanced RAW Processing | Superior RAW engine, precise color control, robust session management | Higher cost, different workflow than Adobe, learning curve |
| Imagenomic Portraiture | Automated Skin Smoothing & Retouching | Fast, preserves texture, customizable masks | Can look artificial if overused, additional cost |
Frequently Asked Questions (FAQ)
Question: Can I fix severe inconsistencies if I didn't use a grey card on set? Yes, but it will be significantly more challenging and time-consuming. You'll rely more heavily on manual color sampling from 'ideal' skin areas within your images, using adjustment layers like Curves and Selective Color, and potentially global adjustments in your RAW converter. It requires a keen eye and more iterative adjustments, often involving comparing against a known neutral reference (like a white point in the image or a neutral grey swatch in Photoshop).
Question: How do different lighting conditions (e.g., studio vs. outdoor) affect skin tone consistency in an editorial? Outdoor lighting, especially natural daylight, is dynamic and constantly changing (clouds, sun angle, reflections from environment), leading to more frequent and unpredictable shifts in skin tone. Studio lighting, being controlled, offers greater consistency but still requires careful management of light modifiers and power settings. The key is to be acutely aware of the light source's color temperature and direction in both scenarios and adjust your approach accordingly.
Question: What's the best way to maintain natural-looking skin while color correcting? The secret is subtlety and non-destructive editing. Avoid aggressive global adjustments. Focus on targeted corrections using masks and adjustment layers, only affecting the specific areas of the skin. Prioritize matching the luminosity and hue, then fine-tune saturation. Always compare your edited image to the original (or a master reference) to ensure you haven't introduced an unnatural cast or over-saturated the skin. Frequency separation is also crucial here for preserving texture.
Question: How much time should I allocate for skin tone correction in a typical editorial workflow? This varies greatly depending on the initial consistency of the shoot and the desired level of perfection. For a well-planned shoot with good on-set practices, you might spend 5-15 minutes per image on precise skin tone matching after initial global adjustments. For a shoot with significant inconsistencies, this could easily jump to 20-30 minutes or more per image. Budgeting sufficient time for this critical step is essential for high-quality results.
Question: Is there an AI tool that can automate skin tone matching perfectly? While AI-powered tools are rapidly advancing (e.g., some features in Lightroom, Capture One, or plugins like Imagenomic Portraiture), none can perfectly automate complex skin tone matching across an entire editorial to a professional standard. They can provide excellent starting points or handle basic smoothing, but the nuanced, artistic decisions required to maintain naturalness and editorial cohesion still demand human expertise and a skilled retoucher's eye. They are assistants, not replacements.
Key Takeaways and Final Thoughts
Achieving flawless, consistent skin tones across a fashion editorial is a hallmark of professional work. It's a complex challenge, but one that is entirely conquerable with a strategic, systematic approach.
- Prioritize Pre-Production: Planning, lighting diagrams, and on-set white balance are your first lines of defense.
- Shoot Smart: Tethered shooting and consistent reference shots save immense time in post.
- Master Your Tools: Become proficient with adjustment layers, masks, and techniques like frequency separation.
- Work Systematically: Establish a master reference and apply corrections methodically across the entire set.
- Practice Patience: Precise skin tone correction is an art that demands a keen eye and meticulous attention to detail.
Remember, your goal isn't just to fix inconsistent skin tones across a fashion editorial; it's to elevate the entire visual narrative, making each image a seamless part of a compelling story. Embrace these strategies, and you'll not only deliver breathtaking results but also solidify your reputation as a true master of your craft. Keep learning, keep refining, and let your work speak volumes about your expertise.
Recommended Reading
- 7 Proven Strategies: Monetize Style Tips Effectively on Your Fashion Blog
- Verifying True Textile Sustainability: 7 Critical Steps for Innovation
- Safeguarding Your Sneaker Business: 7 Steps to Combat Chargeback Fraud
- 5 Menswear Secrets: Project Executive Presence & Command Respect
- 7 Ways to Spot True Luxury Investment Pieces vs. Overrated Trends


Your email address will not be published. Required fields are marked *