
What's the best method to securely set fragile antique gemstones?
For over two decades in the intricate world of jewelry design and restoration, I've witnessed the sheer joy of bringing a forgotten heirloom back to life and, sadly, the heartbreak of a priceless antique gem damaged during an ill-conceived setting attempt. The allure of antique jewelry lies not just in its history and aesthetic, but in the unique, often delicate, characteristics of its gemstones.
The inherent fragility of many antique gemstones – whether due to age, internal inclusions, historical cutting methods, or previous treatments – presents a unique challenge to even the most seasoned jeweler. A modern setting technique applied without nuanced understanding can easily lead to irreparable chipping, cracking, or even complete fracture, effectively destroying a piece of history.
This comprehensive guide is born from countless hours at the bench, meticulous research, and the shared wisdom of fellow conservators. I'll share not just the 'what,' but the 'how' and 'why,' offering proven frameworks, real-world insights, and actionable steps to ensure your cherished antique gemstones are set not just securely, but with the respect and understanding they deserve.
Understanding the Unique Fragility of Antique Gemstones
Before we even consider a setting method, we must first deeply understand the material we are working with. Antique gemstones are often vastly different from their modern counterparts. Their history, sometimes spanning centuries, means they’ve been subjected to various environmental factors, wear, and even crude repairs over time.
Identifying Common Vulnerabilities
I've seen countless antique gems that, at first glance, appear robust, but upon closer inspection, reveal inherent weaknesses. These vulnerabilities can stem from several factors:
- Age-Related Changes: Over time, some gems, like opals or pearls, can dehydrate or become brittle. Surface abrasions accumulate, weakening the stone's integrity.
- Internal Inclusions and Fractures: Many antique gems were cut before advanced gemological tools could precisely map internal flaws. These inclusions, often beautiful and unique, can be stress points. Feathers, cleavages, and growth lines can become catastrophic fracture planes under pressure.
- Historical Cutting Styles: Old mine cuts, rose cuts, and various cabochons often have thin girdles or irregular shapes that are highly susceptible to chipping. Facet junctions might be rounded or uneven, making standard prong setting risky.
- Past Treatments and Repairs: Some antique gems may have undergone early, less sophisticated treatments (e.g., foil backing, oiling) that can affect their stability. Previous repairs, if poorly executed, might have introduced new weaknesses.
- Thermal Sensitivity: Certain gems, like emeralds, opals, and tanzanites, are highly sensitive to thermal shock. The heat generated during soldering or even rapid changes in ambient temperature can cause internal fractures.
The Perils of Modern Setting Techniques on Old Stones
Modern jewelers are trained with techniques optimized for contemporary, often more durable, or factory-calibrated gemstones. Applying these without modification to an antique piece is a recipe for disaster. For instance, aggressive burnishing of a bezel for a modern sapphire might chip an antique garnet with a delicate girdle. Similarly, using standard setting pliers on a rose-cut diamond can easily shatter its thin, flat base. It's a fundamental misunderstanding of material science and historical context.

The Foundation: Meticulous Assessment and Preparation
In my practice, I always emphasize that the setting process begins long before any tool touches the gem. The most secure setting method is only as good as the preparation that precedes it. This stage is paramount for preventing damage.
Comprehensive Gemstone Examination
This isn't just a quick look; it's a forensic investigation. I use a high-powered microscope, often up to 60x magnification, to meticulously map every inclusion, fracture, and surface abrasion. I rotate the stone under various lighting conditions – direct, diffused, darkfield – to reveal hidden weaknesses. It's crucial to understand the gem's internal architecture.
I also test its stability gently. A light tap with a wooden dowel on the girdle, if it produces a 'dead' sound, might indicate a hidden fracture. I record everything, often with detailed sketches or macro photographs, creating a 'gemstone health report' before any work begins. This documentation is vital for client trust and liability.
Selecting the Right Tools and Environment
The tools used for antique gems are often specialized or modified. I have dedicated sets of setting pliers with softened jaws, wooden pushers, horn burnishers, and custom-made punches. A well-lit, vibration-free workbench is non-negotiable. I often work under a dedicated air filtration system to prevent dust or debris from scratching the gem during handling.
Temperature control is also critical. I ensure the workshop temperature is stable, especially when working with thermally sensitive stones, to avoid shocking the gem when it’s handled or exposed to tools. This seemingly minor detail can prevent major issues.
| Assessment Stage | Action | Tool |
|---|---|---|
| Initial Visual | Examine overall condition, previous settings, surface abrasions. | 10x Jeweler's Loupe |
| Microscopic Analysis | Map inclusions, fractures, girdle integrity, cut style. | Stereo Microscope (30x-60x) |
| Structural Integrity Test | Gentle pressure test (wood dowel), thermal sensitivity check. | Wooden Dowel, Controlled Environment |
| Documentation | Photograph, sketch, note all findings and potential risks. | Macro Camera, Logbook |
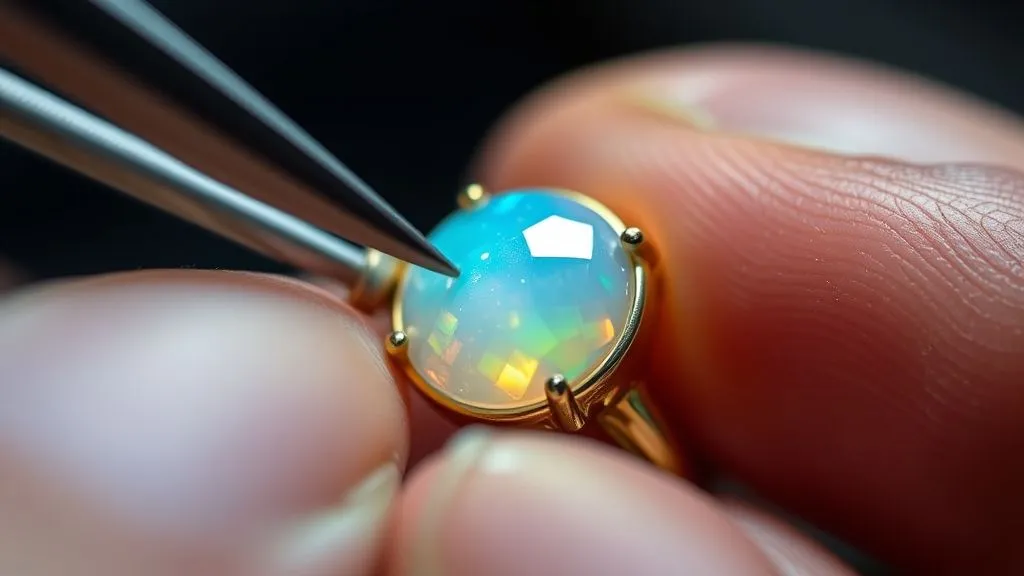
Method 1: The Art of Bezel Setting with a Twist
The bezel setting, in its traditional form, encases the entire girdle of a gemstone in a continuous band of metal. For antique gems, this is often my preferred starting point due to its superior protection. However, it requires significant adaptation to account for fragility.
The 'twist' is in the execution: it's about extreme gentleness, precision, and understanding the metal's flow. I aim for a bezel that provides a secure hug, not a suffocating grip.
- Precision Measurement and Cushion: I measure the gem's girdle precisely, then fabricate the bezel wire to be infinitesimally larger – perhaps 0.05mm – to create a 'cushion' effect. This allows the metal to flow around the gem without direct, hard pressure.
- Extreme Annealing: The bezel metal (usually 18k gold or platinum) must be annealed to its softest possible state. This isn't just for ease of work; it allows the metal to deform around the gem's contours with minimal resistance, reducing stress on the stone.
- Slow, Controlled Forming: Instead of pushing the metal down in one go, I use a series of gentle, overlapping strokes with a highly polished steel burnisher or a horn tool. The goal is to gradually compress the metal around the gem's girdle, allowing it to conform, rather than forcing it.
- Non-Marring Tools: I exclusively use tools made of softer materials like horn, wood, or highly polished steel that won't scratch or mar the gem's surface if accidental contact occurs.
- Burnish, Don't Push: The final securing of the bezel is a burnishing action, gently flowing the metal over the gem's edge, rather than a hard push. This creates a secure, protective rim without undue stress on the stone. As the GIA often emphasizes, proper material preparation is key to preventing damage, especially with delicate gems. See their insights on gemstone stability here.
Method 2: Adapting Prong Settings for Delicacy
While often perceived as less protective than bezels, prong settings can be adapted for fragile antique gems, particularly when the gem's cut or aesthetic demands more exposure. The key is in the design and meticulous shaping of the prongs themselves.
Low-Profile and Wide-Base Prongs
Traditional prongs can be thin and sharp, creating high-pressure points. For antique gems, I advocate for lower-profile prongs that don't extend far above the gem's table, reducing snagging risks. More importantly, the base of the prong where it meets the girdle should be wider and gently rounded, distributing the pressure over a larger surface area. This prevents the 'knife-edge' effect that can easily chip a delicate girdle.
The Role of 'Claw' and 'Button' Prongs
I often employ modified 'claw' or 'button' prongs. Claw prongs, when executed correctly, can flow elegantly around the gem's curvature, offering a secure hold without aggressive clamping. Button prongs, which are essentially small, rounded beads of metal, offer minimal contact points with maximum security, particularly useful for irregularly shaped or highly fragile gems.
- Substantial but Not Overwhelming Prongs: The prongs must be robust enough to hold the gem securely, but not so thick they overpower the stone or create excessive bulk. It's a delicate balance.
- Pre-Shape to Contour: Before setting, each prong is carefully pre-shaped to match the exact contour of the gem's girdle and crown facets. This ensures a custom fit, minimizing the amount of force needed to close the prong.
- Minimal, Controlled Pressure: Using specialized setting pliers with soft jaws, I apply minimal, controlled pressure, closing each prong incrementally. I never close opposing prongs simultaneously, but rather work in a cross-pattern to distribute stress evenly.
- Avoid Sharp Points: The tips of the prongs are meticulously rounded and polished. Any sharp edges near the gem's girdle are filed away to prevent accidental chipping or scratching during wear.

Method 3: Channel Setting with a Safety Margin
Channel setting, where gems are set side-by-side within two parallel metal walls, might seem counterintuitive for fragile stones due to the lateral pressure involved. However, for certain cuts, like baguettes or carré-cut diamonds, and with specific modifications, it can be a viable and secure option.
Creating Internal Cushions
The standard channel setting relies on the metal walls being pushed against the gem's girdle. For fragile stones, I introduce an internal 'cushion.' This involves creating a very slight bevel or groove on the inside of the channel walls, allowing the gem to rest slightly recessed. When the metal is gently compressed, it flows *over* the edge of the gem, rather than directly *into* its girdle, providing a more forgiving hold.
The Importance of Precision Grooving
The 'seat' for each gemstone within the channel must be cut with absolute precision. Any unevenness will cause undue stress on one part of the gem. I use specialized gravers and burs to create a perfectly flat and level seat, ensuring the gem sits without wobble. The channel walls are also meticulously polished to prevent abrasion.
- Accurate Channel Width: The channel width must be precisely measured, often allowing for a fraction of a millimeter more than the gem's width. This 'play' is crucial for accommodating the internal cushion and preventing tight, damaging pressure.
- Meticulous Channel Wall Polishing: Before setting, the inside walls of the channel are highly polished. Any rough spots can abrade the gem's girdle or cause stress points.
- Using Soft Shims if Needed: In some cases, especially with slightly irregular cuts, I might use tiny, thin shims of a softer metal (like fine silver or even a thin plastic film) between the gem and the channel wall as a temporary buffer during setting. These are removed once the channel is closed, or left in if they are non-reactive and provide a permanent cushion.
- Gradual Closing of the Channel: The metal walls are brought in incrementally, using a setting hammer or specialized pliers, working from the center outwards. This distributes the pressure evenly and prevents sudden, localized stress.
Method 4: The Protective Power of Illusion Setting
Illusion settings are a clever way to enhance the apparent size of a smaller gem while providing significant protection. While often associated with modern diamonds, the principles can be adapted for antique, fragile stones where maximizing visual impact and security are both priorities.
Crafting the Reflective Collar
The core of an illusion setting for an antique gem involves creating a highly polished metal collar or rim around the girdle. This collar is designed to reflect light back through the gem, making it appear larger and brighter. Crucially, this collar also acts as a robust protective barrier, shielding the delicate girdle from impacts. The gem itself is typically set with minimal prongs or a partial bezel within this collar.
Minimal Contact Points
The beauty of this method for fragile stones is that the actual setting of the gem within the illusion collar can be done with very minimal contact points. Small beads or very fine prongs are used to hold the gem, distributing the pressure gently. The primary protection comes from the surrounding metal, not from direct pressure on the stone itself. This is particularly effective for antique diamonds or other hard, but inclusion-prone, gems that might chip easily under direct stress.
Method 5: Adhesive-Assisted Setting (The Last Resort, but done right)
Adhesive-assisted setting is a technique I consider only when all mechanical setting methods present an unacceptable risk of damage, typically for extremely fragile, inclusion-riddled, or unusually shaped antique gemstones. It's a last resort, but when executed with archival-grade materials and expertise, it can be the safest option.
Selecting Reversible, Archival Adhesives
The cardinal rule here is reversibility. I exclusively use adhesives that are stable, non-yellowing, and, most importantly, can be safely removed without damaging the gemstone or the metal setting. Epoxies are generally avoided due to their irreversible nature. Instead, I turn to conservation-grade resins, often those used by museum conservators for delicate artifacts. These are typically UV-cured or slow-setting two-part systems, chosen for their low viscosity and excellent adhesion to both metal and gem surfaces.
Proper Application and Curing
Application is precise. The gem and setting must be meticulously clean and dry. A tiny amount of adhesive is applied to the gem's seat, allowing the gem to be gently placed. Capillary action helps draw the adhesive into any tiny gaps. Curing is done under controlled conditions – often UV light for specific resins, or simply allowing sufficient time for air-cured types. The goal is to create a bond that stabilizes the gem without putting it under any compressive stress.
Case Study: The Empress Emerald Pendant
I recall a particularly challenging piece: 'The Empress Emerald Pendant,' a 17th-century Mughal emerald, over 30 carats, riddled with natural fissures and an exceptionally thin, irregular girdle. The original gold setting had failed, and any attempt at traditional re-setting would have almost certainly fractured the stone. After extensive microscopic analysis and consultation, I opted for an adhesive-assisted method. I fabricated a new, custom-fit gold bezel that cradled the emerald without touching its most vulnerable points. Then, using a museum-grade, reversible acrylic resin, I carefully secured the emerald within this bezel. The resin filled the tiny gaps, stabilizing the stone and preventing movement, while allowing for future removal if necessary. This approach preserved the emerald's integrity, ensuring its historical journey continued unimpeded by damage. The pendant is now a treasured part of a private collection, its emerald safe and sound.
In complex conservation scenarios, the British Museum's conservation department often employs similar principles of reversibility and minimal intervention, prioritizing the preservation of original material over aggressive restoration. This aligns perfectly with the ethos required for antique gemstones. You can learn more about their conservation philosophy here.
Method 6: Custom-Fabricated Settings and Micro-Engineering
For truly unique or exceptionally fragile antique gemstones, a 'one-size-fits-all' approach simply won't suffice. This is where bespoke, custom-fabricated settings and micro-engineering come into play, pushing the boundaries of traditional jewelry making.
CAD/CAM for Precision Fit
Modern technology, when used judiciously, can be a conservator's best friend. For stones with highly irregular shapes or extreme fragility, I often turn to Computer-Aided Design (CAD) and Computer-Aided Manufacturing (CAM). The antique gemstone is first 3D-scanned with extreme precision. This digital model then allows me to design a setting that perfectly cradles the stone, often with an infinitesimally small clearance (e.g., 0.01mm) to prevent any direct pressure points. The setting can then be 3D-printed in wax or resin, cast in the desired metal, and hand-finished. This ensures a 'glove-like' fit that is impossible to achieve through traditional hand fabrication alone for highly complex shapes.
Integrating Support Structures
Sometimes, the fragility of a gem necessitates external support. This might involve integrating micro-engineered 'cages' or internal support structures within the setting. For instance, a very large, thin antique emerald might have a delicate framework of fine gold wires built into the back of its setting, providing additional structural support without being visible from the front. These are often designed to distribute any impact forces away from the gem itself, directing them to the more robust metal framework.
Method 7: The Role of Gemological Expertise and Collaboration
While my expertise spans jewelry design and setting, I recognize the limits of my own knowledge, especially when dealing with the vast array of gemstones and their specific properties. Collaboration is not just beneficial; it's often essential for the secure setting of fragile antique gems.
Partnering with a Certified Gemologist
Before undertaking any work on a truly precious or unfamiliar antique gem, I often consult with a certified gemologist (GIA GG or equivalent). Their expertise in identifying specific gem species, detecting treatments (historical or modern), and understanding the internal structure of a stone is invaluable. They can often provide crucial insights into a gem's potential stability, its reaction to heat, pressure, and even certain chemicals, which directly informs my choice of setting method.
Understanding Gemstone Treatments and Stability
Many antique gemstones have undergone various treatments, some benign, some that dramatically affect stability. For example, an antique emerald that has been heavily oiled might react differently to heat than an untreated one. A heavily fractured sapphire that has been lead-glass filled requires entirely different handling than a stable, untreated stone. A gemologist can pinpoint these treatments, allowing me to adjust my approach, ensuring the chosen method is not only secure but also compatible with the gem's inherent characteristics and history. The SSEF (Swiss Gemmological Institute) provides excellent resources on advanced gem identification and treatment detection, which I frequently reference for complex cases: ssef.ch.
| Setting Method | Fragility Level | Key Benefit | Best For |
|---|---|---|---|
| Bezel Setting (Modified) | Moderate to High | Maximum physical protection, even pressure distribution. | Cabochons, irregular cuts, soft gems (opals, pearls), thin girdles. |
| Prong Setting (Adapted) | Low to Moderate | Maximizes light entry, elegant aesthetic, lower profile. | Faceted stones where light is crucial, less fragile girdles. |
| Channel Setting (Modified) | Moderate | Good lateral protection, clean lines for specific cuts. | Baguettes, carré cuts, calibrated stones, with internal cushions. |
| Illusion Setting | Moderate to High | Enhances perceived size, robust collar protection. | Smaller faceted stones, those needing visual boost and girdle protection. |
| Adhesive-Assisted | Extreme | Zero mechanical stress, reversible bond, last resort. | Severely fractured, inclusion-riddled, or thermally sensitive gems. |
| Custom Micro-Engineered | Extreme to Unique | Bespoke fit, integrated support, advanced precision. | Irregularly shaped gems, very large fragile stones, complex designs. |
Post-Setting Care and Maintenance for Antique Pieces
Securing an antique gemstone is only half the battle; ensuring its longevity requires diligent post-setting care and maintenance. It's a responsibility I impress upon every client, emphasizing that these are not just pieces of jewelry, but fragments of history.
Gentle Cleaning Protocols
Many antique gems and their settings are sensitive to harsh chemicals, ultrasonic cleaners, and steam. I always recommend the simplest, gentlest cleaning method: a soft, lint-free cloth, lukewarm water, and a tiny drop of mild, non-abrasive soap. A soft brush can be used for intricate areas, but never directly on the gemstone surface, especially for softer gems. Ultrasonic cleaners are almost universally contraindicated for antique jewelry, as the vibrations can dislodge fragile stones or exacerbate existing fractures. For more on delicate artifact care, resources from institutions like the American Institute for Conservation of Historic and Artistic Works (AIC) are invaluable: culturalheritage.org.
Regular Inspection and Professional Check-ups
Even the most perfectly set antique gem can be compromised by daily wear. I advise clients to visually inspect their pieces regularly for any loose prongs, signs of wear on the bezel, or any movement in the stone. More importantly, I recommend professional check-ups at least once a year. During these check-ups, I can microscopically examine the setting, re-tighten any prongs if necessary, and ensure the gem remains stable. This proactive approach is crucial for preventing minor issues from escalating into significant damage.

Frequently Asked Questions (FAQ)
Can all antique gemstones be re-set? While most can, some are simply too fragile or damaged to be safely re-set without significant risk. In such cases, alternative methods like display in a protective case or the use of conservation-grade adhesives might be considered as a last resort, prioritizing preservation over wearability. A thorough gemological assessment is always the first step.
What's the biggest risk when setting old gems? The biggest risk is applying localized pressure without understanding the gem's internal structure and material properties. This can lead to chipping, cracking, or catastrophic fracture along cleavage planes or existing inclusions. Thermal shock during soldering or even aggressive polishing can also be highly damaging.
How do I know if my jeweler is qualified to handle fragile antique gemstones? Look for a jeweler with specific experience and training in antique jewelry restoration and gemological knowledge. Ask about their tools, their assessment process, and their philosophy on conservation. A truly qualified expert will prioritize the gem's safety and integrity above all else and will be transparent about potential risks. Certifications from organizations like GIA or specific training in historical jewelry techniques are good indicators.
Are there any "invisible" setting methods for antique stones? While truly 'invisible' settings (like tension settings) are generally too risky for antique gems due to the immense pressure involved, illusion settings (as discussed) can create the perception of a larger, more prominent stone with minimal visible metal contact. The goal for antique gems is secure protection, not necessarily invisibility at the cost of safety.
What's the lifespan of a secure antique setting? A properly executed, secure setting for an antique gemstone, coupled with appropriate care, can last for many decades, even centuries. However, it's not a 'set it and forget it' situation. Regular wear and tear, accidental impacts, and even environmental factors can degrade a setting over time. Annual professional inspections are crucial to maintain its security and extend its lifespan.
Key Takeaways and Final Thoughts
The journey of learning what's the best method to securely set fragile antique gemstones is one of continuous learning, meticulous attention to detail, and a profound respect for history. It's a blend of art, science, and patience.
- Prioritize Assessment: Never skip a thorough, microscopic examination of the gemstone's unique vulnerabilities.
- Adapt Techniques: Modern setting methods must be adapted with extreme care and gentleness for antique pieces.
- Choose Wisely: Select the setting method that offers the best protection for the specific gem, not just what's aesthetically pleasing.
- Tools and Environment Matter: Use specialized, non-marring tools and work in a controlled environment to minimize risks.
- Embrace Collaboration: Don't hesitate to consult with gemologists or conservation experts for complex cases.
- Educate for Longevity: Empower clients with knowledge on post-setting care and the importance of regular professional check-ups.
Ultimately, securing fragile antique gemstones is more than just a technical skill; it's an act of stewardship. By applying these expert methods and embracing a conservative, informed approach, you're not just setting a stone; you're safeguarding a legacy, ensuring these precious pieces continue to tell their stories for generations to come. It's a responsibility I take to heart, and I encourage every jeweler and collector to do the same.
Recommended Reading
- 7 Proven Ways to Halt Activewear Breathability Loss Fast
- Bridal Gown Delayed? 7 Steps to Navigate & Secure Your Dream Dress
- The Unseen Value: Best Heritage Luxury Brands for Investment Revealed
- Unveiling the Future: How Advanced Textile Technologies Are Slaying Fashion Waste
- Unlock the Secret: How to Care for Delicate Artisan Jewelry Pieces

Your email address will not be published. Required fields are marked *