
Solving common stone chipping issues during micro-pavé setting?
For over two decades in the intricate world of fine jewelry, I've witnessed firsthand the sheer frustration and significant financial setbacks caused by a single, seemingly minor flaw: stone chipping during micro-pavé setting. It's a problem that plagues even the most experienced setters, turning hours of meticulous work into scrap and undermining a brand's reputation for quality.
This isn't just about a tiny chip; it's about lost time, wasted materials, tarnished craftsmanship, and ultimately, a hit to your bottom line. The delicate nature of micro-pavé, where tiny stones are set in close proximity, amplifies every potential pitfall, making stone integrity paramount.
In this comprehensive guide, I'll share the accumulated wisdom from my years at the bench and managing production. We'll dive deep into actionable frameworks, expert techniques, and real-world insights designed to empower you to master micro-pavé, virtually eliminating stone chipping and elevating your craft to an unparalleled level of precision and trust.

Understanding the Root Causes of Micro-Pavé Chipping
Before we can solve a problem, we must understand its origins. Stone chipping in micro-pavé isn't usually the result of a single catastrophic error but rather a culmination of subtle missteps throughout the setting process. It’s a dance between the stone, the metal, and the setter.
Material Mismatches & Stone Selection
One of the most overlooked factors is the stone itself. Not all gemstones are created equal, especially when it comes to durability under pressure. While diamonds are renowned for their hardness, even they have cleavage planes that can be exploited by improper setting.
Softer stones or those with inherent inclusions and fractures are significantly more prone to chipping. Selecting stones with good clarity and minimal internal stress is crucial. Always consider the Mohs hardness scale and the stone's fracture toughness.
Inadequate Preparation of the Metal Setting
The metal structure that holds the stone is its foundation. If this foundation isn't perfectly prepared, it creates stress points that can lead to chipping. Improper drilling, burring, or creating an uneven seat are prime culprits.
A seat that is too tight, too shallow, or has sharp edges directly underneath the stone's girdle will exert undue pressure, making the stone vulnerable to fracturing during or even after setting. The quality of your burrs and the precision of their use are non-negotiable.
Sub-optimal Tooling and Equipment
You can't achieve world-class results with sub-par tools. Dull burs, improperly shaped gravers, or worn-out beading tools can mar both the metal and the stone. They require more force to achieve the desired effect, increasing the risk of slips and chips.
Furthermore, an inadequate microscope or poor lighting can obscure critical details, leading to errors that are invisible to the naked eye. Investing in high-quality, well-maintained equipment is an investment in your craft and your reputation.
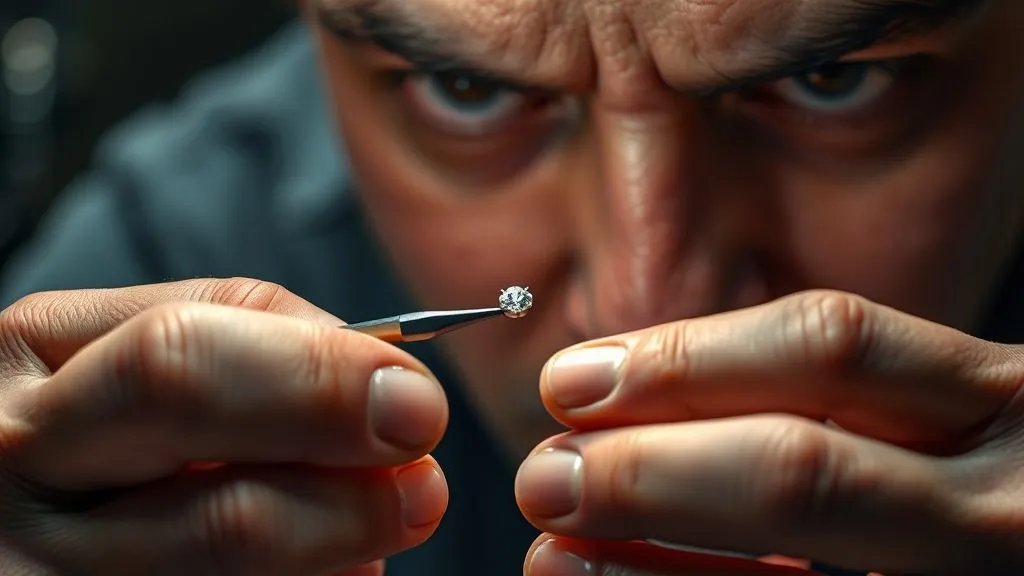
Precision Stone Selection & Inspection: The First Line of Defense
My first rule of thumb has always been: a good setting starts with a good stone. This isn't just about carat weight or color; it's fundamentally about the stone's structural integrity. Source your gemstones from reputable suppliers who can guarantee ethical sourcing and consistent quality.
Before a stone ever touches the metal, it must undergo a rigorous inspection. Using a jeweler's loupe, or preferably a high-magnification microscope, scrutinize each stone for internal inclusions, surface blemishes, or any existing chips or fractures. Pay close attention to the girdle, as this is often the first point of contact and vulnerability.
Identify stones with thin girdles or existing stress lines. These are your 'high-risk' stones and may require a different setting approach or even be deemed unsuitable for micro-pavé. Don't be afraid to reject a stone if its integrity is questionable; the cost of a chipped stone far outweighs the cost of a replacement.
"In micro-pavé, the smallest imperfection in a stone can lead to the biggest headache. Pre-setting inspection isn't a suggestion; it's a critical preventative measure."

Mastering Metal Preparation: Crafting the Perfect Seat
The seat for the stone must be a perfect cradle – secure, level, and free of any sharp edges or irregularities. Think of it as tailoring a custom suit for each individual gemstone. This meticulous preparation is foundational to solving common stone chipping issues during micro-pavé setting.
The Art of Drilling & Burring
The initial drilling for the stone's position and the subsequent burring for the seat are critical steps. Too deep, and the stone sits too low; too shallow, and it protrudes excessively, making it vulnerable. The size and type of burr are paramount.
- Select the Right Burr: Choose a burr slightly smaller than the stone's diameter for the initial drill, and then a setting burr (like a bud or hart burr) that matches the stone's girdle diameter for the seat.
- Drill with Precision: Use a slow, controlled speed for drilling. A high-speed drill can generate excessive heat, work-harden the metal, and make subsequent steps more difficult.
- Create a Level Seat: The burr should cut a perfectly flat or gently curved seat, allowing the stone to rest evenly. Any tilting or unevenness will create pressure points.
- Clean the Seat: After burring, use a fine-pointed tool or air blower to remove any metal shavings or dust from the seat. A clean seat ensures the stone sits perfectly flush.
Creating a Secure & Stress-Free Seat
The goal is for the stone to "drop in" with minimal resistance, not be forced. The seat should support the girdle evenly, without any part of the stone's pavilion touching the bottom of the hole. This often means undercutting the seat slightly to ensure only the girdle makes contact.
I always emphasize checking the fit by gently placing the stone in the seat. It should feel stable and level. If it wobbles or feels tight, rework the seat. This attention to detail dramatically reduces the likelihood of chipping.
"A stone forced into an ill-fitting seat is a ticking time bomb. Patience and precision in seat preparation are your greatest allies against chipping."
| Burr Type | Primary Use | Chipping Risk Factor | Expert Tip |
|---|---|---|---|
| Ball Burr | Creating initial stone seats, shaping concave surfaces | Medium (if dull or too aggressive) | Use light pressure, rotate consistently, keep sharp. |
| Bud Burr | Refining stone seats, undercutting for security | High (if used improperly or too large) | Match size to stone girdle, clean cutting, minimal pressure. |
| Hart Burr | Flat bottom seats, squaring off edges | Medium-Low (good for flat seats) | Ensure flat contact, avoid rocking, check for sharpness. |
| Setting Burr (Cup Burr) | Forming prongs/beads over stones | Low (if correctly sized and sharp) | Select size slightly larger than stone, use with lubricant, slow speed. |
Tooling Up for Success: Essential Equipment and Maintenance
The quality and condition of your tools are direct reflections of your commitment to excellence and directly impact your ability to prevent stone chipping. Think of your tools as an extension of your hands; they must be precise, sharp, and well-maintained.
Gravers & Beading Tools: Precision is Key
For micro-pavé, you'll primarily use gravers to cut channels and push metal, and beading tools to form the tiny prongs or beads that secure the stones. The shape and sharpness of these tools are paramount. A dull graver will drag and tear the metal, requiring more force and increasing the risk of slipping and hitting the stone.
Invest in high-quality carbide or HSS gravers and learn to sharpen them meticulously. I recommend a polished, mirror-finish cutting edge for the cleanest cuts. Similarly, your beading tools must be perfectly hemispherical and smooth. Any nicks or irregularities can scratch or chip the stone's table or crown during the final securing process. Regular inspection and maintenance are crucial.
Microscope & Lighting: Seeing is Believing
Micro-pavé is, by definition, work done on a microscopic scale. Attempting it without adequate magnification is like trying to navigate a maze blindfolded. A good stereo microscope (typically 10x-40x magnification) is indispensable. It allows you to see the minute details of the metal, the stone's girdle, and the interaction of your tools with both.
Equally important is shadow-free, bright lighting. Many microscopes come with integrated LED rings or fiber optic illuminators. Ensure your lighting setup eliminates shadows that could conceal crucial details or lead to misjudgments of depth and pressure. High-quality setting tools and microscopes are available from specialized suppliers.
Advanced Setting Techniques to Minimize Stress
With the right stones and perfectly prepared metal, the actual setting process becomes a refinement of technique. This is where your skill and understanding of material behavior truly shine, directly addressing the core problem of solving common stone chipping issues during micro-pavé setting.
Gentle Pressure & Controlled Movements
The biggest mistake I see setters make is using excessive force. Micro-pavé requires a delicate touch. The metal is often thin, and the stones are small and vulnerable. Instead of brute strength, focus on controlled, deliberate movements.
Apply pressure gradually and consistently, allowing the metal to flow rather than forcing it. Use your non-dominant hand to stabilize the piece firmly, and your dominant hand for the precise, measured movements of the graver or beading tool. Think of it as coaxing the metal, not coercing it.
The 'Push-Over' vs. 'Bead-Up' Debate
There are generally two main approaches to forming the tiny beads that hold the stones: the 'push-over' method and the 'bead-up' method. Each has its merits and specific applications:
- Push-Over Method: This involves pushing a small amount of metal from the wall of the setting over the stone's girdle. It's often used for larger micro-pavé stones or when a more robust bead is desired. The key is to push slowly and evenly, ensuring the metal flows smoothly over the stone without creating a sharp edge.
- Bead-Up Method: Here, a tiny bead is raised directly from the metal surface next to the stone. This requires a very sharp graver to cut a small "island" of metal, which is then rounded and pushed over the stone with a beading tool. This method is excellent for very tight settings and smaller stones, providing a delicate yet secure hold.
Regardless of the method, the goal is to create just enough metal to secure the stone without encroaching on its table or crown, which can lead to stress points and chipping.
"Less is often more when it comes to pressure in micro-pavé. Let your sharp tools and precise technique do the work, not brute force."

Post-Setting Inspection & Quality Assurance
Your work isn't finished once the last bead is set. A thorough post-setting inspection is crucial for catching any issues before they become costly problems. This final check ensures that all your efforts in solving common stone chipping issues during micro-pavé setting have paid off.
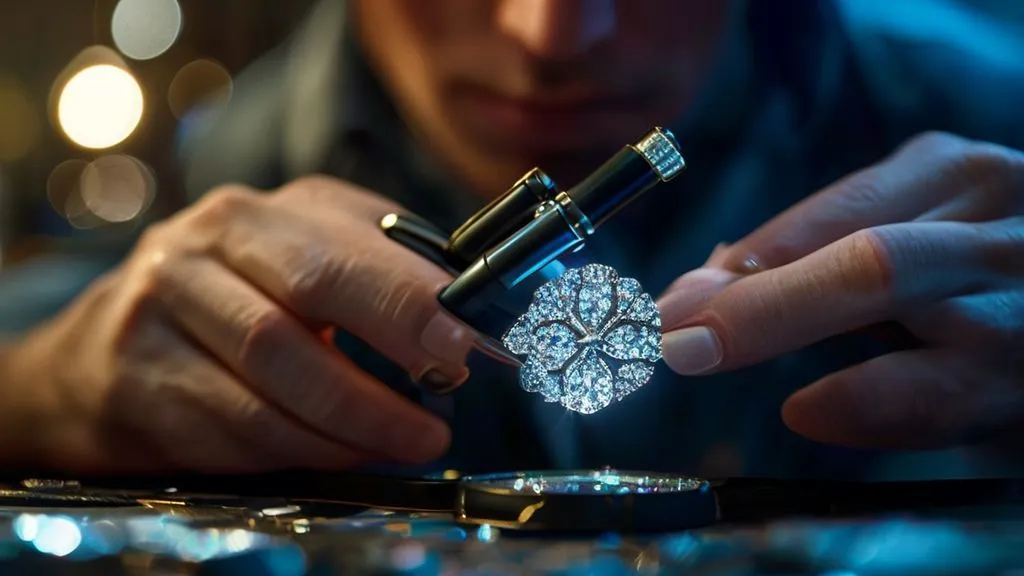
Visual Checks & Microscopic Scrutiny
Immediately after setting, give the piece a careful visual inspection under magnification. Check every single stone for any signs of chipping, even microscopic ones. Look for cracks, especially around the girdle. Ensure each stone is securely held, with no movement when gently probed with a fine pick.
Examine the beads or prongs. Are they uniformly shaped? Do they cover just enough of the stone to secure it without obscuring its brilliance or creating undue pressure? Any metal that's too thin or too sharp around the stone can lead to future chipping or dislodgement.
The Importance of Ultrasonic Cleaning & Polishing
Proper cleaning and polishing are the final steps, but they can also be points of vulnerability if not handled correctly. Ultrasonic cleaning, while effective, can sometimes dislodge poorly set stones or exacerbate existing micro-fractures if the piece is left in for too long or if the solution is too aggressive.
When polishing, use appropriate compounds and wheels. Be mindful of applying excessive pressure or heat to the areas around the stones. Polishing wheels can catch small beads and potentially chip stones if not handled with extreme care. Always ensure the piece is properly deburred and smoothed before polishing to prevent snagging. GIA provides excellent guidance on safe jewelry cleaning practices.
Case Study: Gemstone Gurus' Chipping Reduction
Gemstone Gurus, a high-volume micro-pavé manufacturer, struggled with a 12% stone chipping rate, leading to significant rework and material loss. By implementing a comprehensive training program focusing on my recommended pre-setting inspection protocols, precise burr selection, and controlled setting techniques, they saw a dramatic improvement. Within six months, their chipping rate plummeted to under 2%. This not only saved them thousands in material and labor but also boosted their reputation for impeccable quality, allowing them to secure larger contracts. Their success story underlines the power of meticulous process refinement.
Environmental Factors & Best Practices in the Workshop
Beyond the direct setting techniques, the environment in which you work plays a subtle yet significant role in preventing stone chipping. Overlooking these factors can undermine even the most skilled setter's efforts.
Temperature and Humidity Control
Extreme fluctuations in temperature can cause metals to expand and contract, potentially stressing already set stones. While this is more of a concern in extreme industrial environments, maintaining a stable, comfortable workshop temperature can contribute to overall consistency and reduce the risk of thermal shock to delicate stones during various processes like soldering and quenching.
High humidity can also affect the grip and stability of some tools, and can contribute to the rusting of steel tools if not properly maintained. A well-regulated environment fosters consistent results.
Workspace Ergonomics & Organization
A cluttered or poorly organized workspace is a recipe for accidents. Tools can slip, pieces can fall, and fatigue can set in, all increasing the risk of chipping. Ensure your bench is clean, well-lit, and your tools are easily accessible and neatly arranged.
Ergonomics are also vital. Spending hours hunched over a microscope can lead to neck strain, eye fatigue, and shaky hands. Invest in an ergonomic chair, proper bench height, and take regular breaks. A comfortable and well-supported setter is a more focused and precise setter. Learn more about ergonomics in jewelry manufacturing for a healthier workspace.
Training & Continuous Learning: Investing in Skill
The journey to mastery in micro-pavé setting is continuous. Even after decades, I find myself learning new nuances and refining techniques. The best setters are those who never stop investing in their education and skill development.
Seek out advanced workshops, engage with mentors, and study the work of master jewelers. Practice on scrap metal regularly, experimenting with different burrs, gravers, and setting angles. This deliberate practice builds muscle memory and intuitive understanding that can only come from experience.
Remember, every chipped stone is an opportunity to learn. Analyze what went wrong, adapt your approach, and apply the lessons. This continuous feedback loop is how true expertise is forged, transforming challenges into stepping stones for greater skill.
"Mastery in micro-pavé isn't about avoiding mistakes entirely, but about learning from every single one and relentlessly pursuing perfection through practice."

Frequently Asked Questions (FAQ)
Can certain metals increase chipping risk? Yes, the hardness and ductility of the metal play a significant role. Harder metals like platinum or certain white gold alloys can be more challenging to work with, requiring sharper tools and more precise force, potentially increasing chipping risk if not handled correctly. Softer metals might deform more easily, also requiring careful technique to avoid crushing stones.
What's the best way to clean micro-pavé without damaging stones? For micro-pavé, gentle cleaning is key. A soft brush with warm water and mild soap is often the safest. If using an ultrasonic cleaner, ensure stones are securely set, limit exposure time (a minute or two), and avoid harsh chemicals. Always rinse thoroughly and dry with a soft cloth or air blower.
How do I identify a good quality micro-pavé burr? Good quality burrs are made from high-grade steel or carbide, will be perfectly concentric (no wobble), and have sharp, clean cutting edges without any visible defects under magnification. They should cut smoothly and efficiently without excessive pressure. Investing in reputable brands is advisable.
Is it better to set dry or use a lubricant? For micro-pavé, I almost always recommend using a lubricant, such as beeswax or a specialized setting wax, on your gravers and burrs. This helps the tool cut more smoothly, reduces friction and heat build-up, and prevents metal chips from sticking, leading to cleaner cuts and less risk of stone damage.
What's the biggest mistake beginners make in micro-pavé? The most common mistake is impatience and rushing the process. Beginners often apply too much force, use dull tools, or neglect thorough seat preparation. Micro-pavé demands extreme patience, meticulous attention to detail at every step, and a willingness to stop and re-evaluate if something doesn't feel right.
Key Takeaways and Final Thoughts
Solving common stone chipping issues during micro-pavé setting is not an insurmountable challenge, but a testament to dedication and methodical practice. It's about respecting the materials, understanding the tools, and honing your technique to a razor-sharp edge.
- Prioritize Stone Integrity: Begin with careful inspection and selection of high-quality, stable gemstones.
- Master Metal Preparation: Craft precise, stress-free seats for every stone.
- Invest in Superior Tools: Use sharp, well-maintained gravers, burrs, and adequate magnification.
- Practice Gentle Techniques: Apply controlled, deliberate pressure, allowing metal to flow.
- Implement Rigorous QA: Conduct thorough post-setting inspections and gentle cleaning/polishing.
- Foster a Professional Environment: Maintain an organized, ergonomic workspace.
- Embrace Continuous Learning: Never stop refining your skills and seeking new knowledge.
By integrating these expert strategies into your workflow, you won't just reduce chipping; you'll elevate your micro-pavé craftsmanship to a level that truly stands out. Embrace the journey of precision, and watch your reputation for flawless jewelry sparkle as brilliantly as the stones you set.
Recommended Reading
- Unlock the Secrets: How to Properly Care for Your Luxury Designer Glasses
- The Secret to Effortless Sophistication: How to Infuse Timeless Elegance into Casual Wear
- 7 Steps to Master Cinematic Noir Lighting & Banish Flat Shots
- 7 Proven Strategies: Ethically Sourcing Rare Gemstones for Sustainable Jewelry Lines
- Bride Dislikes Custom Veil? 7 Steps to Save Your Wedding Day Look

Your email address will not be published. Required fields are marked *