
How to safely insert modern lenses into fragile vintage frames?
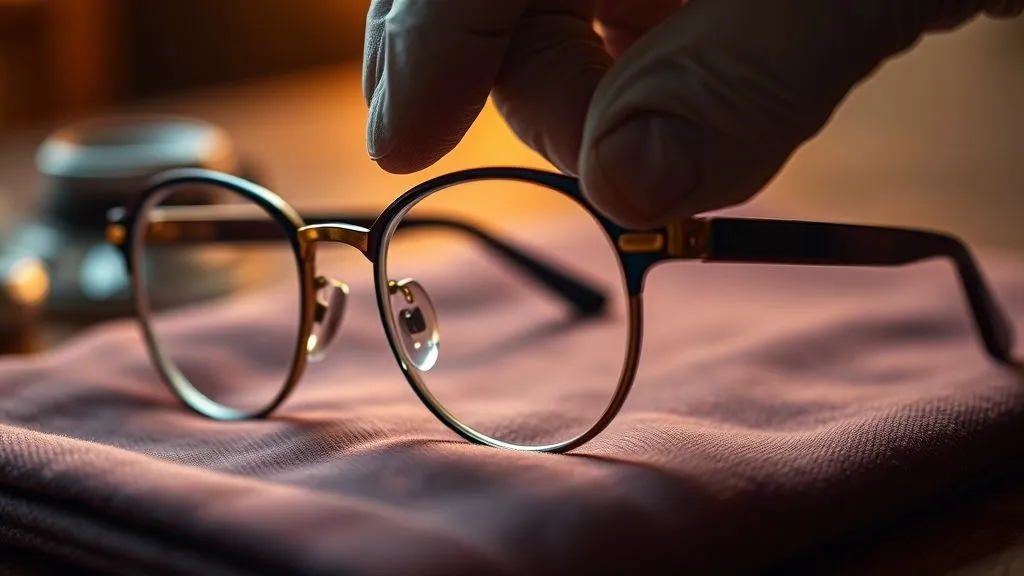
For over thirty years in the eyewear fashion industry, I've witnessed the incredible allure of vintage frames. They carry stories, unparalleled craftsmanship, and a unique aesthetic that simply can't be replicated by mass-produced modern designs. However, I've also seen countless enthusiasts and even some professionals make a critical error: underestimating the delicate nature of these historical pieces when attempting to update them.
The problem is clear: you have a beloved pair of vintage spectacles, perhaps a family heirloom or a rare find, and you want to wear them. But their original lenses are outdated, prescription-less, or simply not suited for modern optical needs. The challenge lies in introducing contemporary, precisely ground lenses into frames that might be brittle, corroded, or made from materials no longer in common use, all without causing irreparable damage.
This guide isn't just a list of instructions; it's a comprehensive framework built on decades of experience in eyewear restoration and custom lens fitting. I’ll walk you through the nuances of material science, provide actionable, step-by-step techniques, and share expert insights that will empower you to safely insert modern lenses into fragile vintage frames, preserving their integrity while enhancing their functionality. You'll learn how to identify risks, select the right tools, and execute the process with the precision of a seasoned artisan.
Understanding the Anatomy of Vintage Frames: A Material Science Deep Dive
Before any lens touches a vintage frame, you must understand the material you're working with. This isn't just about aesthetics; it's about predicting how the frame will react to pressure, heat, and manipulation. Different materials demand vastly different approaches.
Celluloid, Acetate, and Early Plastics
Early plastic frames, particularly those made from celluloid (popular until the 1940s) and early acetate (post-1940s), are notoriously tricky. Celluloid can become incredibly brittle with age, prone to cracking or shattering under stress, and it's also highly flammable. Acetate, while more stable, can still dry out, lose its flexibility, and become susceptible to breakage, especially around hinge points or where lenses are inserted.
Identifying these materials often involves a visual inspection for discoloration, a slight 'off-gassing' smell (camphor for celluloid), or a more rigid, less pliable feel compared to modern acetate. Applying controlled, gentle heat is often necessary for these frames, but too much heat can cause warping, bubbling, or permanent deformation.
Metal Alloys: Gold-Filled, Nickel, and Steel
Vintage metal frames present their own set of challenges. Gold-filled frames, common from the late 19th to mid-20th century, consist of a base metal (often brass or nickel) bonded with a thick layer of gold. While durable, the base metal can corrode, and the gold layer can wear thin, making it vulnerable to cracking during bending. Nickel frames, though strong, can suffer from metal fatigue and become brittle. Early steel frames can rust and seize, making screw removal a delicate operation.
The key here is understanding the metallurgy. Bending old metal can lead to irreversible stress fractures. Lubricants for seized screws and extremely gentle, even pressure are paramount. I've seen frames snap because someone tried to force a screw.
Natural Materials: Horn, Shell, and Wood
These are the rarest and often the most fragile. Horn and tortoiseshell (now illegal, but present in vintage pieces) are organic materials that can dry out and delaminate over time. Wood frames, while robust in some ways, can splinter or crack along the grain if not handled with extreme care. These materials require specialized knowledge, often involving rehydration or specific adhesives for minor repairs, and minimal manipulation during lens insertion.
Expert Insight: "The material dictates the method. Never assume uniform handling for all vintage frames. A thorough understanding of its composition is your first line of defense against irreversible damage."
Understanding these material properties is the bedrock of safe lens insertion. It informs every subsequent step, from pre-assessment to the final reassembly. Without this foundational knowledge, you're essentially working blind, risking the integrity of a cherished piece of history.

Pre-Assessment is Paramount: The Diagnostic Phase
Before you even think about touching a lens, a meticulous pre-assessment is non-negotiable. This diagnostic phase is where you identify potential weaknesses and plan your approach, minimizing surprises.
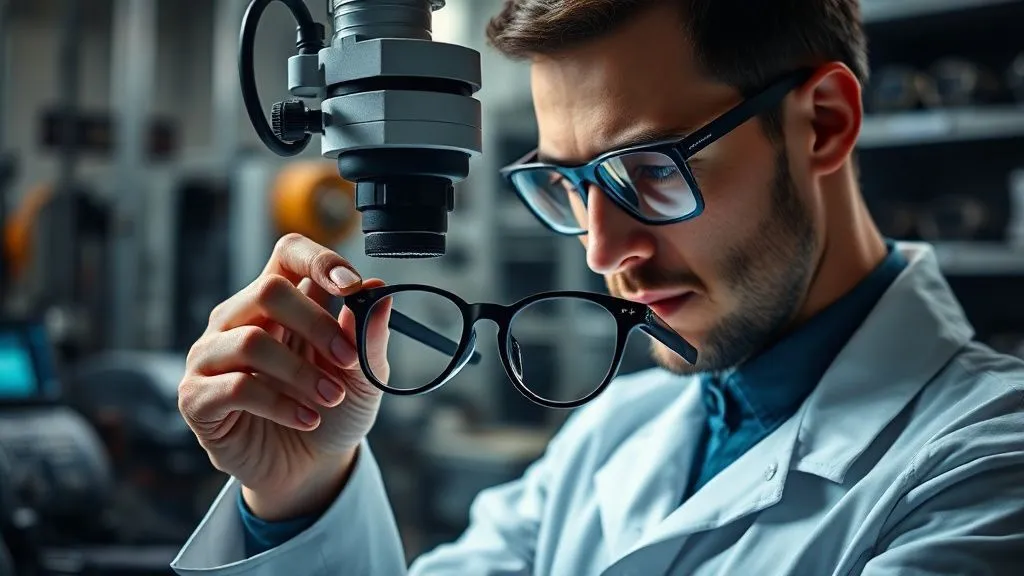
Visual Inspection for Stress Points and Micro-Fractures
Hold the frame up to a strong light source. Use a jeweler's loupe or a magnifying glass. Look for hairline cracks, especially around the bridge, hinge connections, and the eyewire (the part that holds the lens). Pay close attention to areas where the frame might have been previously repaired or where material thinning is evident. These are your red flags.
The 'Tap Test' and Flex Assessment
Gently tap different parts of the frame with a non-marring tool, listening for any hollow or unstable sounds. Carefully, and I mean *carefully*, apply very light pressure to different sections to gauge the material's flexibility. Does it feel overly stiff, brittle, or does it have a natural give? This helps you understand its current structural integrity. If it feels too rigid or makes a creaking sound, proceed with extreme caution, or better yet, consult a specialist.
Identifying Original Lens Type and Mounting Method
Observe how the original lenses are held. Are they screw-mounted (common in metal frames), pressure-fit (often in plastic), or does the frame have a groove for the lens edge? This dictates your removal strategy. Some frames, especially older ones, might have unusual mounting mechanisms that require specific tools or techniques.
- Initial Visual Scan: Check for obvious damage, repairs, or missing parts.
- Magnified Inspection: Use a loupe to find micro-fractures, stress lines, and material fatigue.
- Gentle Flex Test: Assess material pliability, especially around eyewires and hinges.
- Original Lens Analysis: Determine how the current lenses are seated and secured.
- Material Identification: Confirm the frame material to guide subsequent steps.
- Document Findings: Take photos and note any weaknesses for reference.
Essential Tools and Specialized Equipment for Delicate Work
Attempting this task with standard household tools is a recipe for disaster. Investing in the right specialized equipment is crucial for success and safety.
Precision Screwdrivers and Pliers
You'll need a set of optical screwdrivers, often smaller than jeweler's screwdrivers, with various head types (flathead, Philips). For pliers, opt for nylon-jawed or plastic-dipped varieties to prevent scratching delicate frame surfaces. Flat-nose pliers, round-nose pliers, and specialized frame-bending pliers are invaluable.
Lens Warmers and Heating Chambers (Controlled Heat Application)
For plastic frames, a professional lens warmer or heating chamber is essential. These devices provide uniform, controlled heat, which softens the plastic just enough to allow lens insertion or removal without excessive force. A hairdryer is *not* a substitute; it provides uneven, often too-intense heat that can warp or melt vintage plastics.
Specialized Lens Chucks and Holders
These tools securely hold the frame or lens during the process, preventing slippage and allowing you to apply pressure precisely. A sturdy, non-slip workbench mat is also a must.
Protective Wipes and Cleaning Solutions
Always use lint-free, optical-grade wipes and cleaning solutions designed for eyewear. Avoid harsh chemicals that could react with vintage materials or coatings. A soft brush can help remove dust and debris from crevices.

The Art of Lens Removal: Gentle Disassembly Techniques
Removing old lenses is often the most nerve-wracking part. This is where patience and a delicate touch pay off immensely. Remember, you're not just removing a lens; you're preserving a frame.
Heat Application: When and How Much
For plastic frames, controlled heat is your best friend. Place the frame in a professional lens warmer for a minute or two. The goal is to make the plastic pliable, not hot. Test the flexibility gently. For extremely brittle frames, multiple shorter heating cycles are safer than one long one. Metal frames generally don't require heat for lens removal, unless dealing with a seized screw, where a tiny amount of localized heat from a soldering iron tip (applied carefully to the screw head) might help expand the metal slightly, but this is an advanced technique.
The Gradual Release Method for Screw-In Frames
For frames where the eyewire is held together by a screw, loosen the screw *gradually*. Don't unscrew it all the way immediately. A common mistake is to try and pry the eyewire open prematurely. Instead, loosen the screw a quarter turn, gently flex the eyewire, then another quarter turn, and so on. This allows the frame to release its tension slowly, minimizing stress. Use the correct size screwdriver to avoid stripping the screw head.
Careful Popping for Pressure-Fit Designs
If the lenses are pressure-fit into a plastic frame, after warming, apply gentle, even pressure to the center of the lens from the front side, pushing towards the back. Use your thumbs or a soft, rubber-tipped tool. Avoid pushing directly on the edges, which can cause the frame to crack. The lens should 'pop' out with minimal resistance. If it doesn't, re-warm the frame.
Dealing with Rusted or Seized Components
Rusted screws or seized hinge pins are a true test of patience. Never force them. Apply a tiny drop of penetrating oil (like WD-40, but wipe off excess immediately) to the screw head and let it sit. Use a precision screwdriver that fits perfectly. Sometimes, a very gentle tap on the screwdriver handle with a small hammer can help break the corrosion bond. If a screw is stripped, you may need a screw extractor, but this is a high-risk operation on vintage frames and often best left to a professional optical lab. For more on metal corrosion and its impact on delicate mechanisms, consult resources like the NACE International website.
Selecting Modern Lenses: Beyond Just Prescription
Choosing the right modern lens for a vintage frame isn't just about getting the prescription correct. It's about ensuring compatibility, minimizing stress, and preserving the aesthetic integrity of the frame.
Material Considerations: High-Index, Polycarbonate, Trivex
Modern lenses come in various materials, each with pros and cons. For vintage frames, I almost exclusively recommend **high-index plastic** (1.60, 1.67, or 1.74) or **Trivex**. Polycarbonate, while impact-resistant, can be more challenging to edge precisely for certain vintage grooves and can sometimes cause chromatic aberration. High-index lenses are thinner and lighter, which is crucial for delicate vintage frames, reducing overall weight and strain on the frame's structure. Trivex offers excellent optical clarity and impact resistance with less internal stress than polycarbonate.
Edge Profile and Bevel Matching for Vintage Grooves
This is a critical, often overlooked detail. Modern lenses typically have a standard bevel. However, vintage frames might have shallower grooves, unique bevels, or even no bevel at all (for certain rimless or semi-rimless designs). Your optical lab needs to understand this. You might require a custom bevel, a 'mini-bevel,' or a specific edge polish to ensure the lens sits perfectly without forcing the frame or creating unsightly gaps. A poorly matched bevel is a primary cause of frame stress and potential breakage.
Coatings and Treatments: UV, Anti-Reflective, Scratch Resistance
Modern coatings are a must. UV protection is non-negotiable for eye health. Anti-reflective (AR) coatings improve clarity and reduce glare, enhancing both vision and the aesthetic of the eyewear. Scratch-resistant coatings prolong the life of the lenses. Discuss these options with your optical lab; they are standard for modern optics and won't negatively impact your vintage frame.
Expert Insight: "The lens choice isn't just about seeing clearly; it's about the symbiotic relationship between the lens and the frame. A heavy, ill-fitting lens will inevitably compromise a vintage frame's longevity and comfort."
Here's a quick comparison of lens materials commonly used for vintage frame updates:
| Material | Pros | Cons | Ideal For Vintage |
|---|---|---|---|
| High-Index Plastic (1.60-1.74) | Thin, light, good optics, works well with custom bevels | Can be more expensive, less impact-resistant than Trivex/Poly | Most vintage frames, especially delicate ones |
| Trivex | Excellent optics, very impact-resistant, lightweight | Slightly thicker than highest index, moderately expensive | Rimless/semi-rimless, active wearers, children |
| Polycarbonate | Very impact-resistant, thin, affordable | Can have lower optical clarity, harder to achieve precise bevels | Less delicate frames, budget-conscious |
Precision Lens Shaping and Edging: A Critical Step
Once you've selected your lenses, the next critical phase is shaping and edging them to fit the vintage frame's unique contours. This is where an expert optical lab truly shines.
Manual Edging vs. Automated Systems for Custom Fits
While modern labs predominantly use automated edging machines, for vintage frames, manual intervention and skilled technicians are often indispensable. Automated edgers are programmed for standard shapes and bevels. Vintage frames, however, can have irregular curves, non-standard sizes, or unique groove depths that require a technician to hand-finish the lens to ensure a perfect, stress-free fit. Always communicate the vintage nature of the frame to your lab and inquire about their experience with such custom work. The Vision Council provides resources on finding qualified optical professionals.
Bevel Placement and Groove Matching for Secure Fit
The bevel, or the angled edge of the lens, is what sits in the frame's groove. For vintage frames, the bevel's position and angle must be precisely matched to the frame's internal groove. If the bevel is too shallow, the lens might pop out. If it's too deep or positioned incorrectly, it will exert undue pressure on the frame, leading to cracks or warping. This often requires the lab to adjust the bevel's apex to sit perfectly within the unique vintage groove, ensuring even pressure distribution.
The Importance of Minimal Stress
The goal is a 'zero-stress' fit. This means the lens should slide into place with minimal effort and sit snugly without any outward or inward pressure on the frame. Any sign of the frame distorting or resisting the lens indicates a problem with the lens's shape or bevel. Forcing a lens into a vintage frame is a guarantee of future damage. The lens should look as if it was custom-made for that specific frame, because, in essence, it should be.
The Reassembly Process: Skill, Patience, and Expert Touch
This is the moment of truth. Reinserting the new lenses requires the same, if not more, care than removal.
Controlled Heat Re-application for Plastic Frames
Just as with removal, plastic frames will benefit from a gentle re-warming in a professional lens warmer. This softens the plastic, allowing the frame to expand slightly and accept the new lens with less resistance. Ensure the heat is even and not excessive. The frame should be pliable, not hot to the touch.
Gentle Pressure and Even Distribution for Metal Frames
For metal frames, carefully guide the lens into the eyewire. If it's a screw-in type, ensure the eyewire ends align perfectly before attempting to reinsert the screw. For pressure-fit metal frames, apply slow, even pressure around the entire circumference of the lens until it clicks into place. Never force it; if it's not going in, the lens might be too large or the frame might not be properly aligned.
Screw Tightening Protocol: Snug, Not Stripped
If your frame uses screws, use the correct size precision screwdriver. Turn the screw clockwise until it's snug, but do not overtighten. Overtightening can strip the screw threads (especially common in vintage metal frames), crack the plastic, or distort the frame. A good rule of thumb is to tighten until you feel initial resistance, then give it just a tiny additional quarter turn. For information on proper torque for delicate fasteners, industrial engineering standards can offer guidance, such as those found on ASME's website.
Post-Installation Flex and Stress Testing
Once the lenses are in, gently flex the frame to ensure it moves naturally and that the lenses remain secure. Check for any creaking sounds or visible distortion. If the frame feels overly stiff or strained, the lenses might be too large, or the bevel might be incorrect. It's better to address this now, even if it means re-edging the lenses, rather than risk future damage.
- Warm Plastic Frames: Use a professional warmer to make plastic pliable.
- Align Lenses: Carefully position the new lenses into the frame's eyewire.
- Apply Gentle Pressure: Slowly and evenly push lenses into place, avoiding excessive force.
- Reinsert Screws: If applicable, use the correct screwdriver and tighten screws to a 'snug' fit, not overtightened.
- Inspect for Stress: Visually check for any frame distortion or gaps around the lenses.
- Perform Flex Test: Gently manipulate the frame to ensure structural integrity and lens security.
Case Study: The Heritage Eyewear Revival Project
The Challenge: A client brought in a pair of exquisite, 1930s celluloid frames – an oval shape with a very shallow, unique lens groove. The celluloid was discolored and visibly brittle around the bridge. They desperately wanted to wear them with their modern high-prescription lenses.
My Approach: After a thorough pre-assessment revealed significant brittleness, I decided against any forceful manipulation. Instead, I worked closely with my optical lab. We opted for ultra-thin 1.74 high-index lenses. The lab's skilled technician manually edged the lenses, meticulously creating a custom 'mini-bevel' that was significantly shallower and precisely angled to match the frame's delicate groove. We performed multiple dry-fits, sanding down micro-millimeters until the lens slid in with zero resistance.
The Outcome: The lenses were inserted without any heat application to the frame, relying solely on the perfect custom bevel. The frame remained pristine, with no new cracks or stress marks. The client was thrilled, not only with their perfect vision but also with the knowledge that their cherished vintage frames were preserved and wearable for years to come. This project reinforced my belief that expertise in material science and meticulous custom work are irreplaceable when dealing with fragile vintage pieces.

Preventing Future Damage: Care and Maintenance for Your Revived Vintage Eyewear
Once your modern lenses are safely inserted, ongoing care is crucial to ensure your vintage frames last for many more years. They've been given a new lease on life, and proper maintenance will protect that investment.
Proper Cleaning Techniques
Always use a microfiber cloth and a gentle, eyewear-specific cleaning spray. Avoid paper towels, tissues, or harsh chemicals, which can scratch lenses and potentially damage vintage frame materials or their finishes. Clean your glasses daily to prevent build-up that might require more aggressive cleaning later.
Storage Best Practices
When not wearing them, store your vintage glasses in a sturdy, hard-shell case. This protects them from accidental drops, pressure, and dust. Avoid leaving them exposed on a desk or counter where they could be knocked off or scratched. For more comprehensive advice on eyewear care, resources like All About Vision's eyewear care guide are excellent.
Avoiding Extreme Temperatures
Vintage frames, especially those made of plastic or certain metals, are highly susceptible to damage from extreme temperatures. Never leave your glasses in a hot car, near a heater, or expose them to direct sunlight for prolonged periods. Heat can warp plastic frames, degrade coatings, and loosen screws. Cold can make brittle materials even more fragile, increasing the risk of cracking.
When to Call in the Professionals: Recognizing Your Limits
While this guide provides comprehensive insights, there are times when the best course of action is to seek professional help. Knowing your limits is a sign of true expertise and prevents irreversible damage.
Complex Repairs and Frame Reconstruction
If your vintage frame has significant damage – a broken bridge, a missing temple, or extensive cracking – it requires specialized repair techniques that go beyond lens insertion. These often involve welding, precise material matching, or even 3D printing of replacement parts. Attempting these yourself without the right equipment and experience is highly risky.
Rare or Irreplaceable Materials
For frames made from extremely rare materials, or those with significant historical or sentimental value, the risk of DIY attempts is simply too high. A professional vintage eyewear restorer will have the expertise and insurance to handle such precious items with the utmost care.
Specialized Tools Beyond DIY Scope
Some vintage frames have unique construction that requires highly specialized tools (e.g., specific rivet guns, unusual screw types, or custom jigs) that are not practical for the average enthusiast to acquire. If you find yourself in such a situation, it's a clear indicator to consult an expert. Organizations like the Opticians Association of America can help locate qualified professionals in your area.
Frequently Asked Questions (FAQ)
Q: Can I use my old lenses as a template for new ones? A: Yes, if the old lenses are still intact and fit the frame perfectly, they can be used as a template. However, always verify the fit with the frame itself, as the frame might have slightly changed shape over time. It's often better for the optical lab to trace the frame directly.
Q: How can I tell if my vintage frame is too fragile to work with? A: If the frame shows visible cracks, significant discoloration, excessive brittleness during a gentle flex test, or if it's made of very old celluloid that feels exceptionally rigid, it's likely too fragile for DIY. When in doubt, always consult an experienced optician or eyewear restorer.
Q: Is it always necessary to warm plastic vintage frames before lens insertion? A: While highly recommended for most plastic vintage frames to prevent stress, some extremely delicate or brittle frames might react negatively to heat. In such cases, a perfect, custom-edged lens that slides in with zero resistance without heat is the ideal solution. Always proceed with caution and test pliability first.
Q: What if the screws on my metal vintage frame are stripped or rusted? A: For stripped or rusted screws, avoid forcing them. Try a tiny drop of penetrating oil and let it sit. If that fails, it's best to take it to a professional optician or eyewear repair specialist. They have tools and techniques for extracting damaged screws without harming the frame, and can often replace them with matching vintage-style screws.
Q: Can I put prescription lenses into rimless vintage frames? A: Yes, but this requires even greater precision. Rimless frames rely on drill mounts or compression fittings, which demand highly impact-resistant lens materials like Trivex or Polycarbonate, and extremely precise drilling and edge finishing. This is almost always a job for a professional optical lab with experience in rimless mounting.
Key Takeaways and Final Thoughts
- Knowledge is Power: Understand your vintage frame's material and construction before attempting any work.
- Pre-Assessment is Crucial: Meticulously inspect for weaknesses and plan your approach.
- Invest in Proper Tools: Specialized optical tools are non-negotiable for delicate work.
- Patience and Precision: Gentle, controlled movements are key during removal and reassembly.
- Lens Choice Matters: Select modern lenses that are thin, light, and compatible with vintage grooves.
- Professional Edging: Always rely on a skilled optical lab for custom lens shaping and bevel matching.
- Ongoing Care: Protect your revived frames with proper cleaning, storage, and temperature avoidance.
- Know When to Seek Help: Don't hesitate to consult professionals for complex repairs or irreplaceable pieces.
Bringing modern vision to a cherished piece of history like a vintage frame is a rewarding endeavor. It requires a blend of respect for the past, an understanding of modern optics, and a steady hand. By following these expert strategies and embracing a meticulous approach, you can confidently navigate the process of how to safely insert modern lenses into fragile vintage frames, ensuring these timeless pieces continue to tell their stories for generations to come. Your beautiful vintage frames deserve nothing less than the utmost care and expertise.
Recommended Reading
- Sneaker Drop Failure? 7 Expert Steps to Rebound & Score Next Time
- 7 Smart Casual Outfits: Crafting Impactful Looks for Male Professionals
- 7 Steps: How to Implement a Transparent Supply Chain for Ethical Jewelry
- 7 Proven Strategies: Turn Social Media Fashion Followers into Clients
- 7 Pillars: Scaling Streetwear Without Losing Its Authentic Soul


Your email address will not be published. Required fields are marked *