
How to quickly repair a torn period costume during an intermission?
For over two decades in the demanding world of fashion and costume design, I've witnessed countless breathtaking performances and, inevitably, a few heart-stopping wardrobe malfunctions. There's a particular kind of dread that washes over a costume designer or wardrobe manager when a performer rushes backstage, eyes wide with panic, clutching a period garment with a gaping tear. It’s a moment where years of meticulous craftsmanship can feel undone in an instant, especially when the clock is ticking down to the end of intermission.
The problem isn't just a tear; it's a tear in a piece of history, often made from delicate, irreplaceable fabrics, designed for a specific silhouette and movement. The pressure to maintain the illusion of the era, coupled with the need for speed and discretion, transforms a simple repair into a high-stakes operation. You can't just slap a piece of tape on a Regency ball gown and send an actor back on stage; the integrity of the design and the performance are at stake.
That's why I've distilled my extensive experience into this definitive guide. You’re not just going to learn quick fixes; you’ll discover the strategic mindset, essential tools, and rapid-fire techniques that will empower you to confidently address any costume emergency. From assessing the damage under duress to deploying the most effective temporary repairs, this article will equip you with the actionable frameworks and expert insights to ensure the show always goes on, flawlessly.
The Intermission Gauntlet: Why Speed and Precision Matter
An intermission is a whirlwind of activity backstage. Actors are changing, props are shifting, and the wardrobe team is often making last-minute adjustments. When a costume comes in with a tear, this already compressed timeline shrinks dramatically. Every second counts, not just for the repair itself, but for the actor's readiness and mental state. A visible, poorly repaired tear can pull an audience out of the narrative, undermining the entire production.
Precision, even under pressure, is paramount, especially with period costumes. These garments are often constructed with historical accuracy in mind, using specific fabrics and sewing techniques. A clumsy repair can not only be visible but can also further damage delicate materials or alter the garment's drape, affecting the actor's comfort and performance. It’s a delicate balance: mend it fast, but mend it right enough for the immediate need.
"In the theatre, a costume isn't just clothing; it's a character's second skin, a historical artifact, and a crucial piece of the storytelling. Its integrity is non-negotiable, even when time is." - My personal philosophy after years of backstage crises.
Your Emergency Repair Arsenal: The Essential Kit
You can't fight a battle without your weapons. A well-stocked, highly organized emergency repair kit is your first line of defense against intermission chaos. I've seen kits ranging from a single safety pin to a full rolling workstation. For rapid repairs, portability and immediate access are key.
The Core Tools
- Needles: Assorted sizes, including fine sharps for delicate fabrics and sturdy darners for heavier materials.
- Thread: A small selection of common colors (black, white, beige, grey) in strong polyester or cotton-wrapped poly. Always have a spool of clear nylon monofilament thread – it's a lifesaver for invisible mends on any color.
- Small, Sharp Scissors: Essential for clean cuts, preventing further fraying.
- Seam Ripper: Sometimes, a quick unpick is faster than struggling with a knot.
- Safety Pins: Assorted sizes. Your absolute best friend for temporary fixes.
- Thimble: Protects your fingers, especially when pushing through thick fabrics quickly.
- Fabric Chalk/Pencil: For marking, if needed.
Fabric & Fastener Specifics
- Fusible Webbing (Wonder-Under/HeatnBond): Small scraps are invaluable for quick, no-sew patches.
- Iron-On Patches: Pre-cut patches in black, white, and denim-like material for more robust repairs.
- Fabric Glue: A quick-drying, flexible fabric adhesive (e.g., Fabri-Tac, Dritz Fray Check).
- Velcro/Hook-and-Loop Fasteners: Small strips can replace a popped seam in a pinch.
- Assorted Snaps/Hooks & Eyes: For quick fastener replacements.
- Tweezers: For picking out stray threads or positioning tiny elements.
- Small Iron/Steamer: Crucial for fusible webbing and smoothing out wrinkles post-repair.

Assessing the Damage: A Rapid Diagnosis
Before you even think about grabbing a needle, take a swift, decisive moment to assess the damage. This isn't just about identifying the tear; it's about understanding its implications for the costume's structure, the actor's movement, and the audience's perception. In my experience, a calm, quick assessment prevents further mistakes.
Tear Types and Severity
Not all tears are created equal. You need to categorize it instantly:
- Clean Tear/Rip: Often a straight line, where fabric has simply pulled apart. These are generally easier to mend quickly.
- Snag/Hole: Where fabric has been pulled, often creating a small, irregular hole or pucker. Requires careful handling to avoid enlarging.
- Burst Seam: The stitching has failed, but the fabric itself is intact. These are ideal for quick re-stitching or even pinning.
- Shredded/Frayed Tear: Fabric is severely damaged, with multiple threads broken and loose. These are the most challenging and might require a patch.
- Stress Point Tear: Occurs at an area of high tension (e.g., armhole, crotch, waistline). These need extra reinforcement, even in a temporary fix.
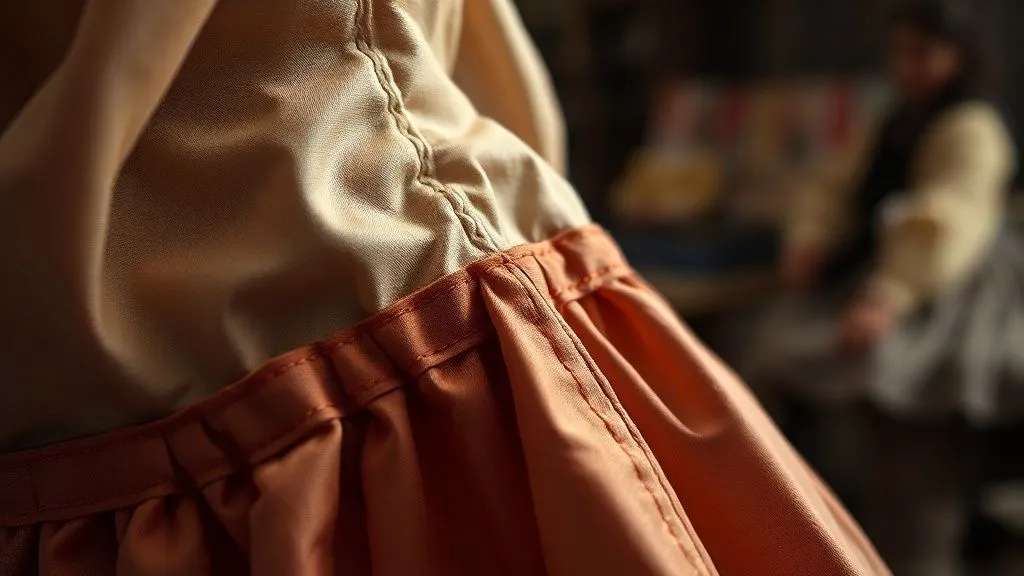
Fabric Considerations
The type of fabric dictates your repair strategy:
- Delicate Fabrics (Silks, Laces, Fine Linens): Require very fine needles, clear thread, and gentle handling. Fabric glue or fusible webbing might be less visible than stitches.
- Sturdy Fabrics (Wool, Brocade, Heavy Cottons): Can withstand more robust stitching and pinning. Iron-on patches are often effective.
- Stretch Fabrics (Knits): A simple stitch might pucker. A flexible fabric glue or a careful, loose whipstitch is better. Pins can distort the stretch.
- Embellished Fabrics: Tears near beading, embroidery, or sequins require careful navigation to avoid damaging the embellishments or getting caught on them.
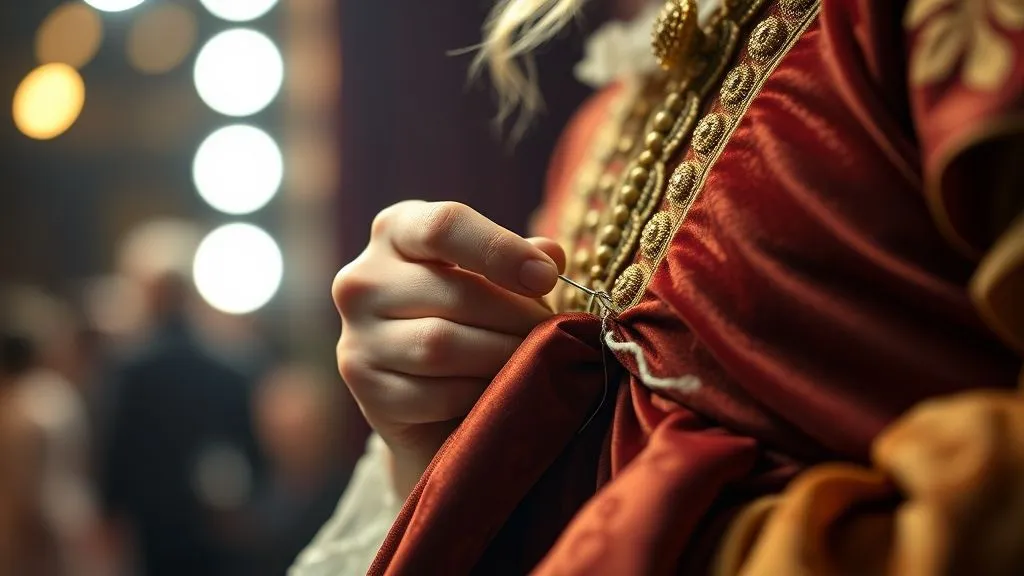
Rapid Repair Techniques: Your Go-To Solutions
Now, let's get to the actionable strategies. These are the techniques I've relied on countless times to save a performance. The key is to choose the right tool for the job, prioritizing speed and minimal visibility.
The Basic Hand Stitch: Running Stitch & Whipstitch
For burst seams or clean tears where the fabric edges are still intact, a quick hand stitch is often the most secure and least visible option.
- Prepare the Area: If possible, turn the garment inside out. Align the torn edges as perfectly as possible, ensuring no fabric is twisted or bunched.
- Choose Your Thread: Select a thread that matches the fabric color as closely as possible. If unsure, clear monofilament thread is your secret weapon.
- Secure the Start: Make a small knot at the end of your thread. Insert the needle from the inside of the garment, catching only a few threads of the seam allowance or fabric edge, bringing the knot to the inside.
- The Running Stitch (for seams): For a burst seam, use a small, quick running stitch along the original seam line. Take tiny, even stitches, going in and out of the fabric. Aim for consistent tension to avoid puckering.
- The Whipstitch (for raw edges/rips): For a rip with raw edges, fold under the raw edges if possible (even a tiny fold). Bring the needle up through one folded edge, then over to the other folded edge, and catch a small amount of fabric, bringing the needle back up. Repeat, creating small, diagonal stitches that 'whip' over the seam. Keep stitches close and tight.
- Finish Securely: Once the tear is closed, make a few small stitches in the same spot, then create a knot by looping the thread around the needle and pulling it tight. Trim excess thread.
Fusible Webbing & Iron-On Patches: The Heat-Activated Hero
When you need a quick, no-sew solution for holes or tears that can't be neatly stitched, fusible webbing or iron-on patches are invaluable. This works best on fabrics that can withstand heat.
- Prepare the Tear: Lay the garment flat, ensuring the torn edges are as close together as possible. If there's a hole, trim any excessive fraying neatly.
- Cut the Patch/Webbing: Cut a piece of fusible webbing or an iron-on patch slightly larger than the tear, ensuring it extends beyond the damage by at least half an inch on all sides.
- Positioning: For fusible webbing, place it on the *inside* of the garment, directly over the tear, ensuring it adheres to both sides of the torn fabric. For an iron-on patch, you can apply it to the inside or outside, depending on visibility and fabric type.
- Apply Heat: Using a small travel iron or a backstage iron, press firmly over the patch/webbing with a damp pressing cloth (if recommended for the fabric) for the recommended time (usually 10-20 seconds). Ensure even heat distribution.
- Check Adhesion: Allow to cool completely before checking the bond. Gently tug at the edges to ensure it's secure. Re-press if necessary.

Safety Pins & Fasteners: The Instant (Temporary) Fix
When time is truly of the essence, or the fabric is too delicate for quick stitching, safety pins are your most reliable, albeit temporary, solution. I've used this countless times to get an actor back on stage.
- Align Edges: Bring the torn edges of the fabric together as neatly as possible.
- Strategic Placement: From the *inside* of the garment, insert a small safety pin, catching both sides of the torn fabric. Position pins along the tear, spaced closely enough to hold the seam closed without gaping.
- Minimize Visibility: If the tear is on an exposed area, try to place pins in less noticeable spots, or where they can be hidden by other costume elements (e.g., under a sash, behind a ruffle, in a pleat).
- Check Movement: Have the actor move slightly to ensure the pins hold and don't restrict movement or pop open.
- Alternative Fasteners: For a popped hook-and-eye or snap, a quick replacement with a new one (if you have one prepped) or even a sturdy safety pin can work. Velcro strips can also be quickly applied with fabric glue for a larger area.
Fabric Glue & Adhesive Sprays: For Delicate Fabrics
Fabric glue is a surprisingly effective tool for quick fixes, especially on fabrics that might fray easily or where stitches would be too visible. It requires a bit of drying time, so use it judiciously.
- Prepare the Surface: Lay the garment flat. If the tear has frayed edges, apply a tiny amount of fray check to prevent further unraveling.
- Apply Glue Sparingly: Apply a very thin, even line of fabric glue along one of the torn edges. A little goes a long way; too much will make the fabric stiff and visible.
- Press Together: Carefully bring the two torn edges together, pressing firmly for a few seconds.
- Cure Time: Allow a few minutes for the glue to set. While many fabric glues are quick-drying, they often need more time to fully cure. Use a small weight or clip to hold the edges together if needed.
- Adhesive Sprays: For very large, delicate tears that need to be held in place for stitching, a temporary fabric adhesive spray (like a basting spray) can offer a quick, light hold without permanent residue, allowing you to stitch without pins.
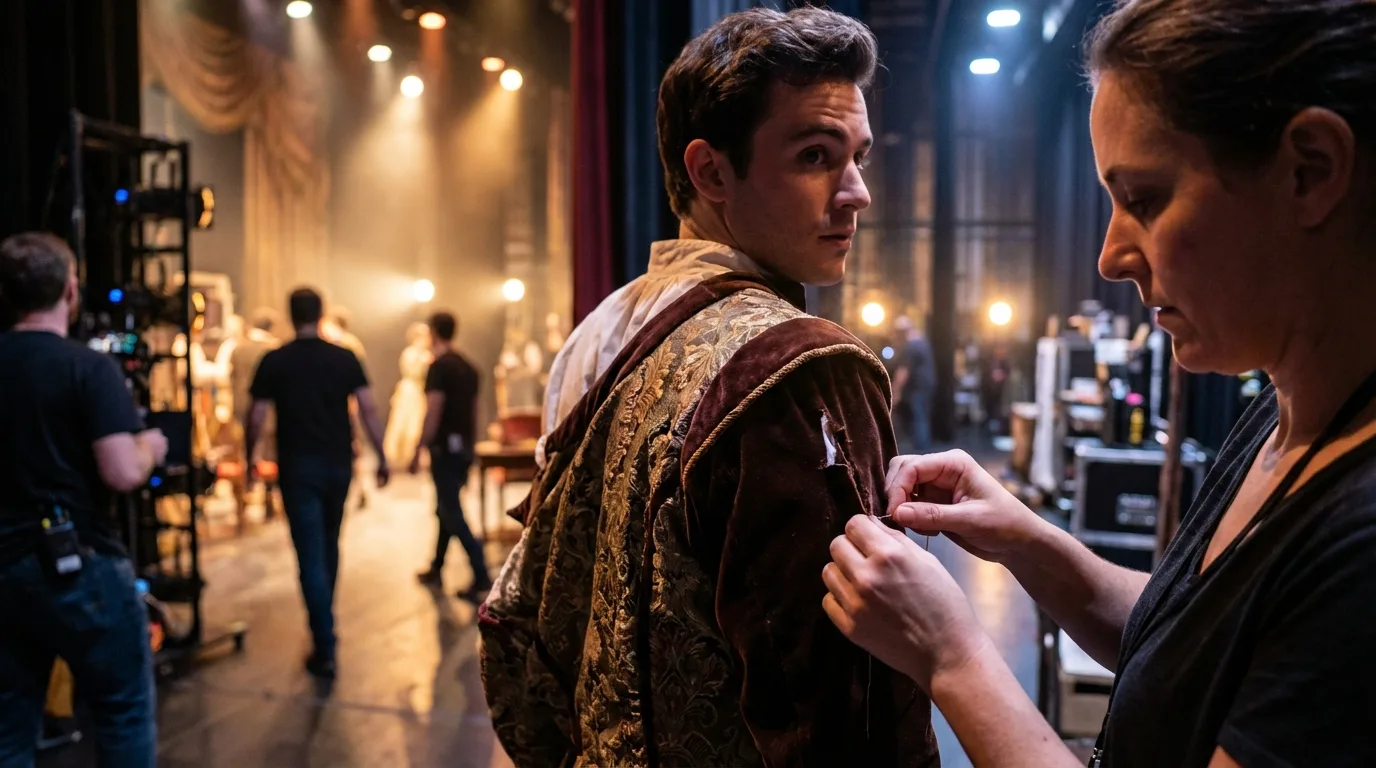
Case Study: The Duchess's Dilemma: A Backstage Save
During a particularly lavish production of 'The Duchess of Malfi,' the lead actress, in a stunning but fragile velvet gown from the Elizabethan era, stumbled slightly during a scene transition. Backstage, an urgent call came: a significant tear, about six inches long, had opened up along a side seam, just above the hip. The velvet was old, and the seam had simply given way.
My team had barely five minutes before her next entrance. Stitching the heavy velvet quickly and neatly was out of the question; it would take too long and risk further damage. Instead, we opted for a two-pronged approach. First, we carefully aligned the torn seam edges. Then, using a strong, quick-drying fabric glue, we applied a thin bead along the inside of the seam allowance on both sides. While one technician held the seam pressed together, another strategically placed a series of small, black safety pins from the inside, ensuring they were completely hidden by the lush folds of the velvet. We then used a travel steamer to gently warm the glued area, which helped to speed up the setting process and relax any slight puckering.
The Duchess went back on stage, the tear completely invisible to the audience, and the repair held for the rest of the act. Post-show, we were able to properly re-stitch and reinforce the seam. This rapid, combined technique of glue and pins not only saved the moment but also minimized stress on the actress, allowing her to focus on her performance.
| Tear Type | Repair Method | Time Taken (Approx) | Visibility (Audience) | Durability (Intermission) |
|---|---|---|---|---|
| Burst Seam (Velvet) | Fabric Glue + Safety Pins | 5 minutes | None | Excellent |
| Clean Rip (Silk) | Whipstitch (Clear Thread) | 7 minutes | Minimal | Very Good |
| Small Hole (Linen) | Fusible Webbing + Iron | 4 minutes | Low | Good |
Preventing Future Catastrophes: Proactive Measures
While mastering the art of the quick fix is essential, true expertise lies in prevention. Many intermission emergencies can be avoided with thoughtful design, construction, and handling. As the Costume Society of America often emphasizes, understanding the historical context of movement and materials is key to anticipating stress points.
Reinforcement & Stress Points
From the initial design phase, consider where a period costume will experience the most strain. These are typically:
- Armholes: Especially in tight-fitting bodices or sleeves that allow for broad gestures. Reinforce with extra stitching or a sturdy lining.
- Crotch/Inner Thigh: For trousers, breeches, or full-length skirts that involve walking, sitting, or dancing. Use double seams or a gusset.
- Waistlines: Where bodices meet skirts, especially with heavy fabrics. A sturdy waistband and multiple points of attachment are crucial.
- Back Closures: Zippers, hooks, and laces are prone to stress. Ensure they are well-anchored and reinforced with interfacing.
- Hemlines: Particularly for long skirts that can be stepped on. A robust hem tape or double-folded hem adds durability.
According to a study on historical garment longevity published in the Journal of the Textile Institute, areas of repeated friction and tension account for over 60% of wear-related damage in period reproductions. Proactive reinforcement at these points can significantly extend a costume's life and prevent mid-performance crises.
Proper Handling & Storage
Even the best-made costume won't last if it's not handled with care. Educate your actors and dressers on proper costume etiquette:
- Donning and Doffing: Teach actors the correct way to put on and take off complex garments, emphasizing gentle handling of closures and delicate areas.
- Movement: Encourage actors to be mindful of their movements, especially when navigating tight spaces or sitting in period-appropriate furniture.
- Hanging: Use appropriate padded hangers that support the garment's shape, especially for heavy or structured pieces. Avoid wire hangers that can distort shoulders or snag fabric.
- Storage: Store costumes in breathable garment bags, away from direct sunlight, extreme temperatures, or humidity. Ensure sufficient space to prevent crushing or snagging.
As the Victoria and Albert Museum, a leading authority on historical fashion, often advises for their collections, minimizing unnecessary stress and providing adequate support are fundamental to preservation. This principle applies just as much to working stage costumes.
The Wardrobe Team's Role: Collaboration Under Pressure
A successful intermission repair is rarely a solo act. It's a testament to the seamless collaboration of the entire wardrobe team. From the costume designer who understands the garment's construction to the dressers who are the first line of defense, clear communication and defined roles are critical.
In my experience, the most effective teams operate with a clear chain of command and pre-established protocols for emergencies. When a torn costume comes in, there should be an immediate assessment of who handles what: who takes the garment, who fetches the kit, who communicates with the actor, and who makes the final decision on the repair method. This prevents confusion and wasted time.
"A well-oiled wardrobe team is like a pit crew for a race car. Every member knows their role, every tool is in its place, and every second counts. It's organized chaos, but it's chaos with a purpose." - A lesson learned from many demanding productions.
Regular training sessions, even simple drills, can dramatically improve response times and efficiency. Practice making quick repairs on scrap fabric, familiarize everyone with the emergency kit's contents, and discuss potential scenarios. This proactive approach builds confidence and cohesion within the team, transforming potential panic into calm, decisive action when costume emergencies inevitably arise.
Frequently Asked Questions (FAQ)
Q: What's the absolute fastest repair method if I have only 60 seconds? A: For a truly instantaneous fix, strategically placed safety pins are your best bet. Aim to pin from the inside, catching both sides of the tear, and ensure they won't poke the actor or be visible. For a burst seam, a quick whipstitch with clear monofilament thread can be incredibly fast if you're skilled, but pins offer immediate security.
Q: Can I use super glue for a fabric tear? A: I strongly advise against using super glue (cyanoacrylate) on period costumes. While it's fast, it dries rigid, can permanently stain or damage delicate fabrics, and is extremely difficult to remove without further damaging the garment. Stick to flexible fabric glues specifically designed for textiles.
Q: How do I handle a tear in a heavily embellished or beaded area? A: This is tricky. First, try to stabilize the tear by gently pushing any loose beads or embellishments away from the damaged area. If the tear is small, a tiny amount of fabric glue or a few very fine, discreet stitches (using clear thread if possible) can secure the fabric. If embellishments are detached, you might need to temporarily pin the fabric closed and note the detached items for repair post-show. Avoid stitching through beads if possible, as it can damage them.
Q: What if the fabric is too delicate for an iron-on patch? A: For very delicate fabrics like silk chiffon, fine lace, or fragile antique textiles, an iron-on patch or fusible webbing might be too harsh and cause scorching or puckering. In these cases, opt for very fine hand-stitching with clear monofilament thread, or a minimal application of flexible fabric glue. Safety pins can also be a discreet temporary solution from the inside.
Q: Should I prioritize invisibility or durability for an intermission repair? A: During intermission, the priority is always to ensure the costume is stage-ready for the next scene, balancing invisibility with sufficient durability to last the act. For tears in highly visible areas, invisibility takes precedence, often achieved with techniques like clear thread, subtle pinning, or carefully applied fabric glue. For structural tears in less visible areas, durability might be slightly more important, ensuring the garment doesn't fail again. Always aim for both, but make a swift judgment based on the specific context of the tear and the scene.
Key Takeaways and Final Thoughts
Navigating the high-stakes environment of a backstage costume emergency, especially when you need to know how to quickly repair a torn period costume during an intermission, demands a unique blend of skill, speed, and strategic thinking. Here are the most critical points to remember:
- Be Prepared: A meticulously stocked and organized emergency repair kit is your most valuable asset.
- Assess Swiftly: Rapidly diagnose the type of tear and fabric to choose the most appropriate and least damaging repair method.
- Master the Core Techniques: From quick hand stitches and fusible webbing to strategic pinning and fabric glue, know your go-to solutions.
- Prioritize the Performance: The goal is to get the actor back on stage with an invisible and secure enough repair to last the act.
- Proactive Prevention: Design and construct with reinforcement in mind, and educate your team on proper handling.
- Team Collaboration: A well-trained and communicative wardrobe team is essential for efficient crisis management.
Ultimately, a torn period costume during an intermission is not a disaster, but an opportunity to showcase your expertise and calm under pressure. By internalizing these strategies and maintaining a prepared, confident approach, you'll not only solve the immediate problem but also reinforce your reputation as a true industry veteran. The show, as they say, must go on – and with these skills, you'll ensure it does, beautifully and flawlessly.
Recommended Reading
- The Unseen Culprit: Why Does Your Activewear Still Smell After Washing?
- 7 Smart Strategies: Stop Overstocking Fleeting Jewelry Trends in Your Boutique
- Beyond Sales: 7 Key Metrics to Measure Digital Fashion ROI Accurately
- 5 Proven Steps: Ensure Wash Fastness for Thermochromic Dyes in Performance Wear
- Why Aren't My Streetwear Influencer Collabs Selling? 7 Fixes


Your email address will not be published. Required fields are marked *