
How to quickly repair a damaged costume backstage during a show?
For over two decades in the demanding world of costume design for live theatre, dance, and film, I've witnessed the full spectrum of backstage drama. From a leading lady's gown tearing at the zipper just before her entrance to a dancer's elaborate headpiece collapsing mid-choreography, the unexpected is always lurking. These aren't just minor inconveniences; they are show-stopping potential catastrophes that can derail months of artistic endeavor and disappoint an eager audience.
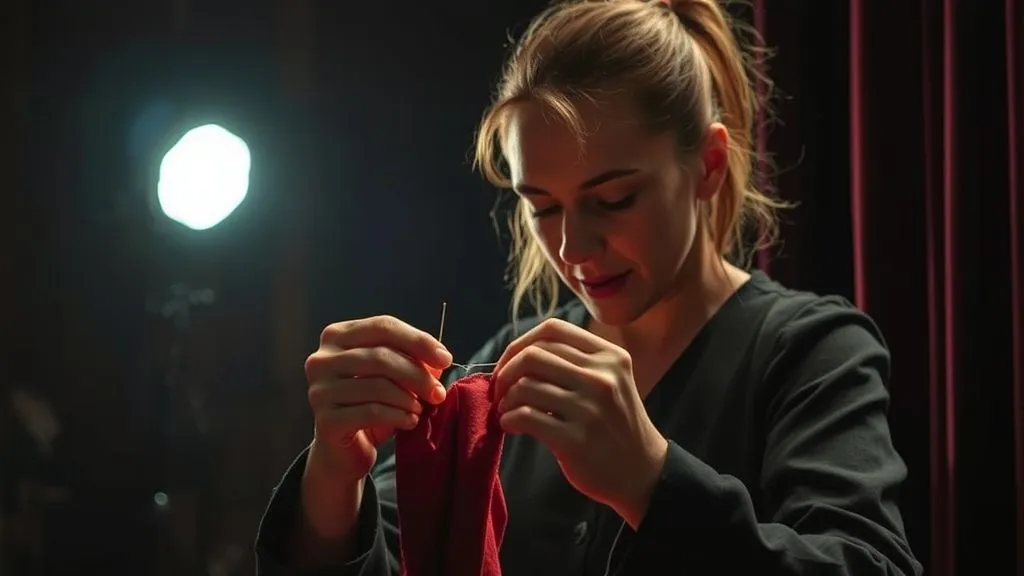
The unique pressure of a live performance means there’s no 'pause' button. Every second counts, and the ability to execute a swift, effective, and often invisible repair is a highly specialized skill. It's not just about knowing how to sew; it's about anticipating failure, prioritizing fixes, and maintaining a calm demeanor under intense pressure.
In this definitive guide, I will share the invaluable frameworks, practical techniques, and expert insights I've gathered from countless moments of backstage tension. You'll learn not just what to do, but how to think like a seasoned professional, ensuring that no costume malfunction ever truly stops the show. We'll cover everything from the essential emergency kit to advanced non-sewing hacks, guaranteeing you're equipped to handle any crisis.
The Essential Backstage Emergency Kit: Your First Line of Defense
Before any curtain rises, your emergency kit is your most crucial ally. I've seen wardrobe teams scramble, desperately searching for a safety pin, and it's a rookie mistake. A well-stocked, meticulously organized kit is the cornerstone of rapid response. Think of it as your portable emergency room for textiles.
Tool Checklist & Why Each Matters
- Sharp Scissors: Not just any scissors. Invest in a small, sharp pair dedicated to your kit. For quick snips, not elaborate cutting.
- Assorted Hand Needles: A variety of sizes for different fabrics and repair types. Include heavy-duty for canvas and fine for delicate silks.
- Strong Thread (Black, White, Neutral): Essential colors. Opt for upholstery thread for strength in high-stress areas.
- Safety Pins (Assorted Sizes): The ultimate temporary fix. They can hold anything, anywhere, for a crucial few minutes.
- Fabric Glue/Adhesive: A quick-drying, flexible fabric adhesive for non-sewing emergencies or securing small embellishments.
- Seam Ripper: For precise, controlled unpicking of a failed seam, rather than tearing.
- Thimble: Protects your fingers during quick, forceful stitching.
- Small Pliers/Tweezers: For manipulating small items, pulling needles through thick fabric, or extracting broken zipper teeth.
- Gaff Tape/Fashion Tape: Gaff tape for robust, temporary holding, fashion tape for delicate skin contact or securing hemlines.
- Lint Roller: For quick clean-ups, as a pristine costume can make minor repairs less noticeable.
- Stain Wipes: Accidents happen. A quick wipe can prevent a small spill from becoming a major distraction.
- Extra Fasteners: Snaps, hooks & eyes, small buttons. Having a few spares can save a costume entirely.
Keeping this kit neatly organized in a tackle box or a multi-compartment bag means you're not fumbling. Every item should have its place, allowing for instinctual grabs in the dark.

| Item | Primary Use | Why it's crucial |
|---|---|---|
| Assorted Needles | Stitching various fabrics | Versatility for delicate silks to heavy canvas. |
| Strong Thread (B/W/N) | Reinforcing seams, reattaching | Durability in high-stress areas. |
| Safety Pins (Assorted) | Temporary closures, quick fixes | Instant hold for critical moments. |
| Fabric Glue | Non-sewing embellishment repair | Fast-drying, flexible, minimal visibility. |
| Gaff/Fashion Tape | Securing hems, quick holds | Strong, temporary adhesion without residue. |
Assessing the Damage: Prioritizing Rapid Response
When a performer rushes backstage with a damaged costume, the first instinct might be panic. Resist it. As your mentor, I can tell you that the most critical skill is a calm, immediate assessment. You have mere seconds to understand the problem and formulate a plan.
"In the heat of a live show, your assessment time is measured in breaths, not minutes. Identify the critical failure point, consider its visibility, and determine the minimum viable repair to get the performer back on stage."
Ask yourself:
- Where is the damage? Is it a visible area (front of bodice, hemline) or a less visible one (underarm, back seam)?
- What is the function of the damaged area? Is it a structural seam crucial for movement, or a decorative element?
- How much time do I have? Is this an immediate entrance or do they have a scene change?
- What's the best temporary fix? Sewing is ideal, but tape or pins might be faster and sufficient.
Prioritize repairs that prevent further damage or expose the performer. A torn crotch seam takes precedence over a loose button on a sleeve, for instance.
Lightning-Fast Fixes for Common Catastrophes
Knowing common failure points and having a go-to strategy for each is what separates a prepared wardrobe assistant from a frantic one. Here are the most frequent issues and their rapid solutions:
Ripped Seams and Tears
This is arguably the most common and often the most visible emergency. A split seam can expose undergarments or hinder movement.
- Assess the Tear: Is it a clean tear along a seam or a fabric shred? A seam tear is easier to mend.
- Gather Edges: If it's a seam, align the raw edges as closely as possible. If it's a fabric tear, try to bring the torn edges together.
- The Running Stitch (Temporary): Using a strong, matching thread, perform a quick running stitch. Don't worry about perfection; focus on security. Start a few stitches before the tear and end a few stitches after.
- The Whipstitch (Stronger Temporary): For a more secure but still fast repair, use a whipstitch. Overcast the raw edges together, ensuring good tension. This is excellent for preventing further fraying.
- Reinforce with Tape (Optional): If the fabric is very fragile or time is extremely limited, a strip of gaff tape on the inside of the garment can provide extra stability *after* a few quick stitches, or even *instead* of stitches if it's completely out of sight and has no stress.

Broken Zippers & Fasteners
A broken zipper can be a showstopper. The key here is often a temporary closure.
- Zipper Pull Failure: If the pull tab has broken off but the zipper teeth are intact, use a safety pin or a paperclip through the slider to act as a temporary pull.
- Separated Zipper Teeth: If the teeth have separated at the bottom, it's a tougher fix. Your best bet is to use safety pins to close the opening. Pin across the opening, not along it, to distribute tension.
- Stuck Zipper: Often, a stuck zipper can be freed with a bit of graphite (from a pencil) or a tiny drop of oil, but backstage, time is of the essence. If it's truly stuck, bypass it with pins or hooks and eyes.
- Missing Hooks & Eyes/Snaps: Quickly hand-sew a new set on, or use a safety pin to bridge the gap. For snaps, a strong fabric glue can sometimes hold a missing half if the material allows.
Loose Embellishments & Adornments
A loose bead or sequin might seem minor, but a falling embellishment can be distracting or even a tripping hazard.
- Assess the Attachment: Is it sewn, glued, or clipped?
- The Quick Knot: If a bead or sequin is dangling by a thread, reinforce the existing thread with a quick knot, or if possible, run a new thread through and tie it off securely.
- Fabric Glue: For flat sequins, rhinestones, or small appliques, a dot of quick-drying fabric glue is your best friend. Press firmly for a few seconds.
- Safety Pin (Hidden): For larger, heavier embellishments (e.g., a brooch, a piece of trim), a small, strategically placed safety pin from the underside can hold it in place until after the show.
The Art of Disguise: Camouflage & Temporary Solutions
Sometimes, a perfect repair isn't possible, or the damage is in a highly visible area where a crude stitch would look worse. This is where the art of theatrical illusion comes into play. You’re not just repairing; you’re disguising.
"A truly masterful backstage repair isn't always about fixing; it's about making the audience believe there was never a problem at all. Sometimes, camouflage is your most effective tool."
Consider these tactics:
- Strategic Pinning: Instead of trying to close a large tear, can you fold the fabric in a way that hides the damage and then pin the fold securely from the inside?
- Layering: Is there another garment or accessory that can be added or adjusted to cover the damaged area? A scarf, a shawl, a jacket, or even a strategically placed prop.
- Hair & Makeup: For damage near the neckline or face, can the performer's hair be styled to cover it? Or can makeup be used to blend a minor tear on a sheer fabric?
- Lighting Adjustment: While not directly your job, a quick word with the lighting designer might mean a dark spot is focused on the damaged area during a crucial moment, rendering it invisible.
- Temporary Patches: For large holes, a piece of matching fabric (even an offcut from the costume itself) can be quickly glued or pinned over the hole from the inside.
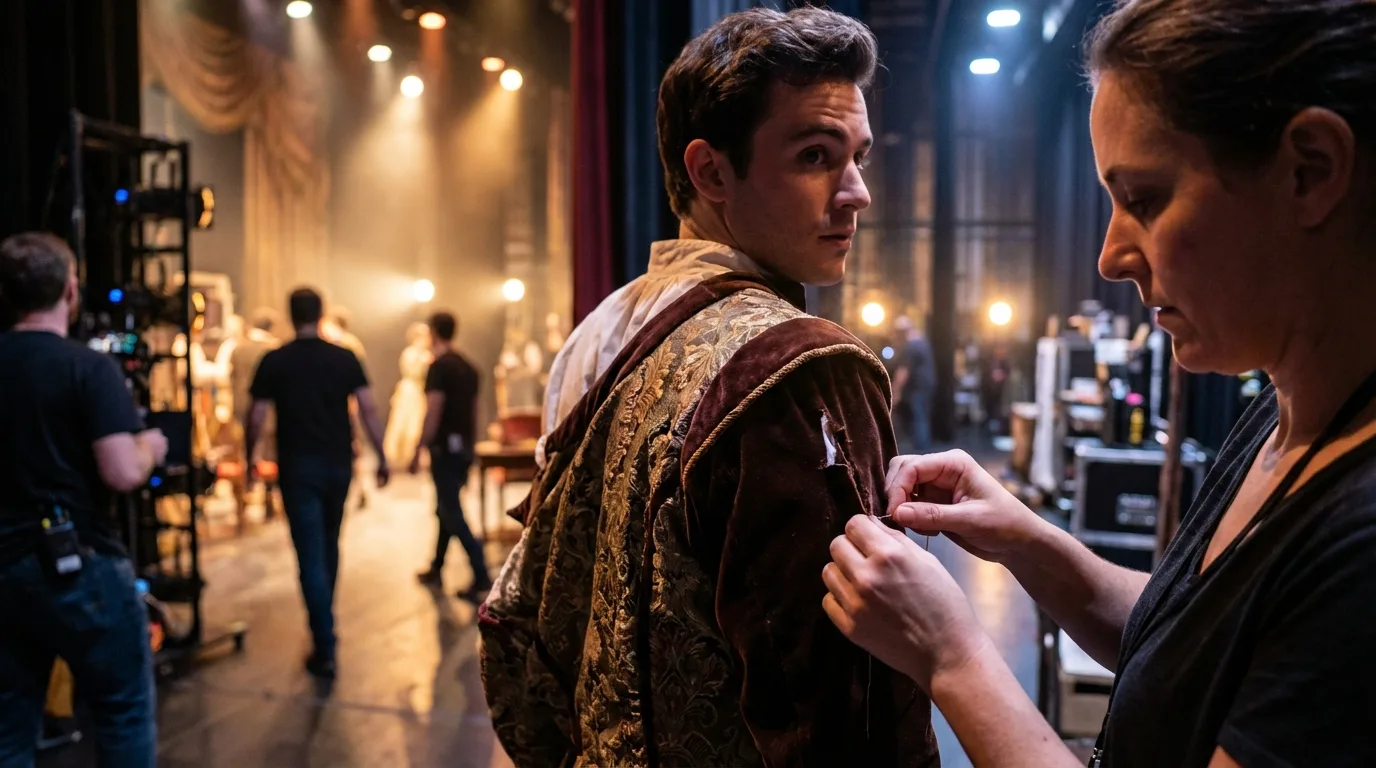
Case Study: The Ballerina's Bodice Bust
Case Study: How a Quick-Thinking Wardrobe Team Saved 'Swan Lake'
During the opening night of a major ballet company's 'Swan Lake,' a critical moment arrived: the lead ballerina's bodice, a delicate structure of boning and silk, unexpectedly gave way at the side seam during a particularly strenuous lift in Act II. The tear, about four inches long, exposed her undergarments and threatened the entire illusion.
The dancer rushed backstage during a brief blackout. The lead wardrobe technician, Sarah, immediately assessed the damage. The fabric was silk, too delicate for a rough, fast stitch without causing more damage. She had less than 45 seconds.
Sarah's plan was swift: she grabbed a roll of heavy-duty black gaff tape (the bodice was black) and a handful of small black safety pins. Instead of attempting to sew, she carefully overlapped the torn edges of the silk on the inside of the bodice, creating a stable, flat surface. She then applied a strip of gaff tape firmly over the overlapped edges, ensuring it wouldn't peel. For extra security, knowing the stress of the next lift, she strategically placed three small safety pins along the outside of the tear, pushing them through the tape and the underlying fabric, making sure the pinheads were barely visible against the black silk.
The ballerina was back on stage for her next entrance, the repair invisible from the audience, and the bodice held for the remainder of the performance. This resulted in a seamless continuation of the show, proving that sometimes, the fastest and most secure repair isn't always a needle and thread.
Beyond the Stitch: Non-Sewing Emergency Hacks
While sewing is the gold standard for repairs, there are moments when it's simply too slow or impractical. Mastering non-sewing hacks is crucial for true backstage agility. These are often the 'MacGyver' solutions that save the day.
- Gaff Tape/Duct Tape: For heavy fabrics or areas out of sight, gaff tape is incredibly strong and versatile. It can hold hems, close tears, or even reinforce a weak strap. Always apply to the inside where possible.
- Fashion Tape: Double-sided adhesive tape designed for skin or delicate fabrics. Perfect for quickly securing a sagging neckline, a gaping placket, or a rogue strap.
- Fabric Glue: As mentioned, for embellishments, but also for small tears in non-stressed areas, especially on fabrics that fray easily. Always test a small, hidden area first if possible.
- Safety Pins: The ultimate quick fix. They can close seams, secure straps, reattach elements, or even temporarily shorten a hem. Learn to place them discreetly.
- Hair Spray: A surprising hack! A light mist can sometimes stiffen a fragile lace or net that's threatening to tear further, or temporarily tame flyaway threads.
- Eyelash Glue: Yes, the same glue for false eyelashes! It's clear, dries quickly, and is surprisingly strong for tiny, delicate repairs like sequins or loose threads on embroidery.
| Solution Type | Specific Tool | Best Use Case | Pros | Cons |
|---|---|---|---|---|
| Adhesive Tape | Gaff Tape | Heavy fabric tears, reinforcing seams, temporary strapping. | Very strong, quick application. | Can leave residue, visible if not hidden. |
| Adhesive Tape | Fashion Tape | Securing delicate fabrics, necklines, minor gaps. | Skin-safe, invisible, no residue. | Less strong, not for structural repairs. |
| Liquid Adhesive | Fabric Glue | Reattaching embellishments, small tears in non-stressed areas. | Strong bond, quick dry. | Can be messy, requires drying time. |
| Mechanical Fastener | Safety Pins | Closing seams, securing straps, temporary closures. | Instant, versatile, reusable. | Can be visible, may snag delicate fabrics. |
Team Communication & Protocol: Orchestrating the Repair
A backstage costume repair is rarely a solo act. It's a finely choreographed dance between the performer, stage management, and the wardrobe team. Effective communication is paramount to executing a repair efficiently and without disrupting the show flow.
As an expert, I've seen how a lack of clear communication can turn a minor issue into a major crisis. Establish clear protocols before the show even begins. This is crucial for maintaining order and speed in a high-pressure environment. For more insights on general stage management, I often refer to resources like USITT (United States Institute for Theatre Technology), which offers guidelines on best practices.
- Performer Protocol: Instruct performers to immediately alert stage management and the nearest wardrobe crew member if a costume issue arises. They should know *where* to go for a repair.
- Stage Management Liaison: Stage management is the central hub. They communicate the issue, the performer's location, and the time available to the wardrobe team.
- Wardrobe Team Roles: Designate a primary repair person and a runner. The primary focuses on the repair, the runner retrieves tools, clears the area, and communicates with stage management.
- Keep it Brief & Clear: When communicating, use concise language. "Tear, left sleeve, 30 seconds" is more effective than a lengthy explanation.
- Pre-Show Briefing: Always have a brief meeting before each performance to discuss potential costume challenges, quick-change choreography, and emergency contact points.
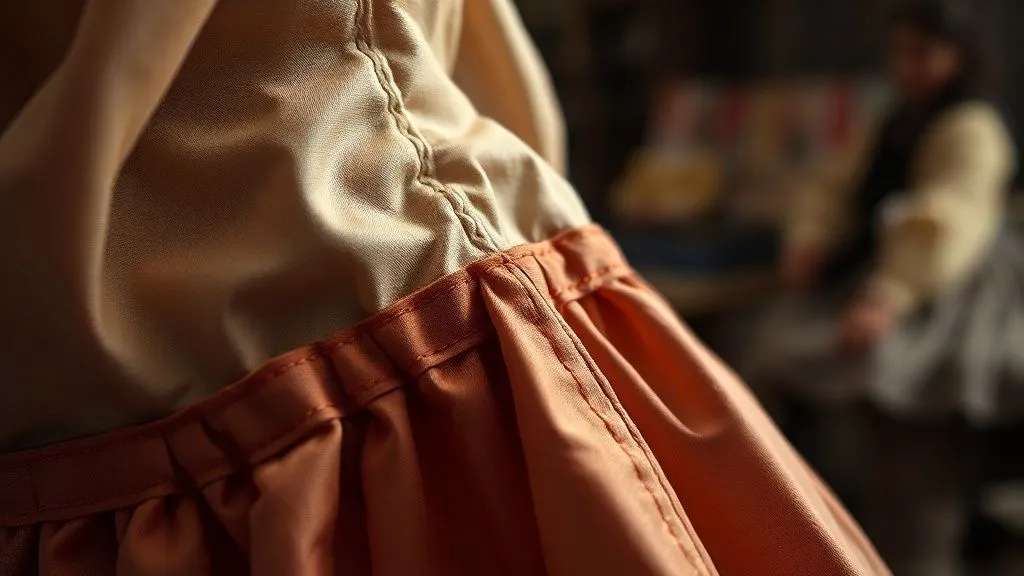
Preventative Measures: Proactive Costume Care
The best backstage repair is the one you never have to make. My years of experience have taught me that proactive care and vigilant monitoring can significantly reduce the incidence of costume emergencies. It's an investment that pays dividends in peace of mind.
Regular inspection and maintenance are not just about preserving the costume; they are about preserving the integrity of the performance. Understanding textile properties and proper care is also key. For robust knowledge on fabric maintenance, resources like The Textile Institute provide excellent foundational information.
- Pre-Show Inspection: Before every performance, meticulously check each costume. Look for loose buttons, fraying seams, weak zippers, and worn fabric. Address minor issues *before* they become major ones.
- Reinforce High-Stress Areas: Proactively reinforce seams, crotches, armholes, and closures on costumes that undergo strenuous movement. Add extra stitching or a discreet fabric patch.
- Proper Storage: Ensure costumes are hung or folded correctly to prevent stretching, snagging, or crushing. Use padded hangers for delicate garments.
- Educate Performers: Teach performers how to handle their costumes gently during quick changes and how to properly don and doff complex garments.
- Scheduled Maintenance: Implement a regular schedule for deep cleaning, minor repairs, and general upkeep. Don't wait for a crisis.
- Duplicate Costumes: For critical roles or extremely fragile costumes, having a duplicate on hand is the ultimate preventative measure, though often budget-dependent. Consider it for high-risk pieces.
By integrating these preventative steps into your routine, you transform from a reactive problem-solver into a proactive guardian of the wardrobe, ensuring smooth sailing even when the waters get rough.
Frequently Asked Questions (FAQ)
What's the absolute fastest way to fix a small tear in sheer fabric like chiffon or silk? For very delicate, sheer fabrics, a traditional stitch can often cause more damage. Your fastest and least visible option is often a tiny dot of clear, flexible fabric glue (like Gem-Tac or E6000 Fabri-Fuse) applied to the underside of the tear, pressing the edges together with tweezers. Alternatively, a strip of transparent fashion tape applied carefully to the inside can hold it. Avoid heavy stitching unless absolutely necessary.
How do I handle a costume that's too tight or too loose mid-show without major alterations? For too tight, if it's a structural seam, you might be able to carefully unpick a few stitches in a non-visible area (like an underarm) to gain a tiny bit of give, but this is risky. For too loose, safety pins are your best friend. Pin excess fabric on the inside, distributing the pins to avoid creating an obvious bunch. For a bodice, cinching a bit at the side seams or center back is usually the safest.
What if a costume gets stained right before an entrance? Act immediately. For liquid stains, blot (don't rub!) with a clean cloth or paper towel. Use a specialized stain wipe from your emergency kit. For greasy stains, a sprinkle of cornstarch or baby powder can absorb some of the oil, then brush off gently. If it's a visible area and the stain won't budge, can you strategically drape a prop, an accessory, or even adjust the performer's pose to hide it? Sometimes, a quick spray of hairspray can also temporarily make a light stain less noticeable.
Is it ever acceptable to use hot glue for a costume repair? While tempting for speed, I generally advise against hot glue for anything structural or load-bearing due to its rigidity and potential to peel or crack under stress. It can also melt or distort delicate fabrics. However, for quickly reattaching a non-critical, decorative element like a plastic jewel or a piece of trim to a sturdy fabric in an emergency, it can be a last resort if fabric glue isn't available and time is utterly critical. Always consider the fabric type and the longevity needed.
How do I prevent a performer from further damaging a repaired costume during the show? The best prevention is clear communication. After a repair, quickly and calmly inform the performer about the nature of the fix and any specific movements or actions they should avoid. For instance, "The side seam is pinned, please be gentle with that arm." If possible, have a wardrobe assistant stationed backstage to monitor the costume during critical scenes or quick changes, ready to intervene if needed.
Key Takeaways and Final Thoughts
Navigating a backstage costume emergency during a live show is a high-stakes challenge that demands calm under pressure, quick thinking, and a well-honed skill set. My years in this industry have repeatedly shown me that preparation is not just half the battle; it's the foundation of success.
- Preparation is Paramount: A meticulously stocked and organized emergency kit is non-negotiable.
- Assess & Prioritize Rapidly: Learn to quickly identify the problem, its visibility, and the fastest effective solution.
- Master Essential Fixes: Be proficient in quick stitching, ingenious pinning, and strategic gluing for common issues.
- Embrace Disguise: When a perfect repair isn't feasible, become a master of illusion to hide the damage.
- Communicate Clearly: Establish protocols with performers and stage management for seamless crisis response.
- Practice Proactive Care: The best repair is proactive maintenance that prevents the emergency in the first place.
Remember, the show must go on, and as a costume professional, you are a vital part of making that happen. By integrating these expert strategies and maintaining a cool head, you won't just repair a damaged costume; you'll uphold the magic of the performance. You are the unsung hero ensuring that every costume looks flawless, no matter what unexpected challenges arise in the wings. Keep learning, keep practicing, and keep that emergency kit ready!
Recommended Reading
- The Future of Fashion: How Advanced Materials Will Reshape Clothing Design
- Mastering Succession: How to Retain Aging Haute Couture Artisans' Rare Skills
- 7 Expert Tips: Guiding Grooms on Complex Bridal Gown Attire Matching
- Supplier Fails? 7 Steps for Haute Couture Fabric Crisis Management
- Effortless Elegance: How to Choose Casual Menswear for Men Over 40


Your email address will not be published. Required fields are marked *