
How to professionally repair fragile vintage dresses without devaluing?
For over two decades in the vibrant world of vintage fashion, I've witnessed countless stunning garments pass through my hands. Each piece tells a story, a whisper from a bygone era. Yet, I've also seen the heartbreak when a cherished vintage dress, perhaps a family heirloom or a rare find, suffers damage. The immediate impulse is often to “fix it,” but I've seen this mistake countless times: well-intentioned repairs that, sadly, strip away not just the garment's aesthetic appeal but also its historical integrity and monetary value.
The core problem isn't just the tear or the stain; it's the profound fear of permanent damage, of making the wrong move that irrevocably diminishes a piece of wearable history. Owners grapple with questions of authenticity, the right materials, and whether their efforts will truly preserve or inadvertently destroy. This isn't merely about mending fabric; it's about safeguarding an artifact, a tangible link to the past, against the ravages of time and clumsy intervention.
In this definitive guide, I will share the distilled wisdom from my years in textile conservation and vintage restoration. You’ll discover a comprehensive, multi-phase framework, complete with actionable steps, expert insights, and real-world considerations, designed to empower you to professionally repair fragile vintage dresses without devaluing them. We'll explore everything from meticulous assessment to archival-grade techniques, ensuring your beloved pieces not only survive but thrive for generations to come.
The Devaluation Dilemma: Understanding What's at Stake
Before we delve into the 'how,' it's crucial to grasp the 'why.' Why is incorrect repair so detrimental to a vintage dress's value? Vintage fashion isn't just old clothing; it's a collectible art form, and its value is intrinsically tied to its originality, condition, and historical accuracy. Any repair that deviates from these principles can significantly diminish its worth, both financially and historically. I often tell my clients, “A poorly repaired dress is worse than a damaged one, because the damage is now permanent and often irreversible in its repair.”
Devaluation can manifest in several ways: using modern synthetic threads on delicate silk, employing aggressive adhesives that yellow over time, or even visible stitching that screams “repair” rather than blending seamlessly. These interventions disrupt the garment's original aesthetic and structural integrity, signaling a lack of professional care and potentially raising red flags for future collectors or appraisers. Our goal is always conservation, not just repair – to stabilize, preserve, and integrate any necessary mending so subtly that the garment's story remains uninterrupted.
Phase 1: Meticulous Assessment and Preservation Principles
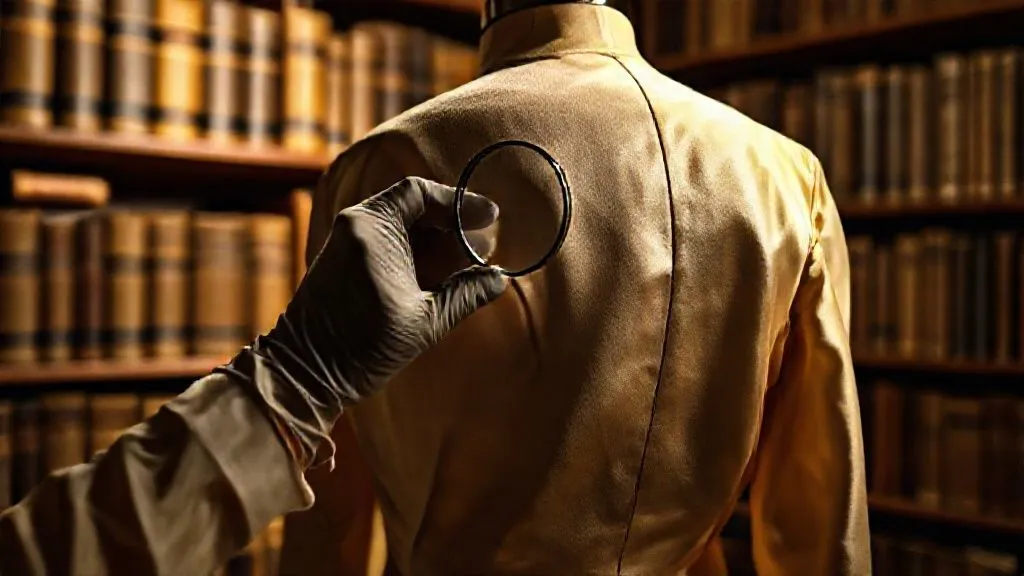
The very first step in any successful vintage dress repair is a thorough, patient, and systematic assessment. Rushing this stage is a recipe for disaster. This isn't just about identifying the damage; it's about understanding the garment's entire history, its vulnerabilities, and its inherent strengths.
Initial Inspection: Beyond the Obvious
Think of yourself as a textile detective. Every crease, every faint discoloration, every loose thread tells a part of the story. I always begin with a macroscopic view, then move to a microscopic one.
- Document Everything: Before touching anything, photograph the dress from all angles, especially focusing on the damaged areas. Use a ruler in the frame for scale. Note the exact location, size, and nature of the damage (tear, stain, moth hole, seam separation).
- Handle with Extreme Care: Always wear clean cotton gloves. Fragile vintage fabrics can easily be further damaged by the oils and acids on bare hands. Support the garment's weight evenly; never pull or stretch.
- Examine the Entire Garment: Don't just focus on the obvious tear. Check seams for stress, look for hidden weak spots, inspect linings, closures (buttons, zippers, hooks-and-eyes), and embellishments (beads, sequins, lace).
- Assess Fabric Stability: Gently test the surrounding fabric. Does it feel brittle? Does it tear easily with minimal pressure? This will dictate how much intervention the fabric can withstand.
- Identify Previous Repairs: Look for signs of older, possibly amateur, repairs. These often need to be carefully unpicked and re-done professionally.
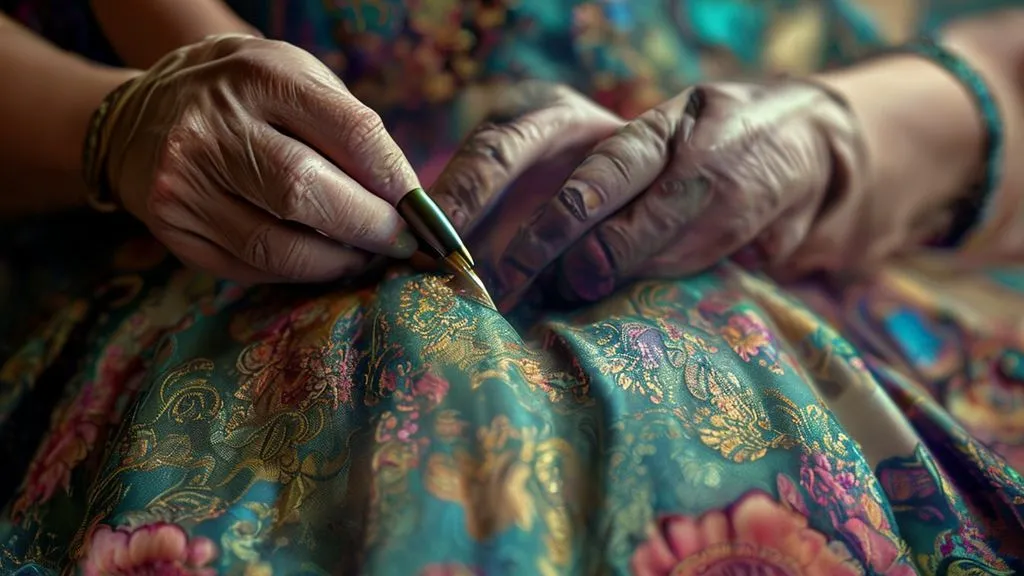
Understanding Fabric Composition and Age
Knowing your fabric is paramount. A 1920s silk charmeuse will require a vastly different approach than a 1950s cotton voile or a 1890s wool gabardine. The age of the garment often dictates the fibers used and their inherent degradation.
For example, earlier silks and acetates can become extremely brittle, while some natural fibers like cotton and linen tend to hold up better over time, though they can still suffer from UV damage and acid degradation. Synthetic fibers from the mid-20th century onwards present their own challenges, sometimes becoming stiff or prone to melting with heat.
| Fabric Type | Common Issues | Repair Approach |
|---|---|---|
| Silk Charmeuse (1920s-30s) | Brittle, shattering, yellowing, dye migration | Minimal intervention, backing fabrics, couching, specialized silk thread |
| Rayon Crepe (1930s-40s) | Shrinkage, water stains, seam stress | Careful steaming, gentle patching, rayon thread matching |
| Cotton Voile/Lawn (1940s-50s) | Tears, holes, sun fading, oxidation spots | Invisible mending, darning, patch repairs with similar cotton |
| Wool Gabardine (1940s-60s) | Moth holes, thinning, seam splits | Felting, darning, patch from unseen areas, wool thread |
| Nylon/Polyester (1960s-70s) | Snags, heat damage, pilling, stiffness | Heat sealing (carefully), specific synthetic threads, minimal patching |
This understanding informs material selection for repair, cleaning methods, and handling techniques. Always assume fragility, even if the fabric appears robust.

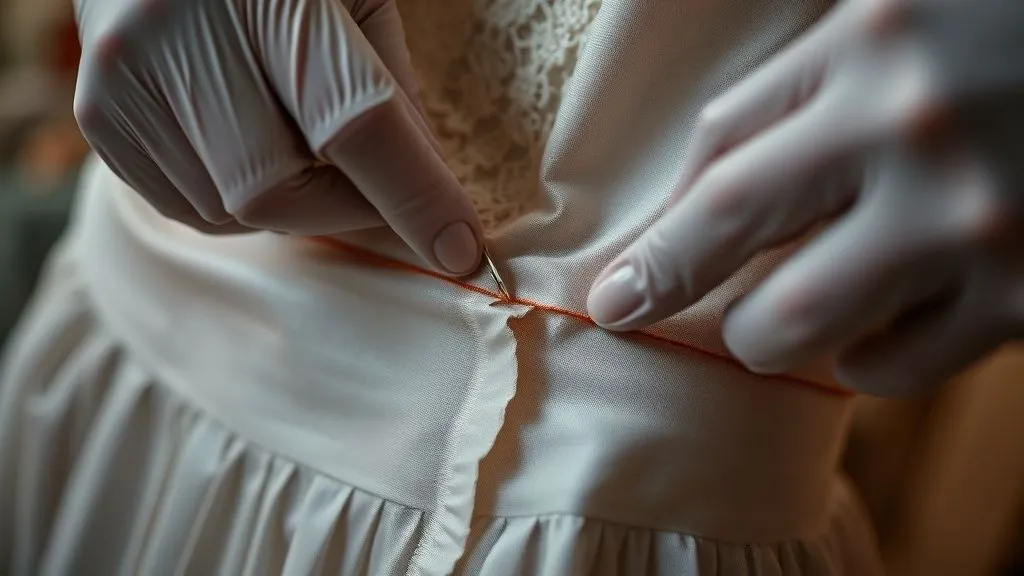
Phase 2: The Art of Invisible Mending and Material Selection
The ultimate goal of professional vintage dress repair is “invisible mending.” This isn't about hiding a flaw; it's about restoring the garment to its original aesthetic and structural integrity without obvious signs of intervention. It requires patience, skill, and an almost obsessive attention to detail.
Sourcing Authentic Materials: A Critical Step
This is where many DIY repairs falter. Using modern cotton thread on a 1920s silk dress is a cardinal sin. Not only will the modern thread likely be stronger and thicker, potentially causing more damage to the fragile silk, but its chemical composition and aging properties will differ. You need materials that are compatible in fiber content, weight, weave, and dye characteristics.
- Matching Fabric: Ideally, you'd use a swatch from an unseen area of the same garment (e.g., a generous seam allowance, hem, or underarm gusset). If not, search for period-appropriate fabric. Textile conservation suppliers often carry vintage or historically accurate materials.
- Matching Thread: This is equally crucial. Seek out silk thread for silk garments, fine cotton for cotton, and so on. Consider the ply and thickness. Acid-free, un-dyed silk crepeline is a conservator's best friend for backing fragile areas, as it's incredibly fine and strong.
- Dye Matching: If patching is necessary, dye matching is an art form in itself. Natural dyes from the past behave differently than modern synthetic dyes. Test on a hidden swatch first.
Choosing the Right Repair Technique
The chosen technique depends entirely on the type of damage and the fabric. There's no one-size-fits-all solution.
- Couching: Excellent for stabilizing shattering silk or delicate lace. It involves laying new, fine threads over the damaged area and securing them with tiny, almost invisible stitches that pass through the original fabric and a backing material.
- Darning: Ideal for small holes, especially in wool or cotton. It involves weaving new threads into the existing fabric structure to fill the gap, mimicking the original weave.
- Patching (Under-patching/Over-patching): Used for larger holes or significant fabric loss. An under-patch is sewn underneath the damaged area, providing support. An over-patch might be used if the original fabric is too weak to hold stitches, but this is less common for invisible mending. The edges of the original fabric are meticulously sewn to the patch.
- Seam Repair: Often requires unpicking the original seam and re-sewing it with period-appropriate techniques, ensuring tension is evenly distributed.
Let's consider a common scenario: a small tear in a delicate 1930s rayon crepe dress. Here’s a simplified approach:
- Prepare the Area: Gently align the torn edges. If the fabric is fraying, use a minimal amount of textile adhesive (acid-free, reversible) on the very edge of the frayed threads to prevent further unraveling.
- Create a Backing: Cut a small piece of matching rayon crepe (or fine silk crepeline) slightly larger than the tear. If using crepeline, consider dyeing it to match.
- Position the Backing: Carefully slide the backing underneath the tear, ensuring the grain matches the original fabric. Pin in place with entomological pins (extremely fine, long pins).
- Couching/Whip Stitch: Using a very fine, curved needle and matching rayon or silk thread, begin to stitch. For couching, lay threads across the tear and secure them with tiny perpendicular stitches. For a whip stitch, carefully join the torn edges to the backing, taking minuscule stitches that barely penetrate the front surface of the original fabric. The goal is to make the repair imperceptible.
- Pressing: Lightly press with a cool iron and a pressing cloth, if the fabric allows, to help integrate the repair.
Expert Insight: “The true measure of a professional repair isn't how well you fixed the damage, but whether anyone can even tell a repair was made. Authenticity is paramount, and that means respecting the garment's original construction and materials at every step.”
Phase 3: Executing the Repair with Precision and Patience
With assessment complete and materials chosen, the actual execution of the repair demands meticulous precision and an abundance of patience. This is not a task to be rushed; each stitch contributes to the garment's future.
Stabilizing Fragile Areas: A Pre-Repair Necessity
Often, the area around the primary damage is also weakened. Before any stitching begins, it's crucial to stabilize these surrounding fragile areas to prevent further damage during the repair process. This might involve:
- Temporary Support Stitching: Using very fine, loose basting stitches around the perimeter of the damaged area to hold it in place.
- Adhesive Backing: For extremely delicate or shattering fabrics, a conservator might use a very thin, reversible, heat-set adhesive film (e.g., conservation-grade thermoplastic film) applied to a backing fabric like silk crepeline, then gently adhered to the reverse of the damaged area. This provides a stable base before any needlework.
- Netting or Tulle: For sheer fabrics, a fine, color-matched silk net or tulle can be carefully couched over the damaged area to provide support without adding bulk.
The Stitching: Hand vs. Machine (and When to Use Which)
In the realm of vintage dress repair, hand-stitching is almost always preferred for its control, delicacy, and ability to blend seamlessly. Machine stitching, while faster, can be too aggressive for aged fabrics, creating perforations that weaken the material further. However, there0s an exception or two.
- Hand-Stitching: Essential for invisible mending, delicate tears, lace repair, and areas requiring precise manipulation. Techniques like whip stitching, slip stitching, and couching are performed by hand. This allows for very small, controlled stitches that follow the fabric's weave and grain.
- Machine Stitching: Rarely used for visible repairs on fragile vintage pieces. It might be acceptable for reinforcing a sturdy, internal seam that has come apart, particularly if the original seam was machine-stitched and the fabric is robust enough to withstand the needle. Even then, use a very fine needle, low tension, and appropriate thread. Always test on a scrap piece first.

Case Study: Restoring 'The Belle' Gown
I once received a stunning 1930s bias-cut silk velvet gown, nicknamed 'The Belle,' which had belonged to a prominent socialite. It had a significant, jagged tear on the skirt, about 6 inches long, and several smaller moth holes on the bodice. The silk velvet was incredibly fragile, almost shattering in places. Many would have deemed it irreparable without significant devaluation.
My approach began with extensive documentation and a fiber analysis, confirming the silk content and the natural dyes. For the large skirt tear, I chose an under-patching and couching technique. I sourced a piece of vintage silk velvet from a period scrap, carefully dyed to match the gown's faded indigo. This patch was meticulously shaped and then applied to the reverse of the tear. Each edge of the original tear was then secured to the patch using incredibly fine, single-ply silk thread, couched down with stitches almost invisible to the naked eye. For the moth holes, I employed a combination of very fine darning with matching silk floss and, in the most fragile areas, tiny silk crepeline backings secured with micro-stitches. The entire process took over 80 hours of painstaking work under magnification. The result? The gown was stabilized, the tear and holes were virtually imperceptible, and its historical integrity was maintained. It went on to be exhibited, valued at a significant sum, proving that professional repair, when done correctly, can preserve and even enhance value.
For more insights into textile conservation ethics, explore resources from The American Institute for Conservation of Historic and Artistic Works (AIC).
Phase 4: Post-Repair Care and Long-Term Preservation
The repair itself is only one part of the preservation journey. How you care for and store your vintage dress after repair is equally critical to prevent future damage and maintain its restored value. This phase is often overlooked but is fundamental to long-term success.
Gentle Cleaning Protocols
Most vintage dresses should never see the inside of a washing machine. Even dry cleaning can be too harsh for many fragile fabrics, especially those with delicate embellishments or degraded fibers.
- Spot Cleaning: For minor surface dirt, use distilled water and a tiny amount of pH-neutral, unperfumed soap (like Orvus WA paste). Apply with a cotton swab, blotting gently. Always test on an inconspicuous area first.
- Wet Cleaning (Professional Only): For more extensive cleaning, consult a professional textile conservator. They have specialized knowledge and equipment for controlled wet cleaning, which can safely remove accumulated dirt without damaging fragile fibers or dyes.
- No Bleach or Harsh Chemicals: These are absolutely forbidden. They will degrade vintage fibers and often cause irreversible discoloration.
Archival Storage Solutions
Proper storage is a passive form of preservation, protecting your garment from environmental damage.
- Acid-Free Materials: Store dresses in acid-free tissue paper and boxes. Acidic materials can cause fabric to yellow and degrade over time.
- Breathable Garment Bags: Use breathable, archival-quality cotton or Tyvek garment bags, not plastic dry-cleaning bags, which trap moisture and can foster mold growth.
- Padded Hangers (if hanging): For sturdier garments, use padded hangers to distribute weight evenly and prevent stress points on shoulders. However, for most fragile or heavy vintage dresses, horizontal storage is preferable.
- Horizontal Storage: For very delicate, heavily embellished, or bias-cut garments, store them flat in acid-free boxes, padded with acid-free tissue paper to support folds and prevent creasing.
- Controlled Environment: Store in a cool, dry, dark place with stable temperature and humidity. Avoid attics, basements, or direct sunlight. Ideal conditions are around 65-70°F (18-21°C) and 40-55% relative humidity.
Regularly inspect your stored garments for any signs of pest activity or environmental damage. Early detection can prevent catastrophic loss. For further guidance on textile preservation, the Victoria and Albert Museum offers excellent resources.
When to Call a Professional: Knowing Your Limits
While this guide empowers you with knowledge, it's vital to recognize when a repair project exceeds your skill set or resources. Attempting complex repairs on highly valuable or extremely fragile pieces without the necessary expertise can do more harm than good, leading to irreversible damage and significant devaluation. Knowing when to call in a professional textile conservator is a mark of true respect for the garment.
Identifying Complex Damage
Certain types of damage almost always warrant professional intervention:
- Extensive Fabric Shattering: When large areas of silk or other delicate fabrics are brittle and literally falling apart.
- Severe Water or Fire Damage: These require specialized cleaning and stabilization techniques that are beyond DIY capabilities.
- Complex Dye Bleeds or Stains: Especially on multi-colored garments or historically significant pieces, where color stability is crucial.
- Structural Damage to Embellishments: Intricate beadwork, embroidery, or lace that requires specific knowledge of historical techniques to repair.
- Valuable or Historically Significant Garments: If the dress has significant monetary, historical, or sentimental value, the risk of amateur repair is simply too high.
The Value of a Textile Conservator
A professional textile conservator possesses a unique blend of scientific knowledge, historical understanding, and advanced practical skills. They can:
- Conduct Thorough Analysis: Identify fibers, dyes, and potential chemical degradation.
- Perform Reversible Repairs: Use techniques and materials that can be undone in the future without damaging the original fabric, adhering to conservation ethics.
- Access Specialized Materials: Source rare or period-appropriate materials that are difficult for individuals to find.
- Provide Archival Recommendations: Offer tailored advice for long-term preservation specific to your garment.
Investing in professional conservation for a truly valuable piece is not an expense; it's an investment in its longevity and continued value. For a deeper understanding of textile conservation, consider exploring academic resources like those found on The Metropolitan Museum of Art's conservation department.
Maintaining Authenticity: A Guiding Principle
Throughout the entire process of how to professionally repair fragile vintage dresses without devaluing them, the principle of authenticity must be your unwavering guide. This means honoring the original intent, materials, and construction of the garment. Every decision, from thread choice to stitching technique, should be made with the goal of preserving the dress's historical integrity and visual harmony.
Expert Insight: “The most authentic repair is the one that respects the garment's narrative, allowing its original voice to speak clearly, unmarred by modern intrusion. It's about being a caretaker of history, not a re-designer.”
Avoid any alteration that fundamentally changes the garment's silhouette, style, or period features, unless it's a historically documented alteration made during its original lifespan. When in doubt, lean towards minimal intervention and reversible solutions. Your goal is to extend the life of these beautiful pieces, allowing them to continue telling their stories for future generations, without compromising their inherent value.
Frequently Asked Questions (FAQ)
Q: Can I use fabric glue for small tears on vintage dresses? A: I strongly advise against using most fabric glues on valuable vintage garments. While some conservation-grade, reversible adhesives exist for very specific applications, standard fabric glues are often irreversible, can yellow over time, stiffen the fabric, and degrade the fibers, significantly devaluing the dress. Always prioritize stitching techniques.
Q: How do I remove a stubborn stain from a vintage dress without damaging it? A: Stain removal is one of the riskiest interventions. The type of stain, fabric, and dye all play a role. My general advice is: do NOT attempt aggressive stain removal yourself. Consult a professional textile conservator. Improper stain removal can set the stain permanently, bleach the fabric, or cause irreparable damage. Gentle spot cleaning with distilled water and a tiny amount of pH-neutral soap (tested first) is the absolute most you should attempt at home.
Q: Is it always better to leave a vintage dress “as is” with damage, rather than attempting a repair? A: This is a nuanced question. For extremely valuable or museum-quality pieces, sometimes stabilization without full “repair” is preferred to maintain historical evidence of its condition. However, for wearable vintage, a professional, invisible repair by an expert is almost always preferable to leaving significant damage, as it enhances wearability and can maintain or even increase value by improving overall condition. The key word here is “professional.”
Q: How can I tell if a repair on a vintage dress is professional or amateur? A: Professional repairs are typically invisible or nearly so. Look for thread that perfectly matches the original in fiber, color, and thickness. Stitches should be tiny, even, and blend seamlessly with the fabric's weave. There should be no puckering, stiffness, or visible patches. Amateur repairs often use mismatched thread, visible stitches, clumsy patches, or tell-tale signs of modern materials.
Q: What's the biggest mistake people make when trying to repair vintage dresses themselves? A: In my experience, the biggest mistake is impatience and a lack of understanding of the delicate nature of aged textiles. Rushing leads to using inappropriate materials (wrong thread, wrong patch fabric), aggressive techniques (too-tight stitches, machine sewing on fragile areas), or incorrect cleaning methods. This often compounds the original damage and devalues the garment. Always prioritize research, patience, and appropriate tools.
Key Takeaways and Final Thoughts
Navigating the delicate art of how to professionally repair fragile vintage dresses without devaluing them is a journey that demands respect, knowledge, and an unwavering commitment to authenticity. It's about being a guardian of history, ensuring these beautiful, storied garments can continue to inspire and charm for generations to come. By embracing the principles I've outlined, you're not just mending fabric; you're preserving a legacy.
- Meticulous Assessment is Non-Negotiable: Understand the garment's history, fabric, and specific damage before any intervention.
- Authenticity in Materials: Always strive for period-appropriate and fiber-compatible threads and fabrics for repair.
- Invisible Mending is the Goal: Techniques like couching and fine darning aim to blend seamlessly with the original garment.
- Patience and Precision: Rushing leads to mistakes; delicate work requires time and a steady hand.
- Post-Repair Care is Crucial: Proper cleaning and archival storage are vital for long-term preservation.
- Know Your Limits: For complex or highly valuable pieces, professional textile conservators are invaluable.
Remember, each vintage dress holds a piece of our collective past. Your careful efforts to repair and preserve them are a testament to their enduring beauty and significance. Approach each repair not as a chore, but as an act of love and historical stewardship. With these expert strategies, you are now equipped to tackle the challenge, ensuring your cherished vintage pieces retain their allure and value for decades to come.

Recommended Reading
- 7 Steps: Ethically Sourcing Sustainable School Uniforms for Your School
- 7 Strategies: How to Maintain Brand Exclusivity for Elegant Womenswear Online?
- The Ultimate Guide: How to Store Handmade Jewelry to Prevent Damage?
- Dazzle on Your Day: Choosing the Best Jewelry for Strapless Dresses
- Scaling Self-Cleaning Fabrics: 5 Strategies for Efficacy & Production


Your email address will not be published. Required fields are marked *