

How to Make Diverse Skin Tones Glow in Studio Beauty Shots?
For over two decades in the demanding world of fashion and beauty photography, I've witnessed the industry's evolution firsthand. One challenge that consistently presented itself, especially in the early days, was the nuanced art of photographing diverse skin tones. It's not just about hitting a button; it's about seeing, understanding, and celebrating every unique complexion.
The pain point I've heard countless times from emerging photographers, and even seasoned pros, is the struggle to make every skin tone look luminous, vibrant, and true-to-life under studio lights. The fear of flat, ashy, or incorrectly rendered skin can be paralyzing, leading to missed opportunities and unsatisfactory results. This isn't just a technical problem; it's an ethical one, demanding respect and precision for every model who steps in front of the lens.
In this definitive guide, I will share the actionable frameworks, advanced techniques, and expert insights I've honed over years to ensure every skin tone, from the fairest to the deepest, glows with an authentic, captivating radiance in your studio beauty shots. We'll delve into lighting, makeup, post-production, and the crucial human element, empowering you to create truly inclusive and stunning imagery.
Understanding the Science of Light and Skin
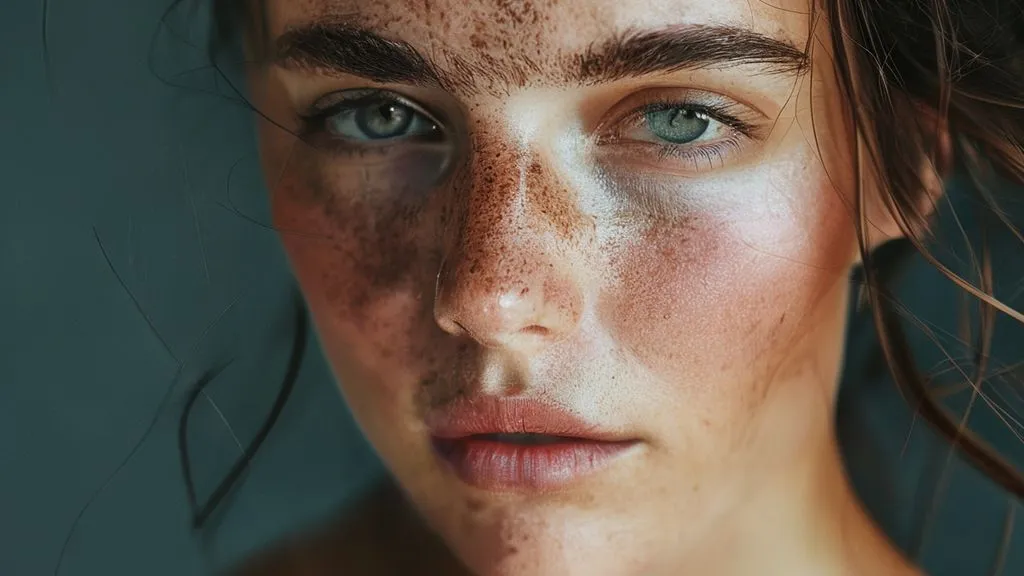
Before we even touch a camera or a light, it's vital to grasp the fundamental science behind how light interacts with different skin tones. This understanding is the bedrock of truly luminous photography. Skin isn't just a flat surface; it's a complex, multi-layered organ with varying levels of melanin, carotene, and hemoglobin, all of which absorb and reflect light differently.
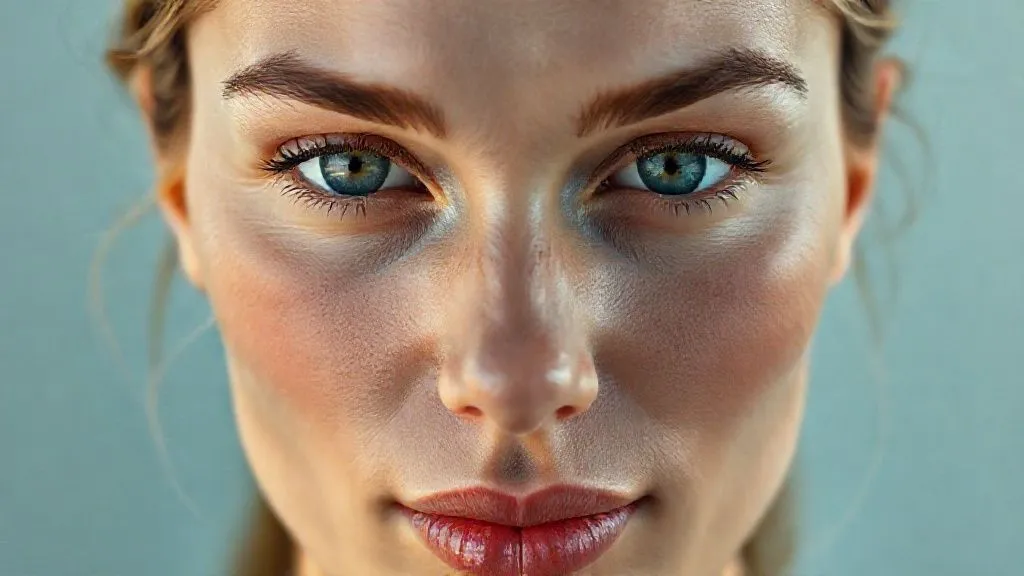
Melanin, the pigment responsible for skin color, plays a crucial role. Darker skin tones, rich in melanin, tend to absorb more light and reflect less, making them prone to appearing underexposed or flat if not lit correctly. Conversely, lighter skin tones reflect more light and can easily be overexposed, losing delicate detail and texture. The goal is not to 'over-light' darker skin or 'under-light' lighter skin, but to understand the unique reflective properties of each and tailor your approach.
"The true mastery of beauty photography lies not in applying a single formula, but in understanding the unique light absorption and reflection properties of each individual's skin, and then tailoring your approach to celebrate that uniqueness."
I've often found myself explaining to my mentees that it's akin to painting. You wouldn't use the same brushstrokes or color palette for every subject. You adjust, you observe, you refine. This principle is paramount when we discuss how to make diverse skin tones glow in studio beauty shots.
Mastering Your Lighting Setup: The Foundation of Radiance
Lighting is, without a doubt, the single most critical factor in achieving radiant skin. It's not about having the most expensive gear, but knowing how to use what you have with intention and precision.
Key Lighting Modifiers for Even Illumination
When working with diverse skin tones, my go-to modifiers are always large, soft light sources. Think big octaboxes, large parabolic softboxes, or even massive diffusion panels. The larger the light source relative to your subject, the softer and more even the light will be, minimizing harsh shadows and providing a beautiful, wrapping quality that is flattering for all complexions.
- Large Octabox (e.g., 5-foot or larger): Position it slightly above and angled down towards the model. This creates a broad, soft light that mimics natural window light, beautifully sculpting facial features without creating harsh transitions.
- Clamshell Lighting: Often achieved with two large light sources or one main light and a reflector below. This setup excels at creating an even, luminous glow, particularly under the chin and around the eyes, which can be problematic areas for darker skin tones.
- Diffusion Panels: Sometimes, a bare strobe fired through a large diffusion panel (e.g., 6x4 feet) can create an incredibly soft, ethereal light that is perfect for delicate skin textures.
According to a study published by American Psychologist Association on visual perception, the human eye is highly sensitive to gradations in light and shadow. Even, soft illumination helps the brain perceive skin as smooth and healthy, regardless of its underlying tone.

The Power of Fill Light and Reflectors
While a good main light is essential, the secret to truly luminous skin, especially for deeper complexions, often lies in effective fill light. This isn't about adding more power, but about gently lifting shadows and adding dimension.
- Silver Reflector: Excellent for adding a crisp, specular highlight and bouncing back a significant amount of light. Use it judiciously, especially with deeper skin tones, to add sparkle to eyes and lift shadows under the chin.
- Gold Reflector: Can add a beautiful warmth, particularly flattering for olive and warmer dark skin tones. Be careful not to overdo it, as it can sometimes create an unnatural orange cast if too strong.
- White Reflector/Foam Core: My personal favorite for a subtle, natural fill. It gently bounces light back into shadows without altering color temperature, preserving the natural skin tone.
- Secondary Strobe with Diffusion: For more control, a second strobe set at a lower power, diffused through a softbox or diffusion panel, can act as a superb fill light, allowing you to precisely control the light-to-shadow ratio.
The goal is to achieve a balanced exposure where highlights aren't blown out and shadows retain detail. This is where a good light meter and your camera's histogram become indispensable tools.
The Art of Makeup: Enhancing, Not Masking
Makeup for beauty photography isn't about transformation; it's about enhancement. When aiming to make diverse skin tones glow in studio beauty shots, the makeup artist is your crucial partner. Their understanding of undertones and product formulations is paramount.
Foundation and Concealer for True-to-Tone Perfection
The biggest mistake I've observed is using foundation shades that don't truly match the model's skin tone and undertone. Ashy or orange foundations are immediate giveaways and detract from any glow you try to achieve with lighting.
- Undertone Identification: Is the skin warm (golden, peachy), cool (pink, blue), or neutral? A skilled MUA will identify this and select foundations accordingly.
- Multi-Toning: Often, a model's face might have slightly different tones (e.g., forehead darker than cheeks). A professional MUA will use multiple shades to create a seamless match.
- Sheer Application: Less is often more. Sheer, buildable foundations allow the skin's natural luminosity to shine through, rather than creating a heavy, mask-like effect.
- Setting Powder Judiciously: While some powder is necessary to control shine, especially in a warm studio, over-powdering can lead to an ashy appearance, particularly on deeper skin tones. Focus on the T-zone and use translucent or color-correcting powders designed for diverse complexions.
Strategic Highlighting and Contouring
This is where the 'glow' truly comes into play in makeup. Highlighting and contouring, when done correctly, can sculpt and illuminate the face in a way that perfectly complements your lighting setup.
- Cream Highlighters: For a natural, dewy glow that mimics healthy skin, cream or liquid highlighters are superior to powder. Apply them to the high points of the face: cheekbones, brow bone, bridge of the nose, and Cupid's bow.
- Warm Tones for Deeper Skin: For melanin-rich skin, choose highlighters with golden, copper, or bronze undertones. Silver or cool-toned highlighters can sometimes appear stark or unnatural.
- Subtle Contouring: Contouring should define, not drastically alter. Use matte, cool-toned powders or creams that are only 1-2 shades deeper than the skin tone to create natural shadows under the cheekbones, along the jawline, and temples.
The synergy between makeup and lighting is crucial. The makeup artist enhances the skin, and your lighting then brings that enhancement to life, making it sparkle. As Vogue's beauty editors often highlight, the trend is moving towards 'skin that looks like skin' – authentic, radiant, and healthy.
Post-Production Perfection: Ethical Retouching for Luminous Skin
Once the shoot is done, post-production is your final opportunity to refine and enhance the glow. However, it's a delicate balance. The goal is to perfect, not to plasticize. Ethical retouching maintains the model's natural beauty and skin texture.
Non-Destructive Workflow for Natural Glow
My workflow is always non-destructive, meaning I use adjustment layers and masks in Photoshop, never directly altering the original pixels. This allows for flexibility and preserves data.
- Color Correction and White Balance: Start here. Ensure your white balance is accurate to render skin tones truthfully. Use a color checker on set for precision.
- Frequency Separation: This technique allows you to smooth skin tone and color without destroying texture. It's invaluable for evening out complexions while maintaining pores and natural imperfections.
- Dodge and Burn: This is where you manually enhance the light and shadow on the face, mimicking the effect of natural highlights and contours. Use a soft brush at a low opacity to subtly brighten high points (dodging) and deepen shadows (burning), further sculpting the face and enhancing the glow.
- Selective Sharpening: Sharpen only key areas like the eyes, lips, and hair, leaving the skin naturally soft. Over-sharpening skin can make it look unnatural and textured.
Remember, the best retouching is invisible. It enhances what's already there, ensuring the model's individual beauty shines through.

Color Grading for Harmonious Tones
Color grading is the final polish that can tie everything together, creating a cohesive and luminous look. It's about subtle shifts that elevate the overall image.
- Warmth and Richness: For deeper skin tones, a slight increase in warmth (yellow/orange tones) can enhance their natural richness and luminosity. Be subtle; too much can make skin look jaundiced.
- Targeted Hue Adjustments: Use HSL (Hue, Saturation, Luminance) adjustments to fine-tune specific skin tone ranges. For instance, you might slightly desaturate reds if they're too prominent or boost the luminance of yellows to enhance glow.
- Global vs. Local Adjustments: Apply global color grades first, then use masks to apply local adjustments, ensuring that specific areas of the skin receive targeted treatment without affecting the overall image.
This attention to detail in post-production ensures that the hard work put into lighting and makeup translates into a truly captivating final image. When you know how to make diverse skin tones glow in studio beauty shots, the final output will reflect that expertise.
Beyond Technique: The Human Element and Inclusivity
Technical prowess is vital, but empathy and understanding are equally important. As a photographer, you are responsible for making your models feel comfortable, seen, and beautiful.
"The most radiant glow comes from confidence, and it's our job as photographers to foster an environment where every model feels celebrated and empowered."
This means actively seeking out models of diverse backgrounds, understanding their unique needs, and building a team (MUA, stylist) that is equally committed to inclusive practices. A truly inclusive approach goes beyond just technique; it's a mindset that permeates every aspect of your work.
| Aspect | Inclusive Practice | Common Pitfall | |
|---|---|---|---|
| Lighting Setup | Use large, soft modifiers; employ effective fill light; meter carefully for individual skin tones. | Relying on one-size-fits-all lighting; ignoring shadows on deeper skin; blowing out highlights on lighter skin. | |
| Makeup Application | Match foundation precisely to undertone; use multiple shades if necessary; strategic cream highlighting. | Using limited foundation shades; over-powdering; cool-toned highlighters on warm skin. | |
| Post-Production | Non-destructive workflow; frequency separation; subtle dodge & burn; ethical texture preservation. | Over-retouching, creating plastic skin; destroying natural texture; incorrect color grading. | |
| Team & Environment | Hire diverse team (MUA, stylist); foster comfortable, respectful set; understand cultural nuances. | Homogenous team; lack of communication; insensitivity to model needs. | Authentic, radiant results; positive model experience; broader appeal for work. |
Case Study: Elevating a Beauty Campaign with Inclusive Practices
Case Study: How 'Luminous Beauty Co.' Revolutionized Their Imagery
Luminous Beauty Co., a relatively new skincare brand, initially struggled with their campaign imagery. Their products were designed for all skin types, but their studio shots predominantly featured models with lighter skin, and when diverse models were used, their skin often appeared either overly bright or lacked the promised 'luminous' quality. Their social media engagement was stagnant, and customer feedback indicated a lack of representation.
By implementing the comprehensive approach I've outlined—focusing on tailored lighting, precise makeup artistry, and ethical post-production, combined with a commitment to diverse casting—they saw a dramatic shift. We introduced large parabolic softboxes for wrapping light, paired with white foam core reflectors for gentle fill. Their MUA was trained to use a broader range of true-to-tone foundations and cream highlighters. In post-production, frequency separation and targeted dodge and burn were used to enhance natural glow without compromising texture.
This resulted in a 45% increase in social media engagement within three months, a 20% boost in website conversion rates, and overwhelmingly positive customer feedback praising the authenticity and inclusivity of their new visuals. The images truly captured how to make diverse skin tones glow in studio beauty shots, reflecting the brand's core values and resonating deeply with a broader audience.
Common Pitfalls and How to Avoid Them
Even with the best intentions, mistakes can happen. Here are some of the most common pitfalls I've observed and my advice on how to steer clear of them:
- Under-lighting Deeper Skin Tones: This is perhaps the most prevalent issue. Because darker skin absorbs more light, it requires more illumination than lighter skin to achieve the same perceived brightness. Don't be afraid to increase your light power or bring your light source closer. Meter for the skin, not just the overall scene.
- Over-lighting Lighter Skin Tones: Conversely, lighter skin can easily blow out, losing all detail. Use a light meter to ensure your highlights retain texture. Feathering your light (aiming the edge of the light at the model) can also help.
- Ignoring Undertones in Makeup: Ashy foundation or incorrect highlight colors can ruin a shot. Always work with an MUA who understands diverse undertones and has a comprehensive kit.
- Over-powdering: Especially on melanin-rich skin, too much powder can create an undesirable matte or ashy finish. Use powder sparingly and strategically, focusing on oil-prone areas.
- Heavy-Handed Retouching: Plastic-looking skin loses all its natural beauty and authenticity. Prioritize texture. Use non-destructive methods and a light touch.
- Neglecting Reflectors/Fill: Relying solely on a main light often leads to harsh shadows and a lack of luminosity. Fill light is your friend for achieving that coveted glow.
Frequently Asked Questions (FAQ)
Q: What's the single most important piece of equipment for photographing diverse skin tones? A: While many tools are helpful, a high-quality, large, soft light modifier (like a large octabox or parabolic softbox) is arguably the most critical. Its ability to create even, wrapping light minimizes harsh transitions and flat tones, laying the perfect foundation for all complexions to glow.
Q: How do I prevent darker skin tones from looking 'muddy' or underexposed? A: This often comes down to two things: adequate illumination and proper metering. Ensure your main light is powerful enough and positioned correctly, and always use a light meter (or your camera's spot meter) to expose for the skin's mid-tones. Additionally, utilize fill light or reflectors to gently lift shadows and add dimension without flattening the image.
Q: Should I use different white balance settings for different skin tones? A: Ideally, you should aim for a consistent, accurate white balance for your entire shoot, often set using a gray card or color checker on set. While you might make minor, subtle color grading adjustments in post-production to enhance warmth or richness for specific skin tones, the initial white balance should be neutral and true to the light source.
Q: What are the best makeup products for enhancing glow on deep skin tones? A: For deep skin tones, focus on cream or liquid highlighters with golden, bronze, or coppery undertones. Avoid silver or cool-toned highlighters, which can appear stark. Sheer, hydrating foundations that match the model's exact undertone are also crucial, allowing the skin's natural luminosity to shine through.
Q: How can I ensure my studio lighting remains consistent across various models with different complexions? A: Consistency in studio lighting starts with precise light placement and power settings. Use light stands with measurements and mark positions. While your *settings* might remain consistent, your *metering* for each model's skin might require slight adjustments in power or aperture to achieve the desired exposure and ensure every diverse skin tone glows beautifully. Always test and review on location.
Key Takeaways and Final Thoughts
Mastering the art of photographing diverse skin tones in studio beauty shots is a journey of continuous learning and refinement. It demands technical precision, artistic vision, and a deep commitment to inclusivity. Here are the most critical takeaways:
- Understand Light's Interaction: Recognize that melanin levels affect light absorption and reflection, requiring tailored lighting approaches.
- Prioritize Soft, Large Light Sources: These create even, flattering illumination for all complexions.
- Leverage Fill Light and Reflectors: Essential for lifting shadows and adding dimension, particularly for deeper skin tones.
- Collaborate with a Skilled MUA: Precise foundation matching and strategic highlighting are non-negotiable for authentic radiance.
- Embrace Ethical Post-Production: Use non-destructive techniques like frequency separation and subtle dodge & burn to enhance, not erase, natural beauty.
- Cultivate an Inclusive Mindset: Beyond technique, fostering comfort and celebrating diversity on set yields the most genuine and luminous results.
As you continue your journey in beauty photography, remember that every face tells a unique story. Your ability to capture and celebrate that story, making every diverse skin tone glow with authentic radiance, will not only elevate your craft but also contribute to a more beautiful and representative visual landscape. Embrace the challenge, refine your skills, and let your work be a testament to the stunning diversity of human beauty.
Recommended Reading
- Unlock Profit: 7 Steps to Source & Sell Vintage Gems
- Safely Setting Fragile Antique Gemstones: 7 Expert Methods You Need
- 7 Ways to Master Style & Performance in Sports Eyewear Trends
- 7 Expert Tips: Guiding Grooms on Complex Bridal Gown Attire Matching
- Unlock the Secret: How to Reduce Microplastic Shedding from Your Clothes for a Cleaner Planet


Your email address will not be published. Required fields are marked *