
How to Ensure Structural Integrity for Large-Scale Wearable Art Jewelry?
In my experience, the leap from small-scale adornment to monumental wearable art presents a unique set of engineering challenges. Unlike static sculpture, wearable art must contend with dynamic forces, body movement, and the inherent stresses of being worn, demanding a rigorous approach to its underlying structure.
Material selection is paramount, extending far beyond aesthetic appeal. For large-scale pieces, the mechanical properties of your chosen materials—specifically their strength-to-weight ratio, fatigue resistance, and flexibility—are critical determinants of a piece's longevity and stability.
I’ve often guided designers towards innovative materials like aerospace-grade aluminum, titanium, or high-strength composite polymers, which offer incredible structural integrity without excessive bulk. Even traditional materials like sterling silver or brass can be engineered for strength through strategic alloying, work hardening, or by increasing their gauge.
A common mistake I see emerging artists make is treating structural integrity as an afterthought, rather than an intrinsic part of the initial design blueprint. True robustness begins in the conceptual phase, where you must anticipate the forces acting upon the piece and design accordingly.
Consider the piece as a miniature architectural marvel, subject to gravitational forces and dynamic stresses from the wearer's movement. You must meticulously map out load-bearing points, identify potential stress concentrations, and design for effective weight distribution across the wearer’s body.
The integrity of any large-scale piece often hinges on its joinery and connection points. These are typically the weakest links, and their failure can compromise the entire artwork. Selecting the appropriate joining method for each material and stress point is non-negotiable.
- Welding and Brazing: For metals, these create strong, permanent bonds that effectively become part of the material itself, ideal for high-stress areas.
- Riveting and Bolting: Mechanical fasteners provide robust, inspectable connections that can also allow for controlled movement, which is crucial for articulated pieces.
- Advanced Adhesives: Industrial-grade epoxies and structural adhesives can offer surprising strength for dissimilar materials, but require meticulous surface preparation and understanding of their curing properties.
- Interlocking Systems: Cleverly designed tabs, slots, or pins can distribute stress across larger areas, often eliminating the need for external fasteners and creating visually seamless connections.
For truly monumental works, an internal armature or support structure is often indispensable. Much like the skeleton within a body or the steel framework within a skyscraper, this hidden infrastructure provides the core strength and shape, allowing lighter, more decorative elements to be attached without bearing significant load.
Beyond mere structural soundness, true integrity encompasses wearability and ergonomic considerations. A piece that causes discomfort, restricts movement, or poses a safety risk to the wearer, no matter how beautiful, ultimately fails in its purpose as wearable art. Balance, weight distribution, and padding are key.
Before committing to final materials and construction, rigorous prototyping and testing are non-negotiable. I always advise creating full-scale mock-ups in less expensive materials to identify structural weaknesses, test movement, and conduct wearer trials. This iterative process saves immense time and resources in the long run.
Integrity in large-scale wearable art isn't just about preventing collapse; it's about enabling the art to live, move, and breathe with its wearer, fulfilling its ultimate purpose as a dynamic extension of the human form.
Finally, designing for longevity and future maintenance ensures the piece can endure beyond its initial exhibition. This might involve modular construction for easier repair, selecting materials that age gracefully, or incorporating adjustable elements to accommodate different body types or future modifications.
Understanding the Root of the Problem: Why Does Large-Scale Wearable Art Jewelry Fail Structurally?
In my two decades of crafting and consulting on large-scale wearable art, I've observed a recurring, fundamental misconception: designers often approach these monumental pieces with the same structural mindset they apply to a delicate pendant. This oversight is the root cause of countless structural failures, transforming breathtaking visions into fragile disappointments.
The leap from a small, static jewel to a large, dynamic wearable sculpture introduces entirely new forces. Gravity, once a benign constant, becomes a relentless adversary, constantly pulling down on every component. Furthermore, the wearer's movement introduces complex kinetic stresses that are rarely considered in initial designs.
A common mistake I see is the misapplication of materials. While a particular metal or polymer might perform admirably in a small-scale piece, its mechanical properties—its tensile strength, elasticity, or fatigue resistance—can be completely inadequate when scaled up. This isn't just about weight; it's about how the material responds to sustained stress and dynamic loads.
For instance, a thin gauge of silver wire, perfect for a delicate filigree brooch, will inevitably buckle or fatigue when used to support a large, multi-component neckpiece. The intrinsic properties of the material simply cannot withstand the amplified forces at play, leading to deformation or outright breakage over time.
Perhaps the most frequent point of failure lies in the joinery. Whether it's soldering, riveting, or cold connections, these are the critical junctures where individual components meet. In my experience, designers often underestimate the sheer amount of stress these points will bear, especially under dynamic conditions.
Insufficient surface area for a solder joint, rivets that are too small or improperly set, or the reliance on adhesives for structural integrity are all common culprits. These weak links act as stress concentrators, ensuring that any force, however minor, will exploit these vulnerable points, leading to premature failure.
Another critical oversight is the failure to properly consider the 'load path'—how forces are distributed and transferred through the entire piece. Many designs prioritize aesthetic flow over structural integrity, inadvertently creating areas where weight and movement converge without adequate support.
Imagine a suspension bridge: every cable, every beam is designed to channel forces efficiently to the foundations. Similarly, in large-scale jewelry, if a heavy element's weight isn't thoughtfully channeled through robust, well-distributed structural elements, it will inevitably cause localized stress, leading to distortion or collapse.
The bench test, while useful for basic assembly, is woefully inadequate for predicting real-world performance. A piece might look sound on the workbench, but its true structural integrity is only revealed under actual wear conditions, with the wearer moving, sitting, and interacting with their environment.
I always stress the importance of rigorous wear-testing. Does the piece snag? Does it pinch? Does it shift uncomfortably, placing unforeseen stress on a particular joint? These are vital questions that can only be answered by observing the piece in motion, under the very conditions it's designed for.
Finally, and perhaps most subtly, is the tendency to fall into the aesthetic trap. While visual impact is paramount in art jewelry, it cannot come at the expense of fundamental engineering principles. A piece that is visually stunning but structurally unsound is, ultimately, a fleeting spectacle.
True artistry in large-scale wearable art lies in the seamless integration of breathtaking form and unwavering function. Neglecting this balance is the surest path to structural failure, and a valuable lesson learned, often, the hard way.
Inadequate Material Selection & Stress Analysis
In my extensive experience overseeing the creation of large-scale wearable art, I've observed that two of the most critical yet frequently overlooked areas are **inadequate material selection** and a complete lack of **stress analysis**. These aren't merely design considerations; they are foundational pillars that dictate whether your magnificent vision will endure or fail spectacularly under its own weight or the stresses of wear.
When selecting materials for large-scale pieces, it's a common mistake to prioritize aesthetics alone. While visual appeal is paramount, the true expert understands that a material's **mechanical properties** are equally, if not more, crucial. We must consider factors like tensile strength, yield strength, ductility, fatigue resistance, and the all-important weight-to-strength ratio.
For instance, using sterling silver for a substantial load-bearing component, purely for its beautiful luster, is a recipe for disaster. While beautiful, silver has a relatively low yield strength and is prone to deformation under continuous stress. Instead, I often guide my students and colleagues towards materials like **hardened stainless steel**, **titanium**, or even advanced composites, which offer superior structural integrity without necessarily compromising the aesthetic vision when used thoughtfully.
Furthermore, consider the environment and potential interactions. Will the piece be worn against skin, exposed to perspiration, or subject to repeated movement? Neglecting **material compatibility** can lead to galvanic corrosion, where dissimilar metals react, causing one to degrade rapidly. This is a subtle yet devastating failure mode that material selection, informed by a deep understanding of metallurgy, can prevent.
Beyond selecting the right material, understanding how forces will act upon your design is paramount. **Stress analysis** is the disciplined process of predicting how a structure will react to external loads and internal forces. For wearable art, these loads include gravity, the wearer's movement, and even incidental contact, all of which can concentrate stress in unexpected areas.
In the initial design phases, even simple conceptual stress analysis—sketching force vectors or building quick physical mock-ups—can reveal critical weak points. I always encourage creating prototypes from inexpensive materials to test load distribution and movement, observing how the piece articulates and where undue strain might occur.
For truly complex or exceptionally large works, embracing **Finite Element Analysis (FEA)** software is no longer a luxury but a necessity. FEA allows you to digitally simulate various stresses and strains on your design, identifying areas of high stress concentration, predicting deformation, and even modeling fatigue over time. This sophisticated analysis can save countless hours and material costs by pinpointing design flaws before fabrication even begins.
A lack of proper stress analysis often leads to common failure points: thin cross-sections that buckle, sharp internal corners that act as stress risers, or joints that fatigue and fracture from repeated movement. These are the details that separate a piece of art that merely exists from one that truly endures and performs as intended.
In my professional opinion, material selection without rigorous stress analysis is akin to building a skyscraper without understanding its foundation or wind loads. The two are inextricably linked; your choice of material must always be informed by a precise understanding of the forces it will be subjected to, ensuring your wearable art is not just beautiful, but inherently robust.
Flawed Design & Construction Techniques
In my fifteen years working with large-scale wearable art, one of the most persistent issues I encounter is the **underestimation of cumulative load and dynamic stress**.
Designers often focus on aesthetics, neglecting that every component, however small, adds to the overall weight, creating significant strain on connection points and primary structures.
A common mistake I see is treating a large piece as merely a scaled-up version of traditional jewelry. This approach fails to account for the exponential increase in forces acting upon the structure when worn.
"A small flaw in a large structure becomes a catastrophic failure point when subjected to the forces of gravity and human movement."
Another critical misstep lies in **inappropriate material selection or insufficient material gauge** for the intended application.
Using a thin gauge wire for a primary support frame, for example, might seem lightweight, but it introduces unacceptable levels of flex and potential for fatigue failure over time.
I've observed designers using brittle materials like certain resins or unreinforced glass in high-stress areas where impact or bending is inevitable, leading to chips, cracks, and eventual disintegration.
Consider the difference between static display and dynamic wear; materials that perform well in a showcase can fail spectacularly when subjected to the wearer’s movement and external forces.
The integrity of any large structure hinges on its **joinery and connection points**. This is where many projects falter.
Reliance on superficial soldering, insufficient welding penetration, or using adhesives as primary structural bonds for heavy elements are common culprits.
I frequently see designers using only one or two attachment points for a large, cantilevered section, concentrating all stress onto a minimal area.
Instead, the load needs to be intelligently distributed across multiple, robust connection points. Think of how a bridge distributes its load across numerous girders, not just a single bolt.
- **Insufficient Solder/Weld Volume:** Not enough material to create a strong metallurgical bond.
- **Weak Riveting:** Improperly set rivets or using rivets too small for the load.
- **Adhesive Over-Reliance:** Using glues for structural integrity where mechanical fasteners or metallurgical bonds are essential.
A common oversight, particularly in early careers, is the failure to incorporate **redundancy and robust internal support structures**.
Large-scale pieces often require an internal armature or framework, much like a building needs steel beams, to bear the primary load, with the decorative elements attached to this backbone.
Without redundancy – multiple pathways for load distribution or backup attachment points – a single point of failure can lead to the entire piece collapsing.
In my experience, thinking of the piece as a miniature building or a small bridge helps visualize the need for a hidden skeleton beneath the aesthetic skin.
Finally, a significant flaw stems from designing in a vacuum, **ignoring the dynamic interaction with the wearer's body and movement**.
Large pieces are not static sculptures; they must move, bend, and flex with the human form. Failure to account for this introduces unanticipated stress points.
For instance, a rigid section crossing a joint like the elbow or knee will either restrict movement, causing discomfort, or, more likely, fracture itself under repeated strain.
I always advise extensive **wear-testing and prototyping** with a live model to identify these critical stress zones *before* final fabrication. This practical evaluation often reveals design flaws that are invisible on a flat drawing or mannequin.
Step-by-Step: A Practical Framework to Achieve Structural Integrity
In my fifteen years working with large-scale wearable art, I've seen countless ambitious designs falter not due to lack of artistic vision, but a fundamental misunderstanding of engineering principles. Ensuring structural integrity isn't an afterthought; it's an intrinsic part of the design process, starting from the very first sketch. What follows is a practical framework, honed through years of trial and error, designed to guide you through this critical journey.Phase 1: Holistic Conceptualization & Material Science Integration
The foundation of structural integrity is laid long before fabrication begins. It starts with a deep dive into the properties of your chosen materials, understanding their strengths, weaknesses, and how they interact under stress. A common mistake I observe is selecting materials based purely on aesthetics without considering their mechanical performance under the unique demands of wearable art.
- Early Material Selection: For a large chest piece, for instance, are you considering a high-strength-to-weight ratio material like titanium or aluminum, or are you set on sterling silver, which, while beautiful, requires significantly more structural reinforcement? This decision directly impacts the piece's longevity and wearability.
- Understanding Load Paths: Visualize how the weight of the piece will be distributed and where stress concentrations will occur. Just as an architect designs for load-bearing walls, you must design for load-bearing elements within your jewelry.
- Environmental Factors: Will the piece be worn in high-humidity environments, exposed to sweat, or subject to repeated flexing? These factors influence material choice and the necessary protective measures.
Phase 2: Rigorous Digital & Physical Prototyping
Never skip the prototyping phase, especially with complex, large-scale works. This is where you identify potential failure points cost-effectively, long before investing in precious metals and labor. In my studio, we embrace a "fail fast, fail cheap" philosophy.
- Digital Stress Analysis: Utilize CAD software (e.g., Rhino, Fusion 360) to create detailed 3D models. Many programs offer basic stress analysis tools that can visually highlight areas where material might buckle or fracture under simulated loads. This insight is invaluable for optimizing your design.
- Physical Mock-ups: Beyond digital, create full-scale mock-ups using inexpensive materials like cardboard, foam board, or even 3D-printed plastics. This allows you to test the piece's fit on the body, observe how it moves, and identify areas of strain or discomfort. For a large, articulated collar, a simple paper model can reveal hinge limitations or points of excessive pressure on the wearer.
- Iteration is Key: Do not be afraid to redesign. A prototype failing is a success; it means you found a flaw before it became a costly problem in the final piece.
Phase 3: Engineered Joinery & Connection Strategy
The vast majority of structural failures in large-scale jewelry occur at the connections. A joint is only as strong as its weakest link, and often, it's the most overlooked element. This phase demands a meticulous approach to how individual components are brought together.
- Beyond Simple Soldering: While soldering is fundamental, for large pieces, consider more robust methods. Welding (laser, TIG) offers superior strength for many metals by creating a monolithic bond. For articulated pieces, riveting provides flexible yet strong connections, allowing movement without undue stress on the material.
- Mechanical Fasteners: For components that may need to be disassembled for transport, repair, or even for changing parts, small, custom-made screws or interlocking mechanisms can be incredibly effective. Ensure threads are robust and materials are compatible to prevent galling or corrosion.
- Stress Distribution at Joins: Avoid sharp angles or abrupt changes in cross-section at connection points, as these create stress concentrators. Design your joins with gradual transitions, fillets, or reinforcement gussets to distribute forces more evenly.
"In the realm of large-scale wearable art, the integrity of a piece is not merely about its intrinsic strength, but about the intelligent orchestration of its connections. A magnificent form with a weak joint is nothing more than a temporary spectacle."
Phase 4: Strategic Weight Distribution & Ergonomic Integration
While often perceived as an ergonomic concern, weight distribution is fundamentally a structural one. An unbalanced or poorly distributed load not only makes a piece uncomfortable but also places undue strain on specific points, accelerating fatigue and potential failure. It's about making the piece feel lighter than it is, and distributing forces intelligently across the body and the jewelry itself.
- Internal Bracing & Hollowing: For substantial forms, consider internal structures. Just as an airplane wing is hollow but internally braced, your large elements can be too. Hollowing out sections, while maintaining sufficient wall thickness, significantly reduces weight without compromising strength if designed correctly.
- Counterbalancing: For pieces that extend significantly from the body, explore counterbalancing techniques. This might involve placing a small, dense weight strategically, or extending structural elements to distribute the load across a broader area of the body (e.g., shoulder pads for a large necklace).
- Wearer Interface: The points where the jewelry touches the body are critical. Use broad, smooth surfaces or padded elements to spread the load, reducing localized pressure on the wearer and minimizing stress on the jewelry's attachment points.
Phase 5: Comprehensive Load Testing & Iterative Refinement
The final, and arguably most critical, step is rigorous testing under simulated real-world conditions. A piece might look perfect on the workbench, but its true test comes when it interacts with movement, gravity, and the unpredictable nature of being worn. This isn't just a final check; it's a phase of discovery and potential improvement.
- Dynamic Movement Testing: Have a model (or yourself) wear the piece and perform a range of movements – walking, sitting, raising arms, turning. Observe how the piece articulates, where it flexes, and if any components show signs of strain or undue friction. Listen for creaks or unusual sounds.
- Simulated Stress Scenarios: Gently apply pressure to various points, mimicking accidental bumps or pulls. For an articulated piece, repeatedly flex the hinges to assess their fatigue resistance. In my experience, a controlled "shake test" can reveal loose connections or structural weaknesses that might otherwise go unnoticed.
- Post-Wear Inspection: After each test wearing, meticulously inspect the piece under magnification. Look for micro-fractures, signs of metal fatigue, loosening of joins, or areas where the finish is being abraded due to internal friction. Document any findings thoroughly.
- Refine and Reinforce: Based on your testing, make necessary adjustments. This might involve adding a reinforcing strut, changing a hinge design, or even re-engineering a problematic connection. The goal is not just to fix a flaw, but to understand its root cause and ensure it won't recur.
Step 1: Design Phase - Material Selection & Load Distribution
The very foundation of structural integrity for any large-scale wearable art jewelry piece is laid during the **design phase**, specifically in material selection and load distribution. In my extensive experience, this initial step is not merely conceptual; it's where the piece's long-term viability, comfort, and safety are either meticulously engineered or inadvertently compromised. A common mistake I observe is prioritizing aesthetics above all else, only to face significant structural challenges later. Truly robust design begins with an informed understanding of your chosen materials, recognizing that each possesses a unique set of **physical properties** critical for large-scale applications. When selecting materials, move beyond surface appeal and delve into their **strength-to-weight ratio**, **flexibility**, **fatigue resistance**, and **biocompatibility**. For instance, a beautifully intricate design crafted from a brittle material like certain types of ceramic, without adequate support, is an accident waiting to happen. Consider the inherent characteristics of common jewelry materials:Titanium and Aircraft Aluminum: These offer exceptional strength-to-weight ratios, making them ideal for large, lightweight structures that must withstand dynamic forces. Their workability, however, requires specialized tools and techniques.
Stainless Steel: While heavier, its high tensile strength and corrosion resistance make it suitable for load-bearing frameworks or connection points, especially where durability is paramount.
High-Density Resins and Composites: Materials like carbon fiber reinforced polymers allow for complex, lightweight forms with surprising rigidity, but their long-term UV stability and abrasion resistance need careful consideration.
Traditional Precious Metals (Gold, Silver): While beautiful, their malleability and density often necessitate internal armatures or significantly thicker gauges for large-scale pieces to prevent deformation or collapse.
Multi-Point Attachment: Instead of a single neck wire, consider a harness-like system for a large chest piece, distributing weight across shoulders and back. For a large bracelet, multiple attachment points around the arm prevent rotation and strain.
Internal Armatures and Bracing: For hollow or voluminous forms, incorporating an internal skeleton (e.g., a lightweight titanium frame within a resin shell) provides rigidity and prevents buckling without adding excessive external bulk.
Varying Material Thickness: Thicken sections that will bear more stress (e.g., a joint, a hinge, or the area where a heavy pendant attaches) and thin out less stressed areas to save weight.
Ergonomic Contouring: Design the piece to conform to the body's natural curves, spreading pressure over a larger surface area and minimizing uncomfortable pressure points. A flat back on a heavy piece against a curved torso will inevitably cause discomfort and potentially shift, leading to structural stress.
The true artistry in this step lies in the **synergy between material selection and load distribution**. A super-strong material can still fail if its load is concentrated on a weak point, just as a perfectly distributed load won't save a piece made from an inappropriate, flimsy material. Imagine designing a large, sculptural necklace intended to drape across the shoulders. You might choose lightweight aluminum for the main decorative elements, but for the actual shoulder pads and connection points, you'd opt for reinforced carbon fiber or even a thin, contoured sheet of spring steel, distributing the weight over the clavicles and upper back, rather than just the neck. This layered approach, leveraging the best properties of each material, is key. Mastering **material selection and load distribution** in the design phase is paramount. It's the analytical backbone of your creative vision, ensuring that your wearable art not only captivates aesthetically but also endures structurally, offering both beauty and comfort for years to come.In my workshop, we often say: "A piece that doesn't sit right, won't last right." The wearer's comfort is not just an ergonomic concern; it's a direct indicator of how well the load is being managed structurally.
Step 2: Fabrication Phase - Reinforcement & Joinery Techniques
The fabrication phase is where theoretical designs meet the tangible world, and it's a critical juncture for ensuring long-term structural integrity in large-scale wearable art. This isn't merely about assembling parts; it's about meticulously engineering every connection and support system to withstand the rigors of wear, movement, and gravity. In my 15 years, I've seen countless ambitious pieces fail due to oversight in this very step.A primary consideration is **reinforcement**, which must be integrated, not merely added as an afterthought. For substantial pieces, relying solely on the primary material's inherent strength is often insufficient. Think of it like architecture; you wouldn't build a skyscraper without a steel skeleton.
Internal armatures and ribbing are paramount. I frequently employ **stainless steel wire or titanium rods** of appropriate gauges to create an unseen skeletal framework within the piece. This framework acts as the primary load-bearing structure, distributing weight and stress away from the more delicate decorative elements. For instance, a large breastplate might have a hidden titanium frame that follows the contours of the body, providing rigid support while allowing the outer shell to be lighter gauge metal or even textile.
Beyond internal structures, **strategic material layering and work hardening** are vital. For areas subjected to high stress, such as attachment points or hinges, I often double-layer metal or incorporate gussets. Work hardening, achieved through hammering or forming, significantly increases a metal's strength, but it must be balanced with annealing to prevent brittleness and allow for further manipulation.
When it comes to **joinery techniques**, this is where true mastery is demonstrated. For large-scale work, you must move beyond the basic soldering often taught in introductory courses. Each join must be considered a potential point of failure if not executed flawlessly.
In my experience, the biggest mistake jewelers make with large pieces is underestimating the leverage forces at play. A small, weak solder joint on a long lever arm creates an enormous stress concentration.
While **soldering** remains fundamental, its application shifts dramatically. We move towards harder solders with higher melting points to achieve stronger, more durable bonds. Crucially, maximize the contact area between components; a wide seam is inherently stronger than a narrow one, as it distributes the stress over a larger surface. For complex assemblies, I often plan for multiple, reinforcing solder points rather than relying on a single, central join.
For mechanical strength and the ability to join dissimilar materials or create articulation, **riveting** is indispensable. There are various types, each with its purpose:
- Solid Rivets: Offer the strongest, most permanent connection, ideal for high-stress areas or when integrating components that will experience dynamic forces.
- Tube Rivets: Excellent for creating pivots or allowing elements to swing freely, while still providing robust structural connection.
- Flush Rivets: Used when a seamless, non-protruding surface is desired, often requiring precise countersinking.
Proper hole drilling, reaming, and careful peening are critical for a secure rivet. A poorly formed rivet head can lead to looseness or failure under stress.
For certain materials like platinum, stainless steel, or when extreme strength is required with minimal heat distortion, **welding** techniques such as laser welding or TIG (Tungsten Inert Gas) welding become invaluable. Laser welding offers incredible precision and minimal heat spread, perfect for intricate structural reinforcement in specific areas without compromising surrounding elements. TIG welding, while requiring more skill and setup, provides exceptionally strong, clean bonds on thicker gauges.
Finally, consider **cold connections and specialized adhesives** as supplementary, not primary, structural supports. Cold connections like screws or interlocking tabs can be useful for modularity or when parts need to be disassembled for maintenance or transport. Adhesives, particularly industrial-grade epoxies, can bond materials that cannot be soldered or welded, but they should always be used in conjunction with a mechanical join if the bond is critical. Never rely on glue alone for a load-bearing connection.
Step 3: Component Integration & Weight Management
This pivotal step, Component Integration & Weight Management, is where your artistic vision truly intersects with engineering principles. It's not merely about assembling parts; it's about orchestrating how each element contributes to the overall structural integrity and wearability of your large-scale piece.
In my experience, a common oversight is failing to consider the load paths – how forces are transmitted through the jewelry. Each connection point becomes a potential stress concentrator, and its method of integration dictates the piece's resilience.
For large-scale works, traditional soldering or welding alone may not suffice. I often advocate for a blend of techniques: mechanical fasteners like rivets or screws, interlocking mechanisms, and even specialized cold connections can offer superior strength and flexibility where needed, especially in areas subjected to movement or impact.
It's crucial to reinforce areas that will bear significant load or experience repeated stress. Consider internal armatures or frameworks crafted from lighter, stronger materials, acting as the hidden skeleton of your design. This foresight prevents fatigue failure, which is a silent killer of ambitious pieces.
Hand-in-hand with robust integration is weight management. A structurally sound piece that is too heavy to wear comfortably or safely is, quite simply, a failure in design. The goal is to achieve maximum visual impact with minimum physical burden.
The most direct approach to reducing weight begins with material selection. While precious metals are often desired, exploring alternatives or combinations is vital. For instance, titanium offers an exceptional strength-to-weight ratio, while hollow-formed or electroformed traditional metals can drastically reduce mass without sacrificing the desired aesthetic.
Beyond material choice, intelligent design plays a critical role in weight reduction. I consistently employ techniques that remove significant bulk while maintaining or even enhancing structural rigidity:
- Hollowing Out Forms: Creating hollow shells for what appears to be solid mass, drastically reducing material usage.
- Intricate Filigree: By removing material through delicate patterns, you achieve a lighter piece without sacrificing visual complexity.
- Lattice Structures: Designing open frameworks that distribute load efficiently, akin to the strong yet incredibly light internal structure of a bird's bone.
Furthermore, weight distribution is as critical as total weight. A heavy piece with poorly distributed weight will feel far heavier and more uncomfortable than a well-balanced one. Analyze how the piece will sit on the body; distributing weight across multiple contact points or using counterweights can dramatically improve wearability.
In my two decades of crafting wearable art, I've learned that this step is an iterative dance between material science, engineering, and artistic intent. It demands foresight, meticulous planning, and a willingness to prototype.
Step 4: Advanced Fastening & Connection Methods
When designing large-scale wearable art, the conventional wisdom of standard jewelry findings simply doesn't apply. In my experience, relying solely on soldered jump rings or delicate clasps for substantial pieces is a recipe for structural failure. We must elevate our thinking to an engineering mindset, employing methods that ensure the piece not only holds together but thrives under the dynamic stresses of wear. The key lies in understanding that large-scale work demands connections that distribute stress across a wider area, prevent material fatigue, and withstand significant tensile, shear, and torsional forces. This often means moving beyond traditional soldering and embracing techniques borrowed from industrial design and fabrication. One of the most robust and elegant solutions is **riveting**. This cold connection method creates a permanent mechanical bond by deforming a metal shaft, effectively clamping components together. It's particularly effective for joining dissimilar metals where soldering might be problematic due to different melting points or galvanic corrosion concerns.- Solid Rivets: Offer maximum strength and permanence, often used in critical load-bearing areas. They require access to both sides for peening.
- Tubular or Semi-Tubular Rivets: Provide a strong connection with less material displacement, suitable for less extreme loads or where aesthetic flushness is desired.
- Blind Rivets (Pop Rivets): Useful for situations where only one side of the assembly is accessible, though generally less strong than solid rivets for heavy-duty applications.
When incorporating bolts or screws, consider:
- Thread Lockers: Products like Loctite can prevent loosening due to vibration, critical for wearable art that moves with the body.
- Lock Washers: Spring washers or star washers add friction, resisting rotational loosening.
- Material Compatibility: Ensure the bolt material is compatible with the components to prevent galvanic corrosion. Stainless steel miniature hardware is often a good choice.
"True structural integrity in large-scale wearable art isn't about adding more glue or a thicker solder joint; it's about fundamentally rethinking how forces are managed and dissipated throughout the piece, often through engineered connections that become part of the aesthetic."For maximum strength and a seamless appearance in appropriate metals, **TIG (Tungsten Inert Gas) welding** or **laser welding** can create incredibly strong, clean joints with minimal heat distortion compared to traditional torch methods. These require specialized equipment and significant skill, but the results are unmatched for critical connections. Another sophisticated approach involves **interlocking mechanisms and keying**. This technique isn't about a single fastener but about designing components that physically lock into each other, distributing loads across surfaces rather than concentrating them at a single point. Think of a tab-and-slot system, or a mortise-and-tenon joint adapted for metal. These mechanisms are often reinforced with rivets or miniature bolts, creating a hybrid connection that leverages the strengths of multiple methods. Finally, while not a primary structural connection for heavy loads, **advanced structural adhesives** can play a crucial supporting role. High-performance two-part epoxies or structural acrylics can bond dissimilar materials, fill gaps, or provide additional shear strength when combined with mechanical fasteners. However, a common mistake I see is designers relying on these alone for primary structural support; they are best used as secondary reinforcement or for non-load-bearing aesthetic elements. Always research the specific adhesive's shear strength, temperature resistance, and flexibility before application.
Step 5: Surface Treatment & Environmental Protection
Once the core structure of your large-scale wearable art is robust, the next critical step, often underestimated, is Surface Treatment & Environmental Protection. This isn't merely about aesthetics; it's the primary shield safeguarding your piece's long-term structural integrity.
In my 15 years in this field, I've seen magnificent pieces degrade prematurely because designers overlooked this vital stage. Think of the surface as the skin protecting the skeleton; without it, the underlying structure is vulnerable to breakdown from wear and environmental stressors.
The primary goals of effective surface treatment are multi-faceted, extending far beyond a simple shine:
- Corrosion Resistance: Especially crucial for metals, preventing rust or tarnish that can weaken joints and components over time.
- Abrasion and Scratch Protection: Minimizing wear from incidental contact, ensuring delicate elements and connections remain intact.
- UV Degradation Prevention: Protecting polymers, dyes, and natural materials from embrittlement or color fading due to sunlight exposure.
- Chemical Resistance: Guarding against damage from body oils, sweat, cosmetics, cleaning agents, and atmospheric pollutants that can erode materials.
- Moisture Barrier: Preventing water ingress that can lead to internal degradation, material swelling, or compromised adhesives.
The choice of treatment is highly material-dependent. For metals, for instance, plating (e.g., rhodium over silver, gold over brass) offers not only beauty but also a robust barrier against oxidation and tarnishing. For aluminum, anodizing creates a hard, corrosion-resistant oxide layer integral to the metal itself, providing superior durability compared to a simple paint.
A common mistake I observe is neglecting proper surface preparation. No coating, however sophisticated, will perform optimally without meticulous cleaning, degreasing, and, if necessary, etching. Residual oils, dust, or oxides will compromise adhesion, leading to bubbling, flaking, or premature failure of the protective layer, exposing the underlying structure.
"A perfect finish on a poorly prepared surface is merely a temporary illusion of integrity."
For polymers and plastics, consider incorporating UV stabilizers directly into the material during fabrication, or applying specialized clear coats designed to block harmful UV radiation. I once worked on a large costume piece where the designer used an off-the-shelf plastic without UV protection; within a year, the exposed sections became brittle and cracked, significantly compromising the entire arm structure.
Natural materials like wood, leather, or textiles require different approaches. Penetrating sealants, waxes, or specialized oils can offer water resistance and prevent drying out or cracking, which can lead to structural failure. For textiles, hydrophobic sprays can provide a crucial layer of protection against spills and environmental moisture, maintaining fabric integrity.
When dealing with mixed materials, especially metals, be acutely aware of galvanic corrosion. Placing dissimilar metals in contact, particularly in the presence of an electrolyte like sweat or high humidity, can lead to rapid degradation of the more active metal. Strategic insulation or barrier coatings between such interfaces are non-negotiable for long-term structural integrity.
Finally, environmental protection extends beyond the piece itself. Educating the wearer on proper care and storage is paramount for the longevity of large-scale wearable art. Advise on avoiding harsh chemicals, storing in controlled humidity environments, and using soft, breathable covers to prevent dust accumulation and accidental abrasion. This holistic approach ensures the structural soundness of your piece for years to come.
Step 6: Wearability Testing & Stress Points Assessment
After meticulous design and fabrication, the true test of any large-scale wearable art piece lies in its real-world application. Wearability testing is not merely about comfort; it's a critical stress test that reveals how the piece interacts with the human form under dynamic conditions, exposing potential structural vulnerabilities that static inspection might miss.
In my experience, skipping or superficial wearability testing is a common pitfall. It's the difference between a gallery showpiece and a resilient, lasting work of art. You need to understand how the weight shifts, how gravity acts on different components, and where friction or impact might occur during movement.
To conduct effective wearability testing, I advocate for a multi-faceted approach, ideally involving different body types and movement patterns. This isn't a task for a mannequin; it requires the nuanced feedback of a human being.
- Simulated Environments: Have your test subject wear the piece in conditions that mimic its intended use. Will it be worn standing, sitting, walking, or even dancing? Each posture and movement will exert different forces on the structure.
- Extended Duration: A quick try-on is insufficient. Encourage the wearer to keep the piece on for an extended period – an hour, several hours, or even a full day if practical. This allows for the cumulative effects of wear and fatigue to become apparent.
- Active Movement: Instruct the wearer to perform a range of motions, from simple arm raises to more complex bending and twisting. Pay close attention to how the piece responds to these actions.
- Detailed Feedback: Provide a structured questionnaire or conduct an interview. Ask about pinch points, areas of discomfort, sounds the piece makes, any feeling of instability, or components catching on clothing.
Simultaneously with wearability, you must conduct a rigorous stress points assessment. These are the Achilles' heels of your design – areas where concentrated force, repeated motion, or material fatigue are most likely to lead to failure. Identifying these early allows for strategic reinforcement or design modification.
A common mistake I see is designers focusing solely on the primary connections. While crucial, stress points often emerge in less obvious areas, like where a decorative element meets a structural frame, or where a flexible component transitions to a rigid one.
During and after wear testing, closely examine the piece for tell-tale signs of stress:
- Visual Cues: Look for subtle deformations, hairline cracks, scratches, or abrasions. Even a slight bend in a component can indicate an overloaded area.
- Tactile Cues: Gently manipulate various parts. Do any joints feel loose? Are components wobbly? Does a connection point creak or show any give?
- Material Response: Understand how your chosen materials behave under stress. Metals can work-harden and become brittle; plastics can creep or fatigue; textiles can fray or tear.
Think of it like an aerospace engineer testing a wing. They don't just look at the primary attachment points; they analyze every rivet, every seam, every material transition for potential fatigue. For large-scale jewelry, common stress points include:
- Hinges and Pivots: These are constantly in motion and bear significant load.
- Clasps and Fasteners: The primary connection to the body, often subject to tension and repeated manipulation.
- Suspension Points: Where the entire weight of a section, or the whole piece, hangs. Ensure these are robust and distribute load broadly.
- Thin or Undersupported Sections: Any area where the material gauge is insufficient for the expected load or where a long span lacks adequate bracing.
- Material Intersections: Points where different materials meet, especially if they have disparate flexibility or thermal expansion rates.
“The true genius of a wearable art piece isn't just in its initial beauty, but in its ability to endure the dynamic dance between art and anatomy. If it fails on the body, it fails as wearable art.”
Once identified, stress points demand immediate attention. Reinforcement isn't just about adding more material; it's about intelligent load distribution, much like how an architect designs a bridge to spread forces evenly. This might involve increasing material thickness, adding gussets or strategic bracing, using multiple connection points instead of a single one, or even redesigning the joint entirely to better dissipate stress.
This iterative process of test, assess, and refine is what ultimately elevates a design from a mere concept to a truly structurally sound and wearable masterpiece.
Step 7: Maintenance & Handling Guidelines for Longevity
It's a common misconception that once a large-scale wearable art piece is completed, its structural integrity is set in stone. In my extensive experience, the journey to longevity truly begins after fabrication, with diligent maintenance and meticulous handling. These guidelines are not merely suggestions; they are critical protocols that safeguard your creation against the inevitable forces of wear, environment, and time. The very first interaction with a newly completed large-scale piece, especially after shipping, is crucial. I've seen more initial damage from improper unpacking than from actual wear. Always unpack on a clean, soft, and stable surface, ensuring multiple handlers are present if the piece is unwieldy. Lift from designated strong points and never by delicate embellishments or unsupported spans; think of it like handling a fragile antique, with slow, deliberate movements. Environmental factors are silent aggressors. Humidity fluctuations, extreme temperatures, and direct sunlight can cause materials to expand, contract, or degrade, leading to stress on joints and material fatigue over time. For textile-based or organic components, maintaining a stable relative humidity between 45-55% is ideal. For metals, this prevents oxidation and tarnishing that can weaken surface integrity. I always advocate for **custom-built storage solutions**. This isn't an extravagance; it's an investment. A tailored mannequin or support structure, designed to evenly distribute the piece's weight and avoid pressure points, is non-negotiable for true longevity. Consider a climate-controlled display case or storage area, especially for exhibition pieces, as dust accumulation can trap moisture and abrasive particles, contributing to surface degradation. Regular, gentle cleaning is paramount, but the "how" is material-specific. A common mistake I see is a one-size-fits-all approach to cleaning large, multi-material pieces. For metals, a soft, lint-free cloth and mild, pH-neutral soap solution, applied sparingly, is often sufficient. Avoid abrasive cleaners or ultrasonic baths unless specifically advised for the metal type and any stone settings. * **Textiles:** Gentle vacuuming with a brush attachment or spot cleaning with distilled water and a micro-fiber cloth. * **Resins/Plastics:** A soft cloth dampened with water; avoid alcohol-based cleaners that can dull or craze surfaces. * **Stones/Gems:** Depending on hardness and porosity, some may require only a wipe, others a very mild soap solution. Always research individual stone care. Never submerge large pieces. Instead, clean sections methodically, ensuring complete drying before storage, as residual moisture is a breeding ground for corrosion and biological growth. In my practice, I implement a **scheduled inspection protocol** for any piece intended for long-term display or frequent wear. This is your early warning system. During inspection, meticulously check all solder joints, mechanical connections (rivets, screws), tension settings for stones, and the integrity of flexible components like hinges or chains. Look for hairline cracks, subtle warping, or signs of material fatigue."Ignoring a loose rivet today can lead to a catastrophic component failure tomorrow. Small, proactive repairs are the bedrock of structural longevity."Document any findings, even minor ones. This creates a valuable history of the piece's condition and allows you to track potential problem areas over time, enabling targeted preventative maintenance. Transporting large-scale wearable art is inherently risky. Standard packaging is simply inadequate. I insist on **custom-engineered crates** that suspend the piece, or cradle it securely, preventing any shifting or impact. Padding should be non-abrasive and acid-free, and the piece's orientation within the crate is critical; it should be positioned to minimize stress on its most vulnerable points during transit. When displaying, ensure the mounting system is robust and correctly installed. For pieces designed to be worn, educate the wearer on proper donning and doffing techniques, emphasizing controlled movements and avoiding sudden jerks or impacts. Ultimately, the longevity of your creation often rests in the hands of its custodian. Providing comprehensive, easy-to-understand care instructions is not just good service; it's a vital part of your structural integrity strategy. I always provide a detailed 'Care and Handling Manual' that includes material specifics, cleaning instructions, storage recommendations, and contact information for future maintenance or repair. This documentation should also outline any limitations of the piece – for instance, if it's not designed for prolonged exposure to water, or if certain movements should be avoided while wearing.
Case Study: How a Renowned Artist Achieved Unprecedented Durability
In my extensive career, I've had the privilege of observing myriad approaches to structural integrity in large-scale wearable art. One particularly brilliant artist, renowned for their ambitious, kinetic pieces, offers a masterclass in achieving unprecedented durability. This artist tackled the monumental challenge of creating a full-body, articulated "exoskeleton" that needed to withstand dynamic performance while remaining lightweight and comfortable for the wearer. The initial design phase for this piece was incredibly rigorous, a testament to the artist's foresight. They utilized advanced CAD software not just for aesthetic visualization but for comprehensive Finite Element Analysis (FEA). This allowed them to meticulously map stress points and predict material fatigue under various movement scenarios long before fabrication began.A common mistake I see emerging designers make is underestimating the power of digital prototyping for structural analysis. This artist, however, understood that simulated real-world conditions are invaluable for identifying vulnerabilities.
Their material selection was equally revolutionary. Instead of relying solely on traditional jewelry metals, they integrated aerospace-grade alloys and specialized polymers, strategically chosen for their strength-to-weight ratio and flexibility where needed. For instance, the core armature was constructed from a custom-blended, ultra-light titanium alloy, while points requiring articulation incorporated high-performance, self-lubricating composites.
The innovation extended to their joinery techniques. Rather than conventional soldering or simple riveting, they employed a combination of micro-welding for critical load-bearing connections and custom-engineered interlocking mechanisms that distributed stress across multiple points. This minimized localized strain, which is often the Achilles' heel of large structures.
"True durability isn't about making something unbreakable; it's about understanding how it will interact with forces and designing it to gracefully manage those interactions."
Furthermore, the artist implemented a system of redundant support structures within the piece. If one connection point were to fail under extreme stress, an adjacent, secondary support system would immediately take over, preventing catastrophic collapse. This level of engineering is rarely seen outside of industrial design.
Finally, the prototyping and testing phase was exhaustive. The artist subjected scaled models and full-size sections to simulated impacts, vibrations, and prolonged wear tests using articulated mannequins. Data from these tests informed iterative refinements, ensuring that every curve and connection was optimized for both form and function.
In my experience, this methodical, data-driven approach, combined with a willingness to explore unconventional materials and techniques, is the hallmark of true expertise in structural integrity. It's a powerful reminder that robust design isn't just about making things thicker; it's about making them smarter.
Essential Tools, Materials, and Resources for Durable Jewelry Creation
The foundation of any structurally sound large-scale wearable art piece lies not just in the design, but profoundly in the selection and masterful application of the right tools, materials, and a robust knowledge base. In my experience, attempting to cut corners here is a guaranteed path to disappointment, often leading to premature failure of the artwork.For large-scale work, the tools you employ must match the demands of the materials. We are often dealing with heavier gauges of metal and substantial components, which require more than just your standard bench tools. Precision and leverage become paramount.
Essential Tools for Robust Fabrication
Precision Measuring & Marking Tools are non-negotiable. Digital calipers, micrometers, and a sturdy surface plate with a height gauge ensure that every cut, every bend, and every join is accurate to fractions of a millimeter. This precision directly translates to stronger, more reliable connections.
- Heavy-Duty Forming & Shaping Tools: Forget the tiny rawhide mallets. You'll need substantial planishing hammers, raising hammers, and a selection of large stakes and anvils for shaping metal effectively. Bending jigs and specialized mandrels are crucial for consistent curves and angles in thicker wire or sheet.
- Advanced Joining & Fabrication Equipment: While soldering is fundamental, the scale often demands more.
- High-BTU Torches: An oxy-acetylene or a large propane/oxygen torch is essential for achieving the sustained heat required to flow solder across large surface areas or heavy gauge components.
- Laser Welders: For incredibly precise, localized, and strong joins, especially on intricate details or dissimilar metals, a laser welder is an invaluable asset. It minimizes heat distortion and allows for nearly invisible seams.
- TIG Welders: For steel or titanium armatures, or for creating robust, load-bearing connections, a TIG (Tungsten Inert Gas) welder offers unparalleled strength and control. This is where engineering principles truly intersect with artistry.
- Industrial Riveting Tools: For cold connections that require significant strength, a robust riveting system – from pneumatic rivet guns to specialized hand presses for larger diameter rivets – is indispensable.
- Robust Finishing Equipment: A powerful flex shaft with various attachments, larger capacity rotary tumblers for bulk polishing, and substantial buffing machines are necessary to ensure a smooth, durable finish that protects the underlying structure.
"A common mistake I see is artists underestimating the forces at play in a large wearable piece. Gravity, movement, and accidental impacts demand tools that can create connections designed to withstand these stresses, not just look pretty."
Strategic Material Selection for Durability
The choice of material profoundly impacts the structural integrity and longevity of your wearable art. It's a balance between aesthetics, weight, workability, and inherent strength.
- Metals:
- Sterling Silver (and its alloys like Argentium): While beautiful, pure sterling can be soft for large, unsupported structures. For greater strength, consider using thicker gauges or alloys like Argentium silver, which offers increased tarnish resistance and hardness.
- Brass & Bronze: Cost-effective and excellent for large forms, these metals offer good strength. However, their weight can be a factor, and they require proper sealing to prevent skin discoloration.
- Stainless Steel: Often overlooked, stainless steel is incredibly strong, corrosion-resistant, and relatively lightweight for its strength. It's ideal for internal armatures, clasps, or load-bearing components where its aesthetic can be incorporated or hidden. It does require specialized welding techniques.
- Titanium & Niobium: These are the superheroes of lightweight strength. Hypoallergenic and capable of vibrant anodized colors, they are perfect for large pieces where weight is a critical concern. Be warned, however, they are notoriously difficult to work with, requiring dedicated tools and a steep learning curve.
- High-Karate Gold/Platinum: While luxurious, their cost often limits their use in truly large-scale pieces. When used, their specific properties—platinum's density and exceptional wear resistance, or gold's malleability—must be factored into the structural design.
- Non-Metallic Reinforcements & Adhesives:
- High-Strength Epoxies & Adhesives: For integrating non-metallic elements or reinforcing specific joints, industrial-grade, two-part epoxy resins (e.g., those used in aerospace or marine applications) are far superior to craft glues. They offer incredible bond strength and chemical resistance.
- Carbon Fiber & Fiberglass Composites: For truly ambitious, lightweight, and incredibly strong structures, consider incorporating these materials into internal armatures or as a base layer. They can significantly reduce weight while providing immense rigidity.
- High-Performance Plastics/Polymers: Materials like Delrin or UHMW (Ultra-High Molecular Weight Polyethylene) can be machined into lightweight, durable connecting elements, bearings, or hidden structural components.
Invaluable Resources for Mastery
Beyond the tangible tools and materials, the most crucial resource is knowledge and continuous learning. No amount of expensive equipment can compensate for a lack of understanding of material science, engineering principles, and best practices.
- Specialized Workshops & Masterclasses: Seek out opportunities to learn from experts in metal fabrication, welding, or advanced jewelry techniques. The nuances of working with large-scale pieces are often best learned through hands-on instruction.
- Mentorship & Peer Networks: Connect with other artists who specialize in large-scale or sculptural jewelry. Sharing experiences, troubleshooting challenges, and gaining insights from seasoned practitioners is an invaluable resource.
- Technical Literature & Material Data Sheets: Delve into books on metalworking, welding, and even basic engineering principles. Understanding the tensile strength, yield strength, and fatigue resistance of your chosen materials is vital for predicting performance. Always review manufacturer data sheets for specific material properties.
- Reputable Suppliers: Establish relationships with suppliers known for high-quality, consistent materials. The integrity of your piece is directly tied to the quality of its components. In my experience, a slight saving on inferior materials often leads to costly failures down the line.
- Prototyping & Testing: Before committing to the final piece, create scaled prototypes or test specific joint designs under stress. This iterative process allows you to identify weak points and refine your approach, saving significant time and material in the long run.
Ultimately, creating durable large-scale wearable art demands an approach that marries artistic vision with a rigorous understanding of engineering. It's about building a robust framework, not just adorning a surface.
Frequently Asked Questions (FAQ)
As an expert in the field, I often receive questions about the practical challenges of ensuring structural integrity in large-scale wearable art. It's a critical area where theory meets the reality of the human body and movement. Here are some of the most frequently asked questions I encounter, along with my insights.
Q: What are the most common structural failures you see in large-scale wearable art, and how can they be avoided?
A: In my experience, the vast majority of structural failures stem from a few key oversights. The most common is underestimating the dynamic forces a piece will encounter during wear, rather than just its static weight. Designers often focus on the beauty and form, neglecting the hidden stresses.
- Inadequate Joinery: Relying on a single, small solder joint for a high-stress point is a recipe for disaster. For large pieces, mechanical fastenings like rivets, screws, or even robust interlocking systems are often superior to simple soldering, especially for load-bearing connections.
- Poor Weight Distribution: Concentrating all the mass in one area, particularly on a single point of the body, creates excessive strain on both the piece and the wearer. Think of a cantilever; the further out the weight, the more stress at the anchor point.
- Ignoring Material Fatigue: Materials, even metals, can weaken over time with repeated stress, bending, or vibration. Choosing materials with good fatigue resistance and designing to minimize repetitive stress at weak points is crucial.
- Lack of Wearer Movement Consideration: A piece might look stable on a mannequin, but a wearer's natural movements—sitting, standing, turning, even breathing—introduce complex forces. Flex points and articulation must be thoughtfully integrated.
Q: How do I choose the right materials to balance strength, weight, and aesthetics for large-scale wearable art?
A: This is perhaps the most challenging balancing act in large-scale work. It requires a deep understanding of material properties beyond just their visual appeal. My approach is always to start with the structural core and then build outward aesthetically.
- Strength-to-Weight Ratio: For the core structure, prioritize materials with an excellent strength-to-weight ratio. Titanium and certain aluminum alloys are fantastic for this, offering immense strength while being surprisingly light.
- Flexibility vs. Rigidity: Understand where you need rigidity (e.g., a supporting spine) and where you need flexibility (e.g., an articulated joint). Stainless steel can offer rigidity and strength, but can be heavy. Consider spring steels for areas needing controlled flex.
- Composites: Don't overlook modern materials like carbon fiber or fiberglass-reinforced polymers. These can be incredibly strong and light, offering new design possibilities, though they require specialized fabrication techniques.
- Layering and Reinforcement: Often, the solution isn't one perfect material, but a combination. For example, a lightweight acrylic form can be structurally reinforced with an internal metal armature, or a delicate textile can be stiffened with an invisible wire framework.
In my workshops, I always emphasize: "The strongest material is not always the heaviest. It's the one chosen intelligently for its specific role within the overall design."
Q: What are effective methods for testing the structural integrity of a large-scale wearable art piece before its debut?
A: Skipping thorough testing is a common mistake that can lead to embarrassing and damaging failures. You wouldn't launch a bridge without stress tests; your wearable art deserves the same rigor.
- Simulated Wear Testing: The most crucial test. Have a person (ideally of similar build to the intended wearer) wear the piece and perform a range of natural movements: walking, sitting, raising arms, turning. Observe how the piece moves, where it binds, and where stress points become visible.
- Load Testing: For specific load-bearing components, apply controlled weight. For example, if a large element hangs from a chain, hang a slightly heavier weight from that chain while it's attached to the piece. This helps identify weak links before they fail catastrophically.
- Fatigue Testing (Mini): While full fatigue testing is complex, you can simulate it by repeatedly flexing or stressing key joints or connections. A few hundred cycles of typical movement can reveal weaknesses that static observation won't.
- Visual Inspection: After any test, meticulously inspect all joints, connections, and material surfaces for signs of stress, cracking, deformation, or loosening. Use magnification if necessary.
A common mistake I see is designers only testing the piece while it's stationary. Remember, the piece will be in motion, subject to dynamic forces and the wearer's interaction with their environment.
Q: How can I ensure the piece remains comfortable and wearable, despite its size and structural requirements?
A: Comfort is not a luxury; it's a structural requirement for wearability. An uncomfortable piece, no matter how beautiful, will not be worn or appreciated fully. This often involves ergonomic design and thoughtful interface with the body.
- Distributed Weight: Instead of a single point of attachment, distribute the weight over a larger body area. For a large neckpiece, consider a wide, contoured neckband or even a hidden harness system that spreads the load across the shoulders and back.
- Ergonomic Contouring: Design the inner surfaces of the piece to conform to the body's natural curves. Avoid sharp edges or points that could dig in. Use soft, breathable lining materials where the piece contacts the skin.
- Freedom of Movement: Ensure that the piece doesn't restrict essential body movements. Articulation points should be placed thoughtfully to allow the wearer to sit, stand, and gesture naturally without the piece feeling rigid or obstructive.
- Secure Fastenings: While part of structural integrity, secure and adjustable fastenings are also key to comfort. A piece that shifts or rotates unexpectedly will quickly become irritating. Consider multiple points of securement for large pieces.
Ultimately, a successful large-scale wearable art piece is one that not only stands strong but also feels like a natural extension of the wearer, allowing them to embody the art without discomfort or distraction.
How can I prevent breakage in intricate jewelry designs?
Preventing breakage in intricate jewelry designs is arguably one of the most significant challenges a master jeweler faces. In my 15 years in this field, I've seen countless stunning designs compromised by overlooking fundamental principles of structural integrity. The key lies not just in the beauty of the form, but in the unseen engineering that underpins its resilience.
The journey to preventing breakage begins with an intimate understanding of your materials. It's not enough to simply choose a metal; you must consider its specific alloy, temper, and the gauge required for the most delicate sections. For instance, a fine filigree in 14k gold might be more prone to bending than the same design executed in a harder 18k white gold alloy or even platinum, which possesses superior tensile strength.
- Alloy Selection: Different gold alloys, platinum, and even palladium offer varying degrees of hardness, ductility, and malleability. For fine, exposed elements, I often lean towards materials that can withstand more deformation before fracturing.
- Temper and Gauge: Annealed metals are softest, while work-hardened or half-hard tempers offer increased resilience. Selecting the appropriate wire or sheet gauge is critical; a seemingly tiny increase in thickness can exponentially enhance durability without significantly altering visual weight.
- Material Compatibility: When combining materials, ensure their expansion and contraction rates are compatible to prevent internal stresses that can lead to cracking over time, especially with extreme temperature changes.
Beyond material, the very architecture of your design dictates its vulnerability. A common mistake I see is the creation of sharp internal corners or abrupt transitions in cross-section, which act as severe stress risers. Think of it like a fault line in the earth – these points concentrate force, making them prime candidates for failure.
"Every curve, every joint, and every connection in an intricate design must be meticulously engineered to distribute stress evenly. A truly robust piece whispers its strength rather than shouting it."
- Generous Radii: Always design with generous radii at internal corners, where a component changes direction or thickness. This smooths the flow of stress, preventing it from concentrating at a single point.
- Load Path Management: Visualize the path of forces through your piece. How will a bump or snag impact it? Design redundant or reinforced load paths, much like a redundant support system in a bridge.
- Hidden Reinforcement: For exceptionally delicate areas, consider subtle, hidden structural supports. This might involve a slightly thicker backing plate behind a filigree, or a strategically placed, almost invisible strut that stiffens a cantilevered element.
- Interlocking Joinery: Wherever possible, design elements to interlock or nest, rather than simply butt-joining. This increases the surface area for soldering or welding, creating a much stronger mechanical bond.
Even the best design can fail without impeccable execution. The quality of your joinery, whether soldered, welded, or mechanically fastened, is paramount. A poorly executed solder seam, for example, can be weaker than the surrounding metal, creating an invisible flaw waiting for the opportune moment to break.
- Flawless Soldering/Welding: Ensure clean, complete solder flow throughout the joint. Avoid "cold" joints or areas where the solder hasn't fully penetrated. For delicate work, laser welding offers unparalleled precision and minimal heat affect on surrounding areas, reducing distortion and weakening.
- Secure Mechanical Connections: If using rivets or screws, ensure they are perfectly sized, properly set, and do not introduce undue stress on the surrounding material. A loose rivet will eventually wear away its housing.
- Mindful Stone Setting: While not directly structural, overly tight or improperly aligned stone settings can put immense pressure on delicate galleries or prongs, leading to cracks or breakage in the metal over time.
In my experience, no amount of theoretical design can replace the insights gained from physical prototyping and rigorous testing. Especially with large-scale or intricate wearable art, a full-scale mock-up, even in a less expensive material, is invaluable.
- Material Mock-ups: Create prototypes in a similar density or hardness material – perhaps brass or even a robust resin. This allows you to physically test articulation, balance, and, crucially, identify weak points under simulated stress.
- Simulated Wear & Impact Tests: Don't shy away from putting your prototype through its paces. Gently flex it, twist it, and simulate accidental bumps. Where does it give? Where does it feel flimsy? These are your areas for re-engineering.
- Iterative Refinement: Embrace failure in the prototype stage. Each breakage or deformation provides critical data, allowing you to refine your design, adjust material gauges, or rethink joinery before committing to precious metals.
Finally, the finishing process and subsequent client education play a vital role. Aggressive polishing can thin delicate sections, while improper handling by the wearer is a primary cause of post-delivery breakage.
- Judicious Polishing: Be acutely aware of material removal during polishing, especially on thin wires, delicate filigree, or sharp edges. Over-polishing can significantly compromise structural integrity.
- Client Education: Provide clear, concise instructions on how to wear, handle, clean, and store the piece. Educate them on its delicate nature and the specific areas requiring care. A custom-fitted display or storage box can also prevent accidental damage.
Is 3D printing viable for structural components in wearable art?
In my extensive experience designing and fabricating large-scale wearable art, the question of 3D printing's viability for structural components arises constantly. It's a technology that promises boundless creative freedom, but when it comes to ensuring the structural integrity of a piece that will be worn, moved, and potentially endure stress, the answer is nuanced rather than a simple yes or no.
For true load-bearing or high-stress elements within a large wearable artwork, my professional assessment is that metal 3D printing technologies, such as Selective Laser Melting (SLM) or Direct Metal Laser Sintering (DMLS), are the primary contenders for serious consideration. These processes fuse metal powders (e.g., titanium, stainless steel, certain aluminum alloys) layer by layer, creating components with mechanical properties often comparable to, or even exceeding, traditionally cast or machined parts.
A common mistake I see emerging designers make is assuming that because a part can be printed, it will automatically possess the necessary strength. The material, print orientation, and post-processing are far more critical than the mere act of printing itself.
When considering metal 3D printing for structural elements, the advantages are compelling:
- Complex Geometries: It allows for intricate lattice structures, organic forms, and internal channels that are impossible with traditional fabrication, potentially reducing weight while maintaining strength.
- High Strength-to-Weight Ratio: Materials like titanium, when printed, offer exceptional strength for their weight, crucial for wearable pieces.
- Consolidation: Multiple components can be designed as a single, integrated part, eliminating joints and potential weak points, which is a significant structural benefit.
However, the challenges with metal 3D printing are equally significant. The high cost of machinery, specialized materials, and rigorous post-processing (like heat treatment or stress relieving) can be prohibitive for many independent artists. Furthermore, the learning curve for design optimization for additive manufacturing is steep; simply converting a traditional design to a printable file often results in suboptimal structural performance.
What about polymer 3D printing? For components that are truly structural and bear significant weight or stress, my advice is generally to proceed with extreme caution. While technologies like Selective Laser Sintering (SLS) with Nylon 12 offer impressive strength and flexibility for plastics, and some advanced FDM filaments are reinforced with carbon fiber, they typically possess lower tensile strength, stiffness, and creep resistance compared to metals.
Here's a breakdown of considerations for polymer 3D printing in structural wearable art:
- FDM (Fused Deposition Modeling): Best suited for prototyping, jigs, or non-load-bearing aesthetic elements. The inherent anisotropy (weaker along layer lines) makes it unreliable for critical structural components that will experience multi-directional forces or impact.
- SLA/DLP (Stereolithography/Digital Light Processing): Resins tend to be more brittle than FDM plastics, even after UV curing. While they offer incredible detail, their mechanical properties are generally inferior for structural applications unless specifically engineered for high-performance use, which is rare for large-scale wearable art.
- SLS (Selective Laser Sintering): Nylon 12 powder offers excellent isotropic properties and good strength, making it a viable option for moderately stressed internal frameworks or flexible joint components, provided the design accounts for its specific mechanical limits and the overall load distribution.
In my practice, I often leverage 3D printing for specific, non-critical structural roles or for creating molds and jigs that aid in the fabrication of the final piece using traditional, proven methods. For instance, I might print a complex internal support structure in a high-performance plastic if the outer shell (e.g., metal sheet, leather) is providing the primary structural integrity, and the 3D-printed part is merely a lightweight filler or a precise mounting point for smaller elements.
Ultimately, 3D printing is a powerful tool in the jewelry designer's arsenal, but its application for structural components in large-scale wearable art demands a rigorous understanding of material science, mechanical engineering principles, and the specific limitations of each printing technology. It's not a substitute for thoughtful design and material selection, but rather an enhancement when applied strategically and knowledgeably.
Reading Recommendations:
- 7 Proven Strategies for Consistent Waste Streams in Upcycled Fashion
- Why Does Your Expensive Tailored Suit Scream 'Unprofessional'? 7 Hidden Flaws
- Unlock Visual Comfort: How to Choose the Best Lens Coating for Computer Use
- The Ultimate Secret: How to Properly Prevent Pilling on Yoga Leggings
- Style a Pearl Necklace Everyday? The Ultimate Style Guide!
Key Points and Final Thoughts
The journey of crafting large-scale wearable art is a profound synthesis of artistic vision and rigorous engineering. It's not enough for a piece to be breathtakingly beautiful; it must also stand the test of gravity, movement, and human interaction. In my experience, overlooking the foundational principles of structural integrity is the most common pitfall for designers venturing into this challenging, yet rewarding, realm.
A common misconception I encounter is that structural design is a rigid, uncreative process. On the contrary, it's a dynamic interplay between material science, physics, and artistic intuition. Consider a master architect: their grandest designs are only possible because of an intimate understanding of how materials bear weight and resist forces. Your large-scale jewelry demands the same level of thoughtful consideration.
The iterative nature of design and testing cannot be overstressed. You don't just design it once; you prototype, test, fail, learn, and refine. This cycle is absolutely non-negotiable for pieces that truly push the boundaries of scale and wearability. I've seen countless brilliant concepts fall short because the designer skipped crucial testing phases.
When approaching your design, always think holistically about the forces at play. This includes not only the static weight of the piece itself but also the dynamic forces generated by the wearer's movement. Key considerations include:
- Load Distribution: How is the weight of the piece distributed across the wearer's body? Concentrated stress points can cause discomfort or even injury.
- Flexibility vs. Rigidity: Where does the piece need to move with the body, and where must it maintain its rigid form? This dictates material choices and joint designs.
- Attachment Mechanisms: These are the unsung heroes of large-scale jewelry. They must be robust, comfortable, and seamlessly integrated into the design, often bearing significant loads.
In my work, I often draw parallels to bridge engineering. Just as a bridge must withstand varying loads, wind, and material fatigue, your wearable art must endure the dynamic environment of the human body. Every joint, every connection, every material choice contributes to its overall strength and longevity. Don't let the desire for aesthetic lightness compromise fundamental stability.
A design that fails structurally is not merely inconvenient; it is a fundamental betrayal of the wearer's trust and the artist's intent for longevity. True elegance in large-scale wearable art lies in the seamless integration of form, function, and unwavering integrity.
Finally, remember that the wearer's experience is paramount. A structurally sound piece not only lasts longer but also feels comfortable and secure, allowing the wearer to embody the art without distraction or discomfort. This transforms a mere object into a truly immersive and empowering experience. Embrace the technical challenge; it will only elevate your artistic expression and ensure your creations endure as true masterpieces of wearable art.


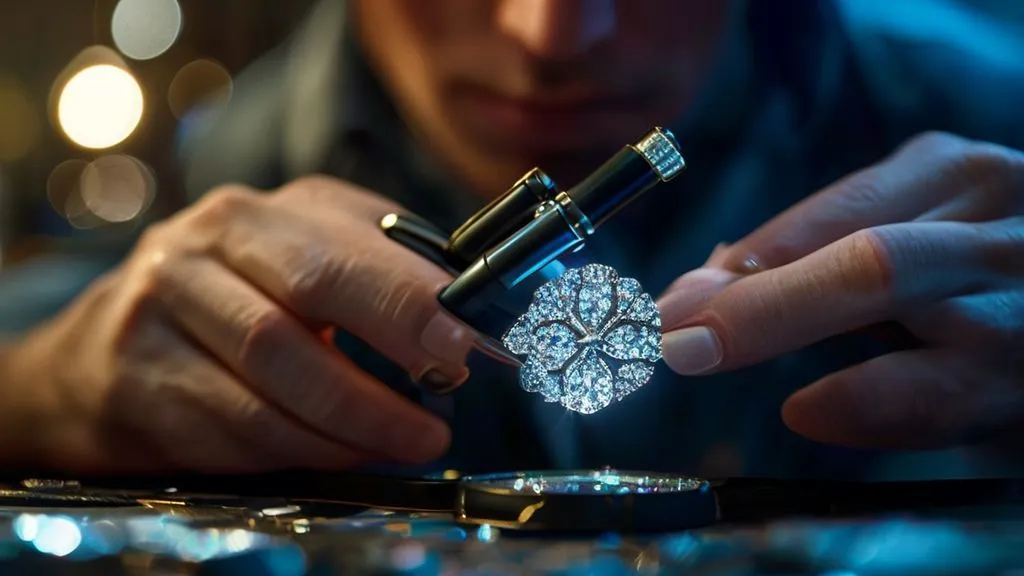

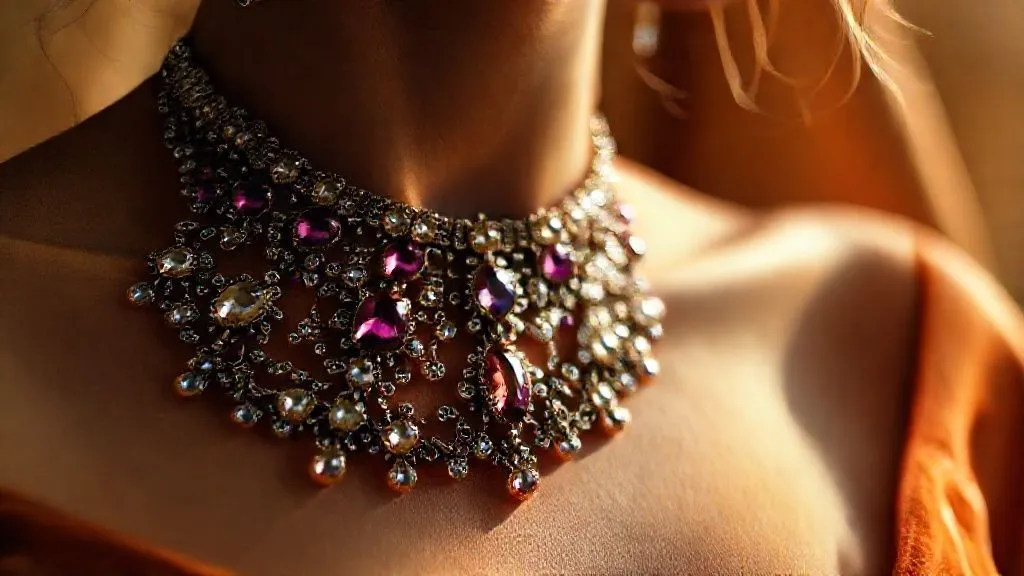
Your email address will not be published. Required fields are marked *