
How to Eliminate Puckering in Haute Couture Hand-Sewn Silk Details?
For over three decades immersed in the intricate world of haute couture, I’ve witnessed countless masterpieces come to life, each a testament to unparalleled skill and dedication. Yet, even in the most esteemed ateliers, one persistent adversary often arises, threatening to mar the perfection of a hand-sewn silk garment: the dreaded pucker.
This isn't just a minor aesthetic flaw; it’s a direct challenge to the very essence of haute couture, where every millimeter of fabric, every stitch, speaks volumes about quality and craftsmanship. A puckered seam can transform a sublime silk drape into a frustrating ripple, undermining hours of meticulous work and the garment's inherent value. It's a problem that demands not just a solution, but a profound understanding of silk itself.
In this definitive guide, I will share the invaluable insights and proven techniques I’ve gathered over my career, providing you with actionable frameworks and expert strategies. You’ll learn precisely how to eliminate puckering in haute couture hand-sewn silk details, ensuring your creations embody the flawless elegance they deserve. Prepare to master the nuanced art of silk, transforming potential pitfalls into perfect finishes.
Understanding the Enemy: Why Silk Puckers
Before we can conquer puckering, we must first understand its origins. Silk, for all its ethereal beauty and luxurious feel, is a notoriously challenging fabric to hand-sew. Its unique characteristics make it highly susceptible to puckering, and without a deep appreciation for these properties, even the most skilled hands can struggle.
The Nature of Silk: A Double-Edged Sword
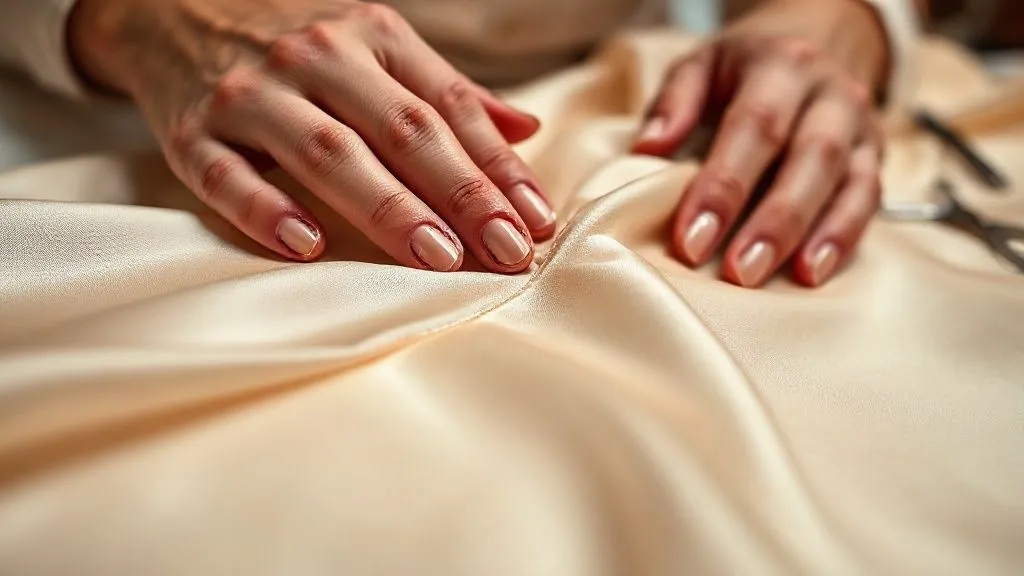
Silk fibers are incredibly smooth and fine, giving the fabric its exquisite drape and sheen. However, this very smoothness means it has a tendency to shift and slide, making it difficult to control during stitching. Furthermore, silk is highly sensitive to tension, moisture, and heat, all of which play critical roles in the sewing process. Its delicate weave can easily distort, leading to uneven tension distribution that manifests as puckers.
Common Culprits Behind Puckering
Puckering isn't a single issue but often a symptom of several underlying problems. I've found that it typically stems from a combination of factors:
- Incorrect Needle Choice: A dull or too-large needle can snag silk fibers, pulling them and creating visible distortion.
- Inappropriate Thread Tension: Whether too tight or too loose, imbalanced tension is a primary cause of puckering, especially in fine silks.
- Improper Stitch Length: Stitches that are too short for the fabric's density can pull and gather the silk.
- Lack of Fabric Stabilization: Without proper support, silk's inherent slipperiness allows it to stretch and shift during sewing.
- Aggressive Handling: Pulling or tugging the fabric, even subtly, while stitching can easily distort the weave.
- Incorrect Pressing Techniques: Applying too much heat, pressure, or steam improperly can set puckers into the fabric permanently.
The Foundation of Flawless: Fabric Preparation & Stabilisation
Just as a grand edifice requires a solid foundation, a flawless silk garment begins with meticulous fabric preparation. Skipping these initial steps is a common mistake I've observed, often leading to avoidable puckering down the line.
Pre-Shrinking and Steaming Silk Fabrics
Silk, being a natural fiber, can be prone to shrinkage. Pre-shrinking is not just about preventing future garment distortion; it also relaxes the fabric, making it more stable and less prone to puckering during stitching. My preferred method is a gentle steaming process:
- Hang the Silk: Drape the silk fabric over a padded hanger in a steamy bathroom for several hours, or use a handheld garment steamer from a safe distance.
- Allow to Rest: Let the fabric hang undisturbed for at least 24 hours in a well-ventilated area to fully dry and stabilize.
- Test for Shrinkage: If uncertain, cut a small swatch, measure it, steam it, and re-measure to confirm stability.
Strategic Underlining and Interfacing
For many haute couture silk garments, especially those with delicate details or structural elements, underlining or interfacing is non-negotiable. This provides a stable base, preventing the silk from stretching or shifting while being sewn. The key is to choose materials that complement, not overpower, the silk.
For underlining, I often recommend a fine silk organza or silk habutai, cut to the exact same pattern pieces as the main fabric. For interfacing, particularly for collars, cuffs, or button plackets, a very lightweight, fusible silk organza or a sew-in silk gauze can provide subtle support without adding bulk or stiffness. The goal is to create a unified fabric that handles more predictably.

Needle, Thread, and Tension: The Unholy Trinity
These three elements are intrinsically linked, and a misstep with any one can lead directly to puckering. Mastering their interplay is fundamental to achieving flawless hand-sewn silk details.
Selecting the Perfect Needle for Silk
The needle is your primary tool, and its impact on delicate silk cannot be overstated. A sharp, fine needle is absolutely essential. A dull needle will drag and damage the silk fibers, while a thick needle will create too large a hole, causing the fabric to gather around the stitch.
| Silk Fabric Type | Recommended Needle Size | Key Characteristic |
|---|---|---|
| Chiffon, Georgette, Organza (Very Fine) | Size 7-9 (Sharps/Quilting) | Extremely fine point, minimizes fiber displacement |
| Charmeuse, Crepe de Chine, Habutai (Medium Fine) | Size 8-10 (Sharps) | Sharp point for clean penetration, gentle on weave |
| Dupioni, Shantung, Taffeta (Medium Weight) | Size 9-11 (Sharps/Betweens) | Stronger shaft, still sharp but less flexible |
Always use a brand-new needle for each significant project, or even more frequently for extensive hand-sewing. Even a slight burr on the needle can cause irreparable damage to fine silk.
Choosing the Right Thread and Its Preparation
For haute couture silk, I exclusively recommend using 100% silk thread. Its natural elasticity and fine gauge are perfectly suited to the fabric. Polyester threads, while strong, can be too stiff and unforgiving, pulling on the silk and contributing to puckering. Choose a thread weight that matches the fabric – typically a fine, machine embroidery weight silk thread works beautifully for hand sewing.
Before you even begin stitching, prepare your thread. I always suggest waxing your silk thread lightly with beeswax. This strengthens the thread, reduces tangling, and helps it glide more smoothly through the fabric, minimizing friction and potential pulls. Simply run the thread over a block of beeswax a few times, then gently press it with a warm iron (through a cloth) to melt the wax into the fibers.
Mastering Hand-Stitch Tension: A Delicate Balance
This is arguably the most critical aspect. Hand-stitch tension on silk is an art form that takes practice and a keen sense of touch. The goal is to create stitches that are secure enough to hold the seam but loose enough not to pull or gather the fabric. This means avoiding both overly tight and overly loose stitches.
“The secret to perfect hand-sewn silk lies not in force, but in finesse. Each stitch should kiss the fabric, not strangle it.”
To achieve this, use shorter lengths of thread (no more than 18-24 inches) to prevent tangling and knotting, which can lead to uneven tension. As you stitch, gently smooth the fabric with your free hand around the area you are working on. Regularly check the reverse side to ensure the thread is lying flat and not pulling. With practice, your fingers will develop a sensitivity to the 'right' tension, allowing the silk to lie perfectly flat.
Precision Stitching Techniques for Pucker-Free Seams
Beyond the tools, the actual method of stitching plays a monumental role. Certain techniques are simply superior for managing silk's delicate nature and preventing puckering.
The Art of the Basting Stitch
Never underestimate the power of thorough basting. For haute couture silk, hand-basting is not optional; it's essential. It temporarily holds the fabric layers together, allowing you to check the drape and fit before making permanent stitches, and most importantly, it stabilizes the fabric, preventing shifting and stretching during final sewing. I recommend a combination of techniques:
- Even Basting: Use a long, even running stitch along the seam line, approximately 1/4 inch from the final stitching line. Keep your stitches consistent and relatively loose.
- Diagonal Basting: For bias-cut seams or areas prone to stretching, diagonal basting provides superior control. Work from the center of the seam outwards, using diagonal stitches that crisscross the seam line.
- Thread Choice: Always use a contrasting color silk or cotton basting thread that is easy to see and remove, but never one that could leave permanent marks.
According to textile experts at the Fashion Institute of Technology, proper basting distributes tension evenly across the seam, which is crucial for preventing puckering in delicate materials like silk.
Invisible Seams: The Couture Approach
For most haute couture applications, the goal is an invisible seam where the stitches almost disappear into the fabric. The backstitch is a strong, reliable stitch for silk, but it must be executed with precision. For truly invisible results, consider a fine prick stitch or a slip stitch, particularly for hems or facings, where the thread is almost entirely hidden within the fold of the fabric.
When executing any hand stitch on silk, ensure your stitches are small and consistent. Avoid taking large bites of fabric, as this increases the likelihood of pulling. Focus on picking up just a few threads of the silk with each needle pass, allowing the fabric to remain undisturbed.
Case Study: Atelier Lumière's Smooth Silk Success
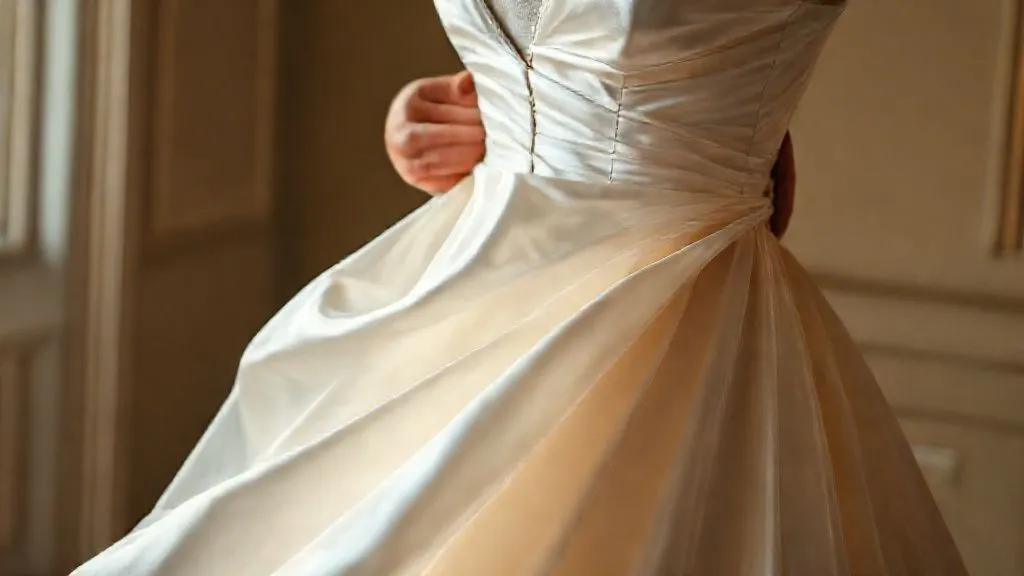
Atelier Lumière, a small but renowned couture house specializing in bridal gowns, faced a persistent challenge with puckering on their hand-sewn silk chiffon overlays. Their standard practice involved machine basting, followed by hand-stitching. Despite using fine needles and silk thread, the delicate chiffon would often show subtle ripples, especially along curved seams.
I advised them to switch entirely to hand-basting with diagonal stitches, using a very fine silk basting thread. Additionally, we implemented a stricter protocol for needle replacement and introduced a light beeswax treatment for their sewing threads. The result? A dramatic reduction in puckering. The hand-basted seams provided superior control, allowing the artisans to adjust the fabric's drape minute-by-minute. This simple, yet profound, shift in technique elevated their chiffon gowns from beautiful to utterly flawless, solidifying their reputation for impeccable craftsmanship.
The Power of Pressing: Beyond Just Ironing
Pressing is not merely flattening; it's an integral part of shaping and setting your stitches. For silk, incorrect pressing can undo all your careful work, permanently setting puckers or distorting the fabric. It requires a gentle, deliberate approach.
Specialized Tools for Silk Pressing
To achieve professional results, invest in the right tools:
- Silk Pressing Cloth: Essential for protecting the delicate surface of the silk from direct heat and preventing shine. A clean piece of silk organza or fine cotton voile works perfectly.
- Tailor's Ham and Seam Roll: These padded forms are indispensable for pressing curved seams and darts without creating unwanted creases or flattening the garment's three-dimensional shape.
- Clapper: A wooden block used to 'set' stitches and flatten seams by absorbing steam and applying gentle pressure.
- Steam Iron: A good quality iron with a reliable steam function is crucial.
The Gentle Art of Steam and Weight
When pressing silk, the mantra is 'gentle steam, minimal pressure.' Avoid dragging the iron across the fabric; instead, use an up-and-down motion, lifting and pressing. Always test on a scrap piece of fabric first to ensure the heat setting and steam level are appropriate.
For seams, press them open flat first, then use a seam roll or tailor's ham to shape. Apply steam through your pressing cloth, then immediately follow with the clapper, holding it in place for a few seconds to absorb the moisture and 'set' the seam. This technique helps to fuse the layers of the seam allowances together without causing distortion to the main fabric, effectively eliminating any subtle puckering that might have occurred during stitching. As Seth Godin often says about attention to detail, "Small is the new big," and this certainly applies to the nuanced art of couture pressing.
Advanced Strategies for Challenging Silk Details
Some silk constructions present unique challenges. Mastering these requires an even more refined approach.
Working with Bias-Cut Silk
Bias-cut silk drapes beautifully but is highly unstable and prone to stretching and puckering. When hand-sewing bias seams, I employ a technique known as 'stay-stitching' or 'stabilizing basting' along the raw edges immediately after cutting. This very fine, loose basting stitch just inside the seam allowance helps to prevent stretching before the main seam is sewn. Always handle bias-cut pieces with extreme care, supporting their weight and avoiding any pulling.
Managing Curves and Corners
Curved seams on silk are notorious for puckering if not handled correctly. To prevent this, clip the seam allowance on convex curves and notch it on concave curves *before* pressing and finishing. Make these clips and notches very fine and close together. For corners, trim the bulk from the seam allowance diagonally, being careful not to cut into the stitching line. These small adjustments allow the fabric to lie flat and smooth without pulling, preventing puckers from forming.
Troubleshooting Common Puckering Scenarios
Even with the best preparation, sometimes puckering still occurs. Here's how to address it.
When Puckering Appears After Stitching
If you notice puckering after your permanent stitches are in, don't despair. First, carefully inspect the seam. Is the tension uneven? Are stitches too tight? If it's minor, often a careful re-pressing with plenty of steam and a clapper can help 'relax' the fabric and distribute the tension more evenly. If the puckering is significant, it's usually best to unpick the seam, re-baste, and re-stitch. While tedious, it's the only way to ensure a truly flawless finish. Remember, haste makes waste in haute couture.
Preventing Puckering in Embellished Areas
When adding hand-sewn embellishments like beads or sequins to silk, the weight and stiffness of these elements can cause the surrounding fabric to pucker. To combat this, I always recommend applying a very fine, sheer underlining (like silk organza) to the area being embellished. This provides a stable base for the stitches, distributing the weight of the embellishments and preventing the silk from pulling or distorting. Furthermore, use the absolute finest beading needles and silk thread to minimize impact on the fabric.
Frequently Asked Questions (FAQ)
Q: Why does my silk pucker even with fine needles and silk thread? A: Even with the right tools, puckering can occur if thread tension is too tight, stitch length is too short, or the fabric isn't adequately basted and supported. Ensure your basting is thorough, your hand is smoothing the fabric as you stitch, and you're not pulling the thread too taut. Also, check that your needle is truly new and sharp.
Q: Can I use a sewing machine for any part of haute couture silk details to avoid puckering? A: While haute couture traditionally emphasizes hand-sewing, some initial construction steps (like attaching a stable lining to a main fabric before hand-finishing) might be done by machine in certain ateliers, especially for straight seams. However, for truly delicate details, curves, and visible seams, hand-sewing offers unparalleled control, allowing you to manipulate the fabric and tension in ways a machine cannot. For the specific problem of puckering in hand-sewn details, the focus remains on manual techniques.
Q: What's the best way to remove puckering without re-stitching? A: For minor puckering, a careful re-pressing with steam and a clapper is often effective. Place the seam over a tailor's ham or seam roll, apply steam through a pressing cloth, and then immediately press with a clapper to set the fabric. This can sometimes 'relax' the fabric back into place. However, for significant puckering caused by improper stitching, unpicking and re-stitching is almost always the only truly satisfactory solution.
Q: How do I handle very sheer silk (e.g., chiffon) without puckering? A: Sheer silks are the most challenging. The key is extreme gentleness and maximum stabilization. Use a silk organza underlining, extensive hand-basting (diagonal basting is excellent here), the finest needle (size 7-9 sharps), and a very fine silk thread. Take tiny stitches, and ensure your hands are always supporting the fabric, never letting it hang or pull. Work on a flat surface covered with a non-slip fabric.
Q: Are there specific silk types more prone to puckering? A: Yes. Very fine, loosely woven silks like chiffon, georgette, and some crepes are highly susceptible due to their delicate structure and tendency to shift. Bias-cut silks, regardless of weave, are also very prone to puckering due to their inherent stretch. Stiffer silks like dupioni or shantung are generally more forgiving, but still require careful handling.
Key Takeaways and Final Thoughts
Eliminating puckering in haute couture hand-sewn silk details is a hallmark of true mastery. It demands patience, precision, and an intimate understanding of this magnificent fiber. As we've explored, success hinges on a holistic approach, from the initial preparation of your fabric to the final, gentle press.
- Preparation is Paramount: Always pre-shrink and consider underlining for stability.
- Tools Matter: Invest in the finest, sharpest needles and appropriate silk thread.
- Tension is Key: Cultivate a delicate touch to achieve balanced, non-restrictive stitches.
- Baste, Baste, Baste: Hand-basting is your best friend for control and prevention.
- Press with Purpose: Use specialized tools and techniques to set stitches, not distort fabric.
- Practice Patience: Rushing silk guarantees puckers. Embrace the slow, deliberate process.
By integrating these expert techniques into your practice, you will transform the challenge of silk into an opportunity for unparalleled craftsmanship. Remember, every stitch is a choice, and with these insights, you are now equipped to choose perfection. Embrace the journey, trust your hands, and let your silk creations flow with the flawless elegance they were always meant to possess.
Recommended Reading
- 7 Ways High Fashion Magazines Balance Print Heritage & Digital Growth
- 7 Discreet Fixes for a Groom's Ill-Fitting Rental Tuxedo Crisis
- 5 Expert Strategies: Elevate Your Luxury Dress Watch for Business Casual
- 5 Steps: Navigating Bridal Trend Decline & Reigniting Your Brand
- 7 Proven Strategies: Maximizing ROI from AI Skin Analysis for Luxury Spas


Your email address will not be published. Required fields are marked *