
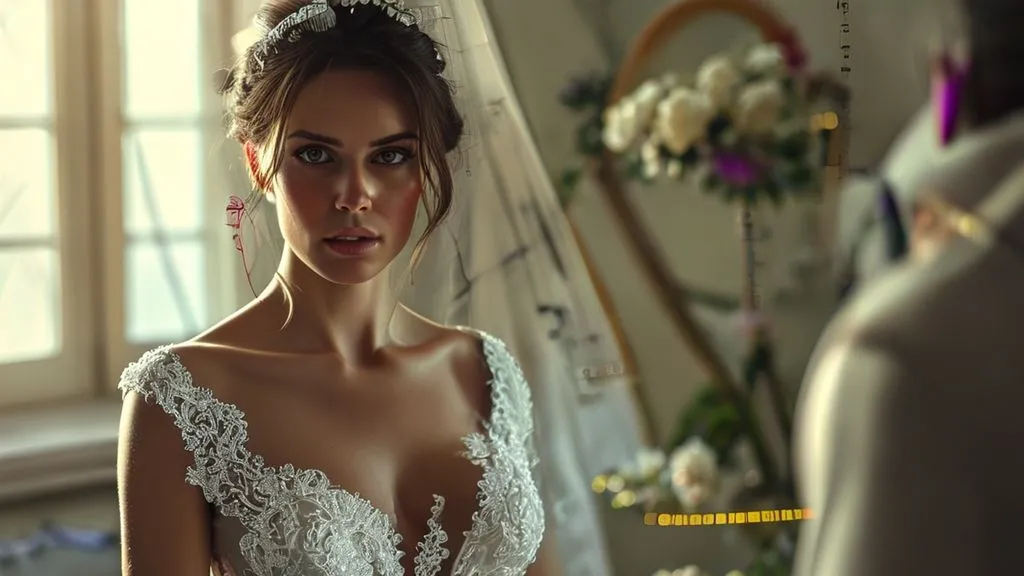
How to alter a fragile vintage wedding dress multiple sizes smaller?
For over 15 years in the bridal fashion industry, I've witnessed the sheer joy and occasional heartbreak that comes with finding ‘the one’ – especially when ‘the one’ happens to be a breathtaking vintage wedding dress. There’s an undeniable allure to a gown steeped in history, carrying whispers of past celebrations. However, I’ve seen countless brides fall in love with a vintage piece only to be confronted with the daunting challenge: it’s beautiful, it’s unique, but it’s several sizes too big, and often, incredibly fragile.
The problem is multifaceted. Vintage fabrics, be they delicate silks, intricate laces, or aged satins, have lost some of their original integrity. They can be brittle, prone to tearing, or simply unable to withstand the rigors of modern alterations. Moreover, the original construction methods can be vastly different, offering little in the way of generous seam allowances. The thought of taking a precious, irreplaceable garment and attempting to shrink it by multiple sizes can feel like a high-stakes gamble, fraught with the risk of irreversible damage.
But here’s the good news: it’s not an impossible dream. As an experienced industry specialist, I'm here to tell you that with the right knowledge, the right expert, and a meticulous approach, it is absolutely possible to alter a fragile vintage wedding dress multiple sizes smaller. This definitive guide will walk you through the essential frameworks, expert insights, and actionable steps to navigate this delicate process, ensuring your cherished vintage gown fits you perfectly while preserving its historical integrity.
Understanding the Unique Challenges of Vintage Fabrics
Before any needle touches fabric, understanding the material you’re working with is paramount. Vintage dresses aren't just 'old fabric'; they are historical artifacts with unique vulnerabilities.
Identifying Fabric Type and Condition
The first step is a forensic examination of the fabric. Is it a fine silk charmeuse from the 1930s, a heavy brocade from the 1950s, or a delicate Chantilly lace from the 1970s? Each material reacts differently to stress, heat, and tension. Silk, for instance, can shatter if pulled too tightly, while aged lace might simply disintegrate. I always advise my clients to consider the weave, the fiber content (if discernible), and the overall 'hand' of the fabric – how it feels to the touch.
Assessing Seam Allowance and Construction
Modern dresses often come with generous seam allowances, making alterations relatively straightforward. Vintage gowns, especially those custom-made or from eras where fabric was more precious, might have minimal allowances. This is a critical factor when attempting to alter a fragile vintage wedding dress multiple sizes smaller. If there isn't enough fabric within the seams, or if the original construction involves complex, non-standard techniques, the challenge escalates significantly.
Expert Insight: Never assume a vintage dress has standard seam allowances. A thorough internal inspection by a skilled eye is non-negotiable. The integrity of the fabric at the seam lines is often the weakest point, having borne years of stress.
Beyond the seams, consider the overall construction. Is it a bias-cut dress, which drapes beautifully but is notoriously difficult to alter without distorting the grain? Does it feature intricate hand-sewn details or delicate embroidery that will need to be carefully removed and reattached? These elements dictate the complexity and feasibility of the reduction.

The Essential Pre-Alteration Assessment: Your Due Diligence
Before even contemplating a seam ripper, a comprehensive assessment is crucial. This isn't just about identifying problems; it's about strategizing solutions and setting realistic expectations.
- Condition Check: Inspect every inch of the dress for hidden tears, stains, dry rot, or areas of extreme wear. Pay close attention to underarms, necklines, and stress points like zippers or closures. These areas are often the first to show degradation and may not withstand the tension of alterations.
- Structural Integrity: Gently test the fabric's strength in inconspicuous areas, such as inside a hem or a hidden seam. A very light tug can reveal if the fibers are still strong or if they've become brittle and prone to tearing. This is not about pulling hard, but about understanding the fabric's resilience.
- Dye Stability: If the dress is not white or ivory, perform a discreet patch test for dye stability, especially if any cleaning or steaming is anticipated. Vintage dyes can bleed, leading to catastrophic color changes.
- Original Construction Analysis: Have a skilled eye examine how the dress was originally put together. Are seams machine-stitched or hand-sewn? What type of stitches were used? Understanding the original craftsmanship provides clues on how best to deconstruct and reconstruct it.
This assessment acts as your roadmap. It helps determine if the dress can indeed be altered multiple sizes smaller without compromising its essence or durability. Sometimes, the honest answer is that the dress is too fragile, and attempting significant alterations would destroy it.
| Assessment Point | Key Questions | Action/Consideration |
|---|---|---|
| Fabric Type & Condition | Is it silk, lace, satin? Are there tears, stains, dry rot? | Identifies fragility, dictates handling. |
| Seam Allowance | How much extra fabric is in the seams? Is it sufficient for reduction? | Determines feasibility of taking in without adding fabric. |
| Construction Method | Hand-sewn or machine? Complex darts? Bias cut? | Influences deconstruction and reconstruction techniques. |
| Embellishments | Are beads, lace appliques, trim present? How are they attached? | Requires careful removal and reapplication plan. |
Finding the Right Expert: Why Experience Matters Most
This is arguably the most critical step. Attempting to alter a fragile vintage wedding dress multiple sizes smaller is not a job for a generalist tailor. You need a specialist, a true artisan who understands the nuances of historical garments.
Qualities of a Specialized Vintage Bridal Seamstress
When seeking a professional, look for specific experience. They should have a portfolio showcasing previous work on vintage or antique garments. Ask about their techniques for handling delicate fabrics, their approach to deconstruction, and their methods for reinforcing weak areas. A true expert won't just 'take it in'; they'll consider the dress's history, its fabric's limitations, and the desired aesthetic outcome.
Interviewing Potential Alteration Specialists
Don't be afraid to interview several seamstresses. Ask pointed questions: 'How would you approach reducing a 1920s silk charmeuse gown by three sizes?' or 'What are your strategies for integrating original lace after a significant seam reduction?' A confident, detailed answer that highlights their understanding of vintage garment construction and fragility is a good sign. Look for someone who is patient, communicates clearly, and offers a transparent explanation of the risks and potential solutions.
Expert Insight: A specialist in vintage alterations often has a background in costume design, textile conservation, or historical garment reconstruction. They understand that they are not just altering a dress, but preserving a piece of history. Always ask for references and view their work. For resources on finding qualified professionals, consider consulting reputable organizations like the Professional Association of Custom Clothiers.
Strategic Deconstruction: Planning for Multi-Size Reduction
Once you’ve found your expert, the planning phase for deconstruction begins. This is not a rushed process; it's a careful strategy to identify the best points of reduction while minimizing stress on the fragile fabric.
Where to Take In: Side Seams vs. Darts vs. Back Panels
The most common areas for reduction are the side seams, especially in the bodice and waist. However, if these seams are too narrow or the fabric too fragile, other options must be explored. Darts can sometimes be deepened, or new darts added, but this requires careful consideration to maintain the garment's original drape and silhouette. For dresses with a back closure (zipper or buttons), the back panel can sometimes be altered, but this can be complex if there are intricate details or a specific design feature.
Considerations for Bodice, Waist, and Skirt Reductions
A multi-size reduction means addressing the entire silhouette. The bodice might need to be taken in significantly, requiring careful removal and re-stitching of sleeves or straps. The waistline, if separate, can be reduced, but this impacts the skirt's attachment. The skirt itself might need to be taken in at the side seams, ensuring the hem remains even and the fabric doesn't pull or distort. The goal is to distribute the reduction evenly across the garment, rather than concentrating it in one area, which could lead to an unnatural fit or fabric stress.

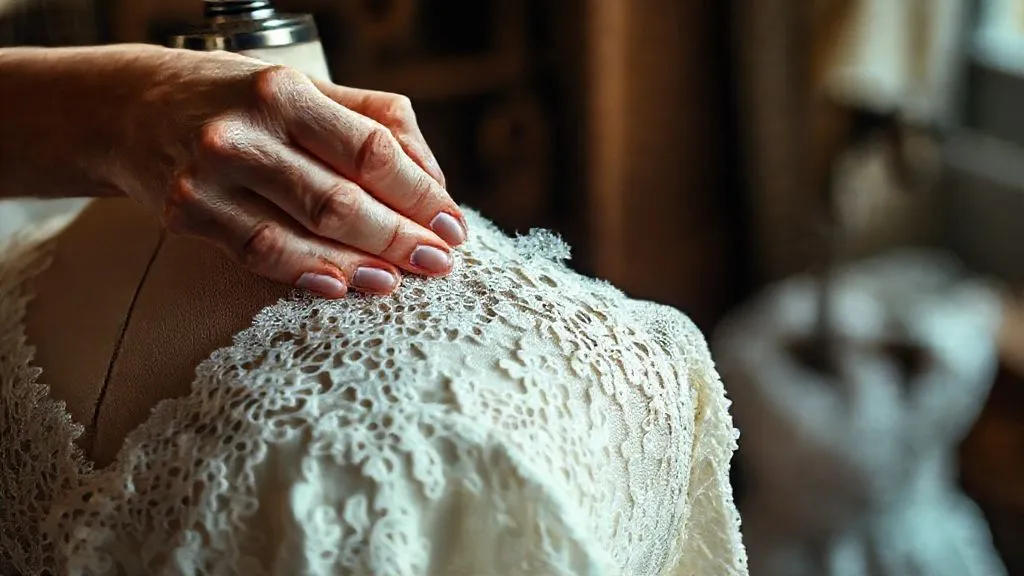
Delicate Alteration Techniques for Fragile Materials
This is where the true artistry of a vintage bridal specialist shines. Standard alteration techniques can be too harsh for fragile fabrics.
Hand-Stitching vs. Machine: The Gentle Approach
Many significant alterations on fragile vintage dresses are best done by hand. Hand-stitching allows for a level of control and delicacy that a machine simply cannot replicate. It minimizes tension on the fabric and allows the seamstress to feel the fabric’s resistance, preventing tears. Where machine stitching is necessary, specialized needles (very fine, ballpoint to slide between fibers) and a very low tension setting are essential. Even then, the seamstress must work slowly and methodically.
Reinforcement and Stabilization Methods
Often, reducing a fragile dress requires internal reinforcement. This might involve carefully fusing or hand-stitching a lightweight, sheer interfacing to the reverse side of the fabric in the alteration areas. This strengthens the fabric without adding bulk or altering its drape. Sometimes, a delicate silk organza might be used as an underlying support layer. The key is to provide support while remaining invisible and maintaining the fabric's original feel. This is particularly crucial when dealing with areas that will bear tension, such as a new zipper or button placket.
Case Study: Eleanor's 1920s Silk Charmeuse Gown
Eleanor inherited her grandmother's exquisite 1920s silk charmeuse wedding gown, a size 12 that needed to be reduced to a size 6. The silk was incredibly delicate, prone to runs, and the original bias cut meant any misstep could lead to irreversible distortion. I worked with a specialist who first performed a thorough fabric assessment, identifying areas of minor degradation near the underarms. Instead of attempting to take in the side seams significantly, which would pull the bias, the expert carefully deconstructed the bodice at the shoulder and side seams, using a combination of fine hand-stitching and a specialized machine with a walking foot for minimal tension. They reinforced the new seam lines with a barely-there silk organza underlay. The significant reduction was achieved by strategically recutting the inner lining and then meticulously hand-stitching the charmeuse to fit the new, smaller dimensions. The result was a seamless reduction, preserving the gown's original flapper-era drape and delicate beauty, without a single tear or distortion. This approach demonstrates the profound difference a specialized hand makes in preserving such a fragile garment.
For further reading on textile conservation techniques, consider resources like those from the American Institute for Conservation of Historic and Artistic Works (AIC).
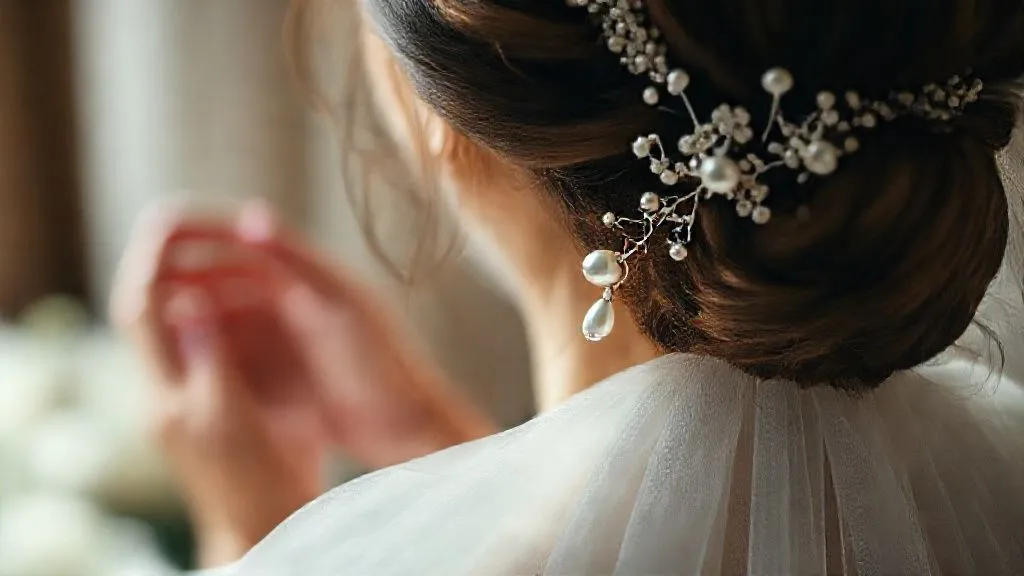
Managing Embellishments and Lace Integration
Vintage dresses are often adorned with intricate embellishments – beads, sequins, lace appliqués, and delicate trims. These elements add to the dress's charm but present significant challenges during alterations.
Careful Removal and Reapplication of Beading and Appliques
When reducing a dress, especially at seams, any embellishments in the alteration path must be carefully removed. This is a painstaking process, often involving tweezers and magnifying glasses, to avoid damaging the surrounding fabric or the embellishments themselves. Once the alteration is complete, these elements must be meticulously reattached, often by hand, to match the original pattern and maintain a seamless appearance. This requires not only skill but also an artistic eye to ensure the reapplication looks entirely natural.
Seamless Lace Panel Reduction and Reconstruction
Lace, particularly delicate vintage lace, is one of the trickiest elements to alter. If a lace panel needs to be reduced, it's rarely a simple matter of cutting and re-stitching. Often, the lace pattern itself must be 'recut' and re-engineered to maintain its continuity. This might involve carefully excising a section of the lace, then hand-stitching the remaining pieces together to create an invisible seam, or even grafting a new, matching piece of lace if the original is too damaged or insufficient. This is where a seamstress's experience with lacework becomes invaluable, as they can make the alterations virtually undetectable.
| Embellishment Type | Challenge | Technique |
|---|---|---|
| Beading/Sequins | Fragile attachment, potential for loss/damage | Individual removal, reapplication by hand with matching thread. |
| Lace Appliqués | Maintaining pattern continuity, delicate fabric | Careful seam ripping, pattern matching, invisible hand-stitching. |
| Embroidery | Distortion if cut, re-stitching complexity | Avoid cutting if possible; if necessary, meticulous re-creation or integration. |
| Trim/Edging | Matching original style, reattachment | Remove cleanly, reattach precisely, often requiring hand-finishing. |
The Fitting Process: Patience and Precision
Altering a fragile vintage wedding dress multiple sizes smaller is not a 'one-and-done' fitting process. It requires multiple, often lengthy, sessions.
Multiple Fittings: A Non-Negotiable Step
Expect at least three to five fittings, sometimes more. Each fitting allows the seamstress to make incremental adjustments, assess the fabric's response, and ensure the fit is evolving as desired. For delicate fabrics, this gradual approach minimizes stress and allows for careful adjustments, preventing sudden pulls or tears. Be prepared to wear the exact undergarments and shoes you plan for your wedding day to every fitting, as these significantly impact how the dress drapes and fits.
Communicating Effectively with Your Seamstress
Open and honest communication with your seamstress is vital. Clearly articulate your vision, but also be open to their expert advice regarding the limitations of the fabric or design. If something feels off during a fitting, speak up. This collaborative approach ensures that the final result meets your expectations while respecting the integrity of the vintage garment. Remember, they are your partner in this delicate endeavor.

Post-Alteration Care and Preservation
Once your vintage gown has been perfectly altered, its journey doesn’t end there. Proper care is essential to preserve your now perfectly-fitting piece of history.
Proper Cleaning and Storage
Before your wedding day, discuss cleaning options with your seamstress or a specialized textile conservator. Many vintage dresses cannot withstand traditional dry cleaning. Often, gentle hand-cleaning or spot treatment is the only safe option. After the wedding, have the dress professionally cleaned again by a specialist in vintage textiles. For storage, use an archival-quality, acid-free garment box or breathable garment bag. Avoid plastic, which can trap moisture and accelerate fabric degradation. Store the dress in a cool, dry, dark place, away from direct sunlight and temperature fluctuations.
Long-Term Maintenance Tips
Even in proper storage, vintage garments benefit from occasional inspection. Every year or two, carefully unbox your dress, inspect it for any signs of wear or degradation, and allow it to air out for a few hours before repacking. This prevents permanent creases and ensures you catch any issues early. Remember, you are now the custodian of this beautiful piece of history. For detailed guidance on archival storage, the Smithsonian Institution provides excellent resources.
Frequently Asked Questions (FAQ)
Q: Can all vintage dresses be altered multiple sizes down? A: No, not all vintage dresses are suitable for significant size reductions. The feasibility depends heavily on the fabric's condition, the original construction (e.g., seam allowance), and the dress's overall structural integrity. A thorough expert assessment is critical to determine if it's possible without compromising the garment.
Q: What's the biggest risk when altering a fragile vintage dress? A: The biggest risk is irreversible damage, such as tearing, shattering of fabric, or distorting the original silhouette due to the fabric's fragility and age. There's also the risk of damaging delicate embellishments or causing dye bleed if not handled by an expert.
Q: How much does it typically cost to alter a fragile vintage wedding dress multiple sizes smaller? A: The cost can vary widely based on the complexity, the number of sizes to be reduced, the fabric type, and the expertise of the seamstress. It will almost always be significantly more expensive than altering a modern dress, often ranging from several hundred to well over a thousand dollars, reflecting the specialized skills and time required.
Q: How do I know if my chosen seamstress is truly an expert in vintage bridal? A: Look for a portfolio specifically showcasing vintage alterations, ask for references, and inquire about their specific techniques for fragile fabrics. A true expert will communicate transparently about risks, offer detailed explanations of their process, and may have a background in textile conservation or historical costuming.
Q: What if the dress doesn't have enough seam allowance to be taken in? A: This is a common challenge. If there isn't enough seam allowance, the seamstress might explore other options like deepening existing darts, creating new ones, or altering the back closure. In very rare cases, if the design allows, a narrow panel of matching vintage fabric might be carefully inserted, but this is a complex and highly specialized solution. Sometimes, if the allowance is too minimal, significant multi-size reduction simply isn't feasible without compromising the dress.
Key Takeaways and Final Thoughts
- Assess Thoroughly: Understand your vintage dress's fabric, construction, and fragility before any alterations.
- Choose Wisely: Entrust your gown only to a specialized vintage bridal alterations expert.
- Plan Strategically: Deconstruct and reconstruct with meticulous care, considering every seam and detail.
- Embrace Patience: Expect multiple fittings and a longer alteration timeline for delicate work.
- Preserve Diligently: Ensure proper post-alteration cleaning and archival storage to protect your heirloom.
Altering a fragile vintage wedding dress multiple sizes smaller is a journey that demands respect for history, a deep understanding of textiles, and the skilled hands of an artisan. It's an investment in preserving a unique piece of your family's story and ensuring it perfectly fits your own. While the process is intricate and requires careful consideration, the reward is a truly unique, perfectly tailored gown that carries the echoes of the past into your future. With the right approach and the right professional by your side, your dream of wearing a perfectly fitted vintage heirloom can absolutely become a beautiful reality.
Recommended Reading
- 7 Steps to Regain Customer Trust After Beauty Product Efficacy Complaints
- Client Rejects Final Photos? 7 Steps to Salvage Commercial Fashion Projects
- Luxury Fashion Week Sample Delays: 7 Urgent Fixes for Your Show
- 7 Pillars: Justifying Premium Pricing for Unique Luxury Eyewear Frames
- 12-Hour Fresh: Your Expert Guide to a Polished Workday Look

Your email address will not be published. Required fields are marked *