
Efficient Runway Photo Culling and Editing for Deadlines?
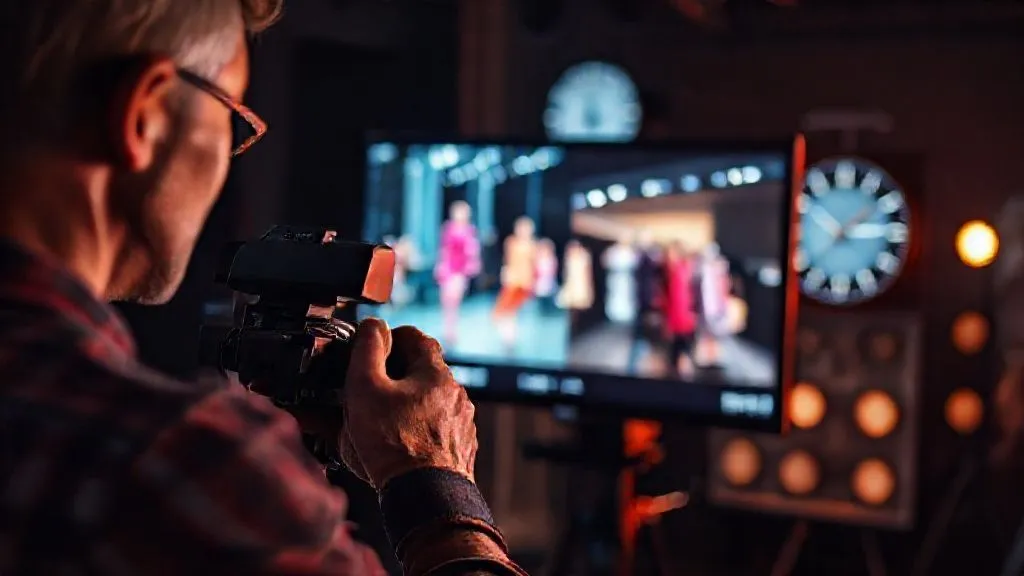
For over 15 years in the high-stakes world of fashion photography, I've witnessed firsthand the exhilarating chaos and crushing pressure of runway shows. There's nothing quite like the adrenaline of capturing those fleeting moments – the fabric's movement, the model's gaze, the designer's vision. But the real challenge, as many of you know, isn't just taking the shot; it's what comes immediately after.
The sheer volume of images – sometimes thousands from a single show – coupled with the relentless demand for instant delivery, can turn even the most seasoned photographer into a stressed-out mess. Clients, editors, and PR teams are often waiting the moment the last model exits the stage, expecting a curated selection of perfectly processed images. This isn't just about speed; it's about maintaining artistic integrity and delivering quality under extreme duress.
In this definitive guide, I'm going to pull back the curtain on the strategies and workflows that have allowed me, and many of my industry peers, to not only survive but thrive under these intense conditions. We'll explore actionable frameworks, expert insights, and real-world techniques to master efficient runway photo culling and editing, ensuring you consistently beat deadlines without compromising your craft.
The Pre-Production Imperative: Setting the Stage for Speed
The race against the clock for runway photography doesn't start when you download your memory cards; it begins long before. Your ability to cull and edit efficiently is profoundly impacted by the decisions you make even before the first model steps onto the runway.
Understanding Client & Editorial Needs
Before any show, I make it a point to have crystal-clear communication with the client. What's their priority? Is it the full collection, specific hero pieces, celebrity attendees, or backstage candids? Knowing this upfront allows you to shoot with intent, reducing the number of 'just in case' shots that clog your workflow later. Are they looking for wide shots, close-ups, specific angles? Are there any brand guidelines for color or mood? This isn't just a nicety; it's a foundational step to efficient culling.
Gear & Settings Optimization
Your equipment should be an extension of your intent. I always shoot with dual card slots, writing RAW to one and a smaller JPEG (or a compressed RAW) to the other. This redundancy is crucial, but the smaller file can sometimes be used for initial, rapid previews if needed. Auto ISO with a minimum shutter speed is your best friend in unpredictable lighting, ensuring you're focusing on composition, not constantly adjusting settings. White balance presets for common fashion show lighting (e.g., tungsten, fluorescent) can save significant time in post-production. According to a recent industry survey, photographers spend an average of 30-40% of their time on post-production; optimizing settings can significantly cut into that.
Strategic Shooting for Culling Efficiency
This is where experience truly shines. Rather than spraying and praying, I focus on capturing decisive moments. When a model exits the frame, I immediately review the last burst on my camera's LCD. If there's a clear miss – eyes closed, awkward pose, bad lighting – I delete it on the spot. This 'delete as you shoot' mentality prevents hundreds of subpar images from ever reaching your computer. I also prioritize capturing a clean run of each look, minimizing variations that offer no added value. Think about the 'story' of each garment as it moves.

Masterful Culling: The Art of Rapid Selection
Once the show is over and the cards are ingested, the real culling battle begins. This phase is about ruthless efficiency and making quick, informed decisions.
Initial Pass: The B-Roll Purge
My first pass is always about eliminating the obvious duds. I use a keyboard shortcut for 'reject' (typically 'X' in Lightroom or 'P' for pick, 'X' for reject in Capture One) and fly through the images. This includes out-of-focus shots, extreme blinks, awkward poses, or anything where the lighting is completely off. Don't agonize over these; if it's not immediately good, it's out. I aim for this first pass to reduce the total count by 30-50%.
“Your culling efficiency isn't just about speed; it's about the courage to delete. Every 'maybe' is a 'no' in disguise when deadlines loom.”
Second Pass: Model & Outfit Consistency
Now, I focus on selecting the best representation of each look and model. I'll group images by model or outfit, often using the 'survey' or 'compare' modes in my software. For each look, I select 2-3 strong contenders, focusing on pose, garment flow, and sharp focus. I'm looking for consistency across the collection, ensuring the designer's vision is clearly articulated. This is also where I'll look for variations that might be needed for different editorial spreads – a full-body shot, a detail shot, an accessory focus.
- Ingest & Backup: Immediately transfer all files to a fast external SSD and a secondary backup drive.
- First Global Pass (Reject Obvious Duds): Rapidly mark all blurry, misfired, or clearly unusable images for rejection. Aim for a 1-star or 'X' flag.
- Second Curatorial Pass (Select Best Takes): Go through remaining images, grouping by model/outfit. Select 2-3 strongest per look/pose (e.g., 3-star or 'P' flag).
- Refine & Compare: Use comparison view to pick the absolute best from your selected 2-3, ensuring variety and quality.
- Final Review: Briefly scroll through your chosen selects to ensure consistency and adherence to client brief.
- Metadata Application: Apply essential metadata (copyright, keywords, client info) to selected images.
| Software | Key Features for Culling | Pros | Cons | Speed Rating |
|---|---|---|---|---|
| Adobe Lightroom Classic | Survey Mode, Compare Mode, Smart Previews, Flagging (Pick/Reject), Color Labels, Face Detection | Deep integration with Adobe ecosystem, powerful cataloging, Smart Previews for offline editing | Can be slower with very large catalogs, subscription model | 4/5 |
| Capture One Pro | Session-based workflow, Variants, Annotations, Color Tags, Rating, Focus Mask | Superior RAW processing, excellent tethering, faster performance with large files, robust color management | Steeper learning curve, higher price point | 5/5 |
| Photo Mechanic | Blazing fast ingestion, lightning-quick previewing, IPTC/metadata editing, Code Replacements | Unrivaled speed for culling and metadata, ideal for sports/event/fashion, lightweight | No editing capabilities, primarily a culling/ingestion tool | 5+/5 |
| Narrative Select | AI-powered culling suggestions, facial detection, duplicate detection, integrated feedback | Significant time savings with AI, intuitive interface, good for portrait/fashion | Subscription model, AI suggestions aren't always perfect, requires internet connection for full features | 4.5/5 |
Streamlined Editing Workflows: Software & Strategy
Once you have your selects, the editing phase must be just as efficient. This isn't about individual perfection on every image but about consistent, high-quality output across the entire collection.
Leveraging Lightroom & Capture One Power Features
Both Lightroom and Capture One are indispensable tools. I personally lean on Capture One for its superior RAW processing and color handling, especially with challenging fashion colors. However, Lightroom's organizational capabilities and vast preset ecosystem are also incredibly powerful. Learn your software's shortcuts inside and out. Utilize Smart Previews in Lightroom for faster editing on the go, or work with Capture One's sessions for dedicated projects. Focus on global adjustments first: exposure, white balance, contrast, and basic color correction. Fine-tune later only on critical images.
Batch Processing & Presets: Your Time-Saving Allies
This is where significant time is saved. Develop a set of custom presets tailored to common runway lighting conditions. A 'bright daylight runway' preset, a 'dark moody runway' preset, etc. Apply these presets as a batch to all relevant images. Then, use synchronization (Lightroom) or 'Copy Adjustments' (Capture One) to apply specific tweaks across multiple similar images. For example, if you correct skin tones on one image from a series, you can often sync those adjustments to the others with minimal further tweaking.
“Consistency in editing isn't just about aesthetics; it's about establishing a repeatable, efficient workflow that scales with demand.”
AI-Assisted Tools: Friend or Foe?
The rise of AI in photography is undeniable. Tools like Narrative Select, as mentioned in the table, can offer initial culling suggestions, identifying blinks or soft focus. AI-powered noise reduction (e.g., in Lightroom) can save hours of manual work, especially for high-ISO runway shots. While I advocate for human oversight, these tools can be powerful accelerators for repetitive tasks. Experiment with them, but always maintain critical judgment. They are assistants, not replacements for your artistic eye.

The Devil in the Details: Retouching for Runway
Runway retouching is a different beast from editorial or beauty retouching. It's about speed, consistency, and focusing on what truly matters for the narrative of the show.
Prioritizing Retouching Tasks
Not every image needs extensive retouching. Prioritize. For runway, focus on:
- Color Accuracy: Ensuring garments look true-to-life.
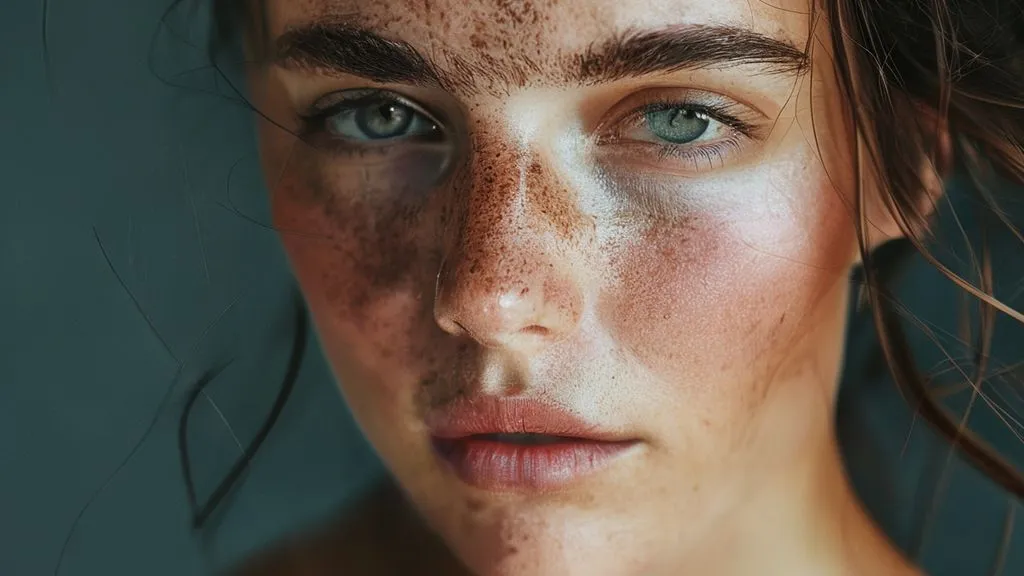
- Skin Tone Consistency: Especially important across multiple models.
- Distraction Removal: Small blemishes, dust spots, rogue hairs, or distracting background elements.
- Lighting Correction: Evening out hot spots or shadows.
Maintaining Brand & Editorial Integrity
Every designer has a vision, and every publication has a style guide. Your retouching should align with these. If a designer is known for raw, edgy looks, over-smoothing skin might contradict their aesthetic. If an editor requires a very natural look, don't overly enhance colors. This again comes back to clear communication and understanding the end-use of the images.
Case Study: How 'Runway Revive Studio' Slashed Turnaround Times
Runway Revive Studio, a boutique post-production house specializing in fashion, faced a recurring challenge: scaling their retouching efforts for simultaneous fashion week commitments. Their traditional workflow involved individual retouchers handling entire sets of images. By implementing a segmented approach, they achieved remarkable efficiency. They divided tasks: one team focused solely on color correction and global adjustments, another on minor blemish removal and cleanup, and a third on final quality control. This specialization, combined with shared custom brushes and action sets in Photoshop, allowed them to process 30% more images per day with a 15% reduction in overall turnaround time, ensuring they met even the tightest editorial deadlines for their high-profile clients.
Building a Collaborative Dream Team & Workflow
For major fashion weeks, it's rarely a one-person show. Effective collaboration can be the ultimate deadline-beater.
Delegating Effectively
If you have a team, delegate. One person can handle initial ingestion and backup, another can focus on the first culling pass, a third on initial color correction, and you, as the lead photographer/art director, can focus on the final selects and critical fine-tuning. Clearly defined roles and responsibilities prevent bottlenecks and ensure everyone is working efficiently towards the same goal. This requires trust and clear guidelines.
Communication is Key: Feedback Loops
Establish clear communication channels. Use tools like Slack or dedicated project management software. Provide precise feedback on edits. Instead of 'make it look better,' say 'reduce magenta in the highlights by 5 points' or 'smooth the fabric crease on the left shoulder.' Regular, concise check-ins prevent rework and keep everyone on the same page. Remember, time spent clarifying is time lost editing.
Cloud-Based Solutions for Seamless Handoffs
Cloud platforms like Dropbox, Google Drive, or specialized photography platforms (e.g., Pixieset, PhotoShelter) are invaluable. They allow for instant sharing of selects, RAW files, or edited JPEGs with your team, clients, or editors, regardless of location. Ensure you have a robust internet connection and clear folder structures. This is critical for getting images to clients who might be halfway across the world, often within hours of the show's conclusion. Cloud storage solutions offer not just convenience but also an essential layer of redundancy and accessibility for a distributed team.
Quality Control & Final Delivery: The Last Mile
You've culled, edited, and retouched. But the job isn't done until the client has the perfect files in hand.
The Importance of a Final Review
Before exporting, take a moment. Step away from the screen for 10-15 minutes, then come back with fresh eyes. Scroll through all the selected images one last time. Look for any missed errors, inconsistencies in color or exposure, or rogue dust spots. This final QC pass is your last line of defense against client complaints and ensures your professional reputation remains intact. It’s also wise to have a second pair of eyes, if possible, for this crucial step.
Export Settings for Various Platforms
Clients often have specific requirements for image delivery: high-resolution for print, web-optimized for social media, specific dimensions for editorial. Create export presets for these common scenarios. This ensures you're not manually adjusting settings for every batch. For example, a 'Web-Small' preset for Instagram, a 'Client-HighRes' for print, and an 'Editorial-Standard' for specific publications. Always ask for these specifications upfront to avoid re-exporting. Adobe's documentation on export settings is a great resource for understanding the nuances of different file types and compressions.

Beyond the Show: Continuous Improvement
The fashion world is constantly evolving, and so should your workflow.
Analyzing Your Workflow
After each major fashion event, take time to debrief. What worked well? Where were the bottlenecks? Did you spend too much time on a particular type of edit? Could a new preset have saved time? Keep a log of these observations. This iterative process of review and refinement is crucial for long-term efficiency gains. Just like designers refine their collections, you should refine your post-production process.
Staying Ahead of the Curve
Technology is always advancing. New software features, AI tools, and hardware can dramatically impact your workflow. Stay informed. Read industry blogs, attend workshops, and experiment with new tools. Investing in faster computers, better storage, or specialized culling software can pay dividends in saved time and reduced stress. The landscape of efficient runway photo culling and editing is always shifting, and staying agile is paramount.

Frequently Asked Questions (FAQ)
Q: How do I manage client feedback efficiently without getting bogged down? A: Utilize online proofing galleries (like Pixieset, PhotoShelter, or ShootProof) that allow clients to comment directly on images. This centralizes feedback. Set clear deadlines for client reviews and specify the number of revision rounds included in your contract to manage expectations. For extensive changes, communicate that additional fees may apply.
Q: What's the best way to handle color consistency across different monitors and devices? A: Invest in a hardware color calibrator (e.g., X-Rite i1Display Pro, Datacolor SpyderX) and calibrate your primary editing monitor regularly (at least monthly). Work in a color-managed environment (sRGB or Adobe RGB for web, specific profiles for print). When exporting, embed the correct color profile. Be aware that client monitors may not be calibrated, so aim for a universally acceptable color balance.
Q: Should I use JPEGs or RAW files for runway photography? A: Always shoot RAW. While JPEGs are smaller and faster to process, RAW files contain significantly more data, offering far greater flexibility for exposure, white balance, and color correction in post-production. This is crucial for correcting challenging runway lighting and achieving the highest quality results. You can always export JPEGs from your RAW selects.
Q: How do I deal with unpredictable lighting conditions at fashion shows? A: This is a common challenge. Shoot in RAW to maximize dynamic range. Use auto ISO with a minimum shutter speed to ensure sharp images. During editing, prioritize global white balance and exposure adjustments first. Utilize spot adjustments for specific areas if necessary. Consider developing presets for common lighting scenarios you encounter to speed up initial corrections.
Q: What's a realistic turnaround time for a typical runway show delivery? A: This varies greatly depending on the client's needs and the volume of selects. For immediate editorial use, key selects (10-20 images) might be required within 1-2 hours of the show. A full gallery of 100-300 images typically ranges from 12-48 hours. Always confirm the required deadline with your client beforehand and factor in your culling, editing, and quality control time.
Key Takeaways and Final Thoughts
Mastering efficient runway photo culling and editing for deadlines is not a mythical quest; it's a learnable skill built on discipline, strategic planning, and leveraging the right tools. By integrating these expert strategies into your workflow, you can transform the frantic post-show scramble into a smooth, predictable process.
- Pre-production is paramount: Shoot with intent and optimize your gear.
- Culling is an art of decisive deletion: Be ruthless in your initial passes.
- Leverage software power: Master batch processing, presets, and shortcuts.
- Prioritize retouching: Focus on consistency and client needs, not perfection on every image.
- Collaborate effectively: Delegate, communicate, and use cloud solutions.
- Never skip final QC: Your reputation depends on it.
- Continuously learn and adapt: Stay ahead of technological advancements.
The fashion industry moves at breakneck speed, and your ability to deliver stunning, high-quality images under pressure is what sets you apart. Embrace these techniques, refine your own process, and you'll not only meet those daunting deadlines but consistently exceed client expectations, solidifying your reputation as a true industry expert. Go forth and conquer those deadlines!
Recommended Reading
- Cut Fashion Returns by 30%? Virtual Try-On Tech Explained
- 7 Proven Strategies: Shoot Fashion Lookbooks That Skyrocket Sales
- Haute Couture Tailoring: Unveiling Hidden Flaws in Meticulous Work
- Beat Digital Eye Strain: 7 Stylish Eyewear Solutions for Professionals
- The Ultimate Guide: How to Make Basic Outfits Look Effortlessly Chic

Your email address will not be published. Required fields are marked *