
Preventing Damage When Fitting Modern Lenses into Vintage Frames?
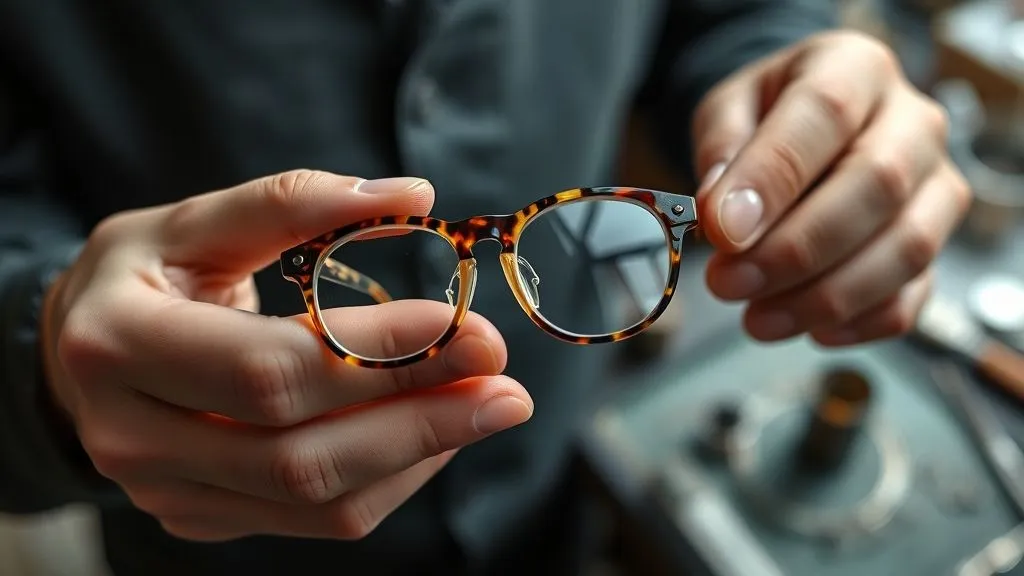
For over two decades in the eyewear fashion industry, I've witnessed the resurgence of vintage frames – beautiful, unique pieces that tell a story. But I’ve also seen the heartache when a cherished frame, perhaps a family heirloom or a rare find, is irreparably damaged during the lens fitting process. It’s a common scenario that can turn excitement into profound disappointment.
The allure of combining timeless aesthetics with modern optical clarity is undeniable. Yet, the delicate nature of aged materials, coupled with the robust demands of contemporary lens technology, creates a significant challenge. Many opticians, accustomed to working with resilient modern plastics and metals, unknowingly apply techniques that can shatter a brittle celluloid frame or distort a meticulously crafted metal rim.
This article is born from countless hours of hands-on experience, learning what works and, crucially, what doesn't. I'm here to share a definitive framework for

Understanding the Unique Anatomy of Vintage Frames
Before any lens touches a vintage frame, it's paramount to understand its inherent characteristics. Unlike their modern counterparts, vintage frames were crafted using different materials and manufacturing techniques, each presenting its own set of vulnerabilities. Ignoring these distinctions is a recipe for disaster.
Material Matters: Celluloid, Bakelite, Metal Alloys
The materials commonly used in vintage frames – from early plastics like cellulose nitrate (celluloid) and Bakelite to various metal alloys – behave very differently from today's acetate, TR90, or titanium. Celluloid, for instance, becomes incredibly brittle with age, loses its plasticizers, and is highly susceptible to heat damage. Bakelite is even more rigid and prone to cracking under stress.
In my experience, respecting the original material is the golden rule of vintage eyewear restoration. Attempting to force a modern lens into an aged frame without understanding its material composition is a critical misstep.
Metal frames from earlier eras often used gold-filled or nickel alloys, which can be softer or more prone to fatigue than modern stainless steel or titanium. These materials can bend or distort permanently if mishandled, especially at solder points or delicate filigree.
Construction & Design: Rivets, Hinges, and Patina
Vintage frames often feature distinctive construction methods that are less common today. Riveted hinges, intricate metalwork, and specific screw types require a gentle, informed approach. The patina, that beautiful aged surface, is also part of the frame's character and should be preserved.
- Riveted Hinges: These can loosen or become brittle, requiring careful handling to prevent shearing.
- Pin-Hinges: Smaller, more delicate pins compared to modern barrel hinges.
- Keyhole Bridges: A classic design that often has less inherent flexibility.
- Gold-Filled Details: Thin layers of gold over base metal can wear through with abrasive handling.
Each element, from the bridge to the temple tips, was designed and manufactured with the technology of its time. Modern techniques, if applied blindly, can easily compromise these intricate structures. This foundational understanding is the first step in

The Crucial Pre-Assessment: A Diagnostic Deep Dive
Before even thinking about lens insertion, a thorough pre-assessment is non-negotiable. This is where you become a detective, identifying potential weaknesses and planning your strategy. Skipping this step is akin to performing surgery without a diagnosis – reckless and likely to end poorly.
Initial Inspection Checklist
I always begin with a meticulous visual and tactile inspection. Every frame tells a story of its past, and you need to listen closely.
- Visual Scan for Cracks: Look for hairline cracks, especially around screw holes, hinges, and the bridge. These are major stress points.
- Assess Material Brittleness: Gently flex the frame in non-critical areas (e.g., temple ends). Does it feel stiff and unyielding, or does it have some give?
- Check Hinge Play & Screws: Ensure hinges are secure but not overly tight. Are screws stripped or corroded? Replace if necessary.
- Examine Lens Grooves: Are the grooves clean and free of debris? Are they uniform or worn in places?
- Evaluate Patina & Finish: Note any significant wear or flaking, which could worsen with manipulation.
Pay particular attention to areas where the frame has absorbed oils or moisture over time, as these can weaken plastic structures. According to a study published in the Journal of Scientific Reports, the degradation of cellulose acetate is often accelerated by environmental factors, leading to increased brittleness.
Material Identification Techniques
Accurate material identification guides your approach. Is it cellulose nitrate, cellulose acetate, Bakelite, or a metal alloy? Each requires a different handling protocol.
- Cellulose Nitrate (Celluloid): Often has a distinct camphor smell when lightly rubbed. Very flammable.
- Cellulose Acetate: Less brittle, sometimes has a slight vinegar smell. Can be gently heated.
- Bakelite: Very hard, often has a distinct 'phenolic' smell when rubbed vigorously. Extremely brittle, do NOT heat.
- Metal Alloys: Use a jeweler's loupe to check for hallmarks. Gold-filled frames are less durable than solid gold or modern titanium.
Frame Integrity Testing (Gentle Stress Tests)
This isn't about bending the frame to its breaking point, but about understanding its limits. I use very light, controlled pressure to gauge flexibility.
- Plastic Frames: Gently twist the frame front, observing how it responds. Listen for creaking sounds.
- Metal Frames: Lightly try to open the eyewire. Note any resistance or stiffness.
Remember, less is always more. If you feel significant resistance or hear any ominous sounds, stop immediately. Pushing through resistance with a vintage frame is rarely rewarded.
This diagnostic deep dive is your best defense against unexpected damage. It informs every subsequent step in the process, from lens selection to fitting technique.
| Frame Material | Key Characteristics | Risk Assessment | Handling Protocol |
|---|---|---|---|
| Cellulose Nitrate (Celluloid) | Brittle, flammable, camphor smell | High - Very prone to cracking, extreme heat sensitivity | Minimal heat (warm water only), slow, gentle pressure, avoid bending |
| Cellulose Acetate (Older) | Less brittle than celluloid, vinegar smell | Medium - Can crack if forced, moderate heat tolerance | Controlled, localized heat (air heater), gradual manipulation |
| Bakelite | Very rigid, no flexibility, phenolic smell | Very High - Will crack with any significant stress or heat | No heat, minimal pressure, custom lens grinding for exact fit |
| Gold-Filled Metal | Soft, prone to fatigue, thin gold layer | Medium - Can distort or wear through if mishandled | Specialized pliers, avoid scratching, gentle screw adjustments |
| Nickel Alloy (Older) | Can be brittle, prone to corrosion | Medium - Requires careful bending, avoid over-tightening screws | Slow, even pressure, careful use of lubricants for screws |
Choosing the Right Modern Lenses: Beyond Just Prescription
The lens you select plays a crucial role not just in vision correction, but in the structural integrity of the vintage frame. It’s not simply about matching the prescription; it’s about finding a lens that complements the frame's delicate nature.
Lens Material & Thickness Considerations
Modern lenses come in a variety of materials, each with different properties. For vintage frames, lighter and thinner is almost always better.
- Polycarbonate & Trivex: These are impact-resistant and lighter than traditional plastic (CR-39) or glass. They are often ideal due to their reduced weight, which places less stress on delicate vintage bridges and hinges.
- High-Index Lenses: While excellent for higher prescriptions by reducing thickness, they can be less flexible than standard plastic. This reduced flexibility can make insertion more challenging and increase the risk of frame damage if the frame requires significant manipulation.
Excessive lens thickness, even with a lighter material, adds weight and bulk. This can strain the frame, particularly if the original frame was designed for much thinner glass lenses. Always aim for the thinnest, lightest lens that meets the patient's prescription and safety requirements.
Edge Profile and Beveling Techniques
This is where custom craftsmanship truly shines. Vintage frames, especially those with deep or uniquely shaped eyewires, often require a custom lens bevel. A standard modern bevel might be too wide, too narrow, or incorrectly angled for the vintage groove.
- Measure Groove Depth: Use calipers to accurately measure the depth of the eyewire groove.
- Match Bevel Angle: The angle of the lens edge must precisely match the frame's groove to ensure a secure, stress-free fit.
- Hand Finishing: Often, the final beveling and edge polishing must be done by hand, using a fine-grit wheel, to achieve the perfect fit without forcing.
An improperly beveled lens can either be too loose, leading to rattling, or too tight, creating immense pressure on the frame's eyewire and risking a crack. Precision here is paramount for
Coatings and Treatments: A Hidden Factor
Modern lens coatings, particularly those that are heat-cured, can sometimes reduce the inherent flexibility of the lens itself. While generally not a major concern for modern frames, for a vintage frame that requires a very gentle 'pop' or slight flex during insertion, a less flexible lens can add to the challenge. Discuss with your lab if a specific coating might impact lens flexibility, especially for high-index materials.
Specialized Tools and Techniques for Delicate Insertion
Working with vintage frames demands a departure from the routine. You need specialized tools and a refined technique that prioritizes finesse over force. This is where experience truly makes a difference.
The Essential Tool Kit for Vintage Eyewear
Your standard optical tool kit might not be sufficient. I've curated a specific set of tools that are indispensable for this delicate work:
- Precision Nylon-Jaw Pliers: Essential for gentle manipulation of metal frames without scratching or marring.
- Controlled Heat Source: A warm water bath (temperature-controlled) or a low-temperature air heater (never a direct flame or high-heat gun).
- Soft Cloths & Microfiber Wipes: For protecting surfaces and ensuring a clean workspace.
- Optician's Loupe: For close inspection of fine details and potential stress points.
- Small, High-Quality Screwdrivers: For delicate screw adjustments, ensuring the correct tip size to prevent stripping.
- Lens Insertion Tools (Plastic/Rubber Tipped): To aid in seating lenses without direct metal-on-frame contact.
- Frame Stretching Pliers (Very Gently Used): Only for very minor, controlled adjustments on specific materials.
Controlled Heat Application: A Double-Edged Sword
Heat can be your ally, but it can also be your worst enemy. For plastic frames, especially older cellulose acetate, controlled heat can make the material pliable enough for lens insertion. For celluloid or Bakelite, heat is almost always destructive.
- Warm Water Bath: My preferred method for plastic frames. Submerge the frame in warm (not hot!) water, typically between 90-110°F (32-43°C), for a few minutes. This provides even, gentle heat.
- Low-Temperature Air Heater: Use with extreme caution. Direct the airflow away from delicate areas and maintain a safe distance. Constantly monitor the frame's response.
Never apply direct flame. Never overheat. The goal is to make the material just flexible enough, not soft or gooey. Overheating can cause irreversible warping, blistering, or even material breakdown.

Manual Manipulation vs. Automated Edgers
While modern automated edgers are incredibly precise for contemporary frames, they are often too aggressive for vintage pieces. The clamping pressure, the speed of the beveling, and the lack of tactile feedback can easily lead to damage.
For vintage frames, I advocate for a significant amount of manual intervention. Hand-finishing the lens bevel, and then carefully hand-inserting the lens, provides the control and sensitivity needed to prevent damage.
An experienced optician, using their hands and specialized tools, can feel the frame's resistance, adjust pressure in real-time, and detect potential issues before they become catastrophic. This tactile feedback is something no machine can replicate when dealing with such delicate and unique items.
Mastering the Art of Lens Insertion: Step-by-Step Precision
With the frame assessed, lenses prepared, and tools at the ready, the moment of truth arrives. This phase demands patience, a steady hand, and meticulous attention to detail. Rush this, and all prior careful preparation can be undone.
For Plastic Frames: The Gentle 'Pop-In' Method
For plastic frames, especially older acetate, controlled heating is key, followed by a precise insertion technique.
- Pre-Heat the Frame: Submerge the frame in a warm water bath (90-110°F / 32-43°C) for 2-3 minutes. Alternatively, use a low-temperature air heater, applying heat evenly and gently until the frame is just pliable.
- Position the Lens: Align one edge of the lens with the frame's groove. Start at the nasal side, as this usually has less flexibility.
- Apply Gentle Pressure: Using your thumbs or a plastic-tipped insertion tool, apply slow, even pressure to the opposite edge of the lens. The goal is to gently 'pop' the lens into the groove. Avoid sudden, forceful movements.
- Work Around the Groove: Once the initial edge is seated, carefully work your way around the lens, ensuring it fully engages with the frame's groove.
- Cool the Frame: Once the lens is fully seated, allow the frame to cool naturally. As it cools, the material will contract, securely holding the lens in place. Never try to rapidly cool it, as this can cause stress.
For Metal Frames: Screw-Mount and Rimless Challenges
Metal frames present a different set of challenges, often involving tiny screws and delicate eyewires.
- Screw-Mounted Rims: Carefully loosen (but do not remove) the screws on the eyewire. Insert the lens into the groove, ensuring a perfect fit. Then, gradually tighten the screws, alternating sides to distribute pressure evenly. Over-tightening can strip threads or distort the frame.
- Half-Rim/Nylor Frames: These are particularly delicate. The groove for the nylon string must be clean. Use a specialized tool to guide the string carefully around the lens, ensuring even tension.
- Rimless Frames: These require precise drilling of the lenses and careful mounting of hardware. Ensure the drill holes are perfectly aligned and the mounting posts are not over-tightened, which can crack the lens.
Post-Insertion Checks and Adjustments
Once the lens is in place, the work isn't over. A final inspection is critical.
- Visual Stress Check: Look for any new hairline cracks, distortions, or areas of unusual stress on the frame.
- Lens Security: Gently try to move the lens. It should be securely seated without any wobble or rattling.
- Frame Alignment: Check the overall alignment of the frame. Has it twisted or become uneven? Make small, gentle adjustments to the temples and nose pads as needed.
This systematic approach minimizes risk and maximizes the chance of a successful, damage-free lens fitting. It’s the essence of
Addressing Common Pitfalls and Emergency Measures
Even with the utmost care, challenges can arise. Knowing how to react to unexpected issues is crucial. It’s about damage control and understanding when to stop before it’s too late.
When a Frame Cracks: Immediate Action
If a hairline crack appears during insertion, stop immediately. Do not proceed. Attempting to force the lens further will only worsen the damage.
- Assess Severity: Is it a minor surface crack or a deeper structural fracture?
- Temporary Stabilization: For minor cracks, a tiny drop of specialized optical adhesive (like those used for frame repair) might temporarily stabilize it. However, this is a repair, not a prevention, and should be done by an expert.
- Referral: If the crack is significant or structural, the frame likely needs professional repair by a vintage eyewear specialist. It's better to admit defeat and preserve what's left than to destroy it entirely.
Stripped Screws and Loose Rivets
These are common ailments of aged frames.
- Stripped Screws: If a screw hole is stripped, try a slightly larger diameter screw, or apply a very small amount of thread-locker designed for eyewear. Be extremely cautious as these can be permanent.
- Loose Rivets: Loose rivets often require careful re-peening or, in severe cases, replacement by a skilled craftsman. This is a job for a specialist.
Case Study: The 'Grandma's Spectacles' Near-Disaster
I recall a client who brought in her grandmother's delicate, gold-filled spectacles from the 1920s. They were incredibly sentimental. During the pre-assessment, I noticed a tiny, almost invisible stress fracture near one of the screw mounts on the eyewire. My initial instinct was to proceed with extreme caution, but the frame felt surprisingly sturdy otherwise.
I chose a very lightweight, high-index lens and meticulously hand-beveled it. During the final tightening of the eyewire screw, I felt a slight 'give' that wasn't right. I immediately stopped. Inspecting it under a loupe, the hairline fracture had indeed propagated slightly. Instead of continuing, I gently loosened the screw, removed the lens, and informed the client. I explained the risk and recommended a specialized metal restorer who could reinforce the area with a micro-solder joint before attempting lens insertion again. The client appreciated my honesty and the decision to prioritize preservation over a rushed fitting.
This experience cemented my belief: humility and a willingness to stop are paramount. No frame is worth destroying for the sake of completion. Sometimes, the best action is to pause and seek further expertise.
Learning from these near-misses is invaluable. It reinforces the importance of a conservative approach and a deep respect for the object's history and fragility.
| Problem | Cause | Immediate Action |
|---|---|---|
| Hairline Crack in Plastic Frame | Material brittleness, excessive force, heat | Stop fitting, assess severity, stabilize if minor, refer for repair if major |
| Distortion/Warping of Frame | Overheating, uneven pressure | Allow to cool naturally, gentle counter-adjustments if minor, refer if severe |
| Stripped Screw Hole (Metal/Plastic) | Over-tightening, incorrect screw size | Try slightly larger screw, use thread-locker sparingly, refer for re-tapping/repair |
| Loose Rivet/Hinge (Plastic/Metal) | Age, wear, stress | Do not proceed with fitting, refer to specialist for re-peening or replacement |
| Lens Does Not Seat Properly | Incorrect bevel, misaligned groove, insufficient pliability | Remove lens, re-evaluate bevel, re-assess frame material and flexibility, do not force |
Long-Term Care and Client Education
Your role in
Educating Your Client: The Key to Longevity
Many clients are unaware of the special care vintage frames require. It's your responsibility to provide them with clear, actionable advice.
- Gentle Handling: Always emphasize using both hands to remove and put on glasses to prevent twisting and stress on hinges.
- Avoid Extreme Temperatures: Vintage plastics are particularly sensitive to heat and cold. Advise against leaving glasses in hot cars or near open flames.
- Proper Cleaning: Recommend cleaning with a mild soap and water, using a soft cloth, avoiding harsh chemicals or abrasive materials.
- Secure Storage: Encourage storing glasses in a sturdy case when not in use to protect against accidental damage.
- Periodic Check-ups: Advise clients to bring their vintage frames in for regular inspections.
As Forbes recently highlighted, the appreciation for vintage items is growing, and with it, the need for specialized knowledge in their care.
Recommended Maintenance Schedule
Suggesting a regular maintenance schedule can prevent minor issues from becoming major problems.
- Every 6-12 Months: Recommend a professional check-up to inspect screws, hinge tension, and overall frame integrity. This allows you to catch and address small issues before they escalate.
- After Any Impact: Advise clients to bring the frames in immediately if they have been dropped or subjected to any form of impact, even if no visible damage is apparent.
By empowering your clients with this knowledge, you ensure the frame continues its story for many more years to come. It's an investment in their satisfaction and the preservation of eyewear history.

Frequently Asked Questions (FAQ)
Q: Can all vintage frames accommodate modern lenses? No, not all vintage frames are suitable. Frames made of very brittle materials like Bakelite, or those with significant existing damage, may be too fragile. A thorough pre-assessment is essential to determine viability. Some frames also have unusual shapes or very shallow grooves that make modern lens fitting extremely challenging or impossible without compromising the frame.
Q: What's the biggest risk when fitting new lenses into old frames? The biggest risk is cracking or permanently distorting the frame, especially in plastic frames due to brittleness and in metal frames due to metal fatigue or delicate solder joints. This is often caused by applying too much force, using incorrect heating methods, or misjudging the material's flexibility.
Q: Should I try to do this myself at home? Absolutely not. Fitting lenses into vintage frames requires specialized tools, extensive knowledge of material science, and considerable experience. Attempting it at home without the proper expertise will almost certainly result in irreversible damage to the frame. Always seek a qualified and experienced optician.
Q: How do I know if my vintage frame is too fragile? Signs of extreme fragility include visible hairline cracks, a very stiff and unyielding feel to the material, signs of material degradation (e.g., flaking, unusual discoloration), or loose, irreparable hinges. If the frame shows significant signs of age-related brittleness during a gentle pre-assessment, it's likely too fragile for lens insertion.
Q: Are there specific lens types I should avoid for vintage frames? While not strictly 'avoid,' certain lens types require extra caution. Very thick or heavy lenses should be avoided as they can stress the frame. Lenses with complex coatings that reduce flexibility can also make insertion more challenging. Always prioritize lightweight, thin materials like polycarbonate or Trivex, and ensure the lab can provide a custom bevel to match the frame's groove precisely.
Key Takeaways and Final Thoughts
The journey of restoring a vintage frame with modern lenses is a testament to craftsmanship, patience, and deep respect for history. It’s a process fraught with potential pitfalls, but with the right knowledge and approach, it’s incredibly rewarding. My goal has always been to empower opticians and eyewear enthusiasts alike with the insights needed to navigate this delicate dance.
- Prioritize Pre-Assessment: Never skip the diagnostic deep dive into material, construction, and existing damage.
- Understand Material Science: Recognize how different vintage materials behave under stress and heat.
- Invest in Specialized Tools & Techniques: Finesse, controlled heat, and manual precision are your best allies.
- Choose Lenses Wisely: Opt for lightweight, thin, and custom-beveled lenses that complement the frame's integrity.
- Educate Your Client: Long-term preservation relies on proper handling and care.
Remember, each vintage frame is a unique artifact, a piece of eyewear history. By embracing these expert strategies for
Recommended Reading
- 5 Expert Strategies: Stop Minimalist Accessories from Dull Professional Outfits
- How to Slash Luxury Women's Shoe Returns by 40%: 7 Expert Tactics
- AI's Role: Cutting Fashion Supply Chain Emissions by 30%?
- 7 Data Analytics Methods to Predict Emerging Sneaker Trends Accurately
- Beyond the Hype: How to Retain Customers After Failed Streetwear Drops


Your email address will not be published. Required fields are marked *