
How to Restore Delicate Retro Clothing Without Devaluing It?
For over two decades in the vintage fashion world, I've witnessed the sheer joy a perfectly preserved retro garment brings, but also the heartbreak when a cherished piece is inadvertently damaged during a well-intentioned restoration attempt. I remember a client who brought me a stunning 1920s flapper dress, its intricate beading dulled by years of improper storage, its silk starting to fray. She had tried to 'freshen it up' with a harsh commercial cleaner, only to find the silk weakened and some beads detached. It was a stark reminder that passion alone isn't enough; expertise is paramount.
The problem is universal for vintage enthusiasts: how do you bring life back to a beautiful but fragile piece of fashion history without diminishing its intrinsic value, its story, and its authenticity? The allure of retro clothing lies not just in its aesthetic but in its historical integrity. A wrong cleaning agent, an aggressive repair, or even improper storage can turn a valuable heirloom into a devalued relic, erasing its past and compromising its future.
This comprehensive guide will equip you with the frameworks, expert insights, and actionable steps I’ve honed over years of working with delicate textiles. You'll learn the nuanced art of assessing, cleaning, repairing, and preserving your vintage treasures, ensuring that you can restore delicate retro clothing without devaluing it, allowing these beautiful pieces to continue telling their stories for generations to come. Let's dive into the careful dance of preservation and revival.
Understanding the Essence of Vintage: Why "Delicate" Matters
Before any restoration work begins, it's crucial to understand *why* vintage clothing is so delicate. It's not just about age; it's a complex interplay of materials, construction, and historical context. My experience has taught me that empathy for the garment's journey is the first step in successful restoration.
Fabric Composition and Age Deterioration
Modern fabrics often boast synthetic resilience, but retro clothing frequently features natural fibers like silk, wool, linen, and cotton, which degrade differently over time. Silk, for instance, can become brittle and susceptible to 'shattering' due due to UV exposure and acidic environments. Rayon, popular in the 1930s-50s, loses significant strength when wet. Even robust cottons can suffer from mildew, pest damage, or oxidation stains. Understanding the fiber type is non-negotiable.
Construction Techniques of Yesteryear
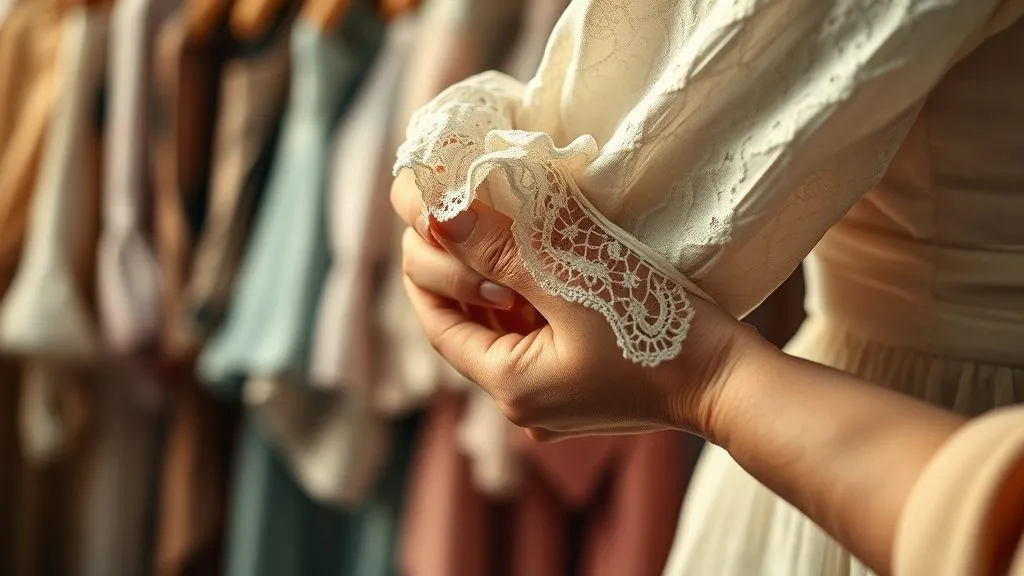
Vintage garments were often hand-stitched or machine-sewn with techniques and thread types that differ from today's. Seams might be less robust, especially in areas of stress. Embellishments like beading, lace, or embroidery were often attached with less durable threads or adhesives, making them prone to detachment. I've seen countless instances where a simple tug on a seam revealed decades of accumulated stress, ready to give way.
The true value of a vintage garment isn't just monetary; it's the tangible link to history it provides. Any restoration must respect and preserve that link, not erase it.
The Golden Rule: Assessment Before Action
The most critical step in learning how to restore delicate retro clothing without devaluing it is a thorough, patient assessment. Rushing this stage is a common pitfall I've seen lead to irreversible damage. Think of yourself as a detective, gathering all the clues before making a move.
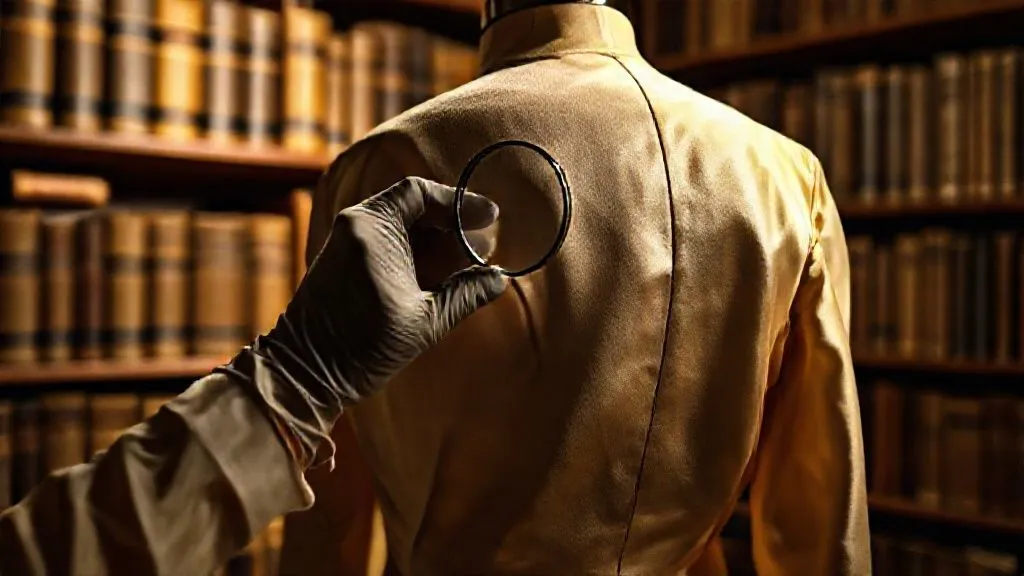
- Visual Inspection (Macro & Micro): Examine the garment in bright, natural light. Look for tears, holes, loose threads, missing embellishments, and stains. Use a magnifying glass to inspect fiber damage, insect activity, or subtle discoloration.
- The "Sniff" Test: Odors can indicate mildew, mothball residue, or ingrained dirt. A musty smell often points to moisture damage or fungal growth, which needs careful addressing.
- Tactile Examination: Gently feel the fabric. Is it brittle? Does it feel dry or sticky? Test the strength of seams by very gently pulling them. Note any areas of particular weakness or stiffness.
- Dye Stability Test: Crucial for cleaning. Find an inconspicuous spot (e.g., an inner seam allowance) and dab it with a damp cotton swab. If any color transfers, the dye is not colorfast, and wet cleaning must be approached with extreme caution, if at all.
- Document Everything: Take detailed 'before' photos from multiple angles. Note down the fiber type, estimated age, existing damage, and your planned course of action. This documentation is vital for preserving provenance and demonstrating the restoration process, which can actually enhance value.
Understanding the garment's fiber type, assessing dye stability, and evaluating its structural integrity are paramount. Never skip these steps.

Gentle Cleaning Protocols: A Fabric-Specific Approach
Cleaning is often the most anxiety-inducing part of retro garment restoration. My cardinal rule is always: start with the least invasive method. Aggressive cleaning can strip fibers, distort shape, or permanently damage dyes, thereby devaluing the piece.
Spot Treatment vs. Full Immersion
For minor stains or localized dirt, spot treatment is always preferable. Use a clean, white cloth or cotton swab dampened with a very mild, pH-neutral detergent solution. Blot, don't rub. Always test on an inconspicuous area first, even if your dye test was positive.
Hand Washing Techniques for Fragile Textiles
If full immersion is necessary and the dye test is positive, hand washing is the safest bet for most delicate items. I strongly advocate for this method for fabrics like silk, rayon, and delicate wools. Here’s my tried-and-true process:
- Prepare Your Bath: Fill a clean basin or tub with cool to lukewarm water (never hot). Add a tiny amount of pH-neutral, unscented detergent specifically designed for delicate fabrics (e.g., Eucalan or Woolite Delicates, or even pure castile soap).
- Submerge Gently: Support the entire garment as you lower it into the water. Avoid sudden movements or wringing, which can stretch or distort fibers.
- Soak, Don't Scrub: Allow the garment to soak for 10-30 minutes, gently swirling the water a few times. For heavily soiled items, you might need to change the water and repeat. Do not scrub or agitate vigorously.
- Rinse Thoroughly: Drain the soapy water. Refill the basin with clean, cool water and gently 'swish' the garment to remove soap residue. Repeat rinsing until the water is completely clear and free of suds.
- Remove Excess Water: Never wring! Gently press water out of the garment against the side of the basin. Then, lay the garment flat on a clean, absorbent towel. Roll the towel and garment together, pressing firmly to absorb more water.
- Air Dry Flat: Lay the garment flat on a fresh, dry towel or a padded drying rack, away from direct sunlight or heat. Reshape it to its original form as it dries. For heavier items, turn periodically to ensure even drying.
When to Seek Professional Conservation
Sometimes, the best restoration is no DIY restoration at all. For extremely fragile items, heirloom pieces, or garments with complex construction (e.g., heavy beading, intricate lacework, structured tailoring), professional textile conservators are indispensable. They have access to specialized techniques, equipment, and museum-grade solvents that can address issues without causing damage. As the Metropolitan Museum of Art's Textile Conservation department often demonstrates, their expertise is built on scientific understanding and years of hands-on experience, something a home enthusiast cannot replicate.
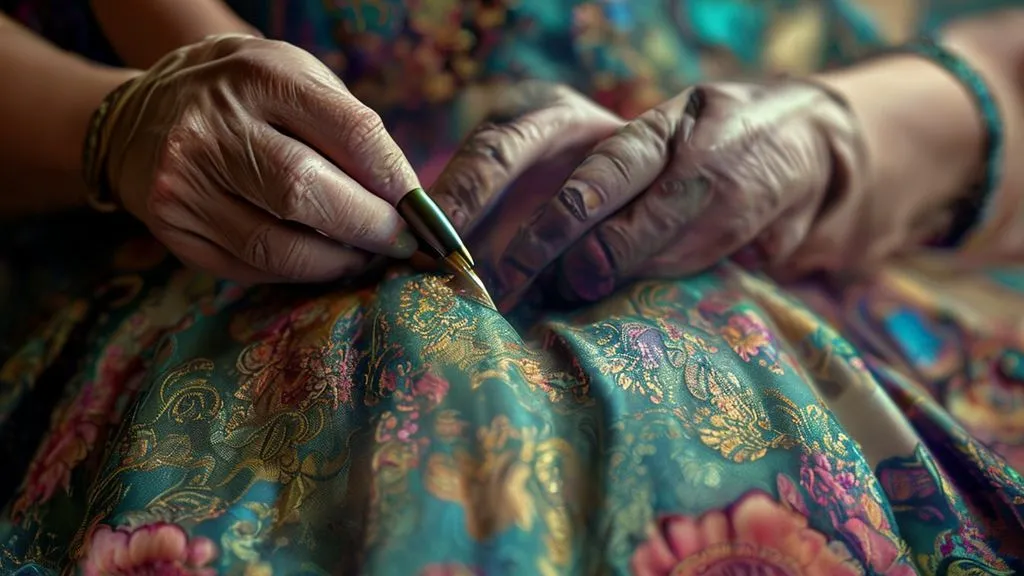
Repairing with Reverence: Mending for Longevity and Value
Mending vintage garments is an art form that requires patience and respect for the original craftsmanship. The goal isn't just to fix a tear, but to do so in a way that is stable, minimally invasive, and preserves the garment's integrity, ensuring you continue to restore delicate retro clothing without devaluing it.
Invisible Mending: Darning and Patching Techniques
For small holes or tears, invisible mending techniques are preferred. Darning, where you weave new threads into the fabric to fill a gap, is excellent for knits or woven fabrics. Use a thread that matches the original fabric's fiber content, color, and weight as closely as possible. For larger areas of weakness or holes, a carefully applied patch of similar vintage fabric (sourced from a less visible part of the garment or a donor piece) can reinforce the area from the inside, providing stability without altering the exterior appearance significantly.
Reinforcing Weakened Seams and Stress Points
Over time, seams, especially in areas like armholes, waistbands, or crotches, can weaken. Instead of waiting for a tear, reinforce these areas with a fine, strong thread, stitching discreetly along the original seam line. For heavily stressed areas, consider adding a thin, bias-cut strip of silk organza or cotton lawn to the inside of the seam allowance. This distributes tension and prevents future blowouts. Always use a hand needle for this delicate work, ensuring your stitches are small and even.

Case Study: The Revival of Aunt Mildred's Silk Gown
I once worked on a 1930s bias-cut silk gown, a family heirloom that had belonged to a client's great-aunt. The silk was incredibly fragile, with several small, almost imperceptible tears near the hem and under the arm. The client was hesitant, fearing any repair would be visible and detract from its value. After a thorough assessment, I opted for a combination of invisible darning for the hem tears, using single strands of vintage silk thread matched to the gown's weave. For the underarm, I created a tiny, custom-dyed silk organza patch, meticulously hand-stitched to the interior, reinforcing the area without adding bulk. The result was a gown that retained its fluid drape, its original integrity, and its sentimental value, now wearable for special occasions without fear of further damage. This careful approach not only preserved its historical value but enhanced its emotional resonance for the family.
| Repair Technique | Best For | Impact on Value |
|---|---|---|
| Invisible Darning | Small holes, knits, woven fabrics | Minimal to positive, if done expertly |
| Internal Patching (Matching Fabric) | Larger holes, weakened areas | Minimal, if discreet and well-matched |
| Seam Reinforcement | Stressed seams, potential blowouts | Positive, extends wearability |
| Embellishment Reattachment | Loose beads, sequins, lace | Positive, restores original look |
Dye Stabilization and Color Revival: A Cautious Dance
Color is a huge part of a vintage garment's appeal, but it can also be its most vulnerable aspect. Fading, bleeding, or color changes due to exposure or improper cleaning are common. My approach here is always one of extreme caution, as dye work is often irreversible.
Testing for Colorfastness
As mentioned in the assessment phase, the dye stability test is paramount. If a garment is not colorfast, even gentle washing can lead to bleeding and irreversible damage. In such cases, professional dry cleaning or spot cleaning with minimal moisture is your only safe recourse. Never attempt to wash a non-colorfast item at home.
Natural Dyes vs. Synthetic: Different Approaches
Older garments, especially those pre-1940s, are more likely to feature natural dyes, which can be more prone to fading from UV light and more reactive to pH changes in water or detergents. Synthetic dyes, while often more stable, can still bleed or shift color. Understanding the likely dye type based on the garment's era can inform your approach. For example, some natural indigo dyes can 'crock' (rub off) even when dry. Learn more about the history and chemistry of textile dyes from resources like the Victoria and Albert Museum's textile archives.
Attempting to 'revive' faded colors with home dyes is almost always a mistake that will devalue a vintage garment. Authenticity of color, even if faded, is often preferred by collectors over an inauthentic, re-dyed look.
Proper Storage: The Unsung Hero of Preservation
Even after meticulous cleaning and repair, improper storage can quickly undo all your hard work and devalue your vintage pieces. I've seen beautifully restored garments ruined by a single season in an attic or damp basement. Storage is a continuous act of preservation, crucial for how to restore delicate retro clothing without devaluing it.
Environmental Control: Humidity and Temperature
Vintage textiles thrive in stable, moderate environments. High humidity encourages mold and mildew growth, while low humidity can dry out and embrittle fibers like silk and leather. Fluctuating temperatures cause materials to expand and contract, leading to stress. Aim for a consistent temperature between 60-75°F (15-24°C) and relative humidity between 40-60%. Avoid attics, basements, and direct sunlight.
Acid-Free Materials: Boxes, Tissue, and Hangers
Regular cardboard boxes, plastic garment bags, and wooden hangers can off-gas acids or chemicals that degrade textiles over time, causing yellowing, staining, or weakening. Always use archival-quality, acid-free tissue paper and storage boxes. For hanging garments, use padded hangers to prevent stress on shoulders, or ideally, fold garments with acid-free tissue in archival boxes to minimize stretching. Never hang heavy or bias-cut garments long-term.
- Clean Before Storing: Ensure garments are spotless and completely dry to prevent attracting pests or sealing in moisture/odors.
- Fold with Tissue: For most items, folding with acid-free tissue paper (to prevent creasing and support fabric folds) in an acid-free box is best.
- Padded Hangers for Select Items: If hanging, use padded hangers and a breathable cotton garment bag (never plastic). Reserve hanging for sturdier, less delicate items.
- Avoid Cramming: Give garments space. Overcrowding can crush fibers and restrict air circulation.
- Regular Inspection: Periodically check stored items for signs of pests, mold, or deterioration.

Documentation and Provenance: Protecting Intrinsic Value
Beyond the physical care, the intellectual care of your vintage collection is equally important for preserving its value. I've often seen the lack of proper documentation diminish the perceived worth of a truly exceptional piece.
Cataloging Your Collection
Maintain a detailed record for each vintage garment. This should include: the item's description (era, style, designer if known, fabric), purchase date and location, original price, condition notes (before and after restoration), any repairs made, and cleaning history. This information builds a provenance, which is incredibly valuable to collectors and historians. A well-documented history can significantly increase a garment's value, as it provides context and authenticity, as highlighted by experts in textile history like those at the George Washington University Museum's Textile Museum.
The Power of Before & After
Take clear, well-lit 'before' and 'after' photographs of any restoration work. These visuals are powerful proof of the care and expertise invested in the piece. They show potential buyers or inheritors that the garment has been thoughtfully preserved, not merely 'fixed.' This transparency builds trust and reinforces the value of your efforts to restore delicate retro clothing without devaluing it.
| Date of Action | Item ID/Description | Action Taken | Materials Used | Result/Condition After | Notes |
|---|---|---|---|---|---|
| YYYY-MM-DD | 1950s Silk Day Dress | Hand wash, spot treat collar | Eucalan wool wash, distilled water | Stains reduced, fabric refreshed | Fabric still delicate, handle with care. |
Frequently Asked Questions (FAQ)
Question: Can I use a washing machine on the 'delicate' cycle for my retro clothing? Absolutely not, in most cases. While modern washing machines have a 'delicate' or 'hand wash' cycle, they still involve agitation and spinning that can be too harsh for aged, fragile fibers and intricate construction. The risk of stretching, tearing, or damaging embellishments is simply too high. Always opt for true hand washing or professional conservation for delicate vintage pieces.
Question: How do I remove stubborn stains like oil or perspiration without damaging old fabric? Stubborn stains on vintage fabrics require extreme caution. For oil-based stains, a very gentle application of talcum powder or cornstarch to absorb the oil, followed by a light brushing, can sometimes help. For perspiration, a diluted solution of distilled white vinegar (always patch test first!) can sometimes neutralize odors and lighten stains, but this is risky on silk or rayon. My expert advice is that for any truly stubborn or old stain, especially on delicate fibers, professional textile conservators have specialized enzymes and solvents that can often remove stains without harming the fabric, which is a risk you shouldn't take at home.
Question: Is it always better to restore myself, or when should I go to a professional? While I encourage learning basic care, knowing when to call a professional is a hallmark of true preservation. You should always consult a professional conservator if the garment is a significant historical piece, extremely fragile (e.g., shattering silk, heavily degraded lace), has extensive or complex damage (e.g., large tears, structural failure), or features intricate, irreplaceable embellishments. Their expertise ensures the item's integrity and value are maintained.
Question: What if a vintage piece has missing beads or embellishments? Should I replace them? Replacing missing embellishments is a nuanced decision. If you can find period-appropriate, matching beads or elements, and the replacement is done meticulously to replicate the original attachment method, it can enhance the garment's appearance without devaluing it. However, using modern, ill-matching replacements or performing a poor repair can significantly detract from its authenticity and value. Often, leaving a few missing elements as a sign of age is preferable to a visibly inauthentic repair. Documentation of any replacement is critical.
Question: How do I know if a repair will devalue the item? A repair devalues an item if it's visible, uses non-period-appropriate materials, alters the original silhouette or design, or is poorly executed, making it look like a 'fix' rather than a seamless restoration. The best repairs are often 'invisible' or so discreet that they maintain the garment's original aesthetic and structural integrity without drawing attention. Always ask yourself if the repair enhances the garment's longevity and appearance without compromising its historical authenticity.
Key Takeaways and Final Thoughts
- Assess Thoroughly: Never skip the detailed inspection and testing phase; it's your first line of defense against irreversible damage.
- Prioritize Gentleness: Always opt for the least invasive cleaning and repair methods, favoring hand washing and discreet mending.
- Know Your Limits: For complex or extremely fragile items, professional textile conservators are invaluable; their expertise preserves value.
- Store Smart: Proper, archival-quality storage in a stable environment is crucial for long-term preservation and preventing devaluation.
- Document Everything: Maintain detailed records and 'before & after' photos to build provenance and enhance the garment's intrinsic worth.
The journey of learning how to restore delicate retro clothing without devaluing it is one of respect, patience, and continuous learning. Each vintage garment is a whisper from the past, a tangible piece of history. By approaching restoration with a conservator's mindset – prioritizing preservation, authenticity, and minimal intervention – you not only extend the life of these beautiful pieces but also honor their legacy. Embrace the process, trust your careful assessment, and enjoy the profound satisfaction of being a steward of fashion history.
Recommended Reading
- 7 Expert Strategies: Avoid Eyewear Dead Stock in Trend Forecasting
- 7 Steps: How to Verify Eco-Friendly Suppliers, Avoiding Greenwashing Claims
- 7 Proven Ways to Diversify Your Fashion Blog Income Beyond Ads & Affiliates
- 7 Proven Strategies: Liquidate Unsold Bridal Gowns Quickly & Profitably
- 5 Proven Ways to Fix 3D Body Scan Data for Perfect Fashion Patterns


Your email address will not be published. Required fields are marked *